Easter Beauty

I find inspiration all over the place. This is another wreath inspired by a picture I saw on Facebook. I fell in love the beauty of the cross draped in white and the Easter Lilies. My take on it is a bit different than the original but the end result is so pretty and perfect to represent the true meaning of the Easter season.

Lets Get Started

Supplies

I used an 18 inch vine wreath form as the base. Use what ever size is best for your. The cross is from Dollar Tree and they have several styles of crosses so pick what you like. You will notice that later on I changed this cross out for a bigger one because I thought the one in this picture was to small. The burlap ribbon is from Hobby Lobby along with the sheer white material. I got the Easter Lilies from Dollar Tree. Honestly they were the best looking ones I found. When I put the wreath together it looked a bit bare so I used random greenery that I had on hand. You will also need some paint or stain, hot glue and some kind of stronger glue that will not melt in the heat, and some floral wire.

The first step is to fill in the hole at the top of the cross with wood filler. Some of the crosses have holes that need to be covered. The second cross I used did not require that step. Once the filler is dry, sand it down smooth.

Now it is time to paint. I used three different colors to get a wood grain look. The lightest color is Waverly Chalk Paint in Hazelnut and I put this down as a base coat. The other two colors are Waverly Chalk Paint in Truffle, and Dark Bronze in the Target brand paint. I roughly mixed the two colors together with a stiff brush. You can also use a fan brush. I dry brushed the two colors over the Hazelnut before it was completely dry. This will blend the paint and give it streaks making it look like dark stained wood. The Bronze color gives the cross some shine which is very pretty. Keep layering and blending the paints until you are happy with how it looks.

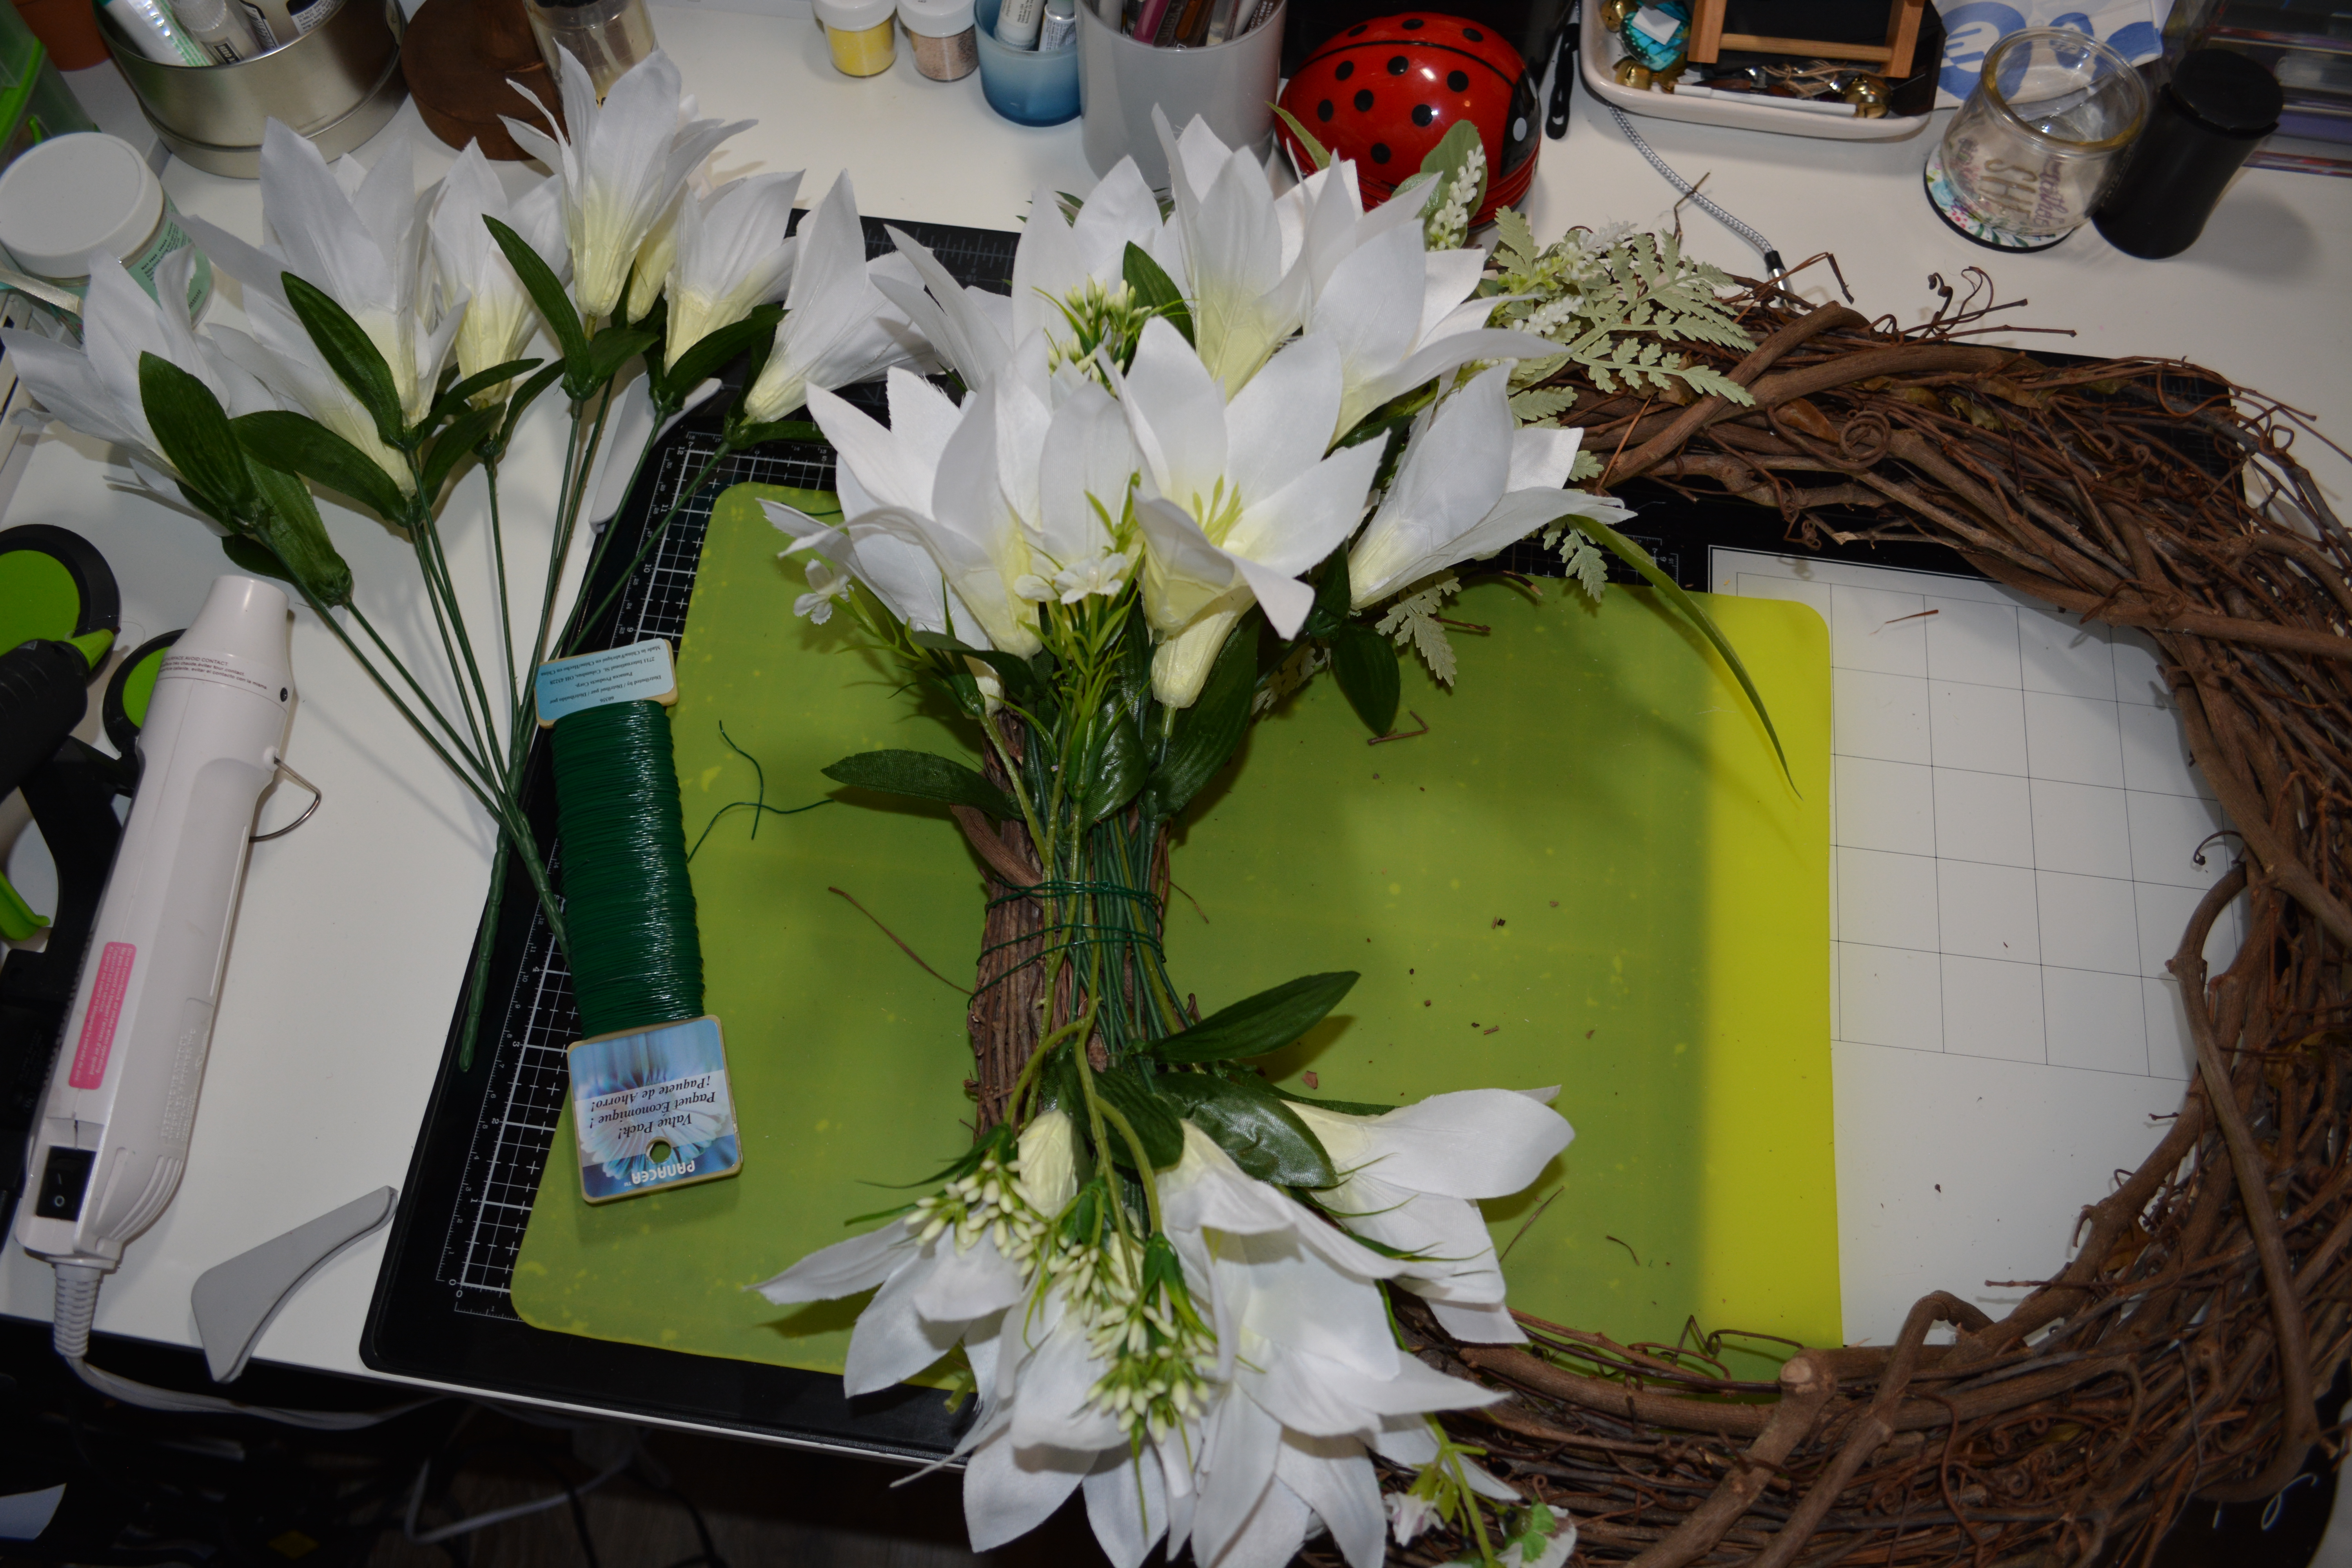
While your paint is drying start on the wreath and flowers. I used three bunches of Easter Lilies. Two up right and one pointing upside down. To attach them to the wreath form I used floral wire and wrapped it tightly around it. You can move and pull the flowers until you are happy with it. I used floral wire to attach the extra greenery too in places I felt needed it.

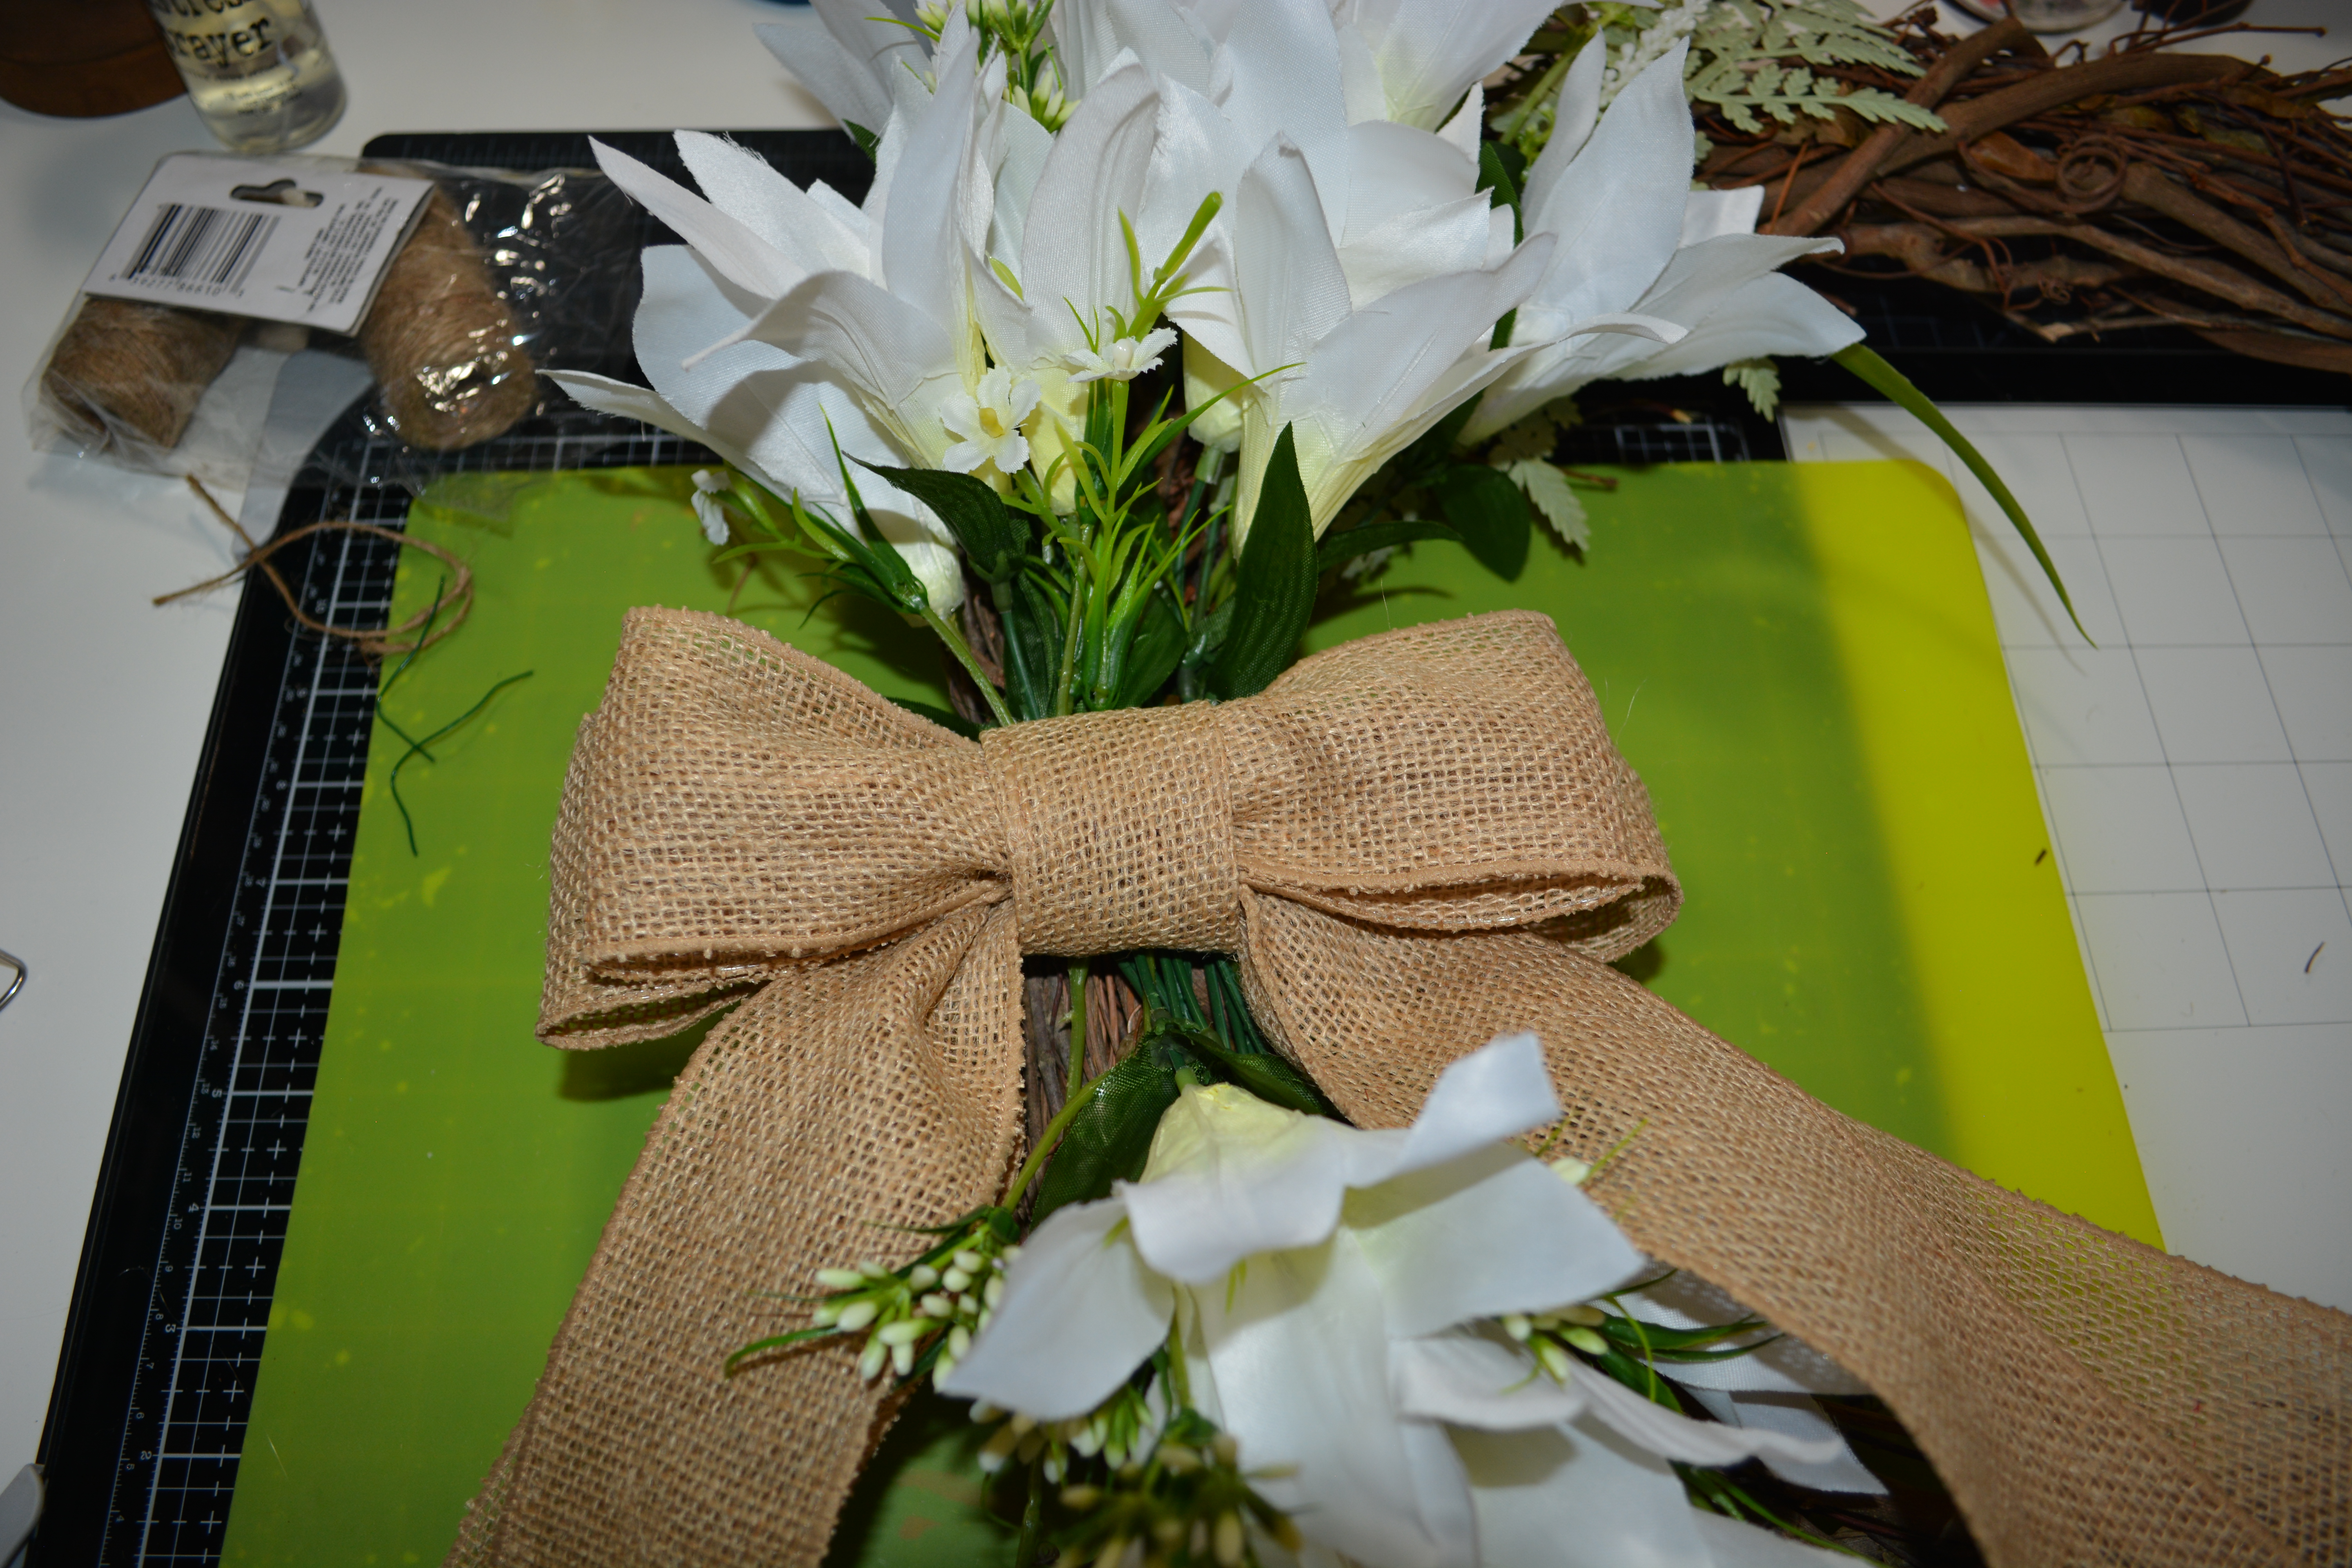
Next I took the burlap ribbon and made a big bow. There are several bow tutorials on YouTube and they are much better than me trying to explain it in words. I did add some floral wire to the back of the bow by threading it through the back loop and adding some E6000 to it to hold it in place and some hot glue for an instant hold. Then I placed the bow in the middle where the Lilies met and brought the wires around the back of the wreath form and twisted them together like you would with a bread twisty tie.

Here’s the thing, if your hanging any wreath where heat will be hitting it, then you have to use a stronger glue. Hot glue will melt in the heat and your wreath will fall apart. That is why I used the hot glue and E6000. It is well worth the time to wait for that stronger glue to dry.

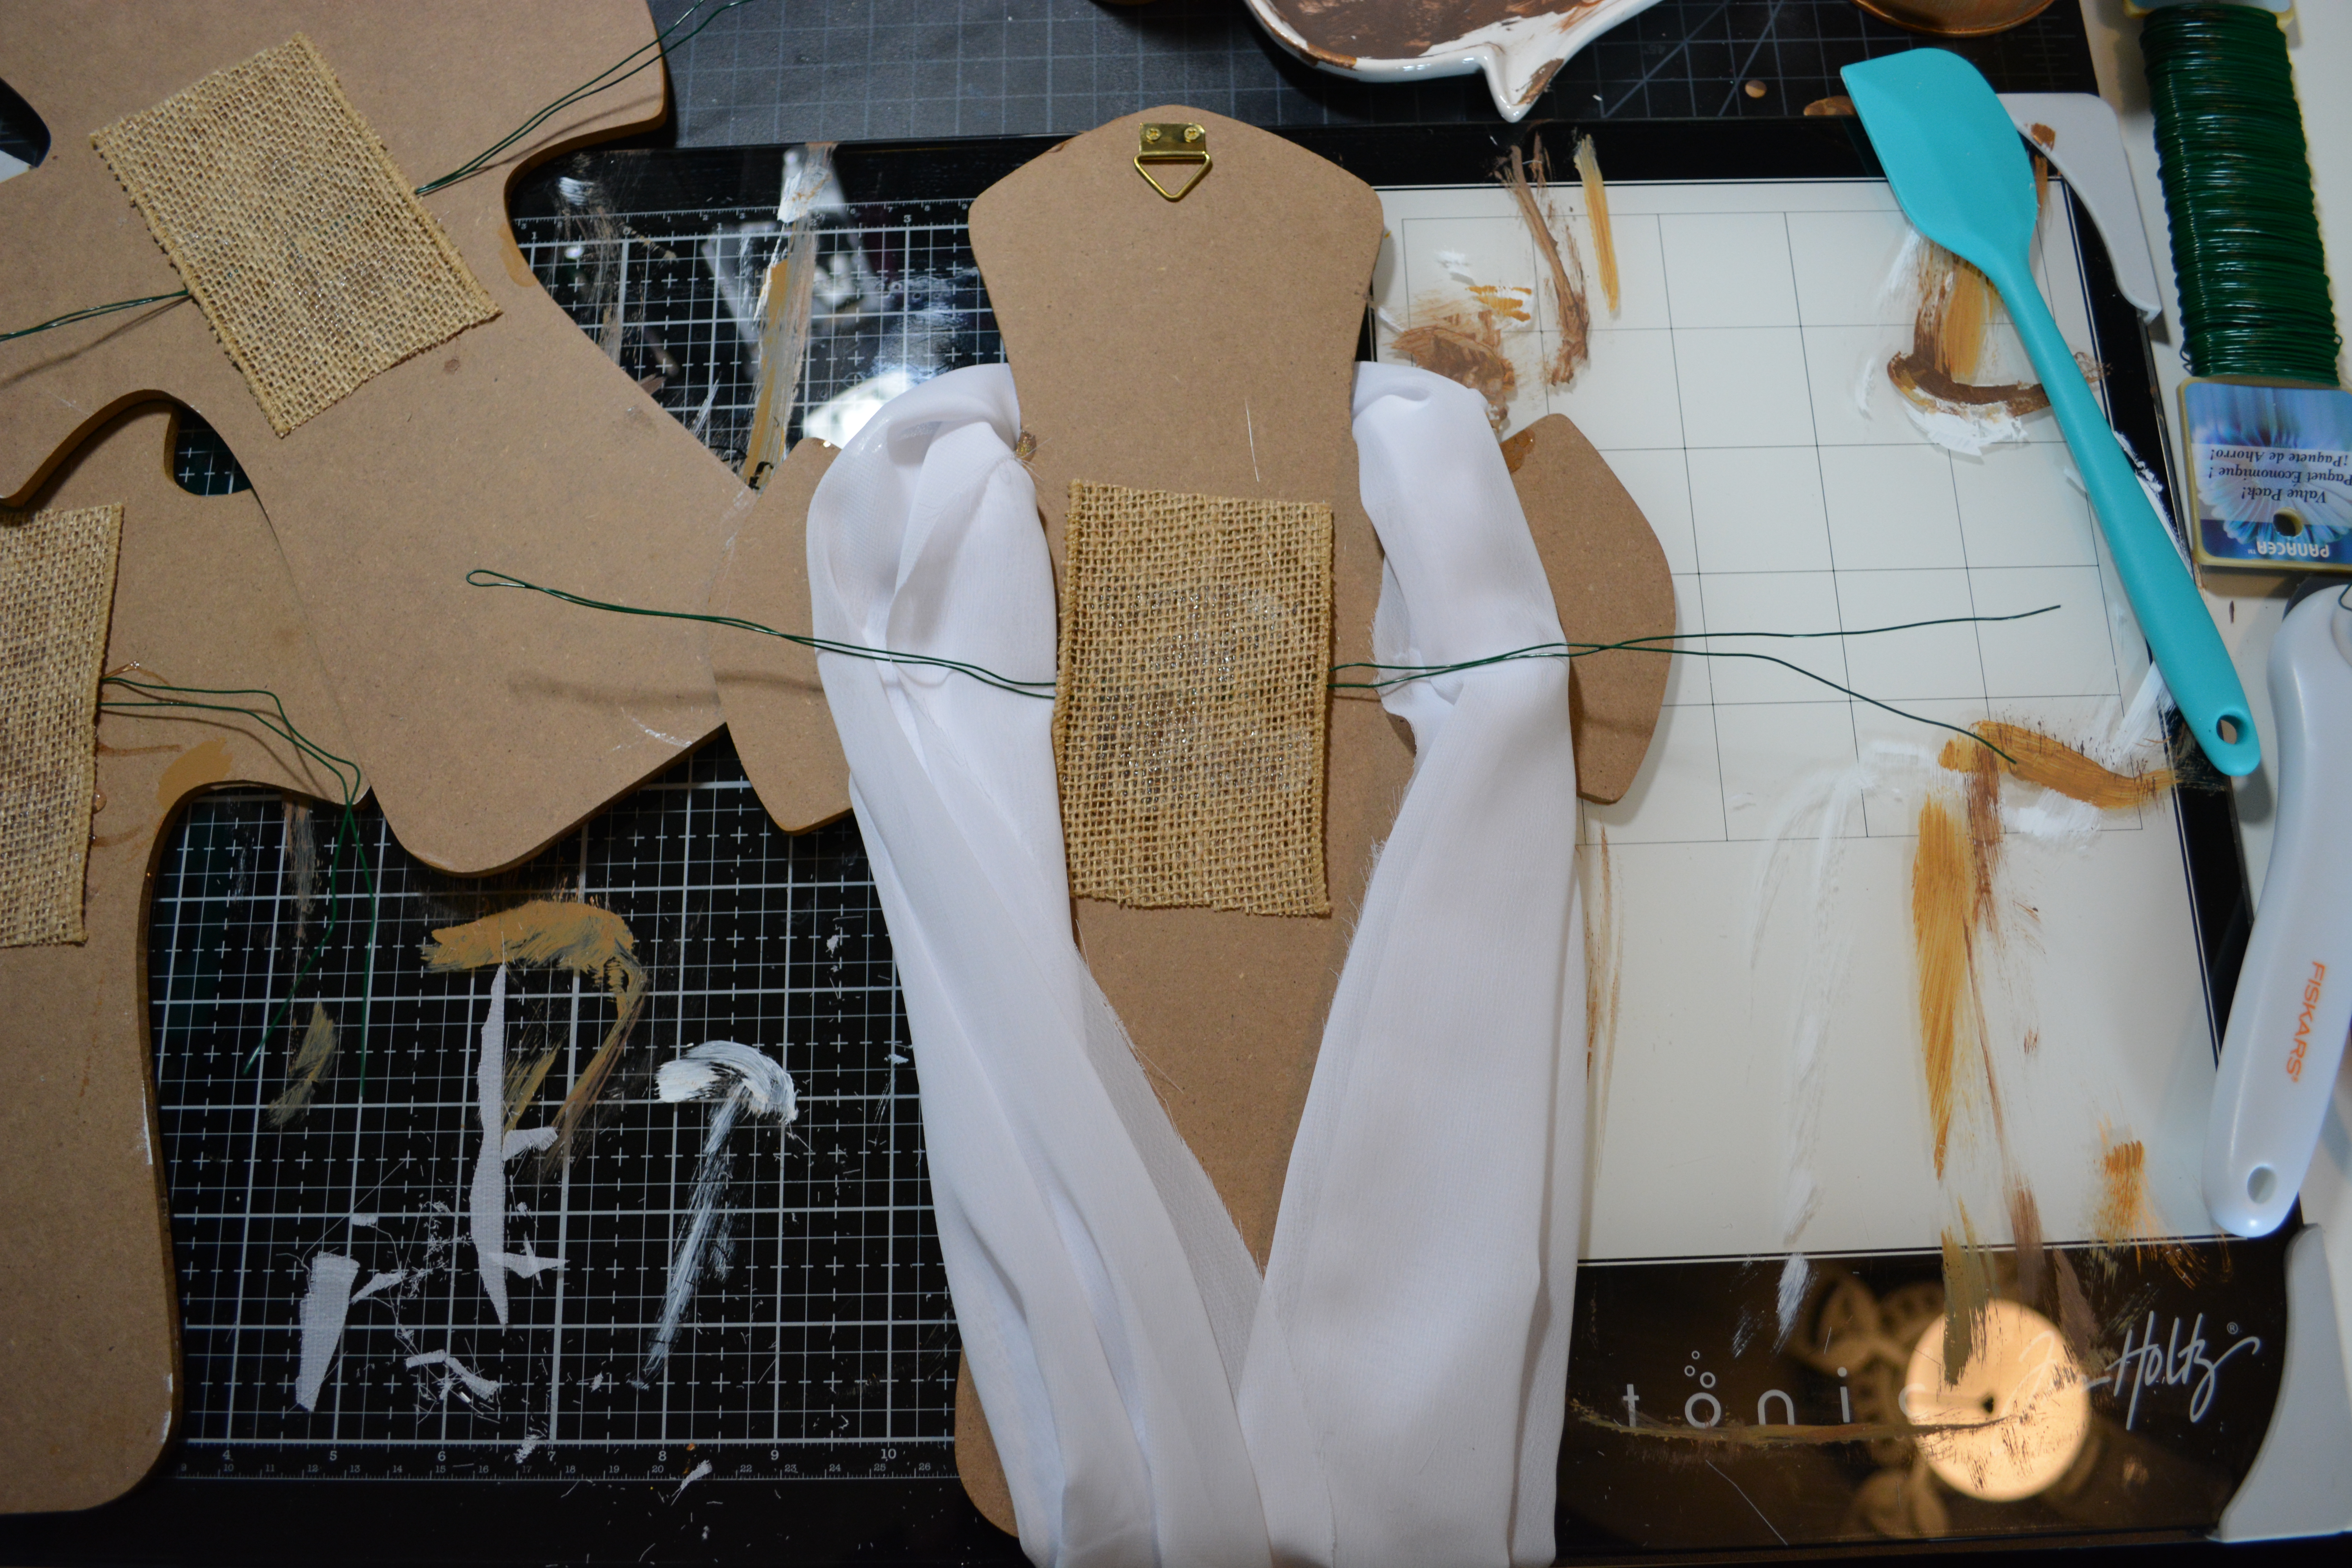
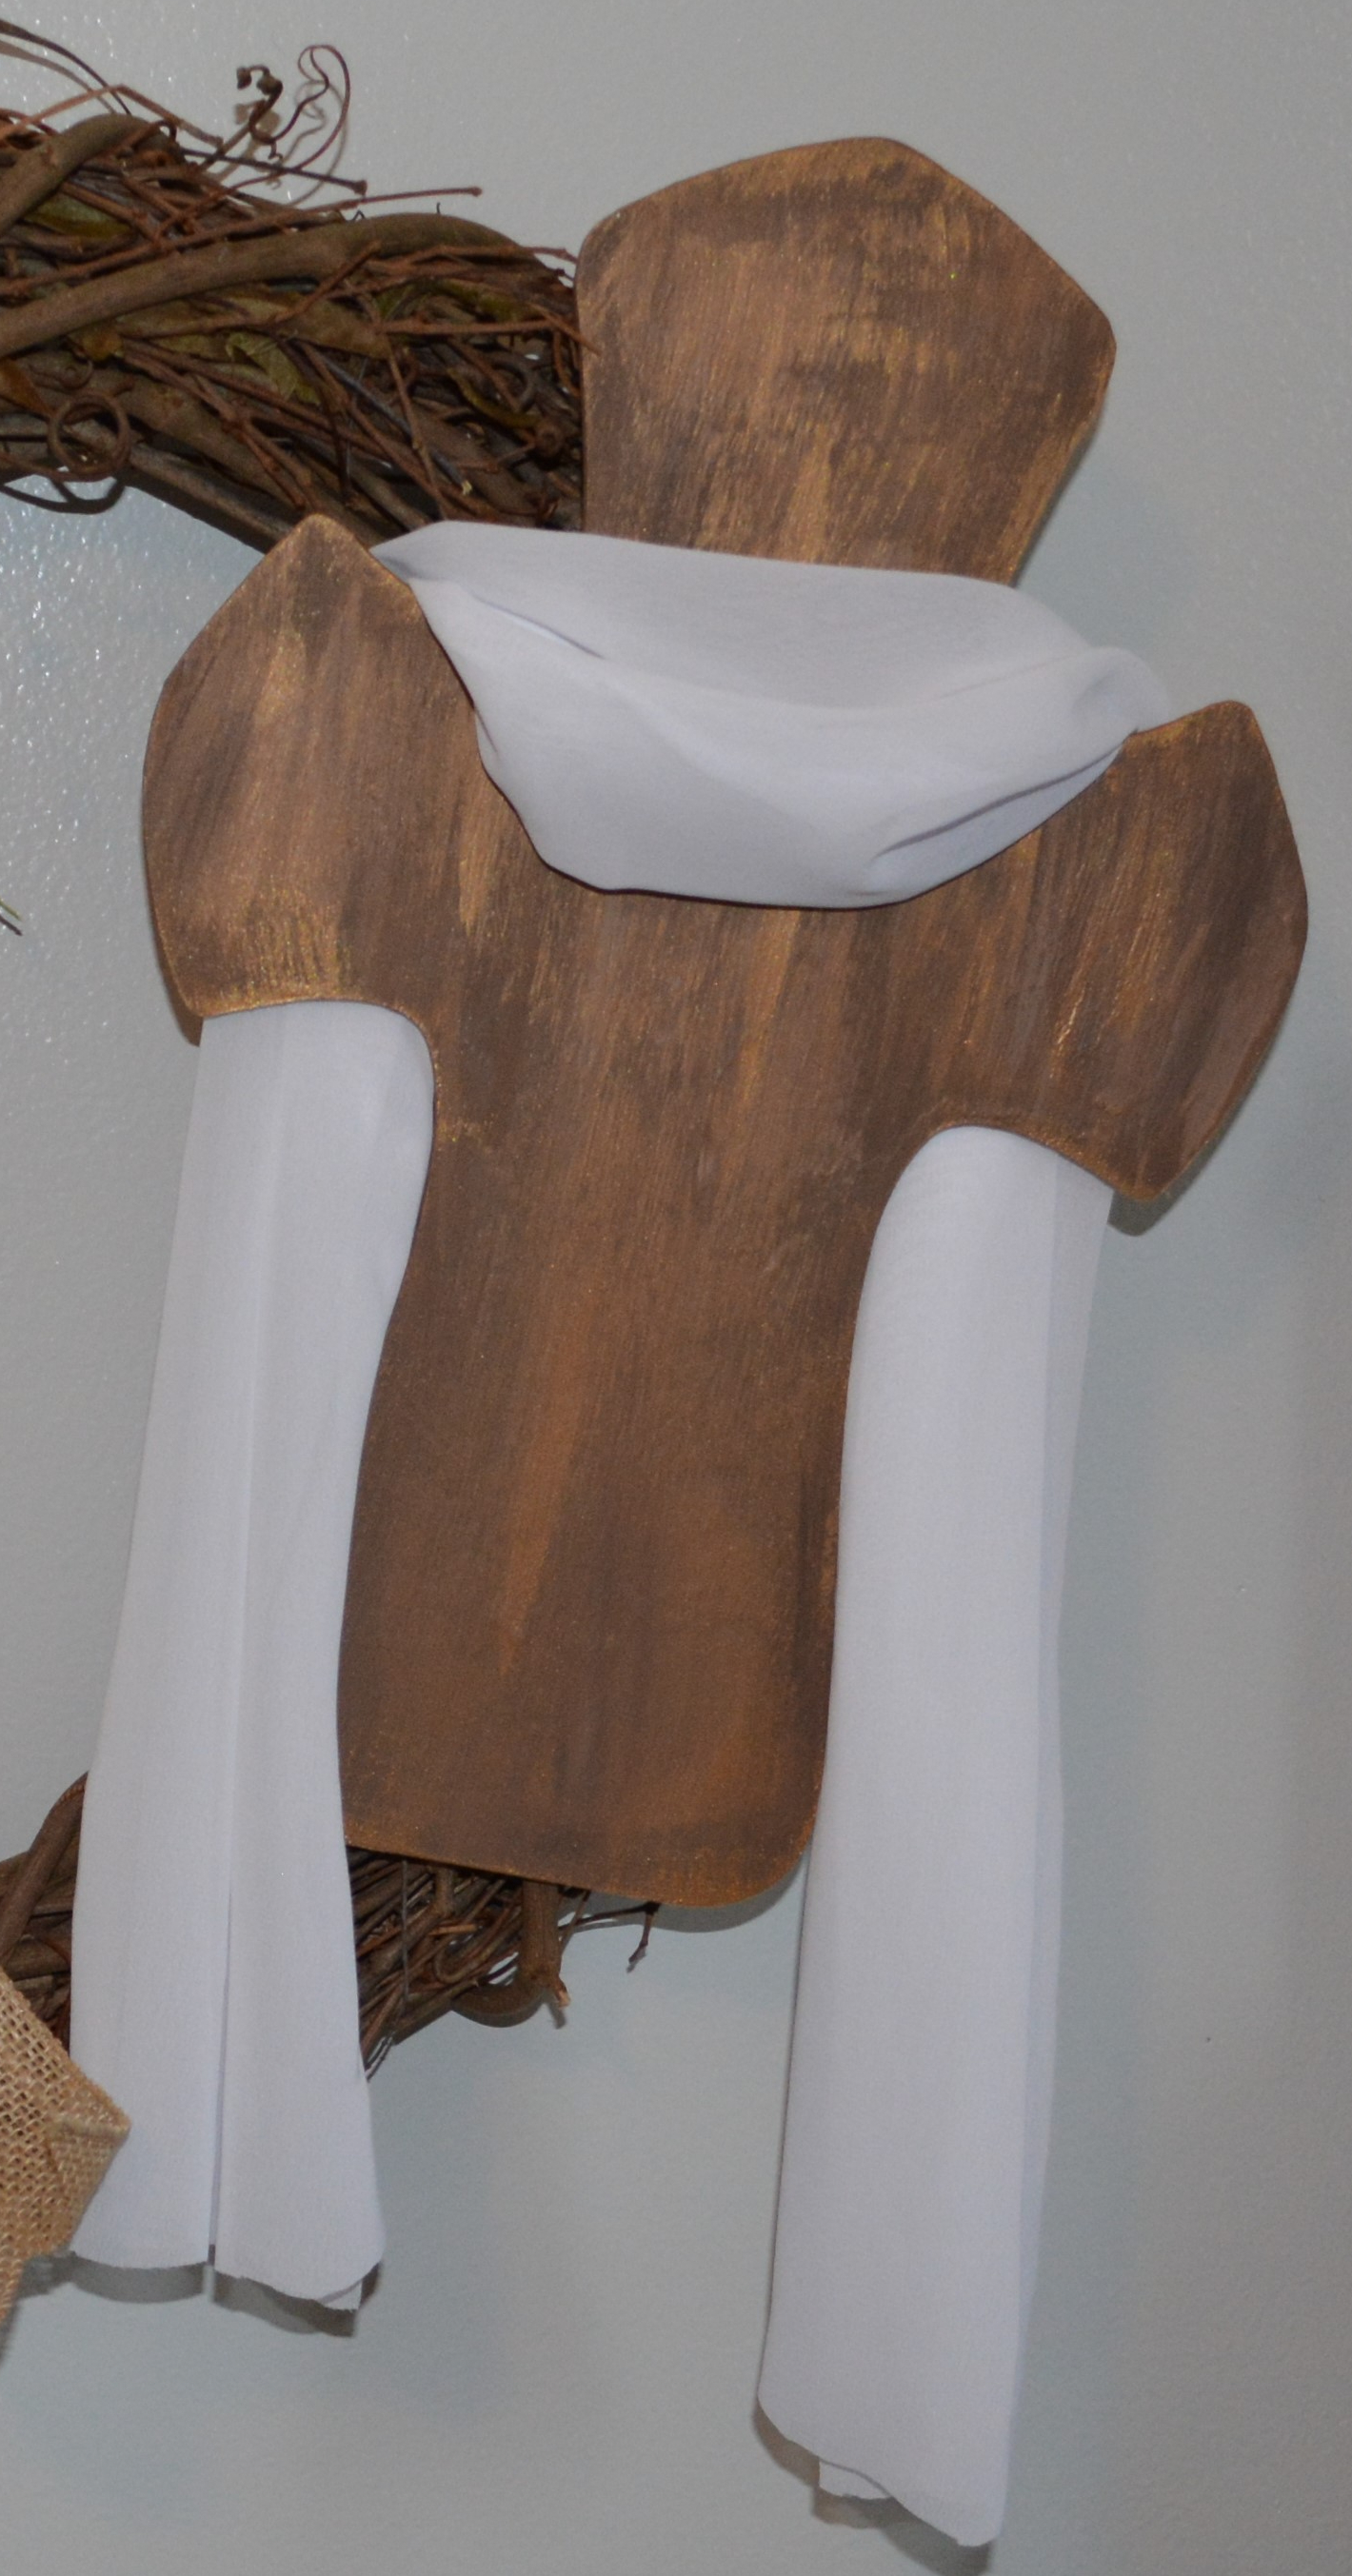
Its time to finish the cross. Cut the sheer white fabric to the length and width that you think looks best with your size cross and drape it around the cross. On the back of the cross, place some hot glue and E6000 behind the sheer white fabric to hold it in place. In the middle of the back of the cross, add the two glues to it then put a long piece of the floral wire in the glues. Take a strip of the burlap ribbon and place it over the wire sandwiching the wire between the ribbon and the cross. This will help hold the wire on. Finally add the cross to the wreath and wrap the wire around the back and twist it tight to hold the cross on.

Here is the finished product. I LOVE this and it shows the true meaning of Easter which is the death and resurrection of Jesus. It represents his ultimate sacrifice for our sins and the great love He has for us.

I hope you enjoyed this project. It really is an easy one to make. Please Like, Share, Comment, and Subscribe. Also find me on Instagram and Facebook under Yellow Butterfly Craft Designs.

Mark 8:34 ESV And calling the crowd to him with his disciples, he said to them, “If anyone would come after me, let him deny himself and take up his cross and follow me.

Have a wonderful weekend!!

Melissa McGuire

Supplies

Vine Wreath Form- Hobby Lobby

Easter Lilies- Dollar Tree

Cross- Dollar Tree

Burlap Ribbon- Hobby Lobby

White Sheer Fabric- Hobby Lobby

Floral Wire- Dollar Tree

Waverly Chalk Paint in Truffle and Hazelnut- Walmart

Dark Bronze Paint- Target

E6000- Hobby Lobby

Surebonder Hot Glue Gun and Hot Glue Sticks- Hobby Lobby

Easter fun with Dollar Tree

St. Patrick’s Day is fast approaching but Easter is right around the corner too. It seems to be really early this year. Hopefully that means spring weather is following!!

This week I wanted to make a few Easter signs out of Dollar Tree products I found. I love to give Dollar Tree products an upgrade and tailor them to the season we are in. It is so much fun to look at the before and after pictures of signs that have been redone and given a face lift.

Lets Get Started

Supplies

I found two different signs at the Dollar Tree that I thought would be perfect for Easter signs. The first one is the wedding sign on the left and the other was the plant sign on the right. I also used some Waverly Chalk Paint in White, Truffle, Hazelnut, and Maize. You will need some form of glue too and I used some wood filler.

The words I cut out using my Cricut machine. You can use stickers, print things off the computer, or free hand them. The other thing I used was carrots from Dollar Tree. They have them every year.

Lets start off with the wedding sign. I spread a thick coat of wood filler over it. I did this because the words looked like they were pressed into the sign so if I painted it, the words would show right through. After that dried I panted over the sign with a mix of Hazelnut chalk paint and Truffle. When you use a dark and light color, it can make the sign look like a piece of wood. I went over the sign a few times with these colors to get the look I was going for. It helps to have a light hand with the dark color.

As for the planting sign, I pulled the metal piece off and then painted the whole thing White with the Waverly Chalk paint. Front and back. Next I took a fan brush and the Maize Waverly Chalk Paint and brushed it on the arched part of the sign to make it look like the sun was rising. Once the paint was dry, I laid out the carrots in a fan pattern and hot glued them to the top part of the sign. I used 7 carrots so you will need 2 packs of them.

The final step was to add the words and eggs. I used my Cricut and Orical 651 vinyl. In Cricut Design Space I made up two saying “Easter Egg Hunt” and ” Welcome To The Carrot Patch”. I also cut out two different eggs and layered vinyl behind both of them so make them two colors.

These two signs are super cute! They were really easy and cheap too. Remember you can use stickers or printables and glue sticks to put words or pictures on your signs. That makes it an easy DIY that is completely customizable. I think the bottom sign would look amazing painted white with the sun rays on the top part. Then put three crosses on it and the words “He Has Risen!” on the bottom. I might have to try that.

I hope you all are happy and healthy. I have a few more Easter project to show you over the next few weeks. Please Like, Share, Comment, and Subscribe. Also find me on Instagram and Facebook under Yellow Butterfly Craft Designs.

 2 Corinthians 5:21 “For he hath made Him to be sin for us who knew no sin…” 

Have a wonderful weekend

Melissa McGuire

Supplies

Wedding Sign- Dollar Tree

Plant Sign- Dollar Tree

Carrots- Dollar Tree

Wood Filler- Dollar Tree

Cricut Machine- Michael’s Craft Supply

Orical 651 Vinyl- Michael’s Craft Supply

Waverly Chalk Paint in White, Hazelnut, Truffle, and Maize- Walmart

Surebonder Hot Glue Gun and Hot Glue Sticks- Hobby Lobby

Spring in Small Places

We have had some warmer weather here the last week or so which has been a nice change from the ice and snow. The birds are slowly coming out and I have even had my windows open a few days. It has been amazing!! All that tells me we are headed toward SPRING!! While Fall is my favorite season, Spring brings its own kind of fun. Things are lighter and brighter and there is a feeling of new beginnings in the air.

The first craft I am going to start the Spring season off with are these sweet flower vases. These can be used from now all the way though summer. If you change out the bow and flowers, these can even take you into Fall. I love crafts that can last more than one holiday or season!

Lets Get Started

Supplies

I feel in love with these little bud vases from Target. They are short and small so they can be used in small spaces or even 3-tiered trays. The other items I used for the craft are some twine, ribbon, and flowers. I also used some paint from Target called New Penny.

The first thing I did was give these vases 2 coats of the New Penny paint from Target. This paint is amazing, at least the metallic colors are. It covers well and looks nice and shiny.

The next step is to pick what kind of ribbon or twine you want to tie around the neck of the vases. I picked this cute plaid ribbon from Michael’s Craft Supply for one of the vases and the other two I used twine from the Dollar Tree. For the ribbon, I tied it in a bow around the neck of the vase. Then I took the tails of the bow and placed them together, folded them in half long ways, and then starting from the bottom with my scissors pointing up toward the bow, and cut the tails down. Once they open up the have the V shape in them. Its my favorite way to cut them.

With the twine, I wanted a bigger bow. I started by cutting 2 longer pieces of twine. Those will be the tails of the bow. Then I took the twine and wrapped it around 3 of my fingers 4 times making loops and then cut the twine. After that I took another longer piece of twine and laid the loops I just made from around my fingers and the 2 pieces of twine I cut for the tails in the middle of it. Once all of that was gathered together, I tied the long piece of twine around the loops and tails. You can now see where the bow was formed. I tied the bow around the vases and cut the tails to the length I wanted.

The last thing I did was pick out some flowers. I tired a few different kinds and settled on the Hydrangeas. I cut the stems down to fit in the vases and I was done.

These are so sweet and tiny. They can be put anywhere and like I said before they can be used for a few holidays. Since I did not glue in the flowers in, they can be changed out for the seasons along with the bows. The penny color makes them great for St. Patrick’s Day too. Let me know what you think! What color would you paint these vases?

Thank you for stopping by, and have a wonderful weekend. Please Like, Share, Comment, and Subscribe. Also find me on Facebook and Instagram under Yellow Butterfly Craft Designs.

2 Corinthians 5:17 17Therefore, if anyone is in Christ, the new creation has come: The old has gone, the new is here!

Melissa McGuire

Supplies

Set of 3 Vases- Target Bullseye Playground

New Penny Paint- Target

Twine- Dollar Tree

Plaid Easter Ribbon- Michael’s Craft Supply

Flowers- Michael’s Craft Supply