This is my first Christmas crafting YouTube video!! Let me tell you the learning curve for making YouTube videos is a big one but one I am finding I love. My creativity has gone through the roof and I cannot film and edit fast enough to put out videos.
Here is a new video that shows how to use wooden packaging to make decor out of it. I hope you enjoy!!
Thank you so much for watching my video and I hope it gave you some inspiration! Save all those wooden boxes you might get this Christmas and craft with them. Also keep an eye out for any other things you receive that you can craft with.
I went shopping at Walmart, Target and Michael’s Craft supply. They all have amazing Christmas Items out right now. I was blown away. Here is a look at what I brought home!!
Please Like, Share, and Subscribe. Also tell me what your favorite thing is that I bought.
Exciting things are happening at Yellow Butterfly Craft Designs!! I have posted my second YouTube video. The first video is a haul video and this second was is a full on craft tutorial.
Happy Halloween!!!!
This craft video is full of Halloween inspiration. I use things from Target and Dollar Tree. I truly hope you enjoy it!!
Thank you so much for joining me. Please Like, Share, Comment and Subscribe!!
I am going to do a series of shelf DIY posts. They will not be posted all in a row because I have a Christmas in July post planned for next week. My hope is to give you some inspiration if you come across old shelves or see some but they might not be the right color or do not match your style. Just to let you know up front, I lost some of the pictures of the shelves but there is enough to get the idea of what I did to DIY them.
Over the last few months I have been collecting several different kinds of shelves. I wanted a new shelf to hang our car keys on. The other place I need shelves is going down our steps to our basement. We have a ton of shot glasses that my husband and I have collected over the years since we got married. The shot glasses have been in a container for the last 4 years so it is time to start getting them out and on display. My goal is to have several different kinds and styles of shelves to put the shot glasses on. I am accomplishing just that.
Lets Get Started
Supplies
SHELVES!!! That is the first thing you will need. I got some shelves from Dollar General, Target, and a thrift store. If you want to change the color of the shelves you will need paint of some kind. I used spray paint, chalk paint, and acrylic paint. To give a few of these shelves some personality I added some wood planks with saying on them that I used my Cricut to do. I used a few basic supplies like twine and hot glue too.
We are going to start with the shelf I found to hang our keys on. I got this one at Dollar General on clearance. It was white and I did not want it to blend in with my walls so I spray painted it with this rust color. I took the wood piece off of the shelf first. Please do spray paint in a well ventilated area. I did 3 light coats of spray paint on each side of the wire part to the shelf. After that I did 2 coats of polyacrylic over it. Then I added the wood piece back on.
I was watching a YouTube video the other day and I saw where they added the saying “Come Home Safely” on a key holder and I loved the saying on it. It is something that we will read every time we walk out the door of our home. To add this to the shelf, I took a wood plank I got from Hobby Lobby and painted it with a little blue paint and water mixture. I cut the words out with my Cricut and some metallic vinyl and added the words to the plank. Then I used some ribbon to help me hot glue the plank to the shelf. Finally, I hung the shelf on my wall and that was it. You can do this project very quick and can accomplish it in a day. Spray paint makes things go a lot faster.
This next shelf started as a table top shelf. I made a mistake from the get go and I should have known better. The surface of the shelf is slick and I should have primed it with chalk paint first. That is not what I did first and man did I pay the price. I used Dark Navy Apple Barrel paint to start painting this shelf. After two coats of paint, I could still see a lot of white through it. So I went over the whole shelf with Ocean Chalk Paint from Waverly and then did two more coats of the Dark Navy over it.
My next issue was that I needed to figure out how to hang a shelf that was not meant to be hung. My husband had a few ideas but I did not want to see all the metal hardware that it would take to hang it. After some thought I decided to drill some holes in what would be the top and bottom of the shelf and then looped twin through the holes. I tied knots where they were needed and then hung it up. It is a shelf that looks very different and I love it!!
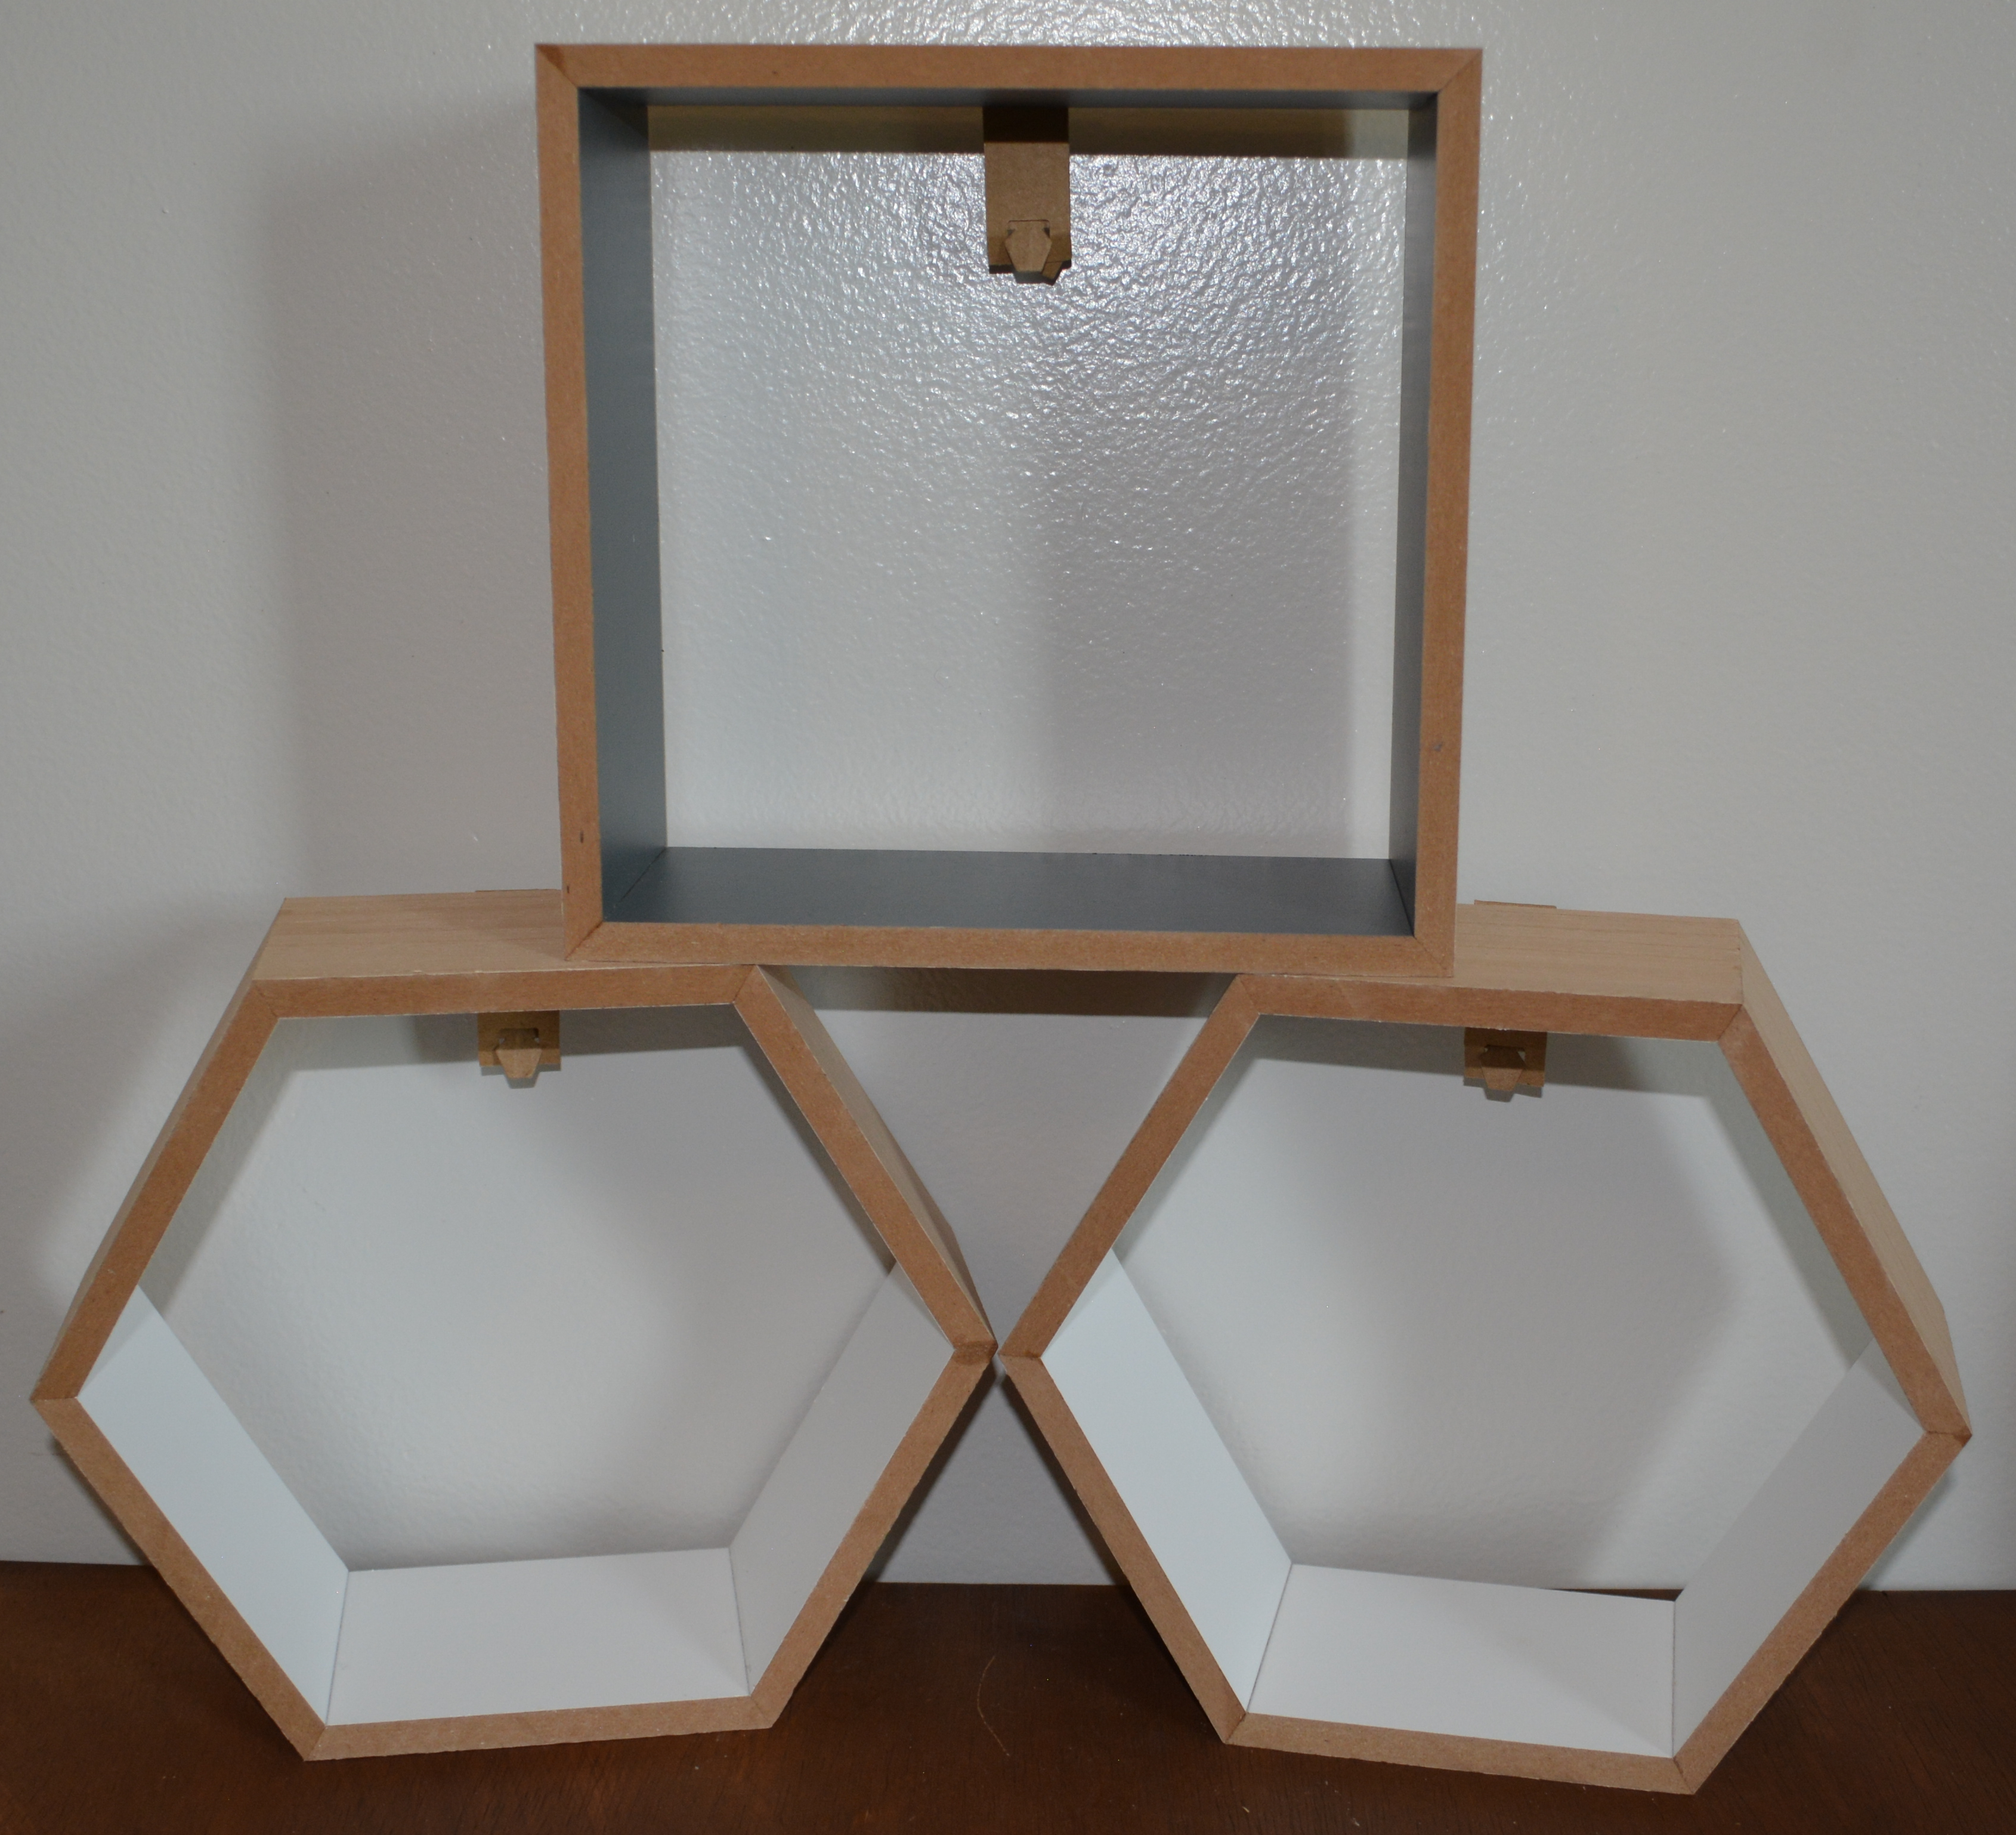
These shelves are from Target. I was able to find 2 of each kind of shelf. I did not want them all the same color on the inside so I painted the inside of one grey and the inside and outside edge of another with Dark Navy Apple Barrel paint. I hung the shelves one on top of the other with space in between each one for more shot glassed on the tops of each shelf. They work great with the tall shot glasses we have.
I found this old shelf at a thrift store. I did not like the heart on it but I knew I could make it work. To start I painted one coat of outdoor grey chalk paint on it. After that was dry, I used some heavy grit sandpaper on the shelf to take some of the paint off all the edges and also off the sides.
Now lets cover that heart!! I took a wooden plank from Hobby Lobby and painted it with a water and white chalk paint to give it a white wash. I wanted the words ” I would rather be someone’s shot of whiskey, Than everyone’s cup of tea!” on the plank. I thought about using my Cricut but the words would be really small and hard to work with if I cut them out. So I typed it out in Cricut Design Space and did a print and cut. It printed out on my printer and then the Cricut cut the paper in a rectangle that will fit on the plank. I used a glue stick to put it on the plank. The paper on the plank was bright white and did not go with the rustic vibe of the shelf. So I took a bit of Antique Wax and VERY lightly brushed over the edges of the plank and over the top of the words. I attached the plank to the shelf with hot glue. It was perfect!!
I do not have the before pictures of these two shelves. I used the same method of painting the grey paint on them and then sanding all the edges of the shelves So simple and easy!!
It was a lot of fun doing all the shelves. Each one was done a bit differently. I am excited to display all the shot glasses and cups that have been in a bin for years. They show the journey my husband and I have taken with all the places we have been. It was really neat to relive a few of the places we have been and show our boys all the places we have visited over the last 20 years. Let me know if you try some of these techniques in making over shelves or any other pieces. Thrift stores are great places to look!!
Thank you for joining me today. Please join me next week for Christmas in July!! I will be flipping some thrift store finds.
If you like this post please Like and Share it!! It would also really help me if you Subscribed to my blog, Instagram and Facebook page.
Have a wonderful weekend.
Melissa McGuire
Yellow Butterfly Craft Designs
Supplies
Shelves- Dollar General, Target, Thrift Store
Waverly Chalk Paint in White and Ocean- Walmart
Dark Navy Apple Barrel Paint- Walmart
Wooden Planks- Hobby Lobby
Twine- Dollar Tree
Surebonder Hot Glue Gun and Hot Glue Sticks- Hobby Lobby
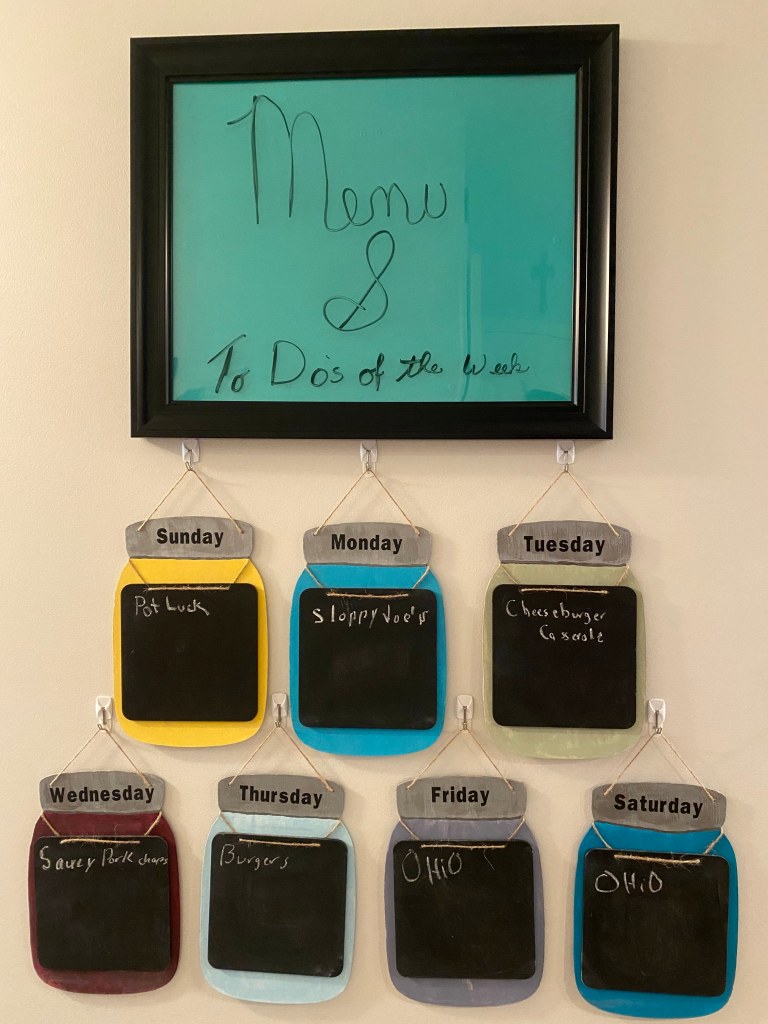
I have had this craft done for a while and have not posted it. It was one of the first crafts I took pictures of before I started my blog. If you know me you know that I LOVE mason jars!! I am excited to finally have these mason jars up and ready for use. The inspiration for this project came when the calendar that had my menu board on it ran out and I needed a new one.
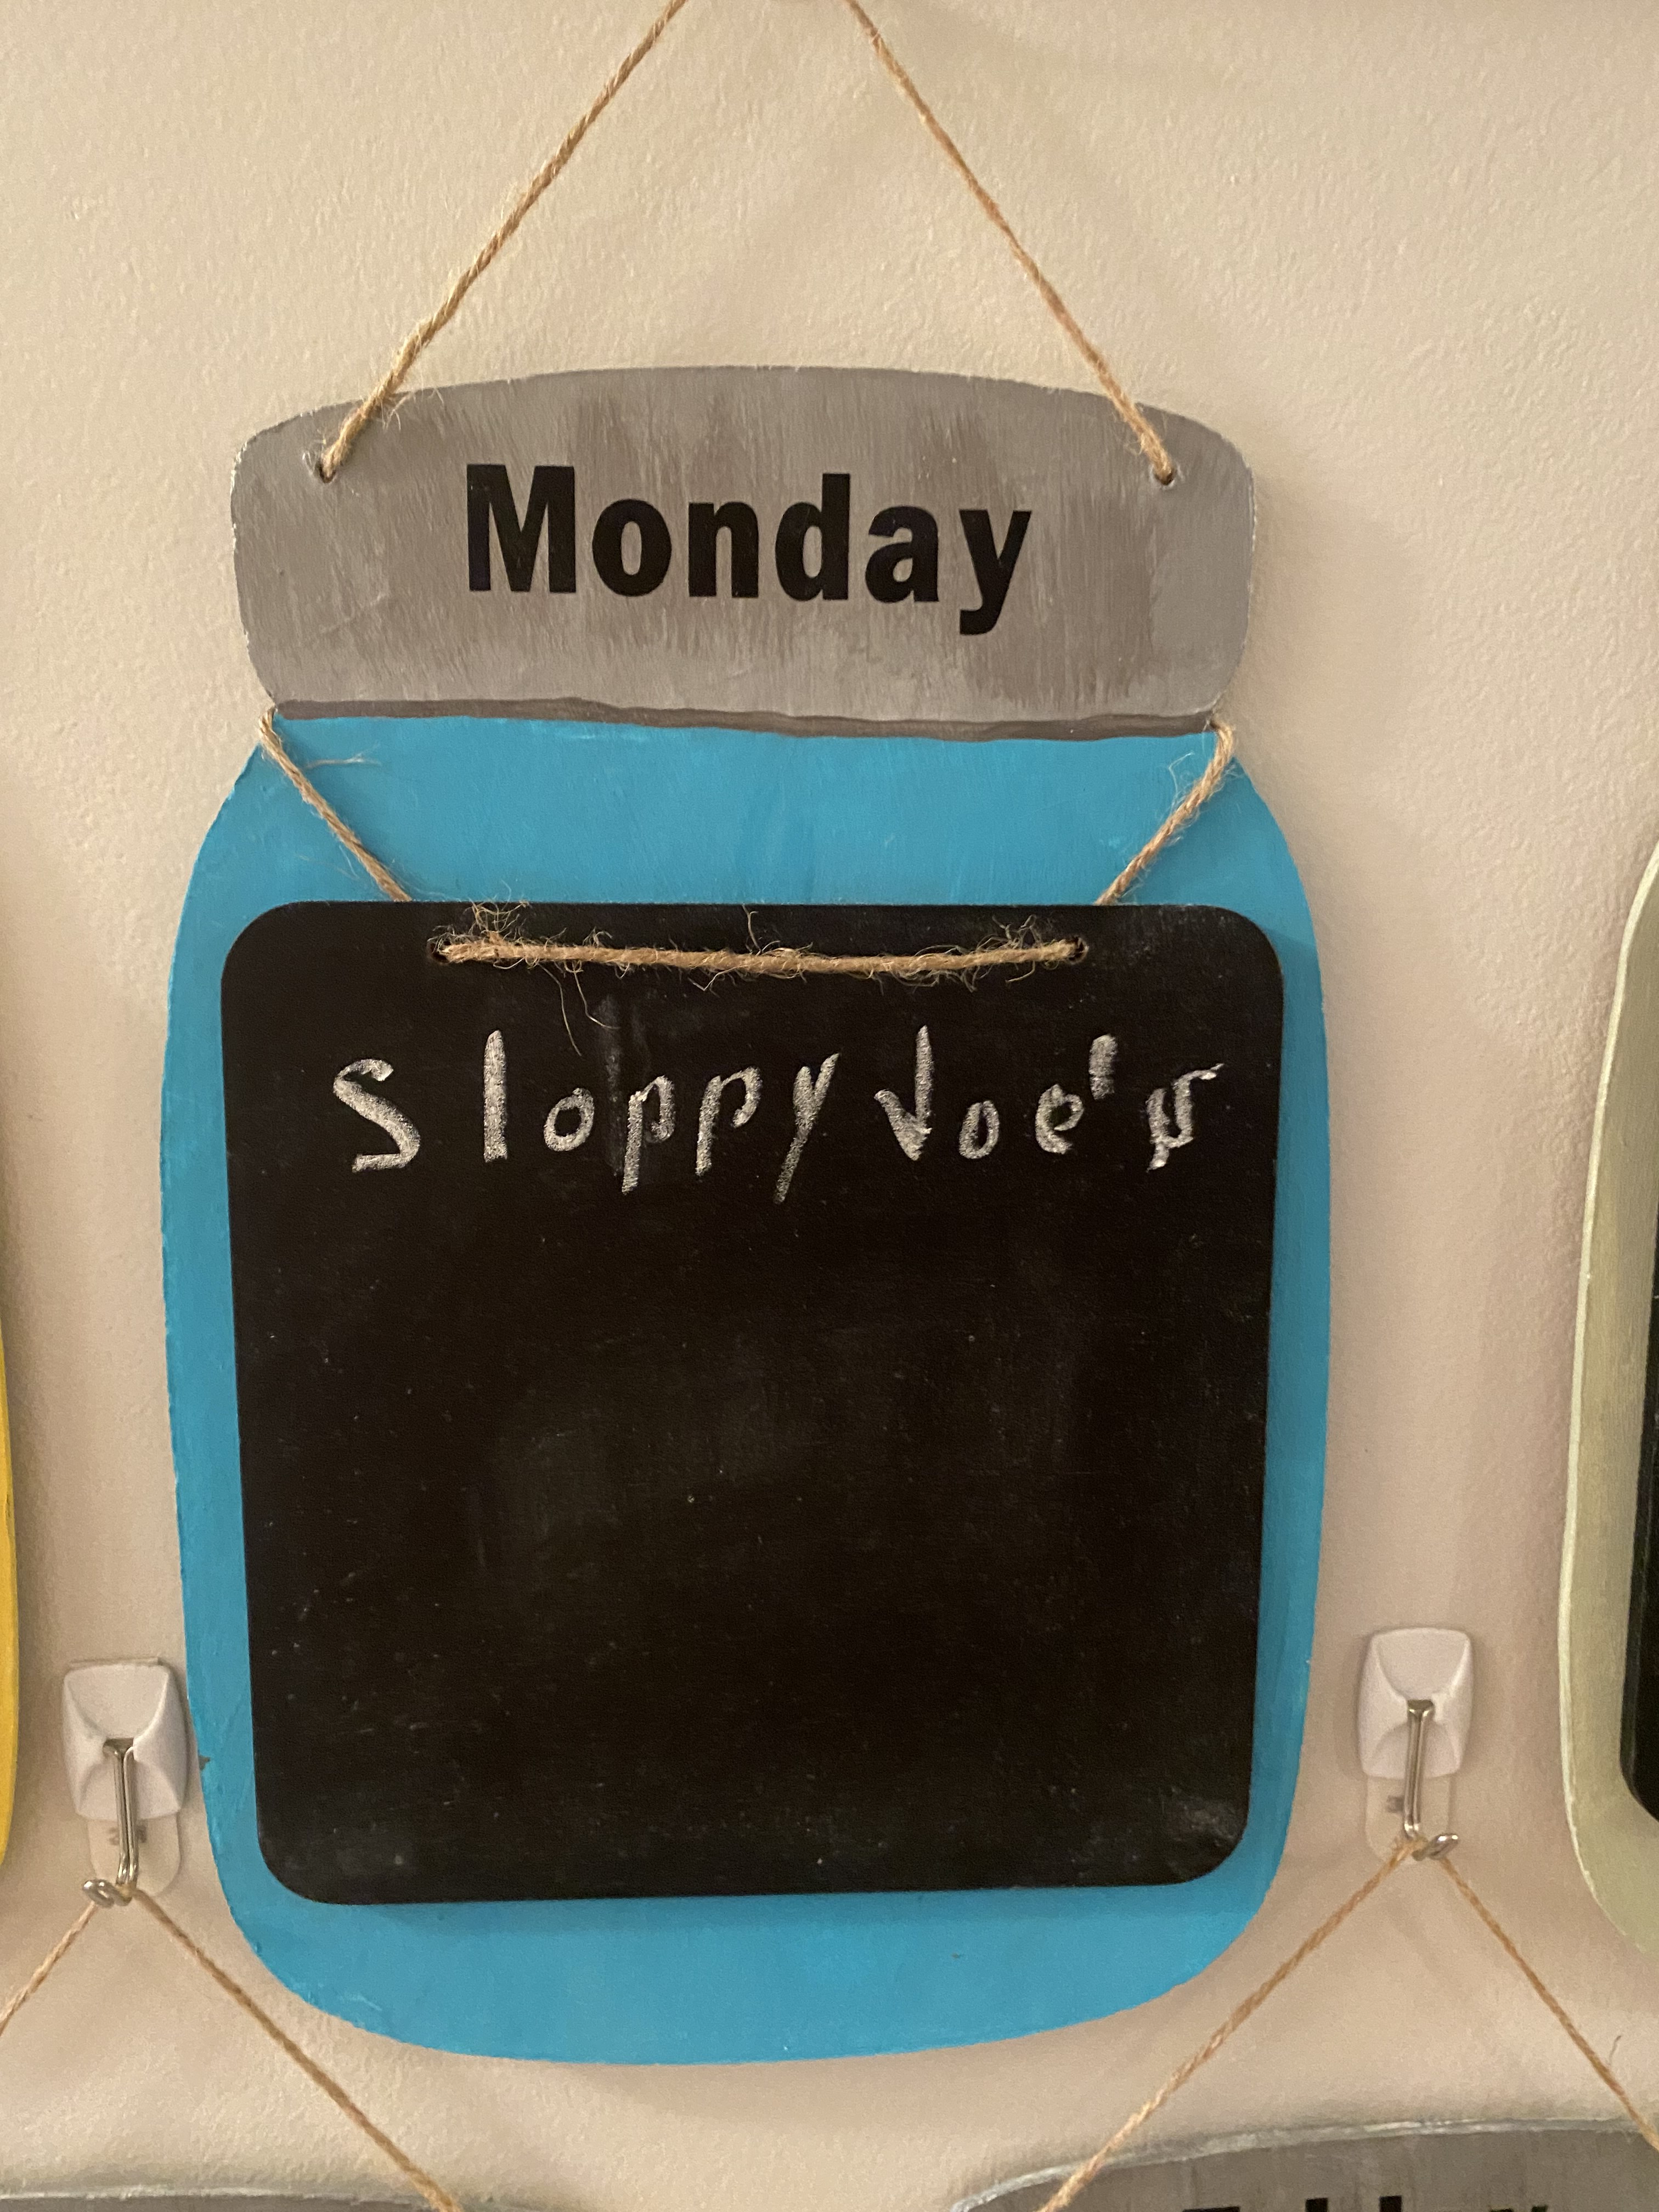
In my house, my family will ask me a million times what is for dinner or what the plans are for the day. Well now I can direct them to this menu and To Do station. (please ignore my poor hand writing on the frame above) Come along with me as I show you how I made these.
Lets Get Started
Supplies
I found these mason jars a few years ago at Dollar Tree but you can get wooden mason jars several places now. You do not have to go with mason jars, you could use circles or squares. The possibilities are endless. I also used chalk paint, silver metallic paint, a scraper, chalk boards, twine, a Cricut and vinyl, and hot glue.
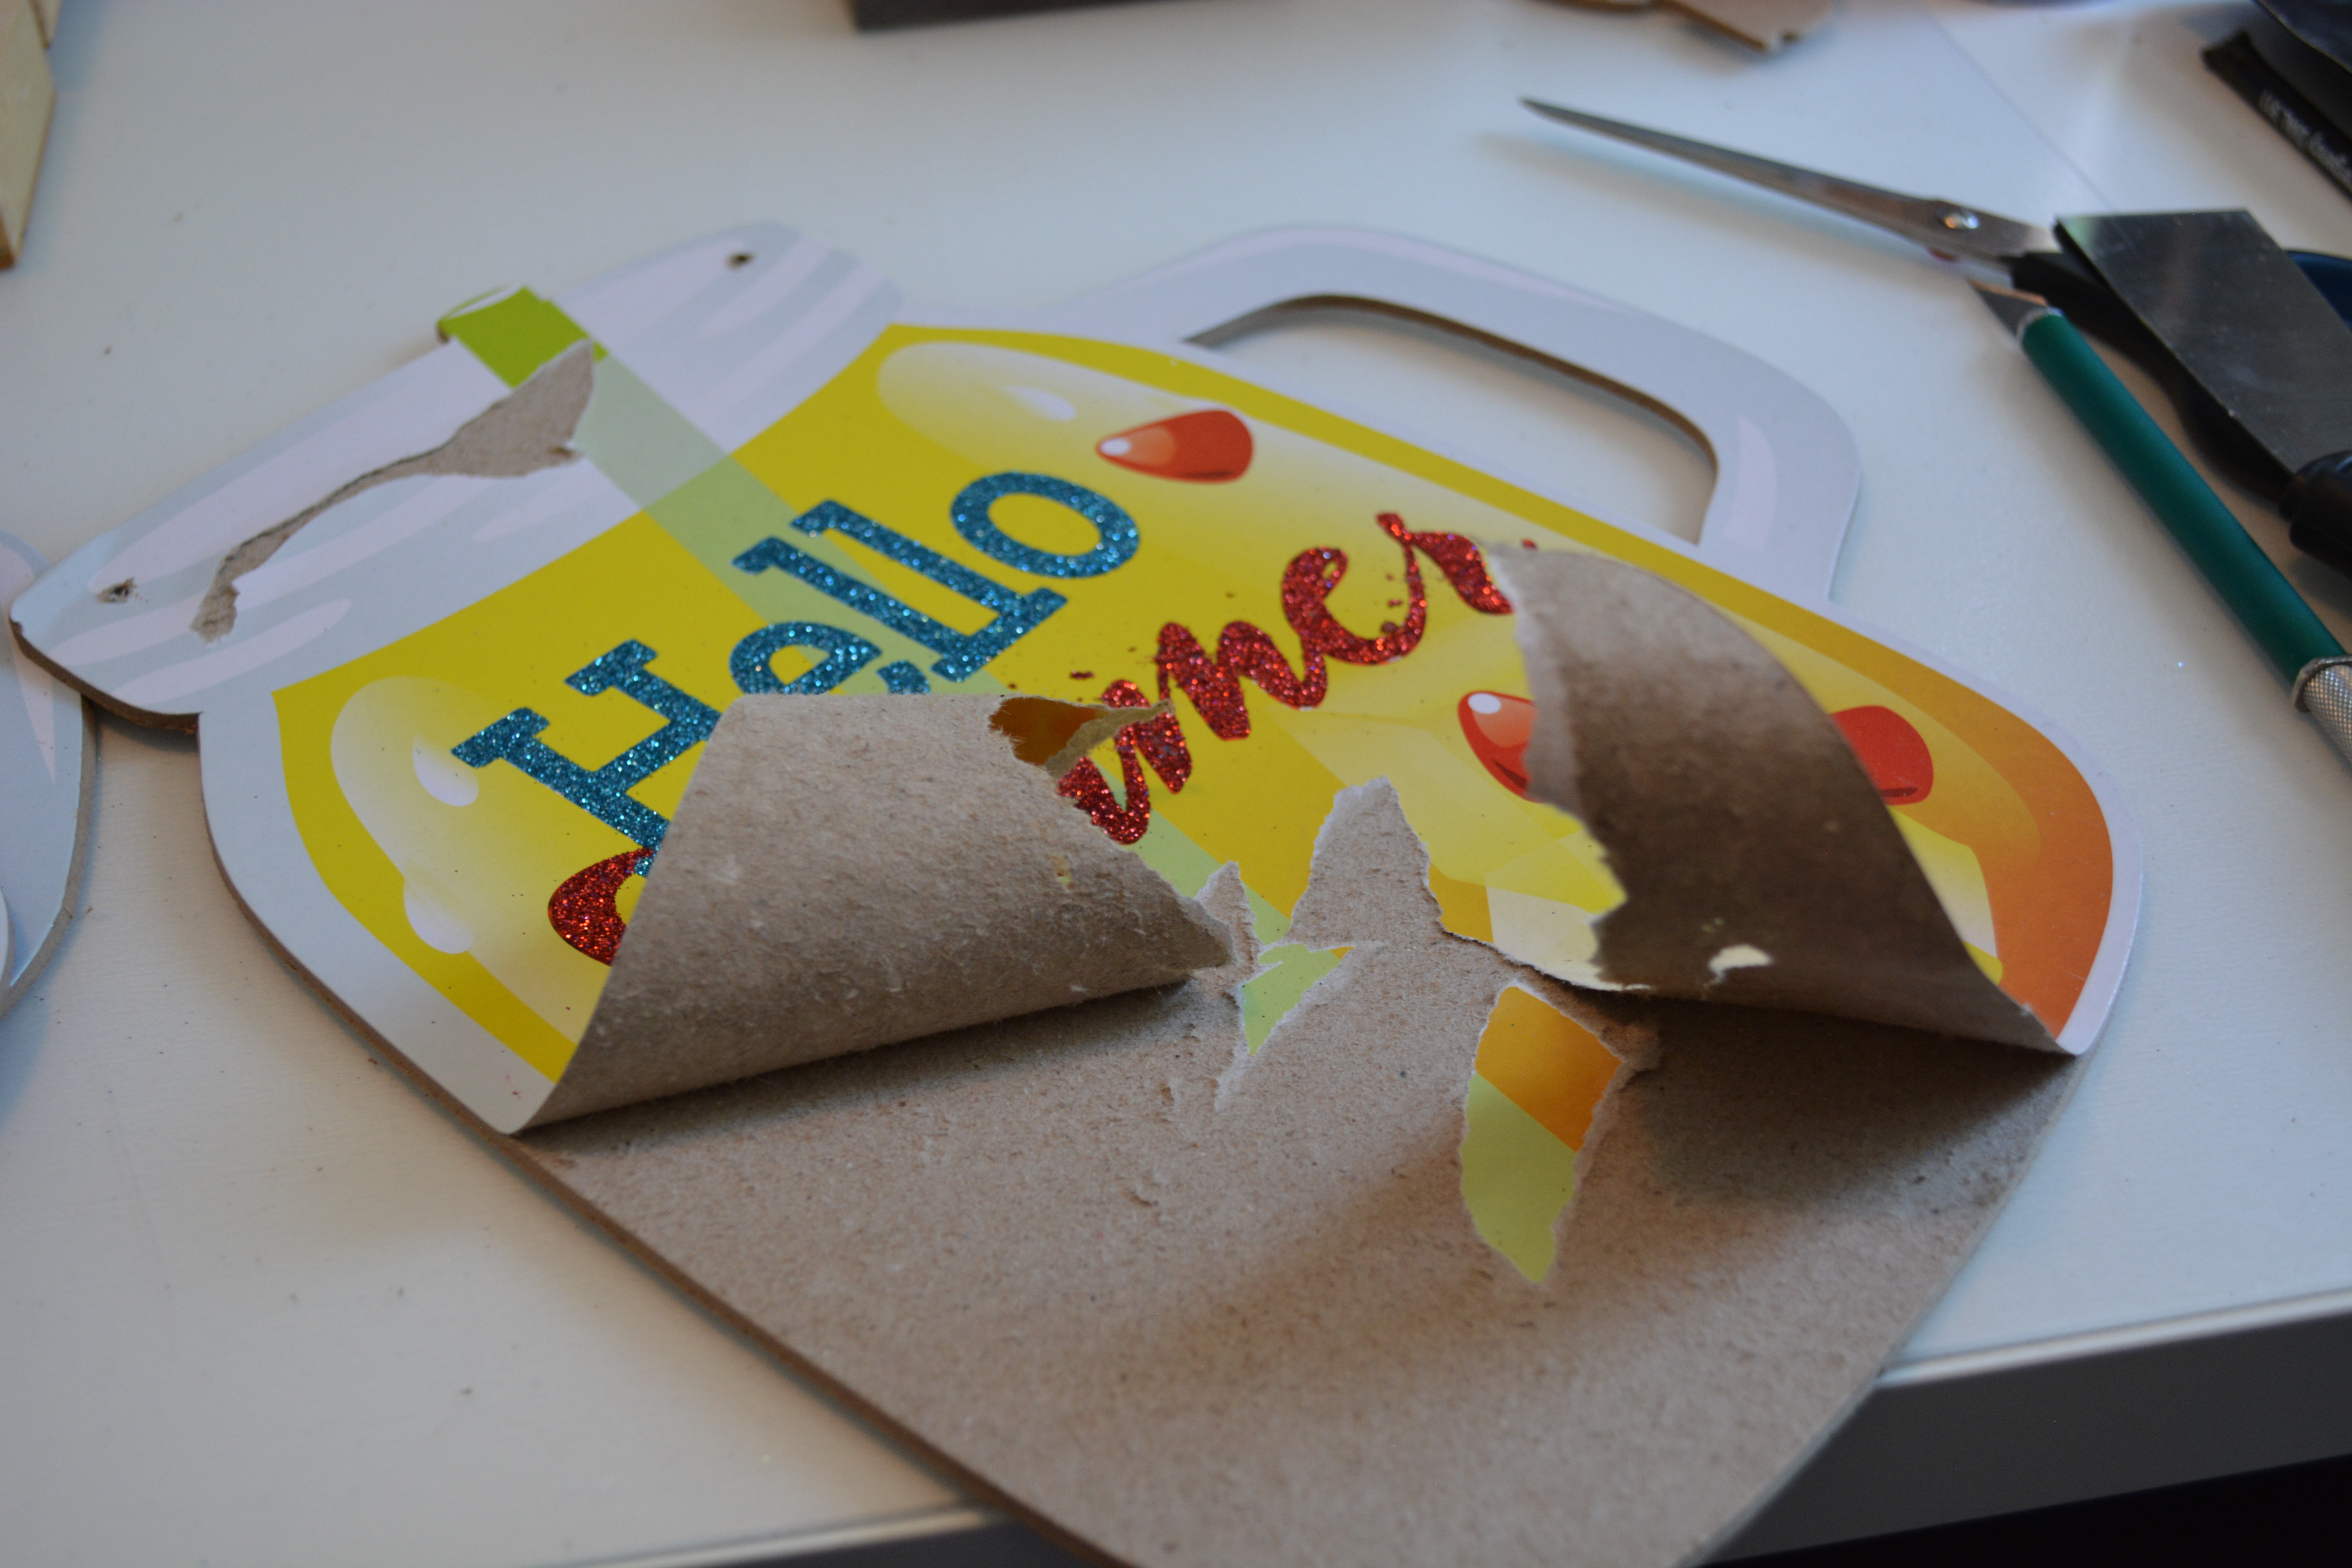
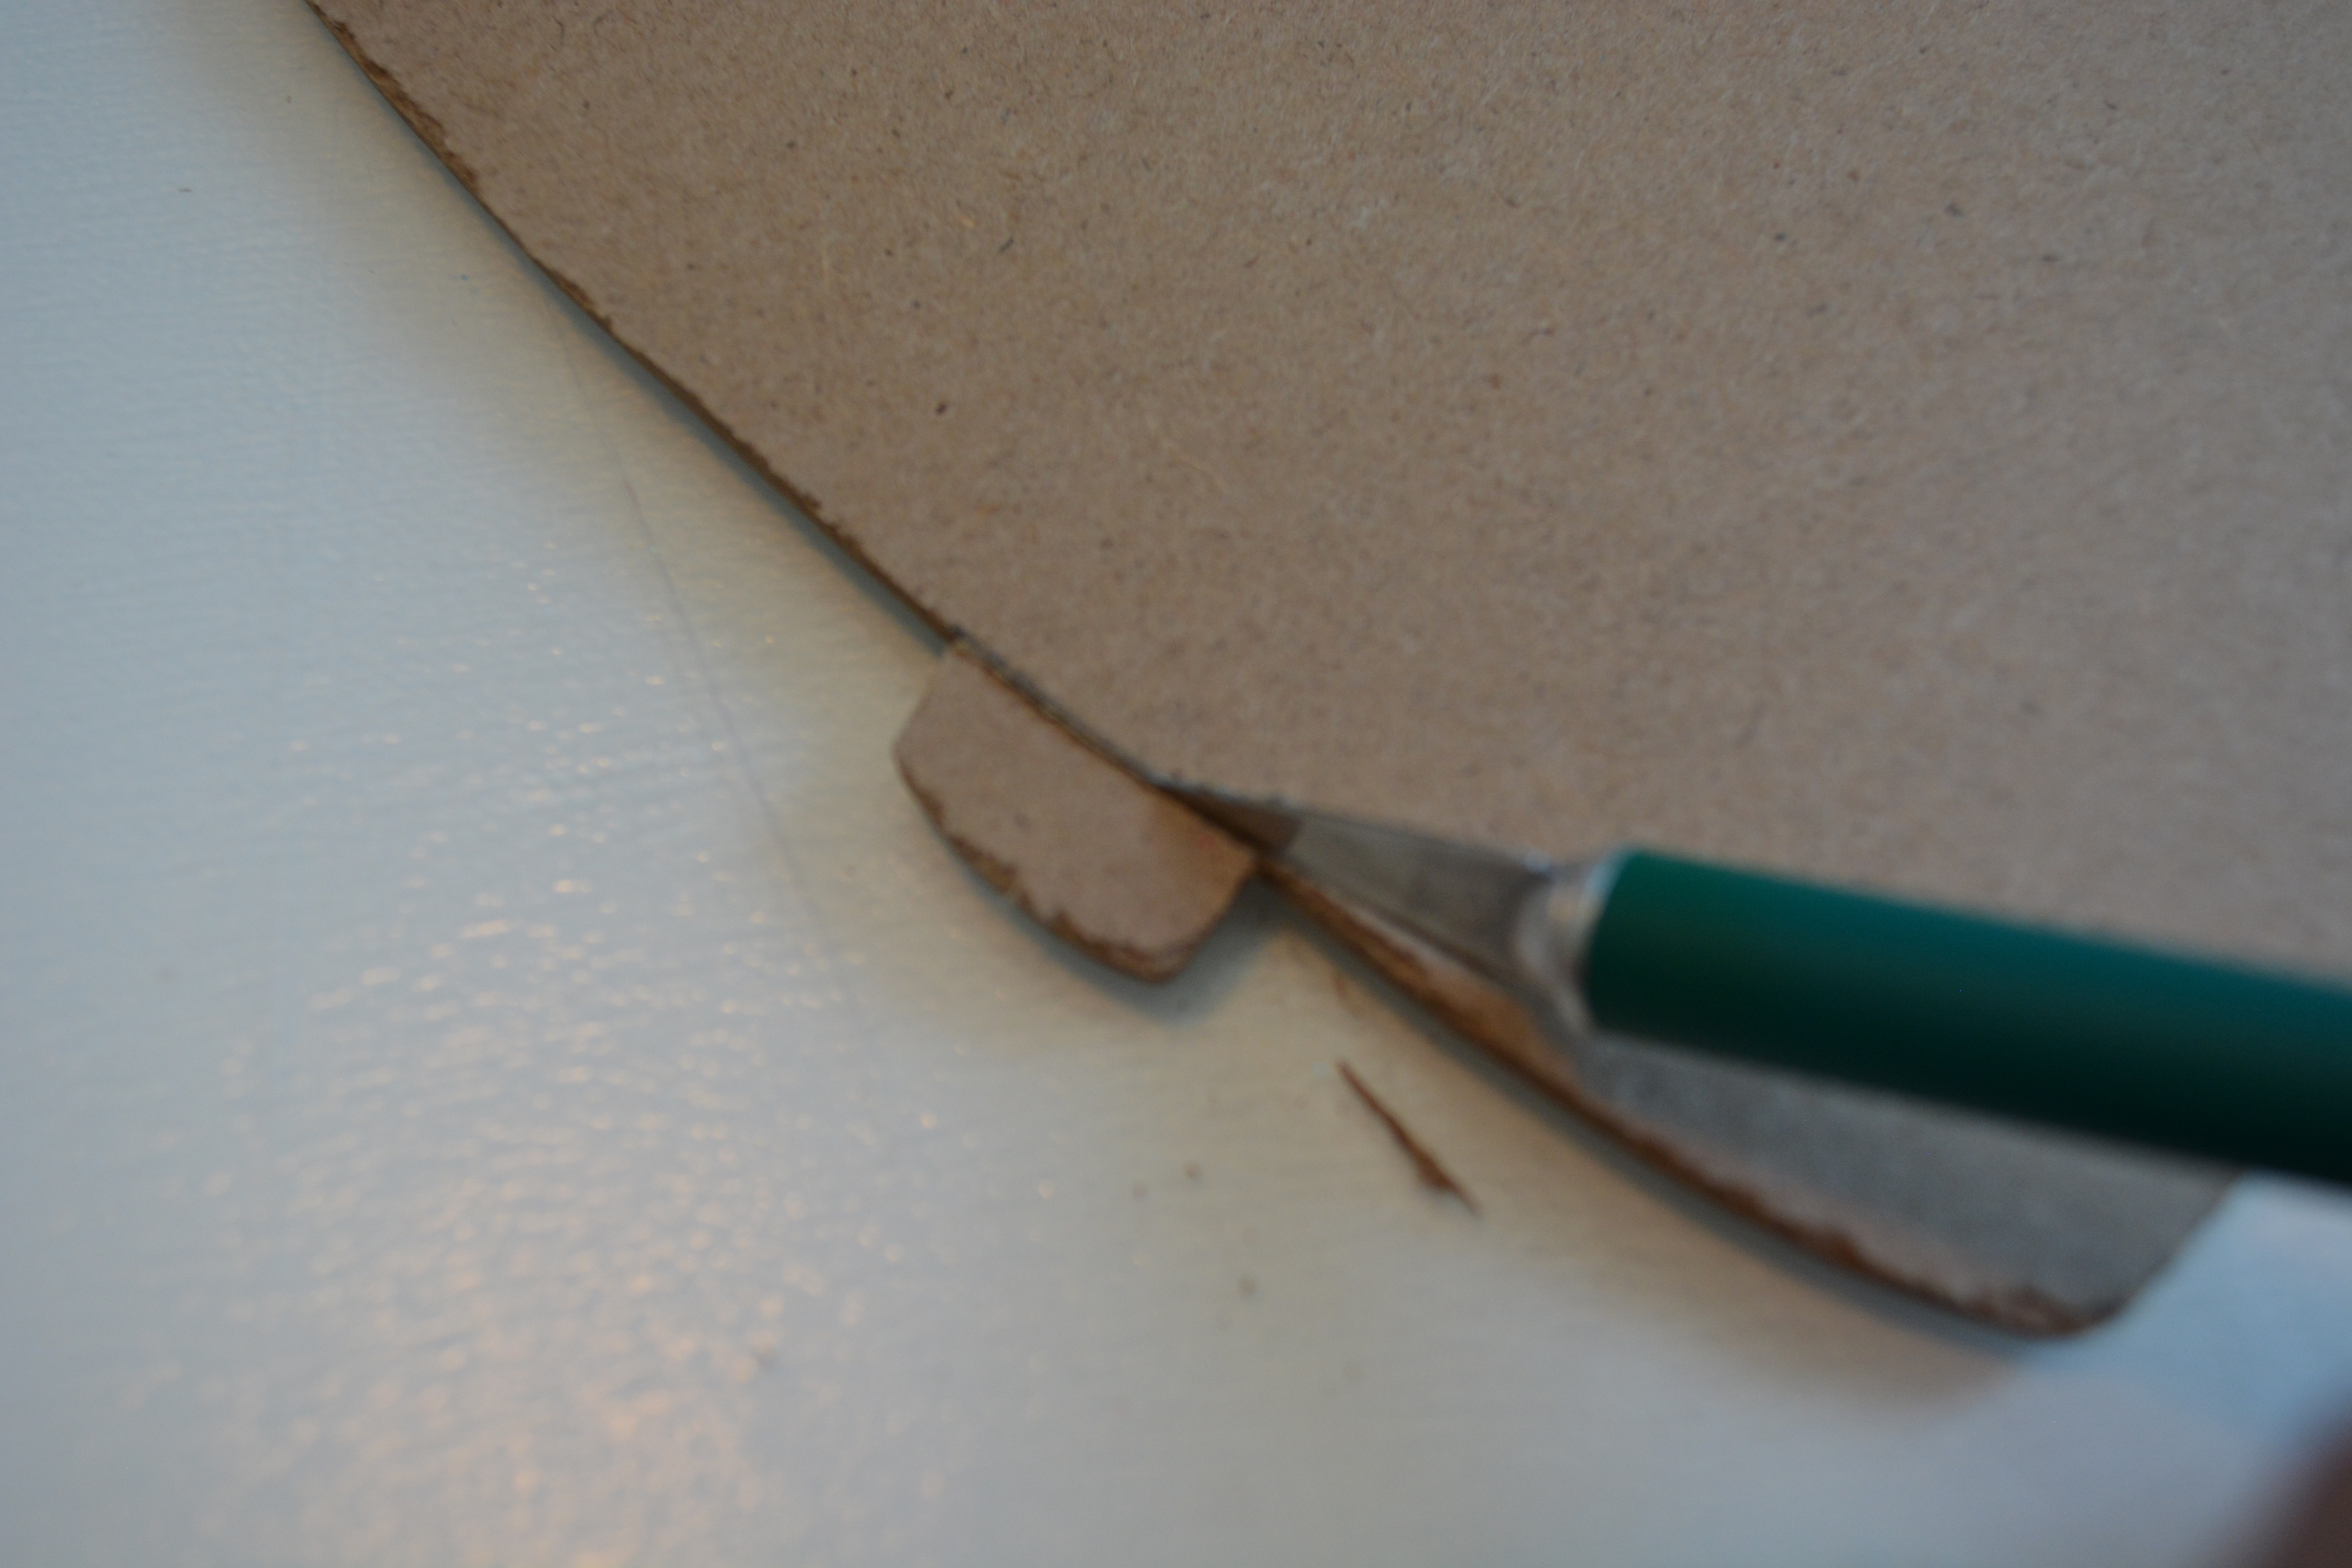
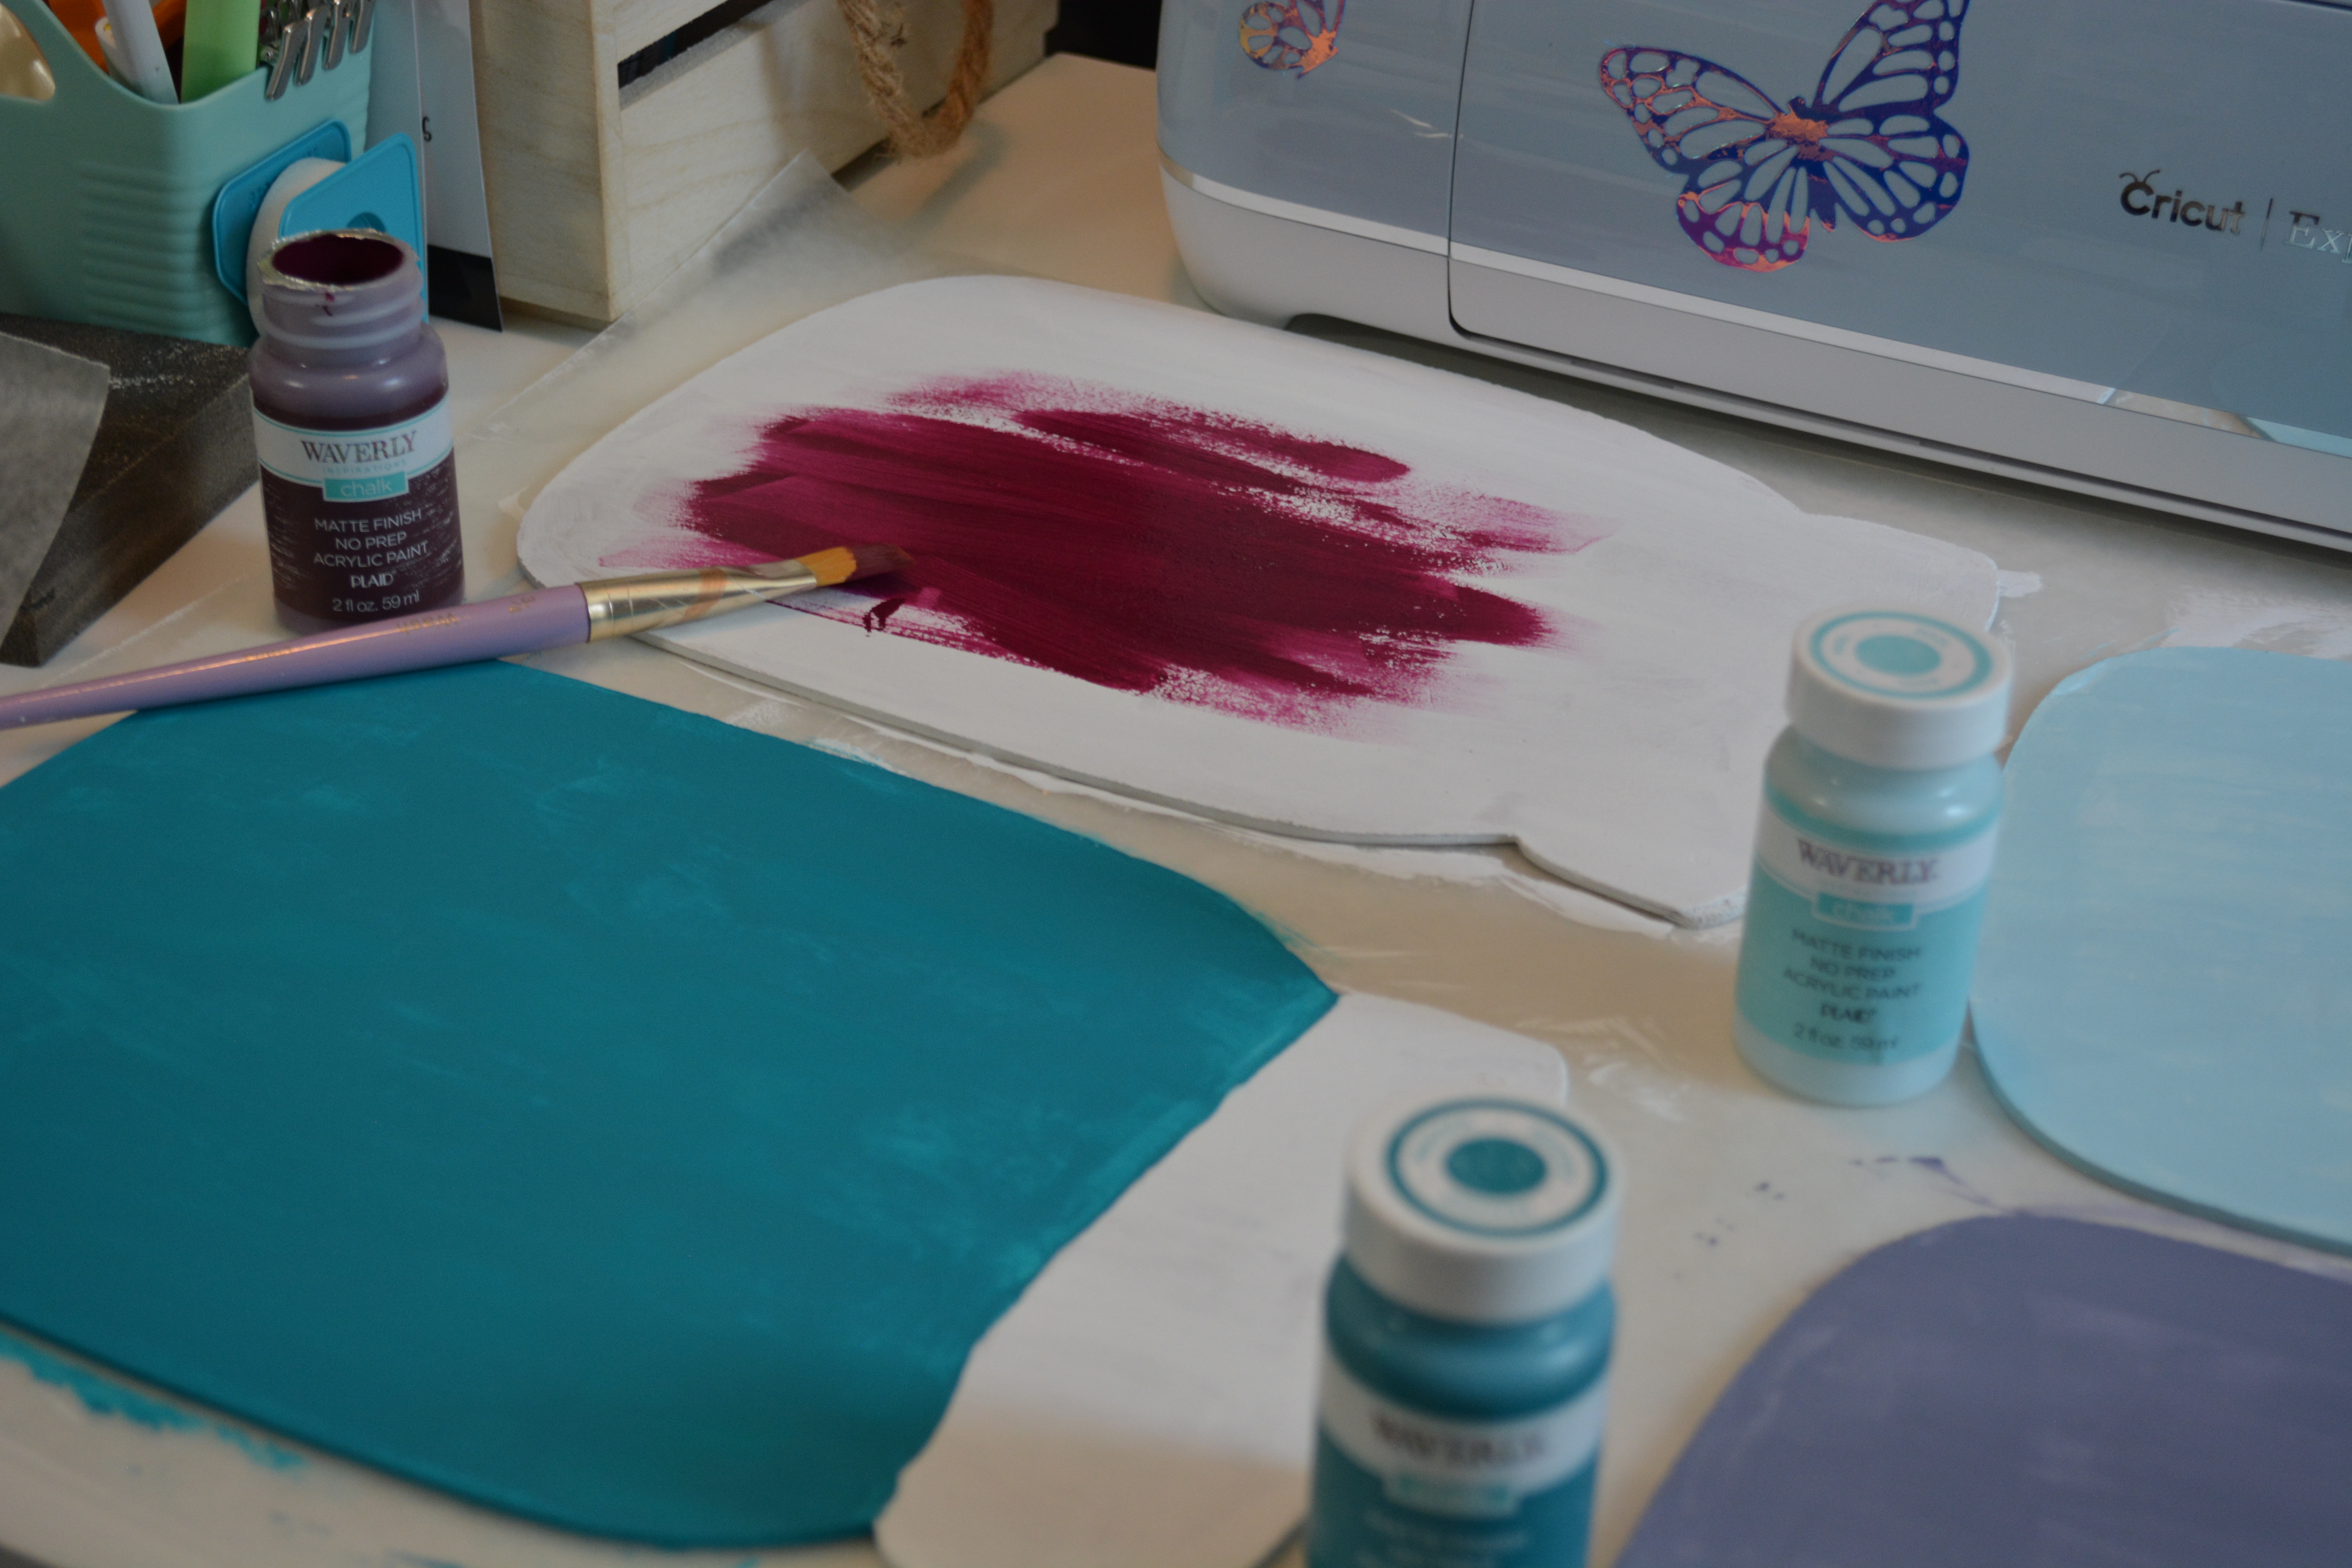
To get started I popped the pineapple piece off with a scraper on all 7 mason jars. Then I peeled the paper with all the glitter off the wooden jars. Next I used an X-Acto knife to cut off the straw piece and handle on all of the jars. I also took the twine hanger off.
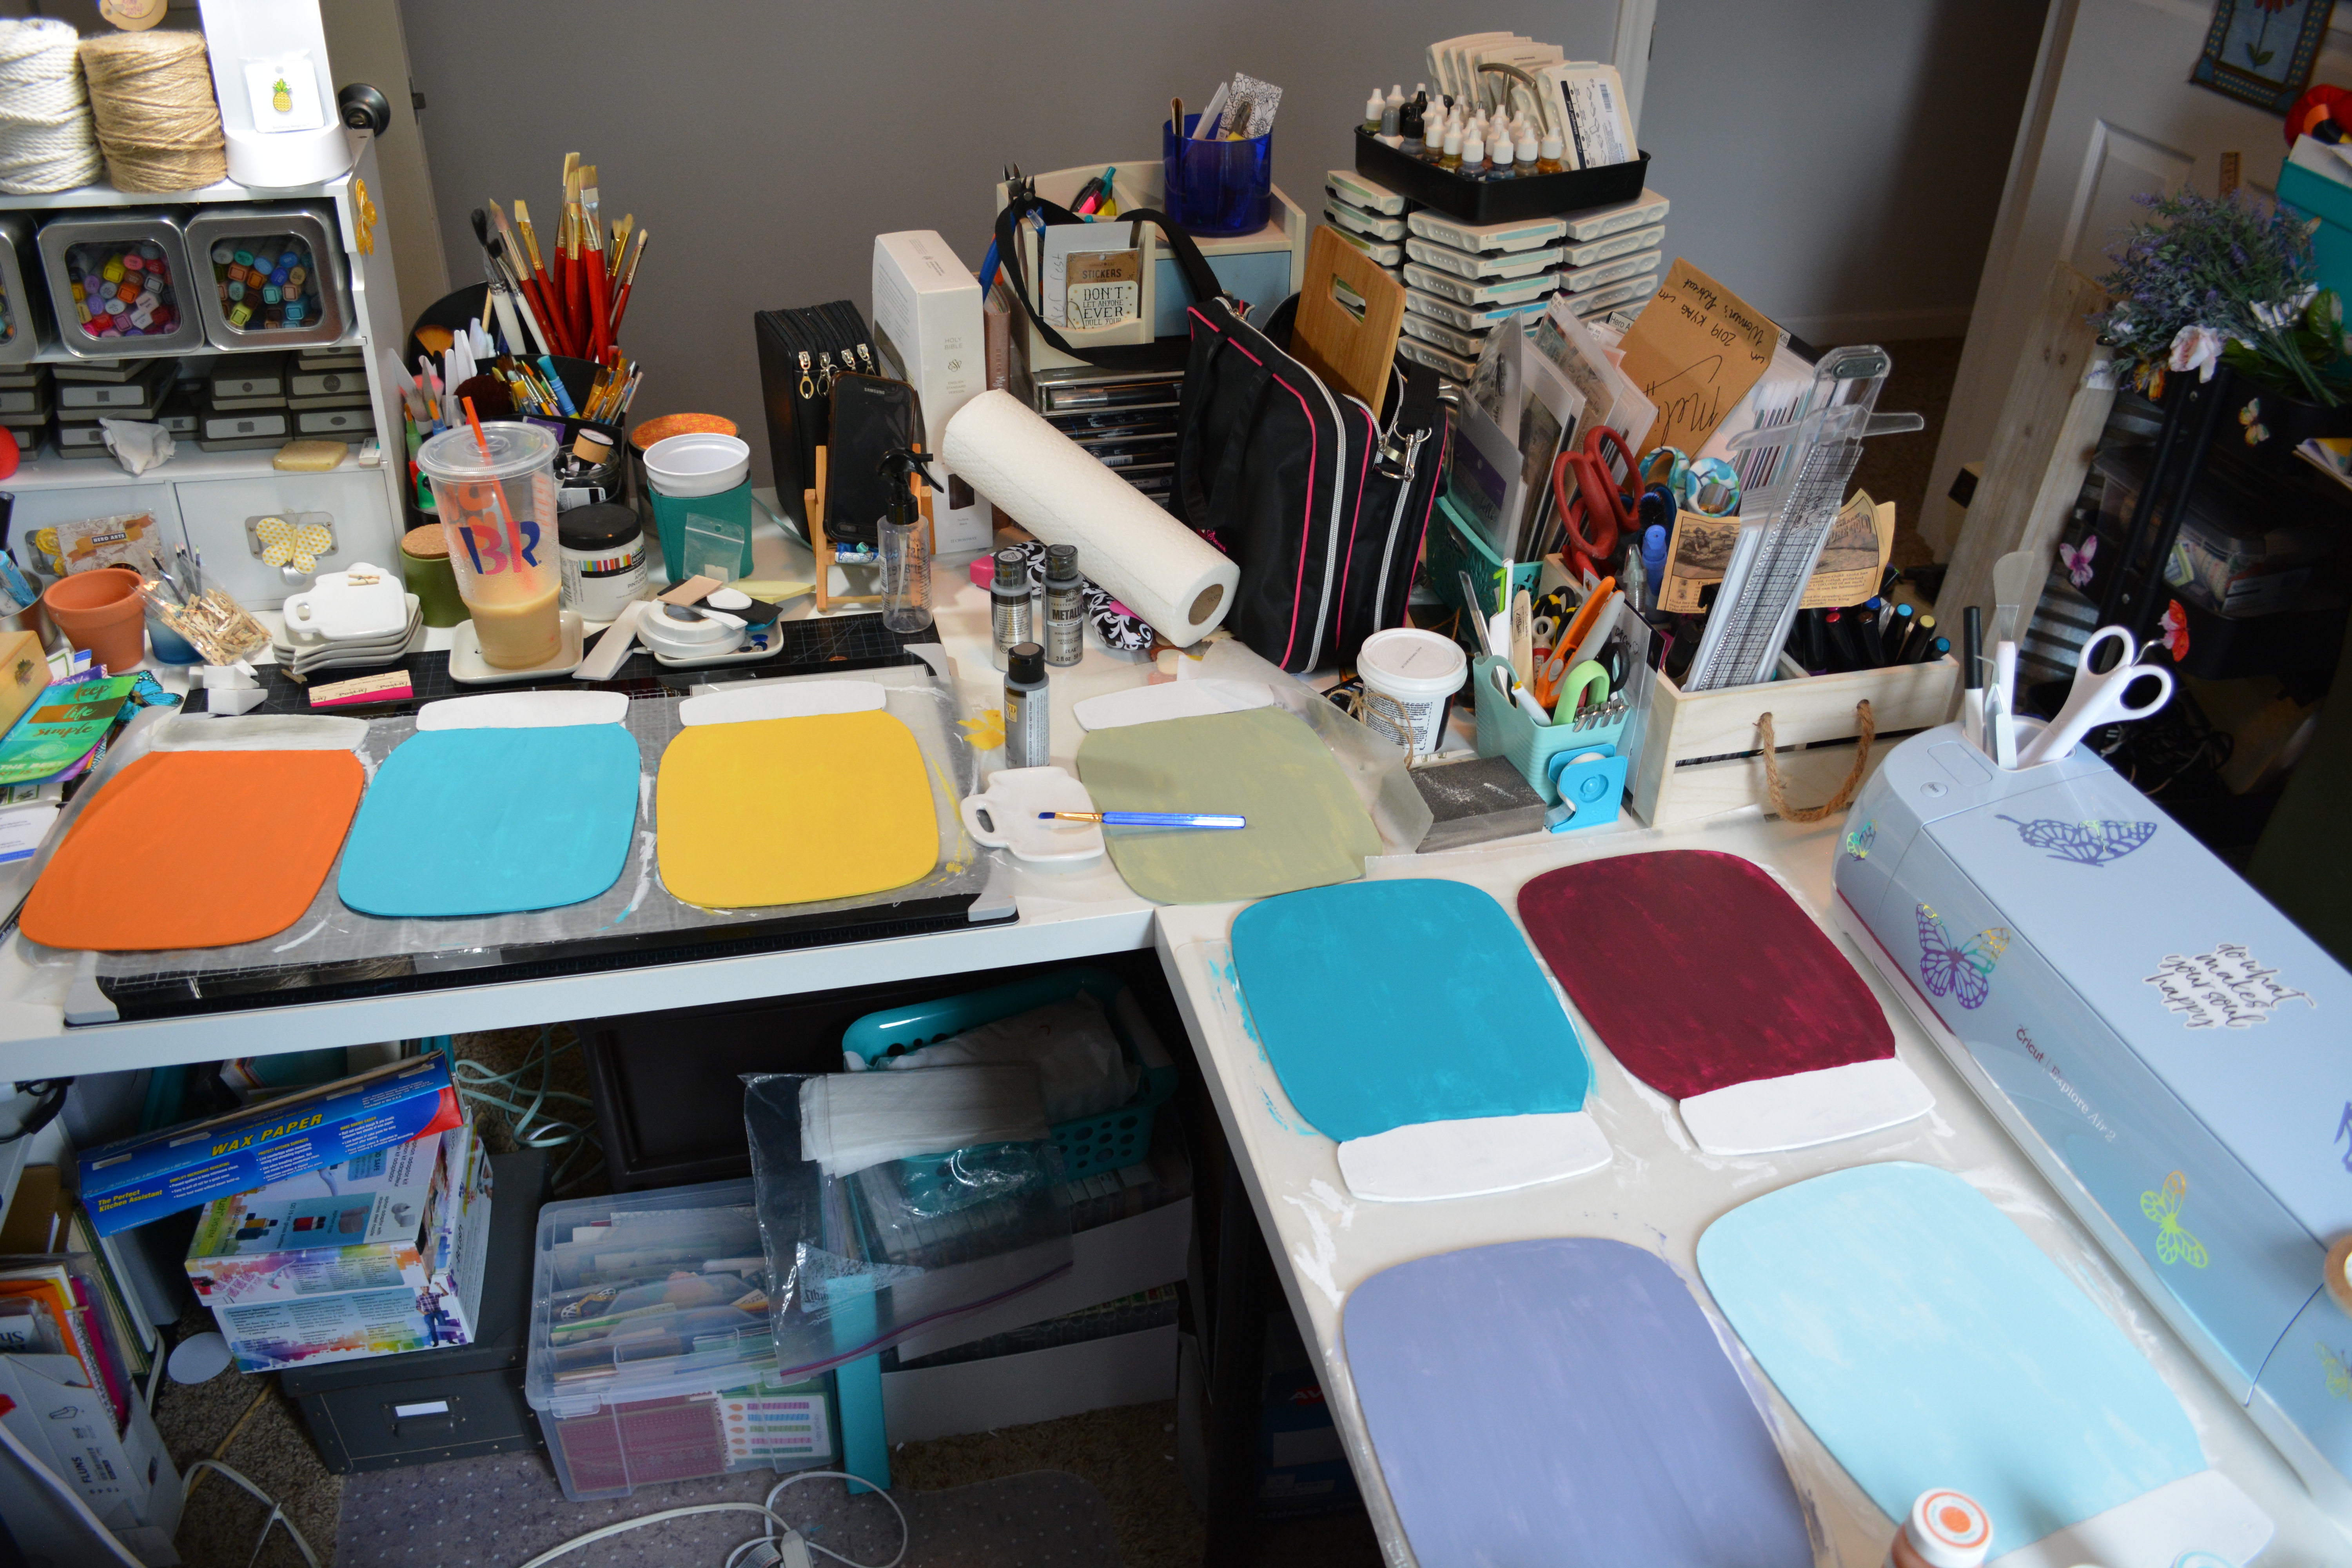
Now its time to paint. As you can see I used several colors of Waverly Chalk Paint. But first I primed each jar with White Waverly Chalk paint so that all the jars had the same base and color. Then I did one coat of colored paint on each jar. One coat of paint made the jars look a bit real. It gave the paint some depth because a tiny bit of the white shows through in places. If you want to do the top part of the jar silver like a real jar then use some masking tape or washi tape to tape off the top so that you do not get your colored paint on it.
Once you have the bottom painted of all 7 jars, take the tape off and you can start painting the top part of the jars to make it look like they have lids. I will warn you, this takes several coats of paint. Once all the paint was dry, I took a black paint marker and drew a line dividing the lid from the rest of the mason jar.
Its time to add the chalk boards. For each jar, I added some twine through the holes on on the chalk boards and pulled the twin to the back of the mason jar right at the neck of the jar. Then I hot glued the twine down. On the front of the jar I glued the chalk board down too.
I used my Cricut and permanent vinyl to add the days of the week to the top of each mason jar where the lid would be. If you do not have a Cricut you can use stickers or write them on yourself. (you can see my hand writing, that’s why I use a Cricut)
Finally I added the twine hangers back onto the jars.
I love these so much. It was a lot of work but I feel like it really paid off. Normally I would do everything one color but I want a more colorful kitchen so I picked colors that are in my kitchen, These are not only cute but functional. Make sure you prime the chalk boards by rubbing chalk all over them then erasing them. That way when you go to write on them the chalk will write. I hung these up with 3M hooks. If I decide I want them somewhere else, I can easily move them.
Thank you so much for joining me today. I have a Christmas in July post coming soon and Yellow Butterfly is moving to YouTube so be on the look out. Please Like, Comment, Share, and Subscribe. Also find me on Instagram and Facebook under Yellow Butterfly Craft Designs.
Have a wonderful weekend!!!
Melissa McGuire
Supplies
Wooden Mason Jars- Dollar Tree
Chalk Boards- Michael’s Craft Supply
Waverly Chalk Paint- Walmart
Twine- Hobby Lobby
Silver Metallic Paint- Walmart
Surebonder Hot Glue Gun and Hot Glue Sticks- Hobby Lobby
Welcome to day 4 for the 4 Days of the Fourth of July!! Happy Independence Day!!!! We are celebrating and spending time with some of our great friends that have become family. My boys love to swim and grill out. They also love the fire works. It is also the day that we reflect on why we have our freedom and that freedom is never free. There were those who paid the price for us to be free. What do you do on the Fourth of July?
Now lets get to our final project. I have wanted to make a ribbon flag for I don’t know how long. My ribbon stash has been out of control for a while so I figured this was the perfect way to use some of it up.
Lets Get Started
Supplies
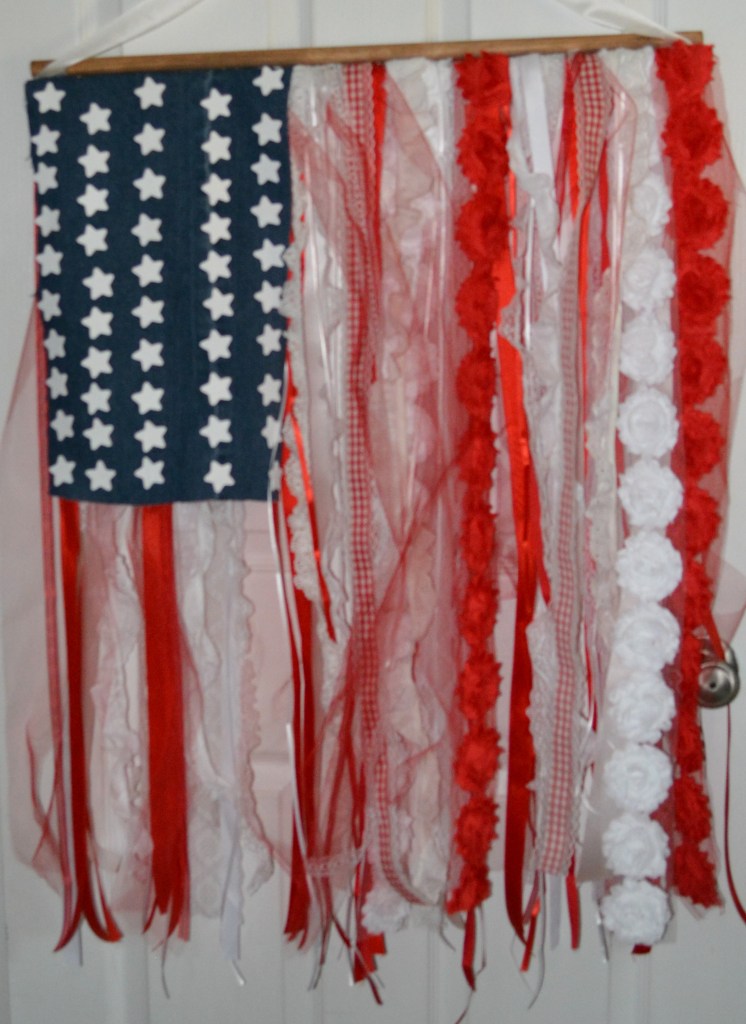
The supplies for this project are pretty simple. You need dowel rods, ribbon, wooden stars, a pair of old jeans, and hot glue. The size of the dowel rods are up to you. It depends on what size flag you want to make.
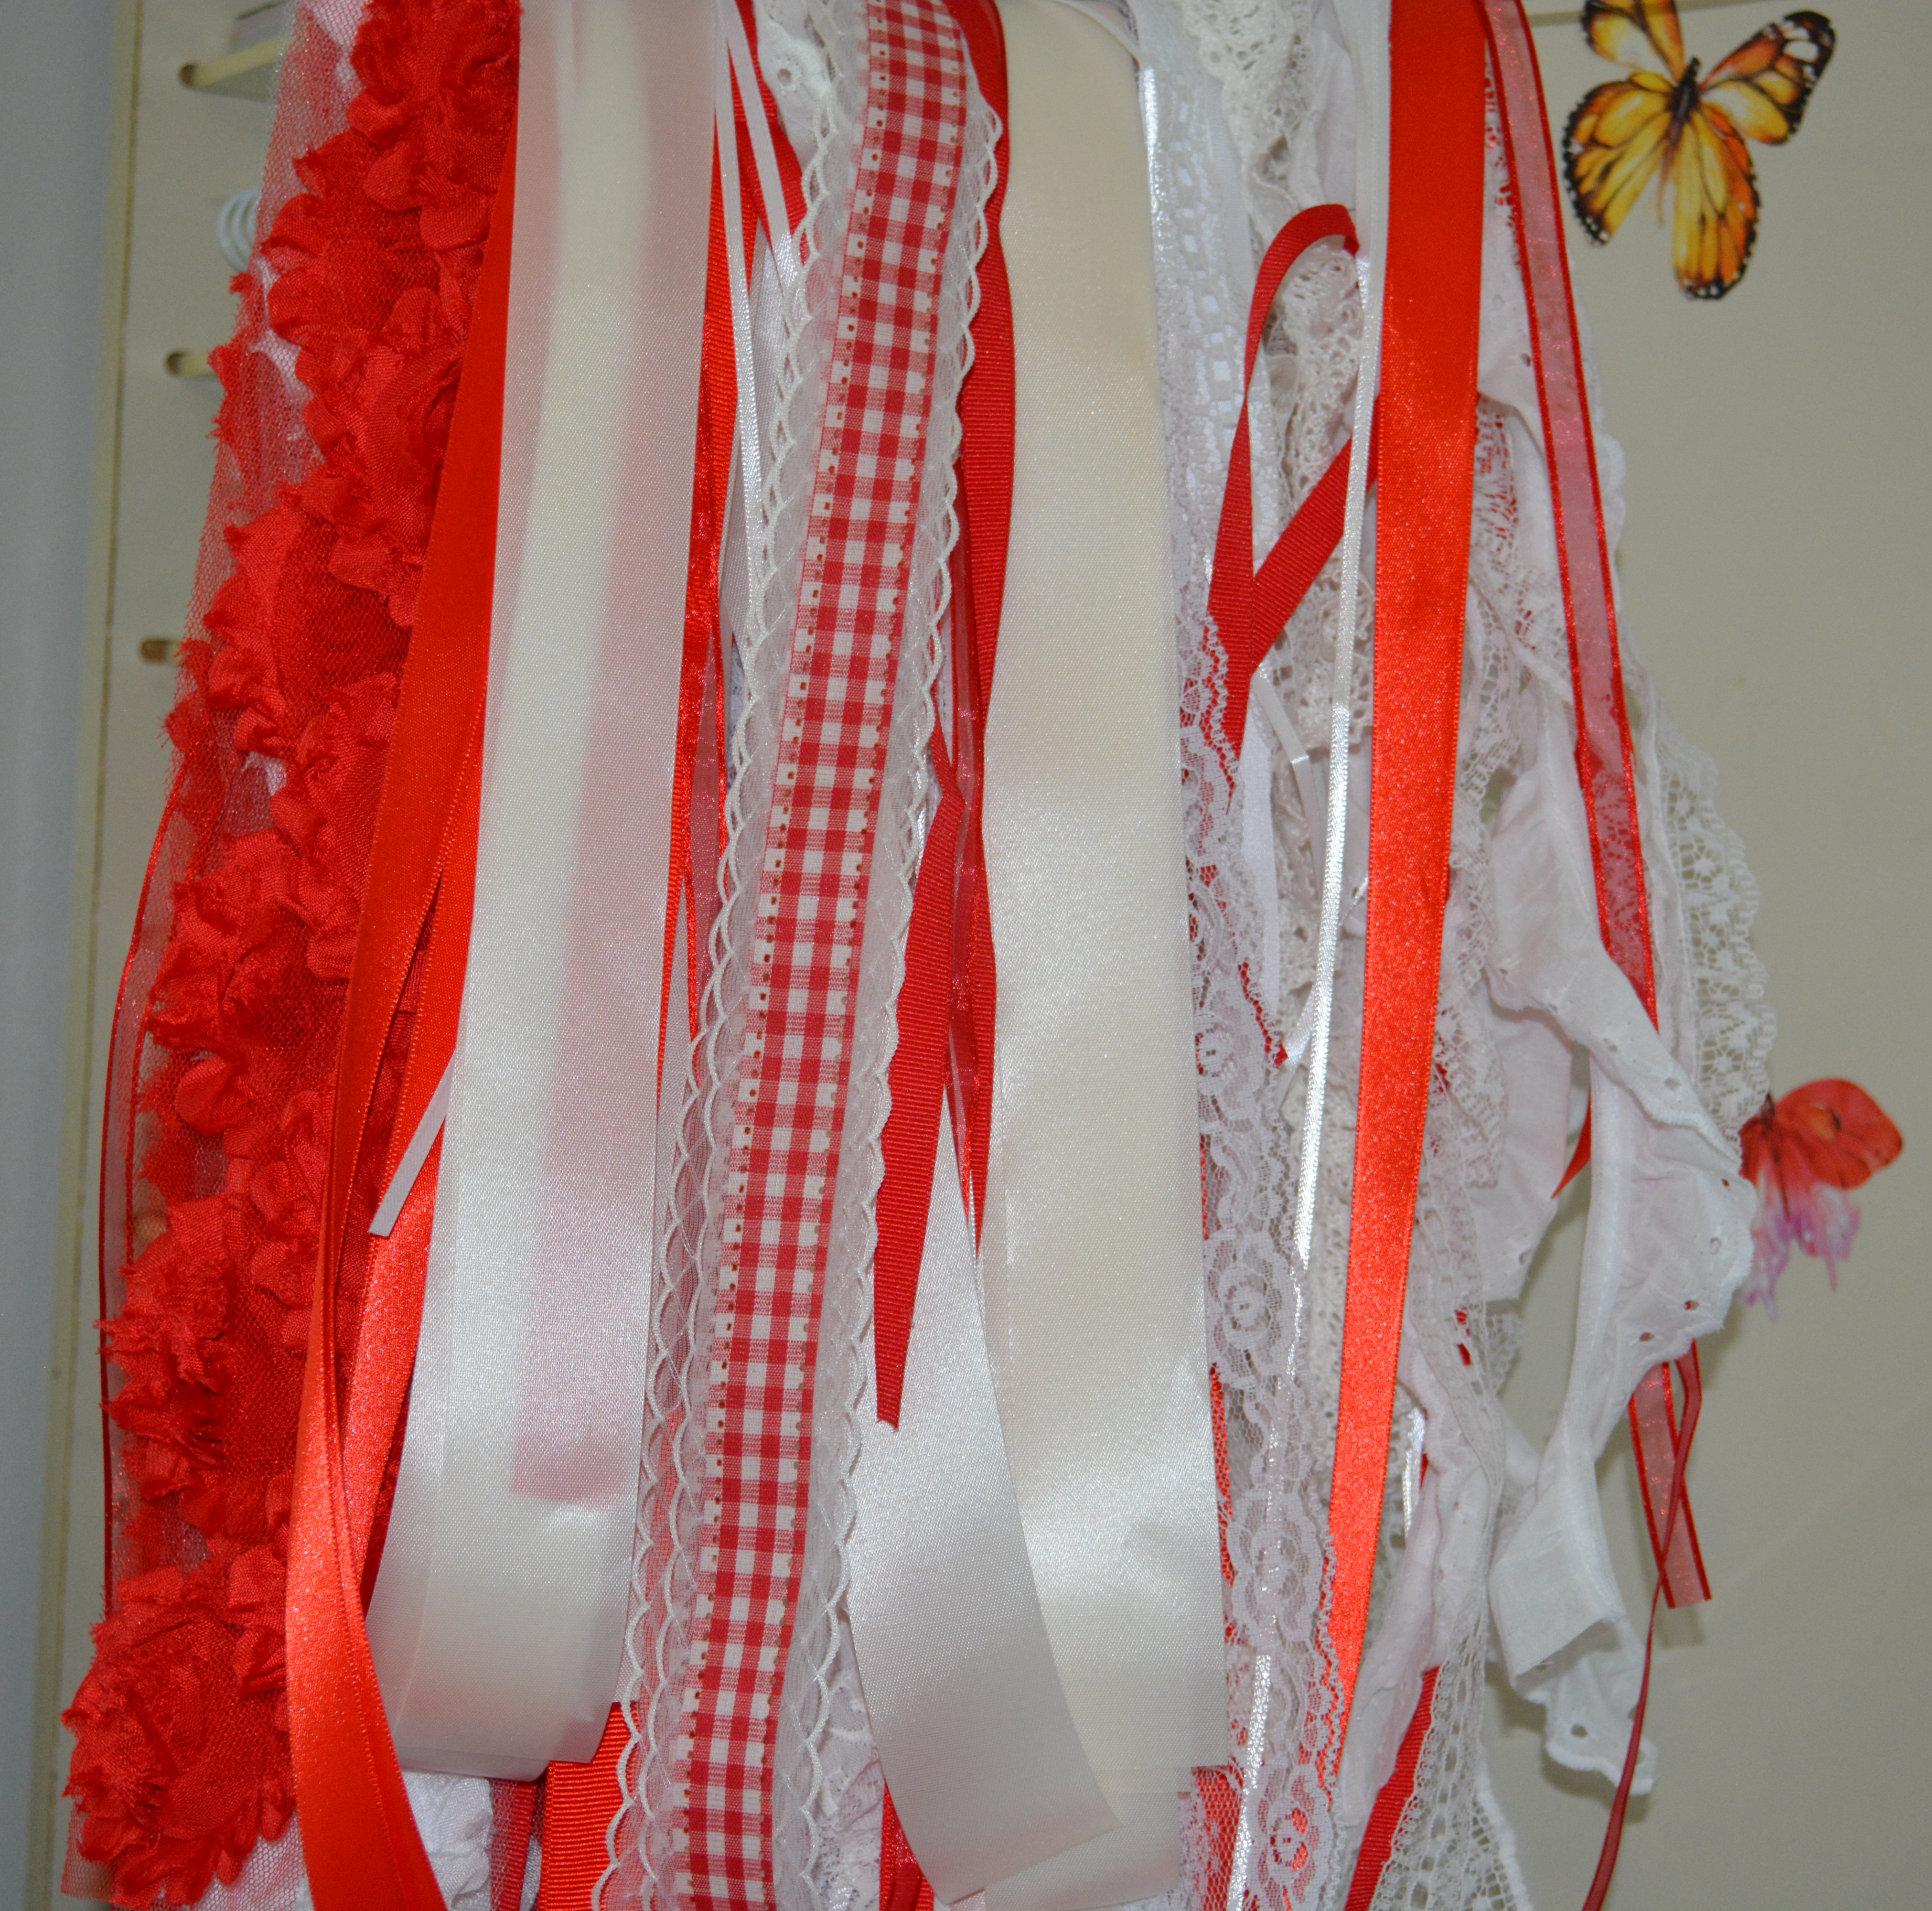
Now lets talk ribbon. For this flag you want several different kinds of red and white ribbon. It is the perfect time to use up scraps if they are long enough. I used around 8 or 9 different types and widths of ribbon and lace. The lace is special because it is from my mom’s craft stash and she is no longer on this earth.
To start this project I had my husband cut down my dowel rods. I started cutting my ribbon. Each ribbon strip is about the same length but not exact. The length of the rods and ribbon will depend on how big of a flag you want to make. After the dowel rods were cut, I used a mix of Antique Wax and water to make a stain and applied it to the rods. You can leave yours all natural if that is what you like.
I looked at a US flag to see how many stripes of each color there was. 13 stripes in all. I picked out ribbons of each color to start with. I glued a red ribbon to each end and one in the middle of one of the rods. Then spaced out the other 4 red pieces of ribbon. Now its time for the white ribbon. I just glued it in between the red ribbons. Now you have a guide to start layering ribbon on top of. I glued the plainer ribbons on the bottom and the lace and more texted ribbon on the top. Just keep making layers with all the ribbon making sure to keep the stripes of the flag.
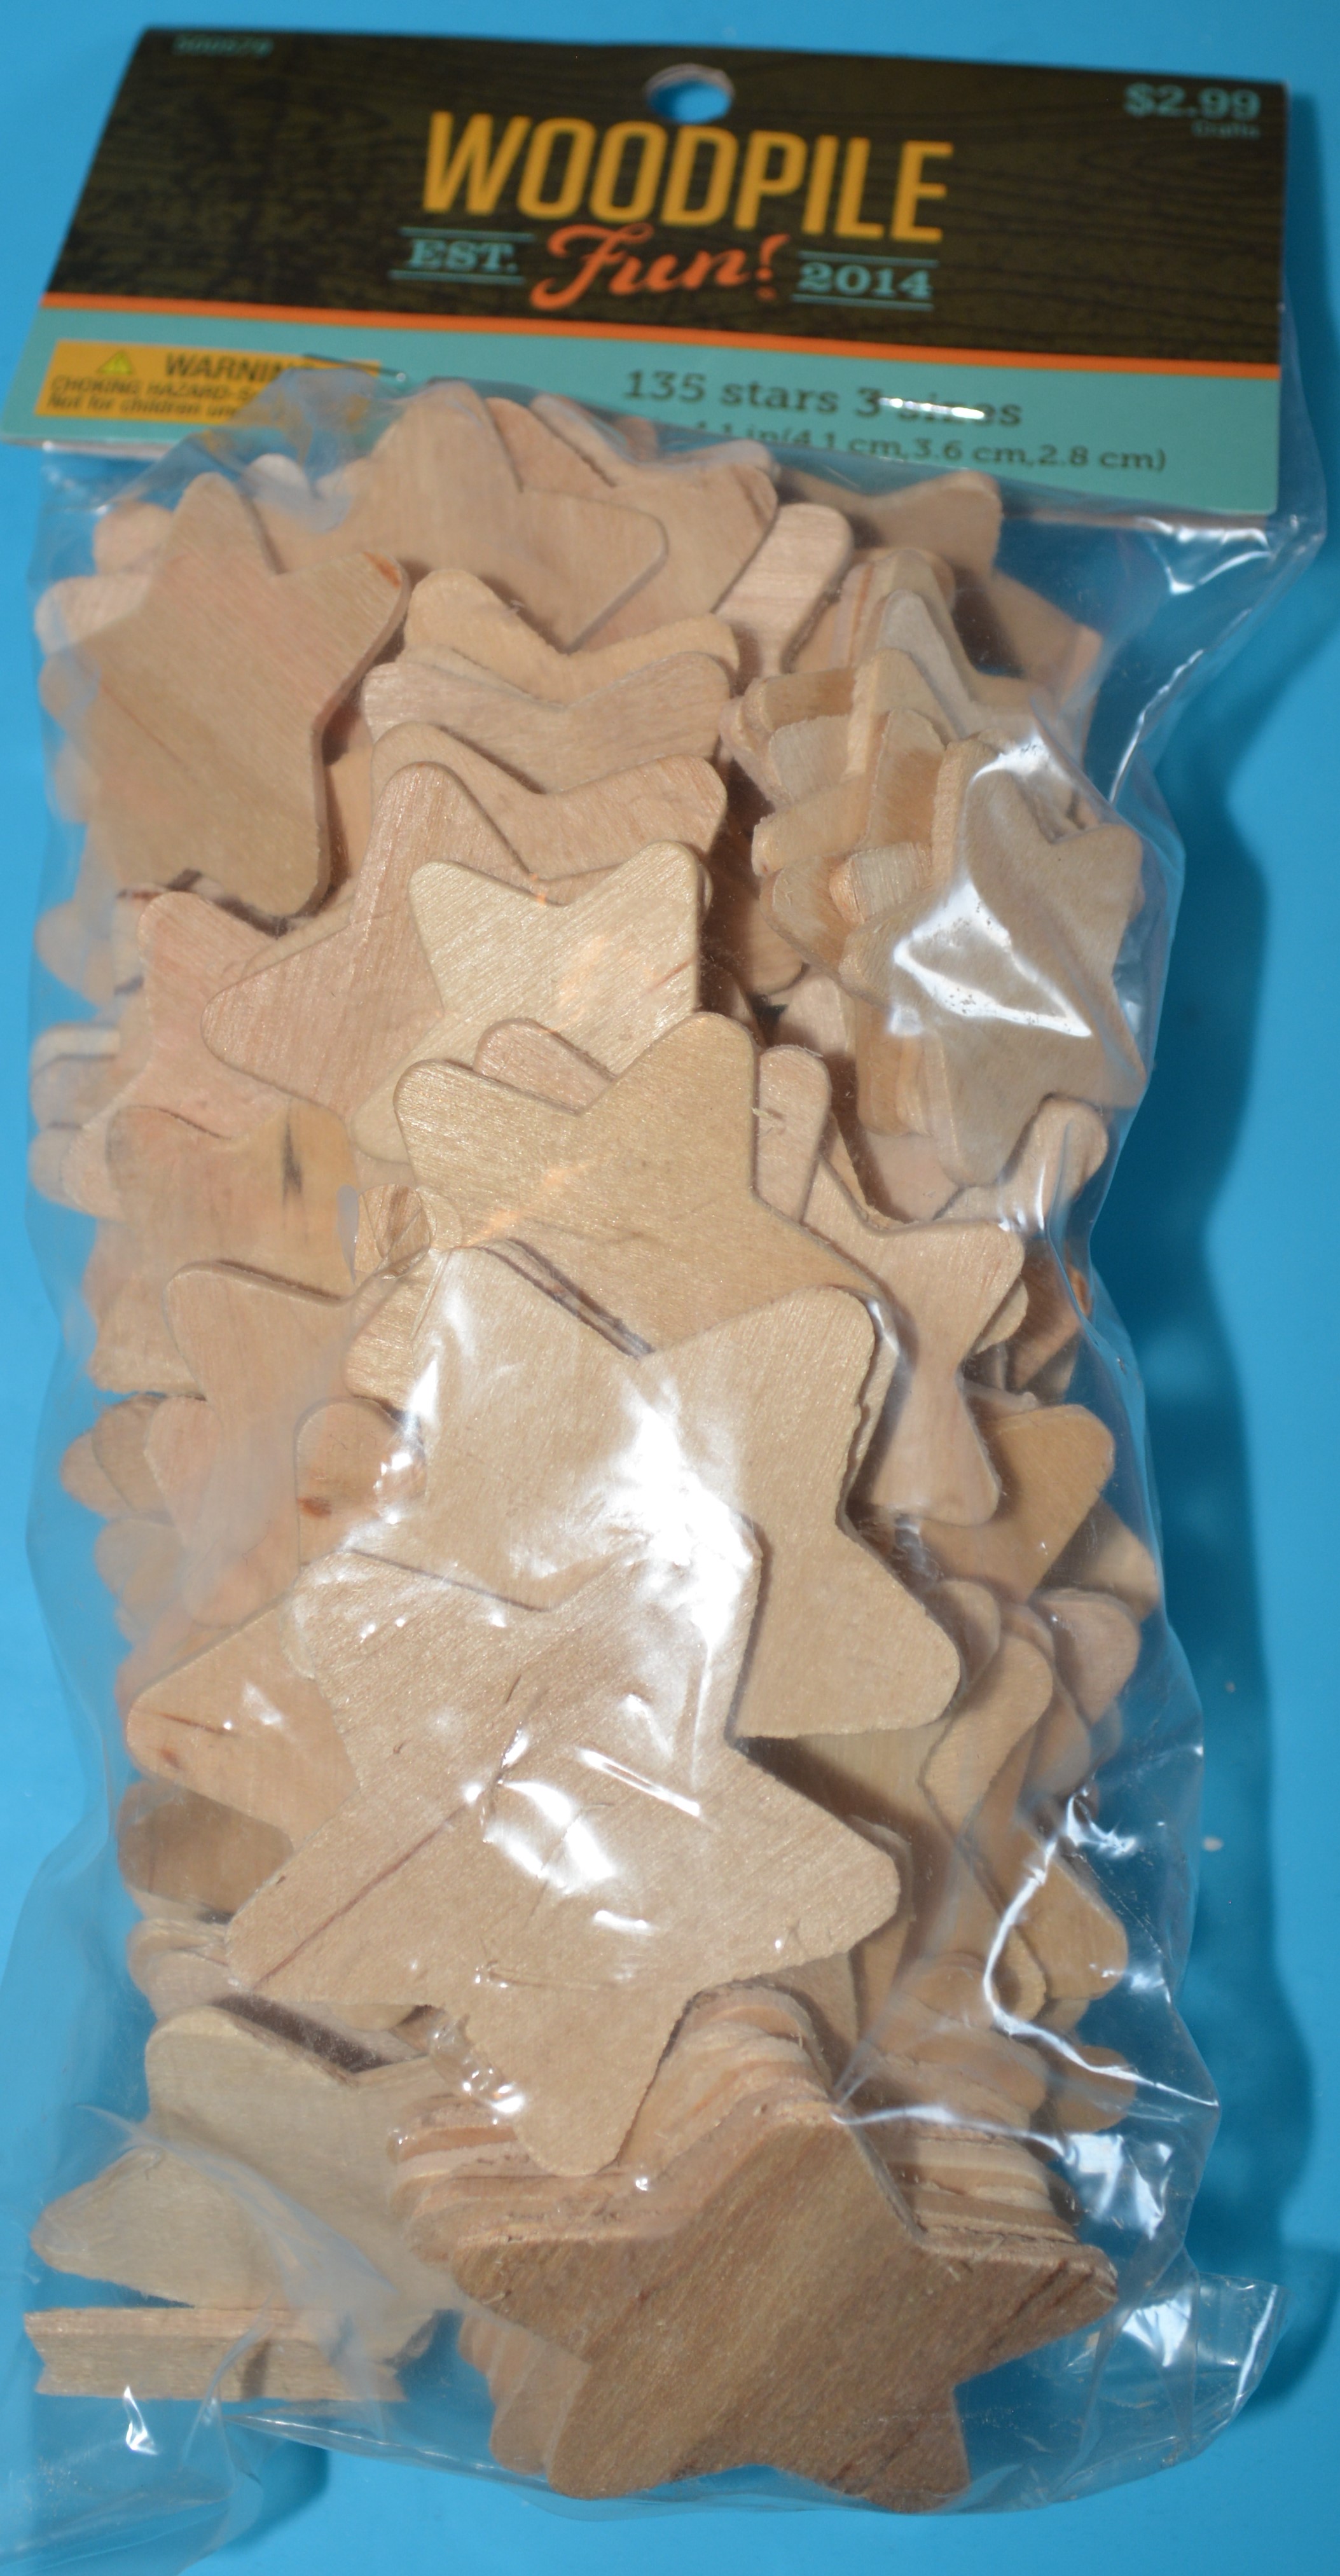
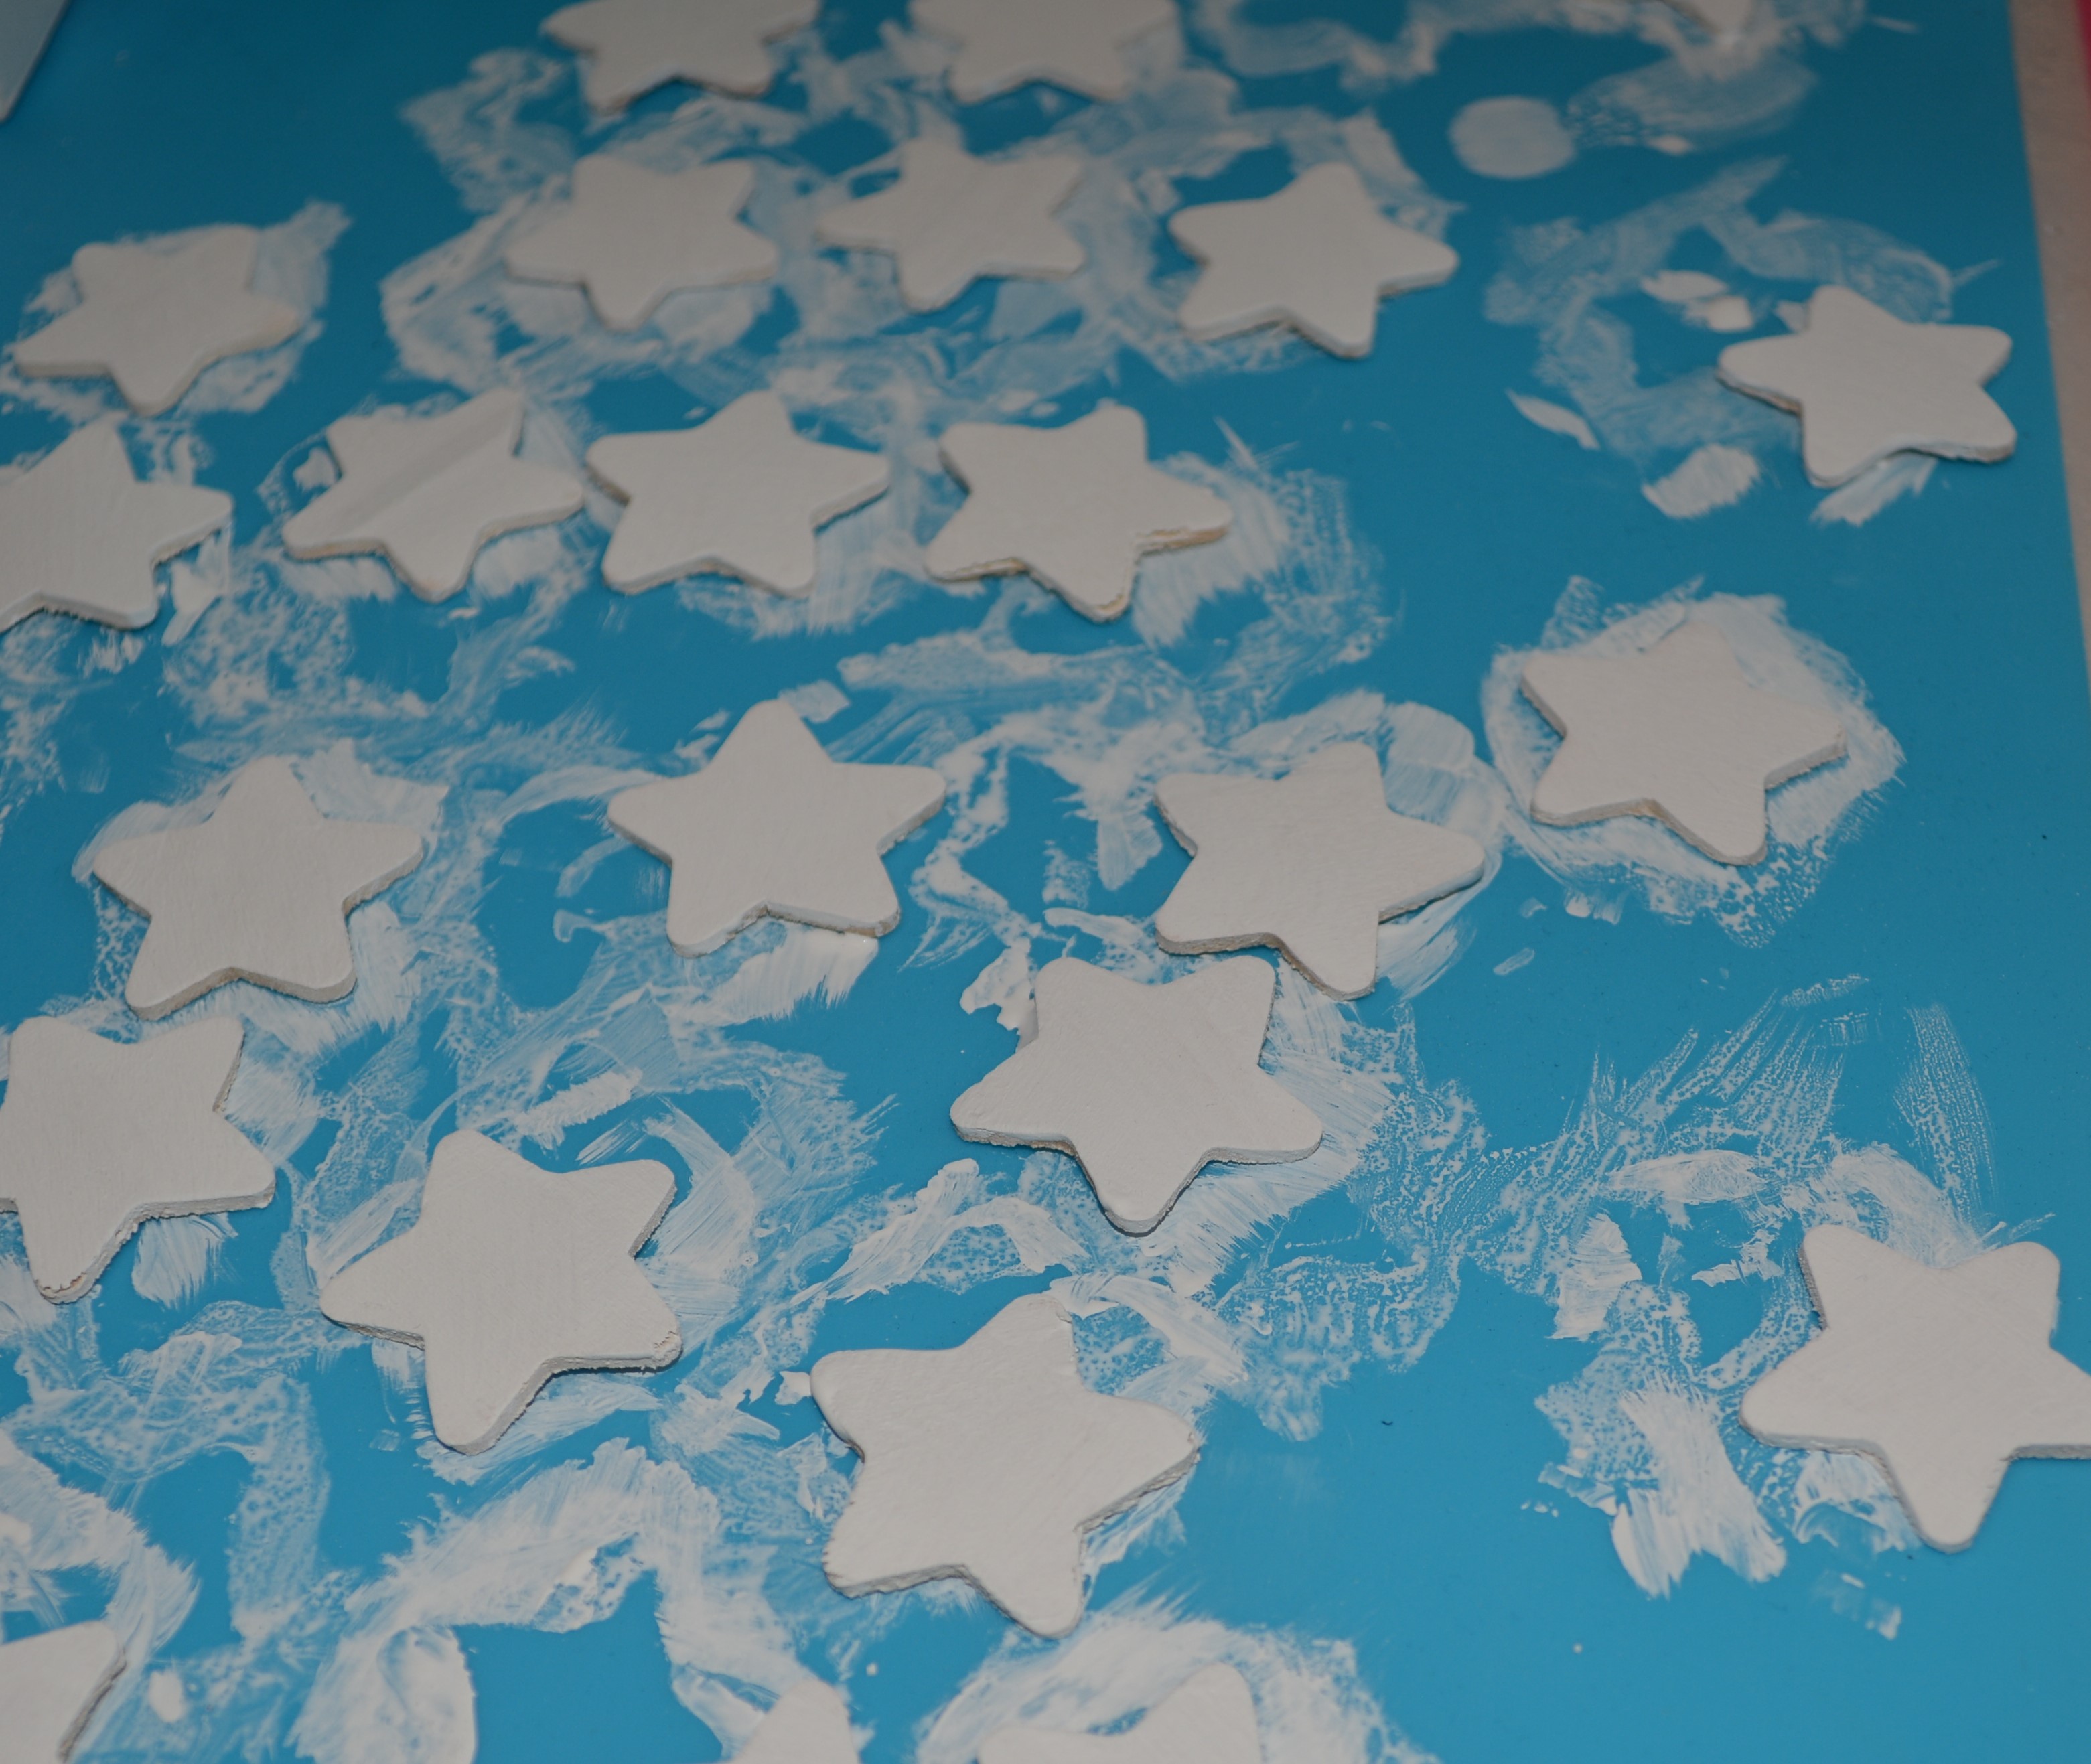
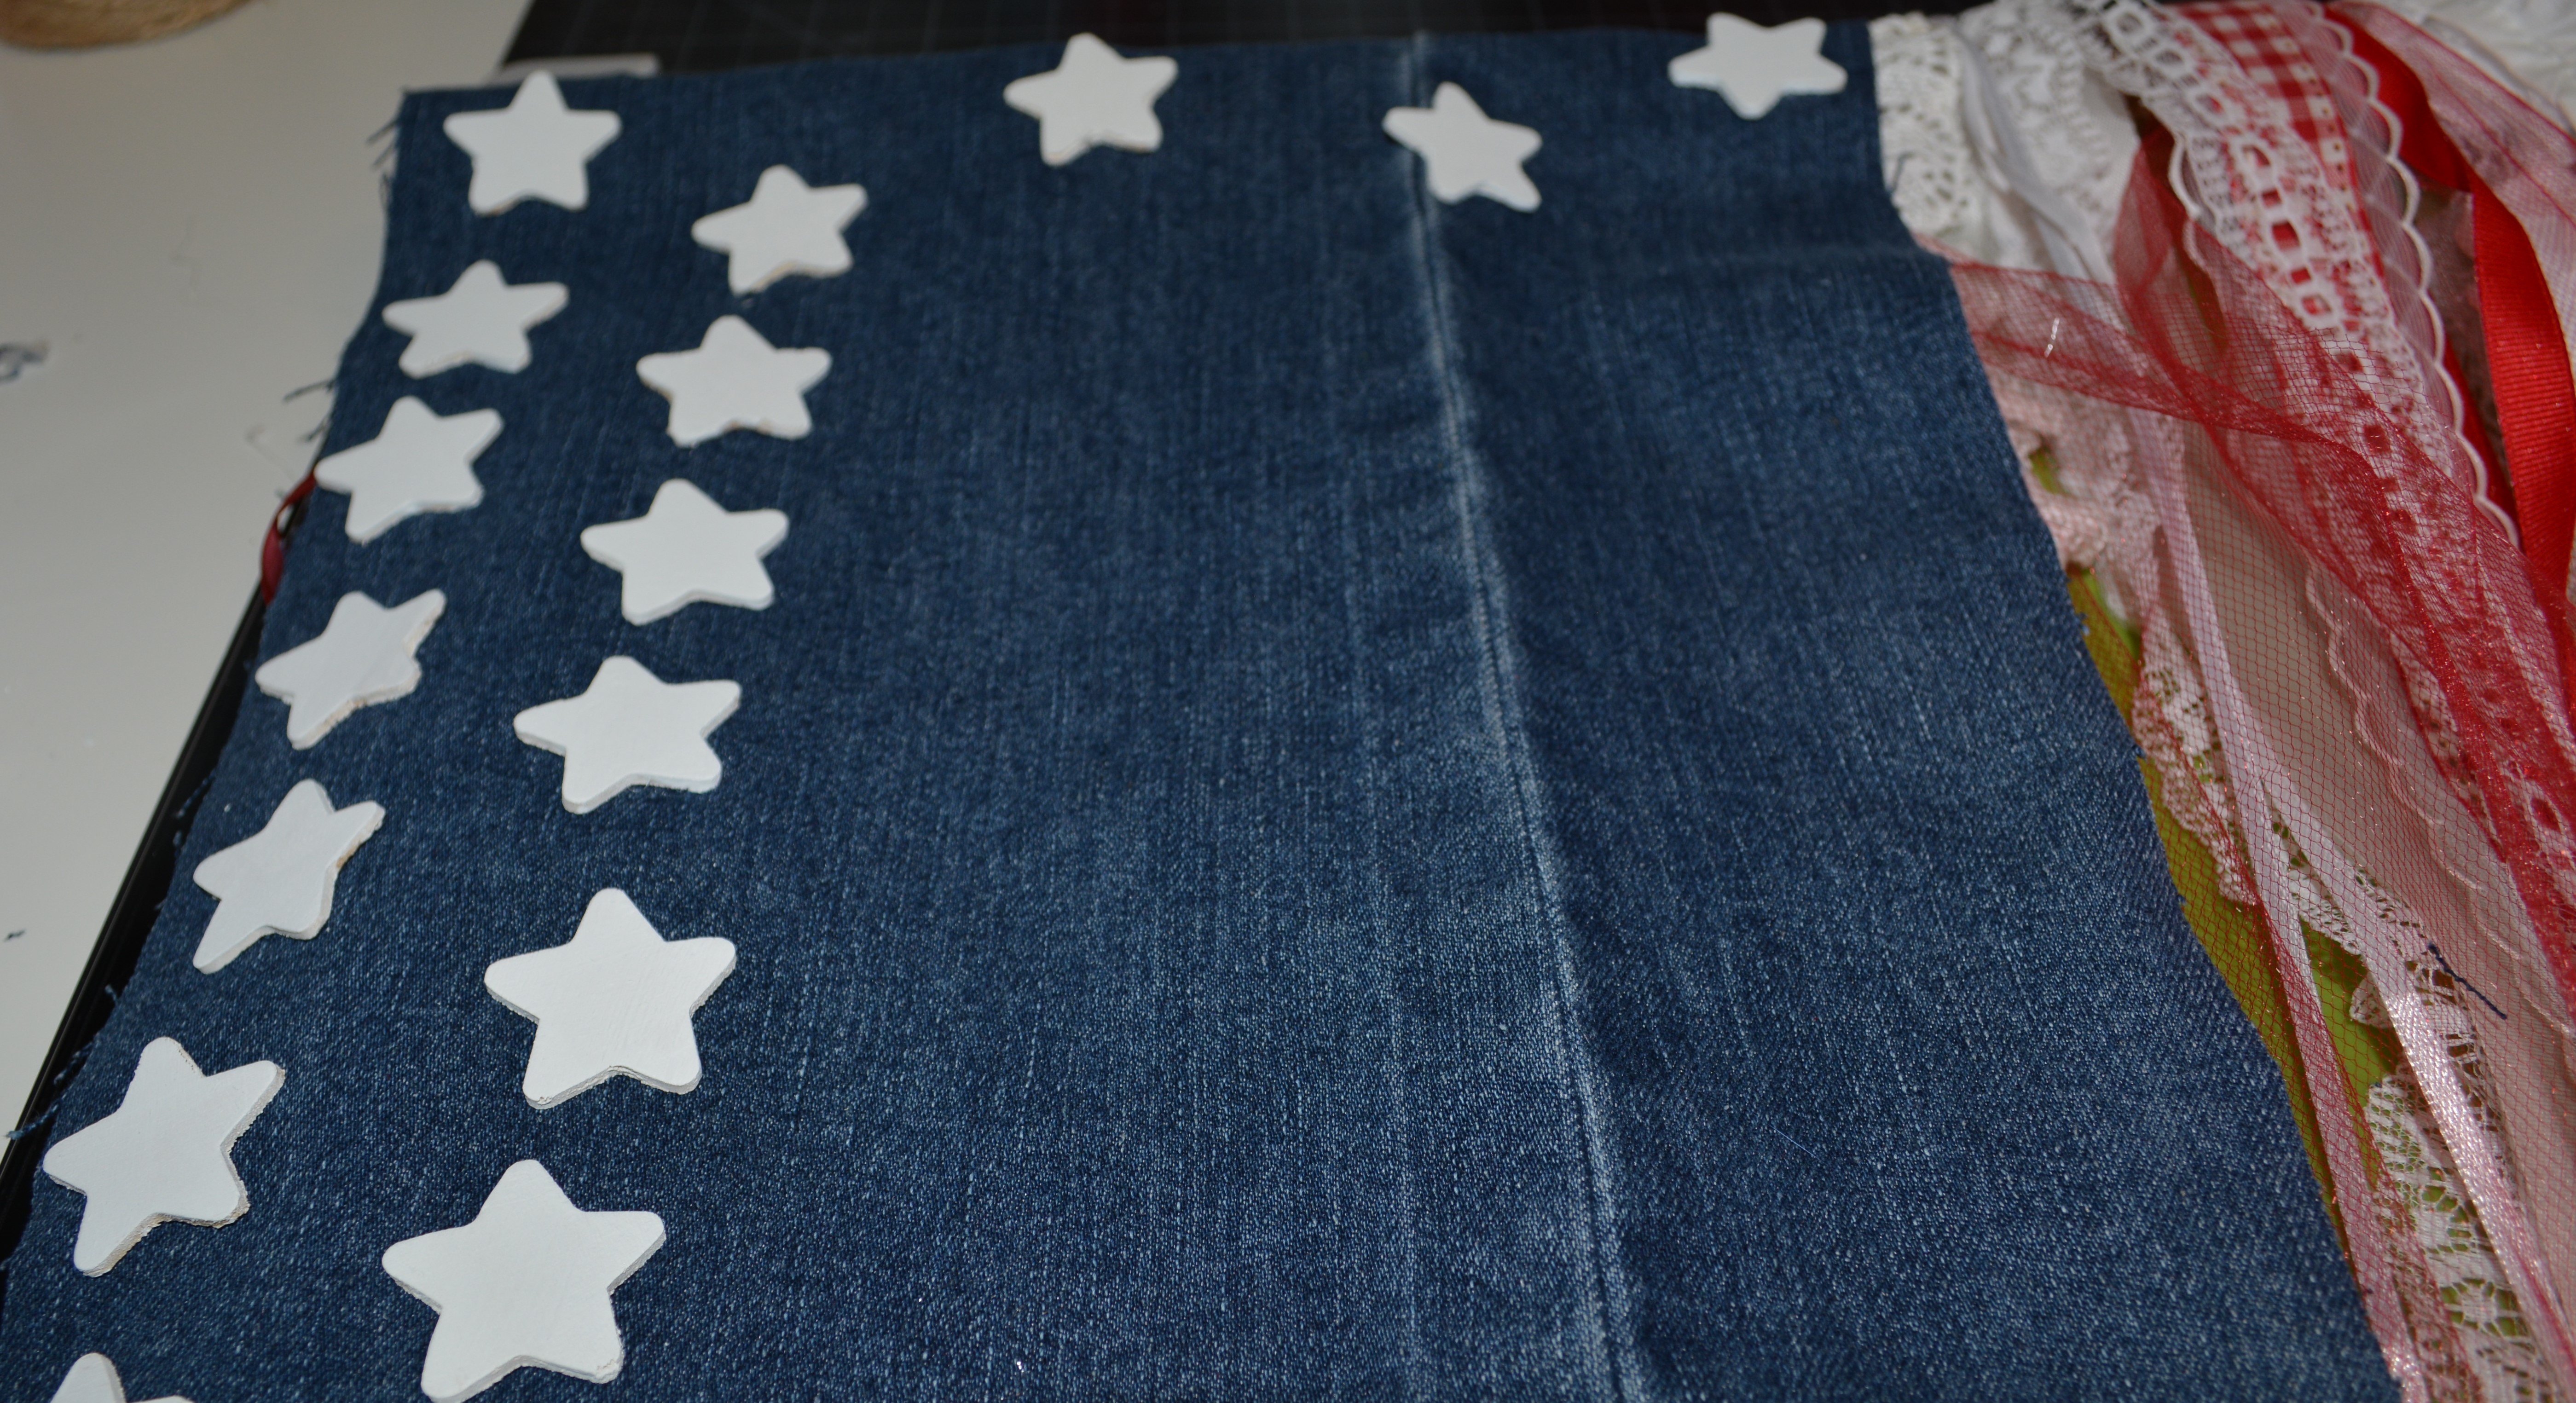
Once all of your ribbon is glued down, it is time to add the blue for our flag and the stars. I got an old pair of jeans at the thrift store. Yesterday I used those jeans to cover a cross wreath. Today I am cutting out a rectangle to serve as the blue piece to my flag. Make sure to take into account the part of the material that will be glued to the rod. From there I laid out 50 small stars I got from Hobby Lobby and I painted them with 2 coats of White Waverly Chalk Paint. While the stars are drying, I glued the jeans to the dowel rod in front of the ribbon. Once the stars were dry, I glued them down on the jean piece.
The final steps are to glue a piece of ribbon as a hanger. Then remember that other dowel rod. Take it and glue it right over top of where you glued all the ribbons down. This will hide all you glue and hold the hanger stable. That’s it!! Your done!!!
What a way to finish up our last few days of patriotic decor. I think this flag is my favorite out of everything I made this year. It is amazing. You could use this to make any kind of flag you wanted. Just pick your colors and follow the same steps. Please try it!!
Thank you for joining me!! Please Like, Share, Comment, and Subscribe. Also find me on Instagram, and Facebook under Yellow Butterfly Craft Designs.
I have some fun stuff coming up. I have some selves to DIY, things with lemons, and some fun honey themed crafts. Also fall is coming up fast!! Dollar Tree and Hobby Lobby are already putting up fall stock.
Have a wonderful and happy Fourth of July!! Please be safe too!
Melissa McGuire
Supplies
Dowel Rods- Hobby Lobby
Ribbon- Anywhere I find it cheap or on sale
Jeans- Thrift Store
Waverly Chalk Paint in White- Walmart
Wooden Stars- Hobby Lobby
Waverly Antique Wax- Walmart
Surebonder Hot Glue Gun and Hot Glue Sticks- Hobby Lobby
Welcome back to day 3 of the 4 Days of the Fourth of July! Today we are going to look at a few wreaths. Both of these are made with items you might not think to use. I love a great wreath. I am not much on the big puffy ones though with lots of tulle. I had a lot of fun thinking outside of the box for these projects. Keep reading to see how far out of the box I went.
Lets Get Started
Project 1
Supplies
For this first wreath you will need some kind of wreath form. I got these small ones at Dollar Tree and they come 2 to a pack. To fill in the wreath I used scarfs from Dollar Tree. I also used wooden letters and a garden stake.
The first thing I did for this project was to paint my letters. If you do not want to paint your letters, that’s okay. My USA was black and I wanted them to match the scarves better. The next thing I did was start on the wreath. To do this I took a small piece of the scarf and pushed it up through the back of the wreath form and slid it to the edge of one of the side wire pieces. Then I took another small piece of the scarf and pushed it though the inside piece of the wreath. You will be creating loops alternating between pushing them through the bottom and top sections of the wreath form. I used 5 scarfs to go around this small form. If you get a bigger wreath form, you will need more scarfs. You repeat these steps all the way around the wreath. If you smash the scarfs together tight enough in each section (there are 4 sections) then you will not need to glue the scarf to the form.
The truck on the wreath is from a Dollar Tree garden stake. I just pulled the stick off of it. Then I hot glued the truck to the scarf wreath. Finally I glued each wooden USA letter on the top and that was it.
The old truck is still one of my favorite things. What do you think of the scarfs?? They make a really full wreath. If yours is not looking full then open the scarf loops and it will fill out. Keep your eye out for the small garden stakes too especially at Christmas. They can be the perfect addition to a craft project.
Project 2
Supplies
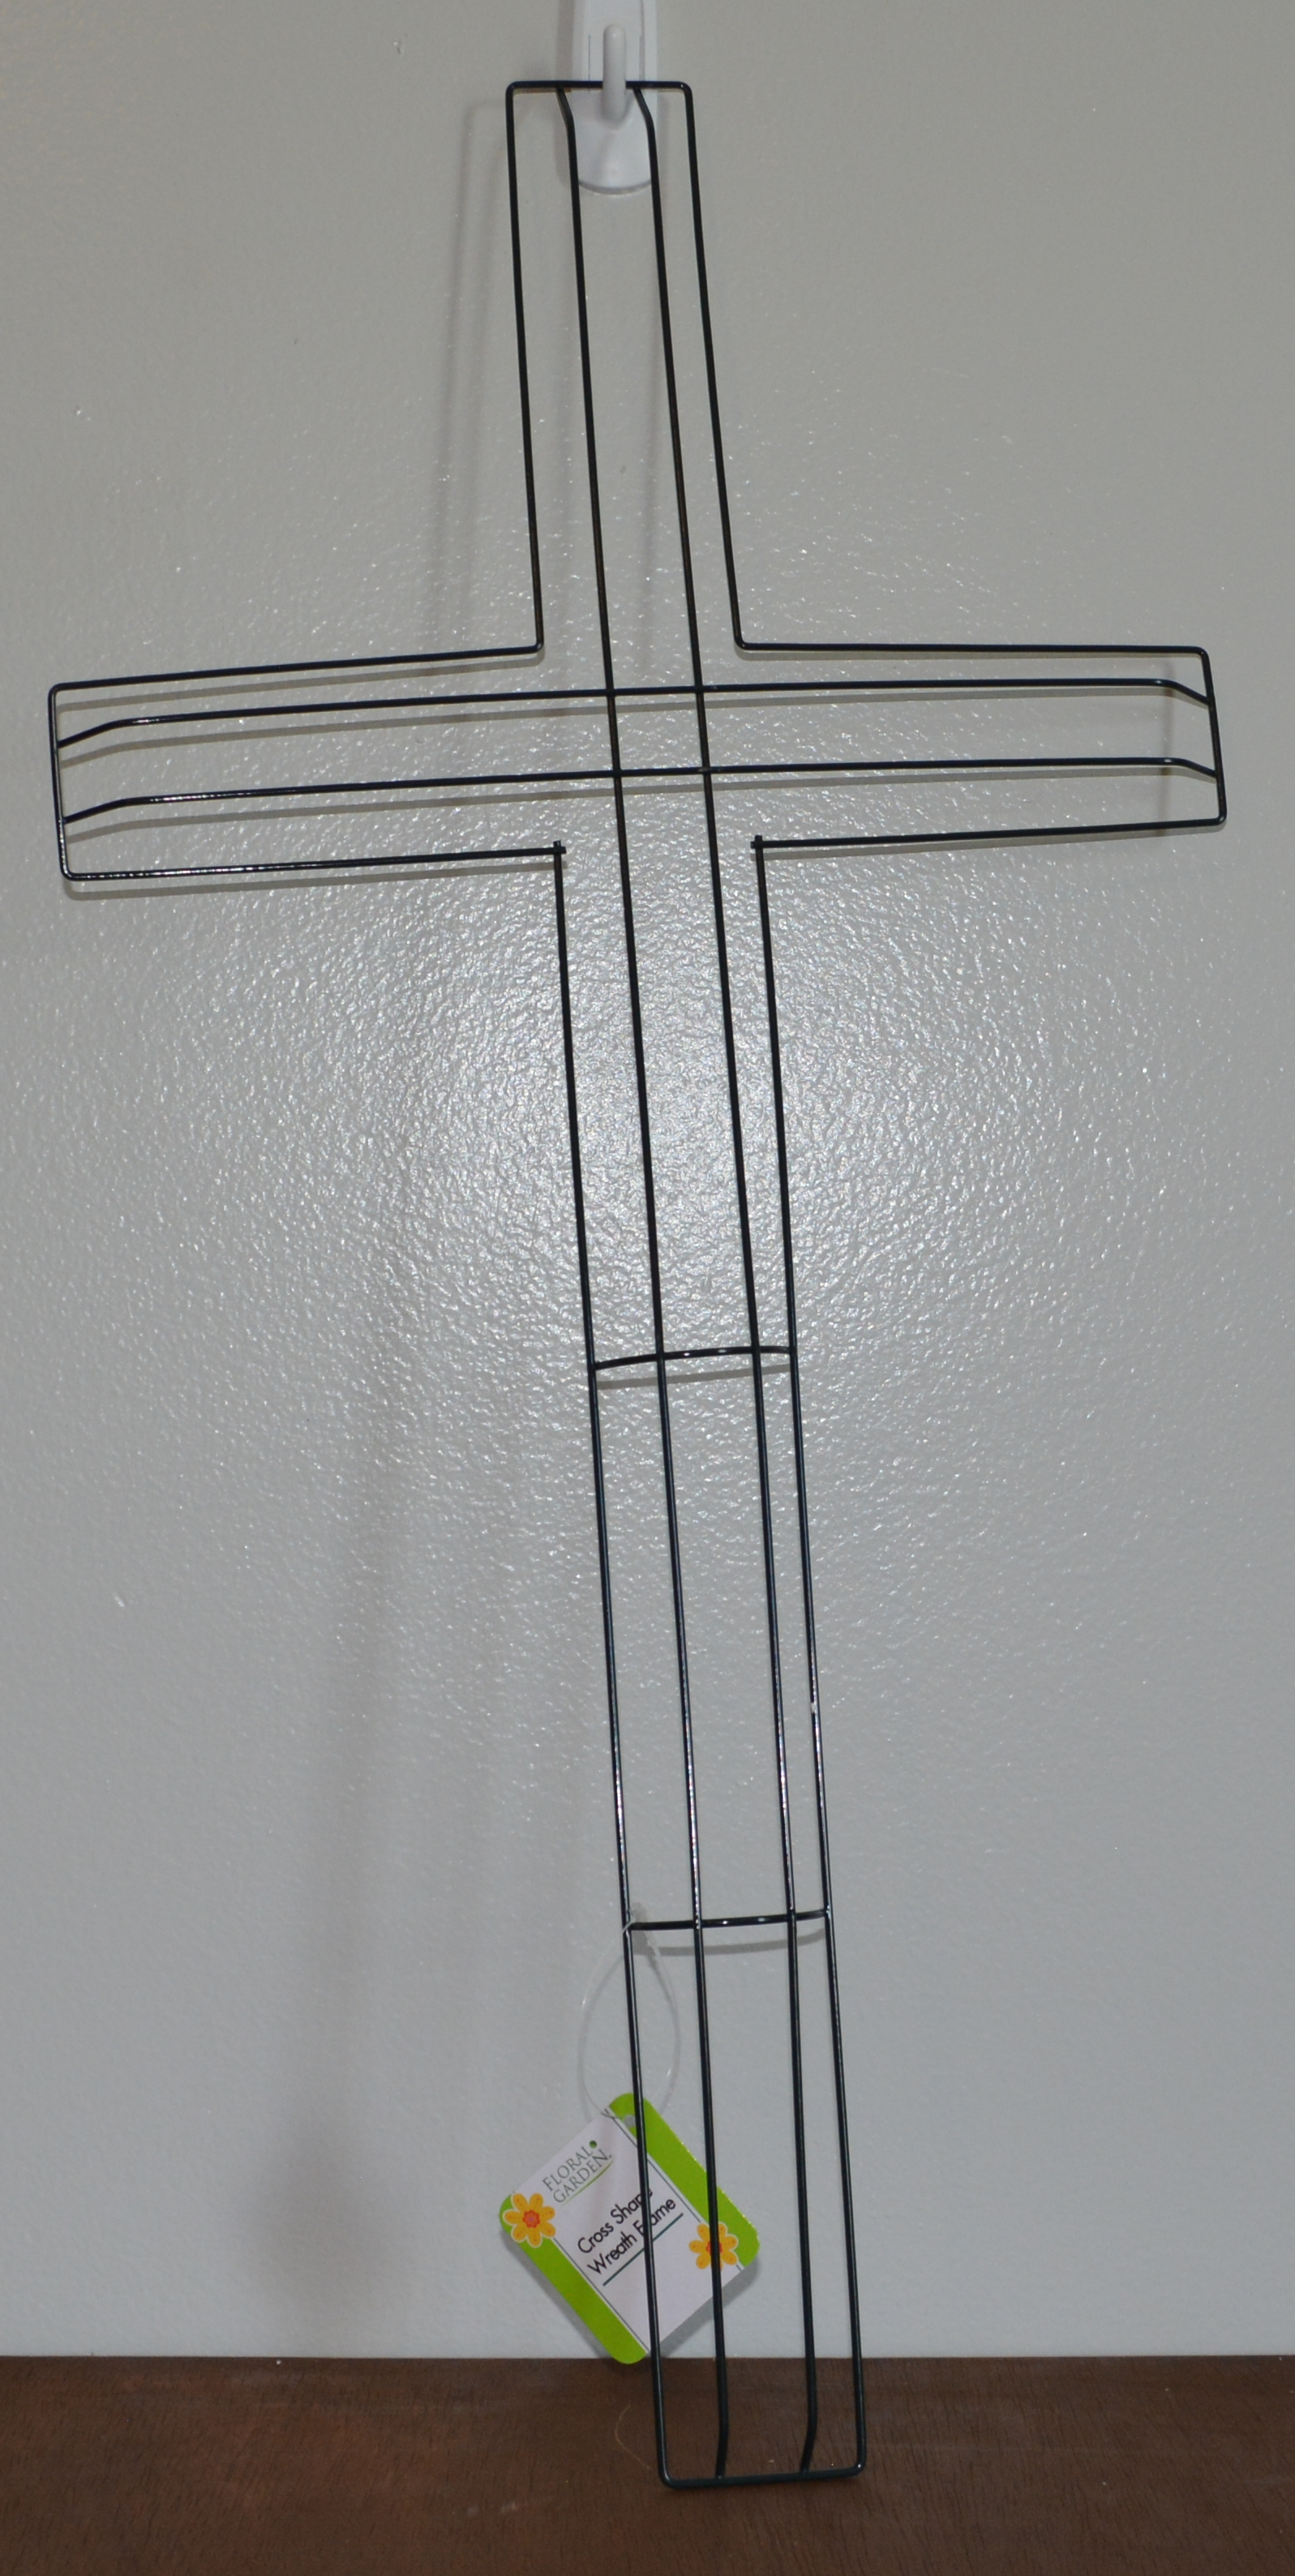
Lets move onto Project 2. You will need a cross wreath form or you can make one out of cardboard or foam board. A wooden plaque in a shape you like. I also used to tulle and paint. The unexpected item I used was a pair of blue jeans. I got a pair from a thrift store.
I started this project by painting the wooden plaque I had so it could be ready when I needed it. I painted it white with Waverly Chalk Paint. While that was drying I cut two strips from the pair of jeans. I made sure I laid the wreath form on the jeans and then cut the strips at least an 2 inches wider than the wreath form. That way you have enough material to wrap around the wreath form. I used two strips because it was much easier to do, one for the long side and one for the width. Once cut, I laid the jean strips right side down and placed the wreath form in the middle of the strip. After that I would pull up small pieces of the jean strip and start gluing it to the back of the form. I did this all the way around the wreath until the whole thing is covered.
I wanted to words “All gave some, Some gave all” on the plaque. I used Cricut Design Space and my Cricut Joy to cut out the words and then applied them to my plaque after it was completely dry. The last thing I did was cut strips of tulle in red slightly longer than the plaque and in white slightly longer than the red. I hot glued the tulle in the middle of the cross, white first then the red. You will need lots of glue for this. Once the tulle is glued down then glue your plaque on top of that. And your done!! The bow is optional. I thought it needed something more. You could add flowers if you wanted.
This cross touches my heart. The words on the plaque are very dear to my family. We understand what that sacrifice is like. My husband served in the US military for over 15 years and we lost a few friends a long the way. I am proud to have this hanging in my home and I just love what it represents.
I truly hope these wreaths give you some inspiration to try out some different materials when crafting. I am going to try and use other new materials to stretch my creativity. You could use old scarfs from family member or old jeans from a child. Make wreaths into memory pieces. That would be amazing!!
I hope you have a wonderful day and join me on the 4th of July for one more project. Please find me on Instagram and Facebook under Yellow Butterfly Craft Designs and Like, Share, Comment, and Subscribe to all of my media platforms.
Thank you for joining me,
Melissa McGuire
Supplies
Project 1
Small Wreath Forms- Dollar Tree
5 Scarfs- Dollar Tree
USA Wooden Letters- Michael’s Craft Supply
Truck Garden Stake- Dollar Tree
Crimson, White, and Ocean Waverly Chalk Paint- Walmart