Love and Clay!

Happy Friday!! I hope this finds you well!

Today we are going to look at a different product. I made the flowers and hearts out of it. Can you guess what product I used?

Air Dry Clay and silicon molds! Yes clay! I do not use clay often. It is just not something I ever think of using. Clay is fun to use though because you can mold it into anything and it can be painted any color you want. I like being able to add things to projects that will not add a lot of weight to it. This sign was heavy enough as it was without adding more weight with the embellishments. Keep reading to see how I made this sweet sign!

Lets Get Started

Supplies

For this project you will need a wooden heart of some kind. I got this one at Dollar Tree. I wanted a word in the middle of my sign so I found the LOVE word. The LOVE came from Target. As far as the clay, I got mine from Stampin Up a few years ago, but you can get Air Dry Clay at any craft supply store. The silicon molds I have came from Michael’s Craft Supply, Dollar Tree, and Stampin up. I bet Amazon would have some amazing molds too. You will also need a powder bag or cornstarch. I also used paint, and hot glue.

To start this project, take a powder bag or cornstarch and cover your mold with it. This will help the clay come out of the molds easier. Next, take a small piece of the clay and push it into the mold. Once you have done that, carefully pop the clay out of the mold. This might take some bending of the molds. If it sticks add more powder to the mold and try it again. You could also use cookie cutters to shape the clay. I make several shapes at one time so that I have some on hand for when I need them. Let your clay dry over night.

Once the clay is dry, it can be painted. The wooden heart I white washed with Waverly White Chalk Paint mixed with water. The LOVE word and the clay pieces I painted with Arteza Acrylic Metallic paint. It took 2 coats of the metallic paint to cover them. Let all of that dry.

The final step is to lay the LOVE word and the clay pieces on the heart to see where they would look the best. I scattered the flowers and hearts around the LOVE word. Rule of thumb is to put things in odd numbers. It is more appealing to the eye. So most of my clusters are in sets of three and I have nine clusters around the word.

Here is the finished project. The clay pieces shine from the metallic paint. I love it because you can get so many different kinds of silicon molds to make all kinds of clay pieces. Being able to use cookie cutters too means you can make even more fun things for projects. I love this wooden heart from Dollar Tree too. It is big and I am a sucker for anything that looks like pallet wood.

I hope you enjoyed today’s project. I know it takes some time to make because you have to wait for everything to dry but sometimes that is worth it.

Please Like, Share, Comment, and Subscribe. Also find me on Instagram, and Facebook under Yellow Butterfly Card Designs.

Isaiah 64:8 But now, O LORD, thou [art] our father; we [are] the clay, and thou our potter; and we all are the work of thy hand.

Melissa McGuire

Supplies

Wooden Heart- Dollar Tree

Love Word- Target

Air Dry Clay- Art Supply Store

Silicon Molds- Dollar Tree, Art Supply Stores, Amazon

Arteza Acrylic Metallic Paint- Amazon

Waverly White Chalk Paint- Walmart

Surebonder Hot Glue Gun and Hot Glue Sticks- Hobby Lobby

Table top Hearts

Love is in the air!! Valentine’s Day is on its way. That means its time for reds, pinks, purples, and hearts!!! I have to admit that I am not a lovey dovey person and I am not a pink girl at all. It is because of that I personally find it difficult to do Valentine’s decor. I have to make it fun and be really creative and with these to signs I did just that. I used products that I would not normally use. Don’t worry!! I will give you some alternative methods to be able to complete signs like these.

Lets Get Started

Supplies

This project is what you make of it. You can put anything on these hearts. I used these hearts from Dollar Tree. That are thick and sturdy. I used chalk and acrylic paint.

Now please keep in mind I have a big craft room with many items to use. I really wanted to think outside the box on this one so I wanted to use some different products that I do not usually use when crafting for this blog. So I used a stamp set that I got from Hero Arts. I got it in a subscription stamp box that I get every month from Hero Arts called My Monthly Hero. I love it and it gives me all kinds of different stamps and inks to try. It is an amazing deal if you are a card maker!!

The other thing I used was a die cutting machine called a Platinum from Spellbinders and steel roll dies from Spellbinders called Truckin’ Through The Season. I used several different kinds of paper with these dies too.

I started by pulling off the paper on the front on the hearts. It pealed off easily and it took all the glitter off without a problem. Then I painted the fronts and backs of the hearts with Waverly White Chalk Paint. It took two coats of paint to cover them and on the second coat I put the paint on thick to give the hearts some texture. I did not paint the sides of the hearts because they were already painted. One if them has red edges and I sanded the edges on that one to destress it.

Next I took Versamark Onyx Black ink and used it on a few of the stamps of this Hera Arts stamp set. I used the flowers, two of the bees and a one of the greetings. Once I stamped the images on the heart and let them dry, I started painting the bees and flowers. I used two different colors of reds and greens. I started with the lighter of the colors. So I paint a few flower petals with the light red and then go in with the crimson in the places of the petals that would be darker. I do this method with all the flowers and the leaves. It gives the picture a 3-D affect. Think about where shadows would be and where light would naturally hit the flowers, that is where you put the light and dark paints.

Pictures do not do this justice. In real life it looks like the bees and flowers are leaping off the hears. Its amazing.

For this next heart, I started by picking out colored paper to cut. Then I put the paper down on the cutting plate of my Platinum, placed the dies on top of the paper, and placed the other cutting plate on top and rolled them through. Once everything was cut I glued the pieces together on the heart and added the foam hearts to the back of the truck. Then I took a pencil and wrote the words “Loads of Love” on the top of the heart. After I was happy with how it looked, I went over the pencil with a paint marker.

I love how shiny the truck is and with some bending of the silver paper, it made the bumper of the truck look more weathered and worn. The words are not perfect but it works for me.

Each heart has a very different look. They are two different styles which I love. The truck is rustic and cute. The flowers and bees is more modern and pretty.

Now if you do not have things like stamps and die cutting machines you can still make these hearts. You can use stickers. That is always an option. They are cheap and easy. The other thing you can do is use napkins and decopodge them on to the hearts. You can also can print out things from the computer and Mod Podge them on to the hearts. Then you can color them or paint them as you wish.

Thank you for joining me today. Try these crafts out. They are easy and then send me a picture! I would love to see what you would do with these hearts.

Please Like, Share, Comment, and Subscribe! Also find me on Instagram and Facebook.

Have a wonderful weekend!!

Proverbs 4:23 NIV Above all else, guard your heart, for everything you do flows from it.

Melissa McGuire

Supplies

Wooden Hearts- Dollar Tree

Stamp Set- Hero Arts

Versamark Onyx Black Ink- Hobby Lobby

Truckin’ Through the Season die cuts- Spellbinders

Platinum Die Cutting Machine- Spellbinders

Foam Hearts- Dollar Tree

Arteza Acrylic Paints- Amazon

Waverly White Chalk Paint- Walmart

Paint Brushes- Hobby Lobby

Paper- Michael’s Craft Store

Liquid Glue- Hero Arts

Snowflakes of fun!!

Are you in an area with snow? Do you long for snow? Me personally, I like a little bit of snow but I hate it when it is up to my knees. They one thing I can say is that I love the way fresh snow looks falling from the sky and sitting on the ground. It is one of God’s greatest creations!

Today we are making a snowflake garland or banner. I’m excited because I used my new paint markers and man where they fun. This was a very simple projects and because of the paint markers it only took me about 30 minutes to do.

Lets Get Started

Supplies

Not only was this project fast but it also did not take a lot of supplies. I used 2 packs of snowflakes from Dollar Tree, and some little snowflakes from Hobby Lobby. I know there is a snowflake garland pictured here but it was to short and I did not use it. I also used the Arteza Acrylic Paint Markers. If you do not have paint markers then please use what ever paint you have. The last thing I used was twine. One that was natural and one that was white bakers twine.

You must decide what you want to hang the snowflakes on, how long you want your garland to be, and then how many snowflakes you want to put on it. I think a garland with lots of snowflakes would be pretty. Next thing you will do is paint the snowflakes. This is where I used the paint markers. Everything took one coat with the markers except the silver. That one took 2 coats. Now you can paint all your snowflakes one color if you want. I used some blues and teals to make an ombre affect. Then the little snowflakes I colored silver and white.

Once the snowflakes are dry, take some twine and tie the snowflakes to what ever you are hanging them on. I am using natural twine to hold the snowflakes and to tie the big snowflakes onto the garland. The little snowflakes I tied on with white bakers twine.

How easy was that? I wish I could have gotten the whole thing in the picture but it was too long and I did not have a spot to take a good picture of it. It looks so neat though. I love garlands and banners. They are great for big walls like a hallway. Garlands are very easy to make and can be changed out depending on the holiday. They can even been layered together.

Thank you for joining me today. Next week we will start some Valentine’s crafts. Also check your Dollar Trees near you because new everyday decor is coming out. If you like the farm house stuff, they have windmills you hang outside. I got a few and can not wait to DIY with them.

As always please Like, Share, Comment, and Subscribe. You can also find me on Instagram and Facebook.

Psalms 46:10 (NIV) He says, “Be still, and know that I am God; I will be exalted among the nations, I will be exalted in the earth.”

Melissa McGuire

Supplies

Big Snowflakes- Dollar Tree

Little Snowflakes- Hobby Lobby

Arteza Acrylic Paint Markers- Amazon

Twine, Natural and White- Hobby Lobby

Winter Fun!!!

Winter is in full swing right now. I am not much on the cold and if it is going to be cold then I feel like it might as well snow. We lived in Wyoming and Montana and their winters are brutal. So I do not miss all that snow but I would like to have enough for the kids to play in.

After taking down all the Christmas decorations, I always feel like my home is empty. For me, it is to early to put up Valentine’s stuff so I wanted something for the in-between time. I found these wooden figures at Target and was going to use them for Christmas but then thought they would look better as winter decor. It is not big massive decorations but just enough to add something to my home so it does not look so empty and depressing.

Lets Get Started

Supplies

The things you will need for this project are some wooden figures, which I got at Target. If you can not find figures like this then you can cut them out of foam core board. They are simple shapes and will cut out easily. The star shapes with snowflakes on them are from Michael’s in their discount bins. The trees that are already painted green were from a shop called Scattering Joy in Hamilton, OH. They are a wonderful little shop if you are in the area check them out!! And here is a shameless plug, some of these DIY’s I have done on here are for sale in the shop along with my greeting cards. There are SOOO many different items in the store that I buy something every time I go in.

You will also need paint of your choosing and paint brushes. I used chalk paint and paint markers. Other things I used was a scarf, felt, hot glue, and a colored pencil.

Lets start with the snowman. He was a natural wood color so I wanted to paint him white. The wood that the snowman was made of had pretty wood grain in it and I wanted that to show through. To do this, I took White Waverly Chalk Paint and mixed it with lots of water. Then I did a white wash over the snowman.

From there I used a black Arteza acrylic paint marker to draw on a mouth and eyes, and colored his hat black. For his nose I wanted something 3-D. I took some orange felt and rolled it up and glued it together. After that I cut it in a carrot shape and hot glued it on. Finally, I had a Dollar Tree scarf that I cut up and made a mini snowman scarf out of it.

I white washed the stars too. Then I took a blue colored pencil to the raised parts of the snowflakes. It really popped off the white.

Next lets look at that the deer. I used the black paint marker to give him an eye and a nose. Then I used the same scarf and cut him a small scarf for him to wear. If your scarf will not lay right just add some hot glue to it to hold it in place.

The trees I did differently. For them I took a fan brush which is pictured above and dipped it into the white wash paint and then dabbed some of the paint off. Next I lightly and at an angle, brushed the white wash paint over the trees. I did it will all of the trees. This should be done slowly and lightly with small strokes of the brush. You can build up the paint little by little.

I think these turned out really cute. They are not loud with bright colors but are just enough to add some decor till Valentine’s stuff goes up. These were easy and fast to do. I completed them in a few hours while helping kids with online schooling.

I hope you are all happy and healthy and having a great start to 2021. A few more winter DIY’s are on their way in the next week and then bring on all the red, pink and purple!! Please find me on Instagram and Facebook. Also Please Like, Share, Comment, and Subscribe!!

2 Timothy 1:7  “For God gave us a spirit not of fear but of power and love and self-control.”

Melissa McGuire

Supplies

Wooden Deer, Snowman, and Big Trees- Target

Stars- Michael’s Craft Supply

Green Trees- Scattering Joy, Hamilton, Ohio

Waverly White Chalk Paint- Walmart

Paint Brushes- Anywhere

Felt- Hobby Lobby

Arteza Acrylic Paint Markers- Amazon

Scarf- Dollar Tree

Surbonder Hot Glue Gun and Hot Glue Sticks- Hobby Lobby

What I got for Christmas 2020

I love seeing what others got for Christmas. It is especially fun to see what people have gotten craft wise. I was given a few new crafting items for Christmas and thought I would share them with you.

The first thing I got is this Waffle Flower Water Media Mat. This mat is great for water color painting or ink blending. The mat is self is a bit sticky so I holds the paper still while you are working. I will use this mainly for card making and goes perfect with the next product I will be showing you.

Over the last year, I have become a big fan of Arteza products. So I had a few things on my wish list for Christmas. I was very excited to see these water color paints from my husband. There are so many different colors and I can not wait to play with these. They come in small tubes so they will last a long time. I can use these with the water media mat!!

Here is another Arteza product. These are acrylic paints. I have the set of 12 so I was excited to receive the bigger set that contains 24. The paints come in metal tubes and while they might be small, they seem to last forever. A little goes a long way. The paint covers great and you can mix them together to create new colors.

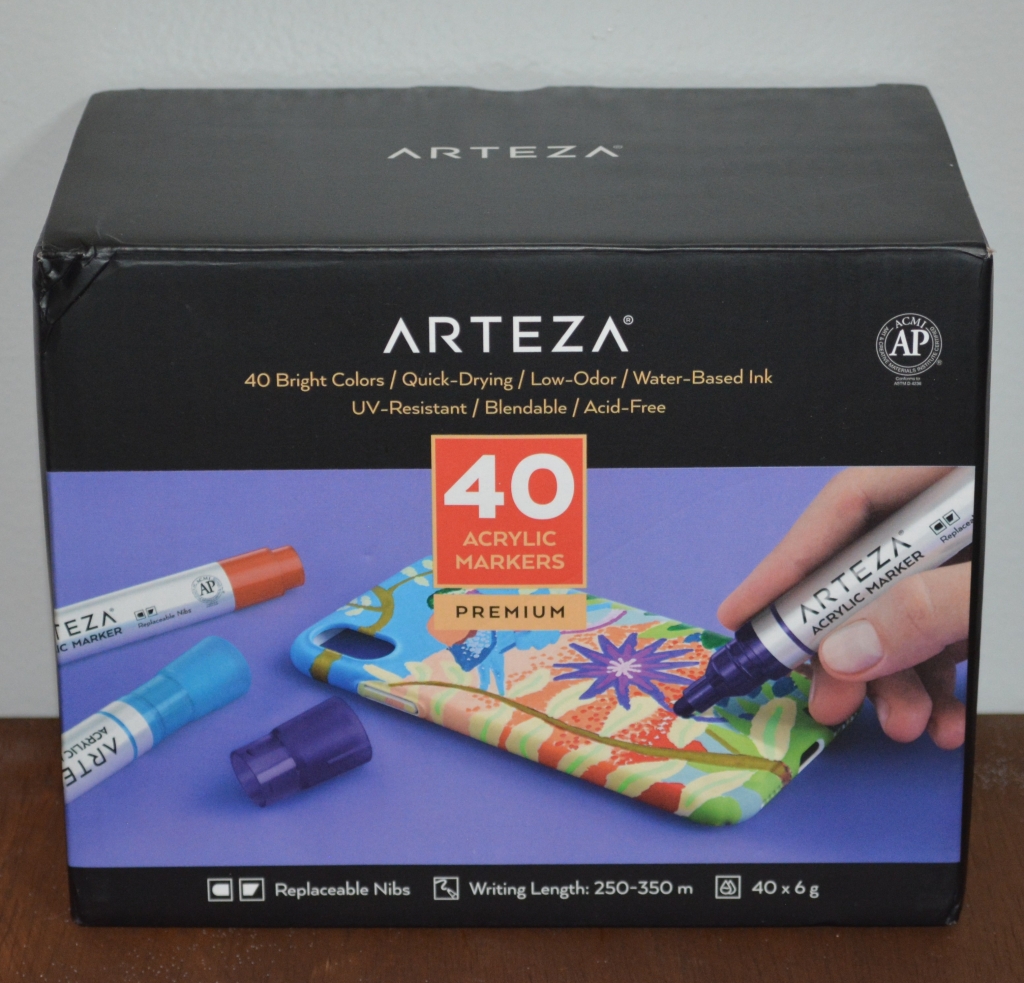
This last Christmas present is the one I am most excited about. These are Arteza Acrylic Markers. Yep you read that right, they are acrylic paint markers. I have seen several YouTube ladies use these and rave about how great they are and how easy they are to use. These were at the top of my Christmas list and you will see me crafting with them very soon!! This is the big box of colors but they do come in a smaller pack. They also have extra maker tips in the box. It’s a great investment!!

Let me know in the comments what kind of crafty things you got for Christmas!! I would love to know if I need to add more things to my wish list for my birthday that is coming up!!

Have a wonderful day and Please Like, Share, Comment, and Subscribe. Look for me on Facebook and Instagram.

Philippians 4:13 “I can do all thing through Christ who strengthens me.”

Melissa McGuire

These products can be found on Amazon, Arteza’s website and Waffle Flower’s website.

Happy New Year 2021!!!

I want to wish you all a very Happy New Year and a hope for a great 2021. I know 2020 was hard for so many people. Remote learning was hard for us and a lot of others struggled with it too. My husband had been off or on an adjusted schedual but he still has a job Thank God! We lost a few dear friends and 2020 gave us one last kick in the gut but taking Brother Gene, our former pastor, who led my husband and I to the Lord. He was like a father to my husband and I and he touched lives all over the world with his faith and grace.

Now we are a few days into 2021 and even though 2020 was hard, I still will not call it the worst year of my life. To give you a bit of insight into my story, I lost both my parents about a year apart and a set of twin boys. Those years were hard. 2020 had nothing on all that loss and grief. So while it was a rough year, there were some great things that came out of it. I got to see my kids grow in school. We spent so much more time as a family. I took a deep dive into my faith and mental health. Those are all very positive things.

For the start of 2021, I have big goals. My word for 2021 is ACCOMPLISH. I joined a CrossFit gym and plan to complete the 110 Stair Climb on 9-11-2021. A YouTube channel is in the future for Yellow Butterfly Craft Designs. That should be fun!! And my husband and I have a PTSD marriage ministry called Relentless Warriors Legacy which has a blog too, and will also have a YouTube channel. Big things are planned for 2021! In the comments, tell me what your plans and goals are for 2021 and how you plan to accomplish them!!!

I hope this finds you well and healthy. I have a few winter crafts planned and then we will jump right in to Valentine’s Day!!

It’s going to be a great year!!

Please Like, Share, Comment, and Subscribe. Also find me on Facebook and Instagram!

Philippians 4:13 “I can do all thing through Christ who strengthens me.”

Melissa McGuire