3 tiered trays are a big trend right now. The thing is, they can also be very expensive. I have one from Hobby Lobby that I paid every bit of $20.00 for and that was because it was 50% off. They only come in certain colors and I wanted something that did not look like everything else out there. So I decided that I was not going to find what I was looking for and was just going to make my own 3 tiered tray for my kitchen.

Supplies
To make my 3 tiered tray I used a plate and bowl set from Dollar Tree. I love the teal color of the plates and bowl. They were exactly what I was looking for. So you will need 2 or 3 items that go from bigger to smaller like a 3 tiered tray does and you do not need 3 items, you can use only 2. Then you need something to go in between each of your layers. I picked 2 galvanized buckets from Hobby Lobby that were two different sizes. They were half off that day so I spent around $5.00 for them. So all together I have about $8.00 wrapped up in this tray. You can get candle sticks to put between your layers too. Dollar Tree sells some glass ones and porcelain ones too. Hobby Lobby and Michael’s sells wooden bases and other kids of candle sticks. It just has to be flat on the top and bottom. Now if you want to paint you what ever you buy, do that first before you start gluing thing together.
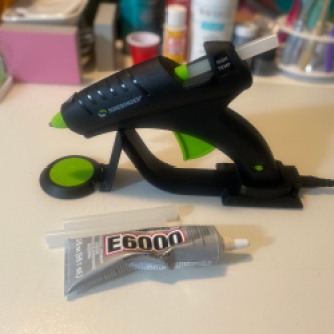
I also used my hot glue gun and some E6000. Later on I decided to use some twine to finish off my tray.
Lets Get Crafting
When I picked out my buckets to go in between my layers, I picked 2 buckets that were different sizes. I wanted a taller gap between my bottom 2 layers than I did with the top two. Now my buckets came with handles, so the first thing I did was pull the handles off. It took a bit of pressure, but they all popped right off.

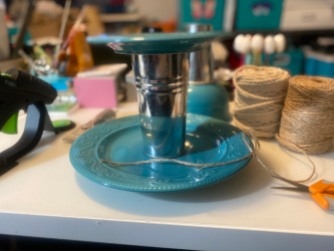
After taking off the handles of my buckets, I started to plan out my layers. I knew I wanted the bowl on top, the salad plate in the middle and the dinner plate on the bottom. You could do just the salad and dinner plate if you want.
I also had to decide which way my buckets were going to face. In the above picture, I had the bottom bucket upside down. This was something I changed when I got to the next step. Also notice the seam on the top bucket. Each bucket has one and that will be important to remember later.

Now it is time to glue things together. I used both the E6000 and hot glue together. The hot glue will provide an instant hold and the E6000 will make this craft last for years. Since we are using hot glue, you do need to more fast. For the top layer, I put a layer of E6000 on the bottom of the bowl. Do that first since the E6000 takes a good 24 hours to dry. Next I put a layer of hot glue on the top of my smaller bucket. Then I placed the top of the bucket on the bottom of the bowl. The edge of the bucket matched up with the bottom of the bowl so no need to find the center.
I repeated this step with the larger bucket and the salad plate. It is easier to do everything separate first then assemble the tiers after that. I let the hot glue set up for a good 5 minutes before moving on.
You can see what I was left with after adding the buckets to the plate and bowl. After the hot glue set up and was solid, I started to assemble the 3 tiers. I placed the bottom dinner plate down and then added the hot glue and E6000 mix on the bottom of the big bucket that is now joined with the salad plate. Then flipped it right side up and place the bottom of the bucket on top of the dinner plate right in the center. Now I eyeball the center of the dinner plate but feel free to measure it out and mark the plates before you start adding glue to things.
Give that a good 5 minutes for that hot glue to set up again and then do the some gluing process with the small bucket and the bowl. Before you glue the plate and bowl together please look and see if your buckets or candlesticks have a seam in them. I made sure to line up the seams so that the top and bottom bucket were in the same spot and facing the same way with the seams lining up together. Once you have planned out which direction you are gluing things, place your bucket in the center of the salad plate.
After putting the tray together I realized I did not like the way the buckets met the plates. I looked around my craft room and tried a few different things like ribbon and different kinds of rope and twine around the buckets where they met the plates. I decided on some twine. I put a very thin layer of hot glue around the the bottom of the bigger bucket, where it met the dinner plate. I started the twine at the seam of the bucket and took it all the way around the base of the bucket. I did this where ever the buckets met the bowl or plates making sure the twine started and ended where the seams of the buckets were.

Here is the final project. I placed the tray in my kitchen. I added a burlap charger plate underneath it along with a rectangular cutting board that was handmade from an Amish store near me. The board holds what ever decorations I put on my kitchen island. I love the color and rustic feel of this 3 tiered tray. It is completely different than anything out on the market and cost me a forth of what the trays are in the stores or online. I hope you like it too!
Please leave a comment below telling me if you like the tray or what kind of trays you would make. Also check out Yellow Butterfly Craft Designs on Facebook and Instagram!
Thank you for joining me for another craft. I have a St. Patrick’s Day craft coming up and several Easters crafts on the way!
Melissa McGuire
Supply List
Surebonder Hot Glue Gun- Hobby Lobby
Surebonder Hot Glue Sticks- Hobby Lobby
E600-Hobby Lobby, Michael’s Craft Store, Walmart and any hardware store
Bowl- Dollar Tree
Salad Plate- Dollar Tree
Dinner Plate- Dollar Tree
Small Galvanized Bucket- Hobby Lobby
Bigger Galvanized Bucket- Hobby Lobby
Twine- Hobby Lobby, Michael’s Craft Store, Walmart, Dollar Tree


