IT”S TIME FOR CHRITMAS!!!!
I have been shopping at Dollar Tree and here are some of the things I will be crafting with this year!!
Please Like, Comment, Share, and Subscribe!!
Thank you
Melissa McGuire
IT”S TIME FOR CHRITMAS!!!!
I have been shopping at Dollar Tree and here are some of the things I will be crafting with this year!!
Please Like, Comment, Share, and Subscribe!!
Thank you
Melissa McGuire


I am going to do a series of shelf DIY posts. They will not be posted all in a row because I have a Christmas in July post planned for next week. My hope is to give you some inspiration if you come across old shelves or see some but they might not be the right color or do not match your style. Just to let you know up front, I lost some of the pictures of the shelves but there is enough to get the idea of what I did to DIY them.
Over the last few months I have been collecting several different kinds of shelves. I wanted a new shelf to hang our car keys on. The other place I need shelves is going down our steps to our basement. We have a ton of shot glasses that my husband and I have collected over the years since we got married. The shot glasses have been in a container for the last 4 years so it is time to start getting them out and on display. My goal is to have several different kinds and styles of shelves to put the shot glasses on. I am accomplishing just that.
Lets Get Started
Supplies


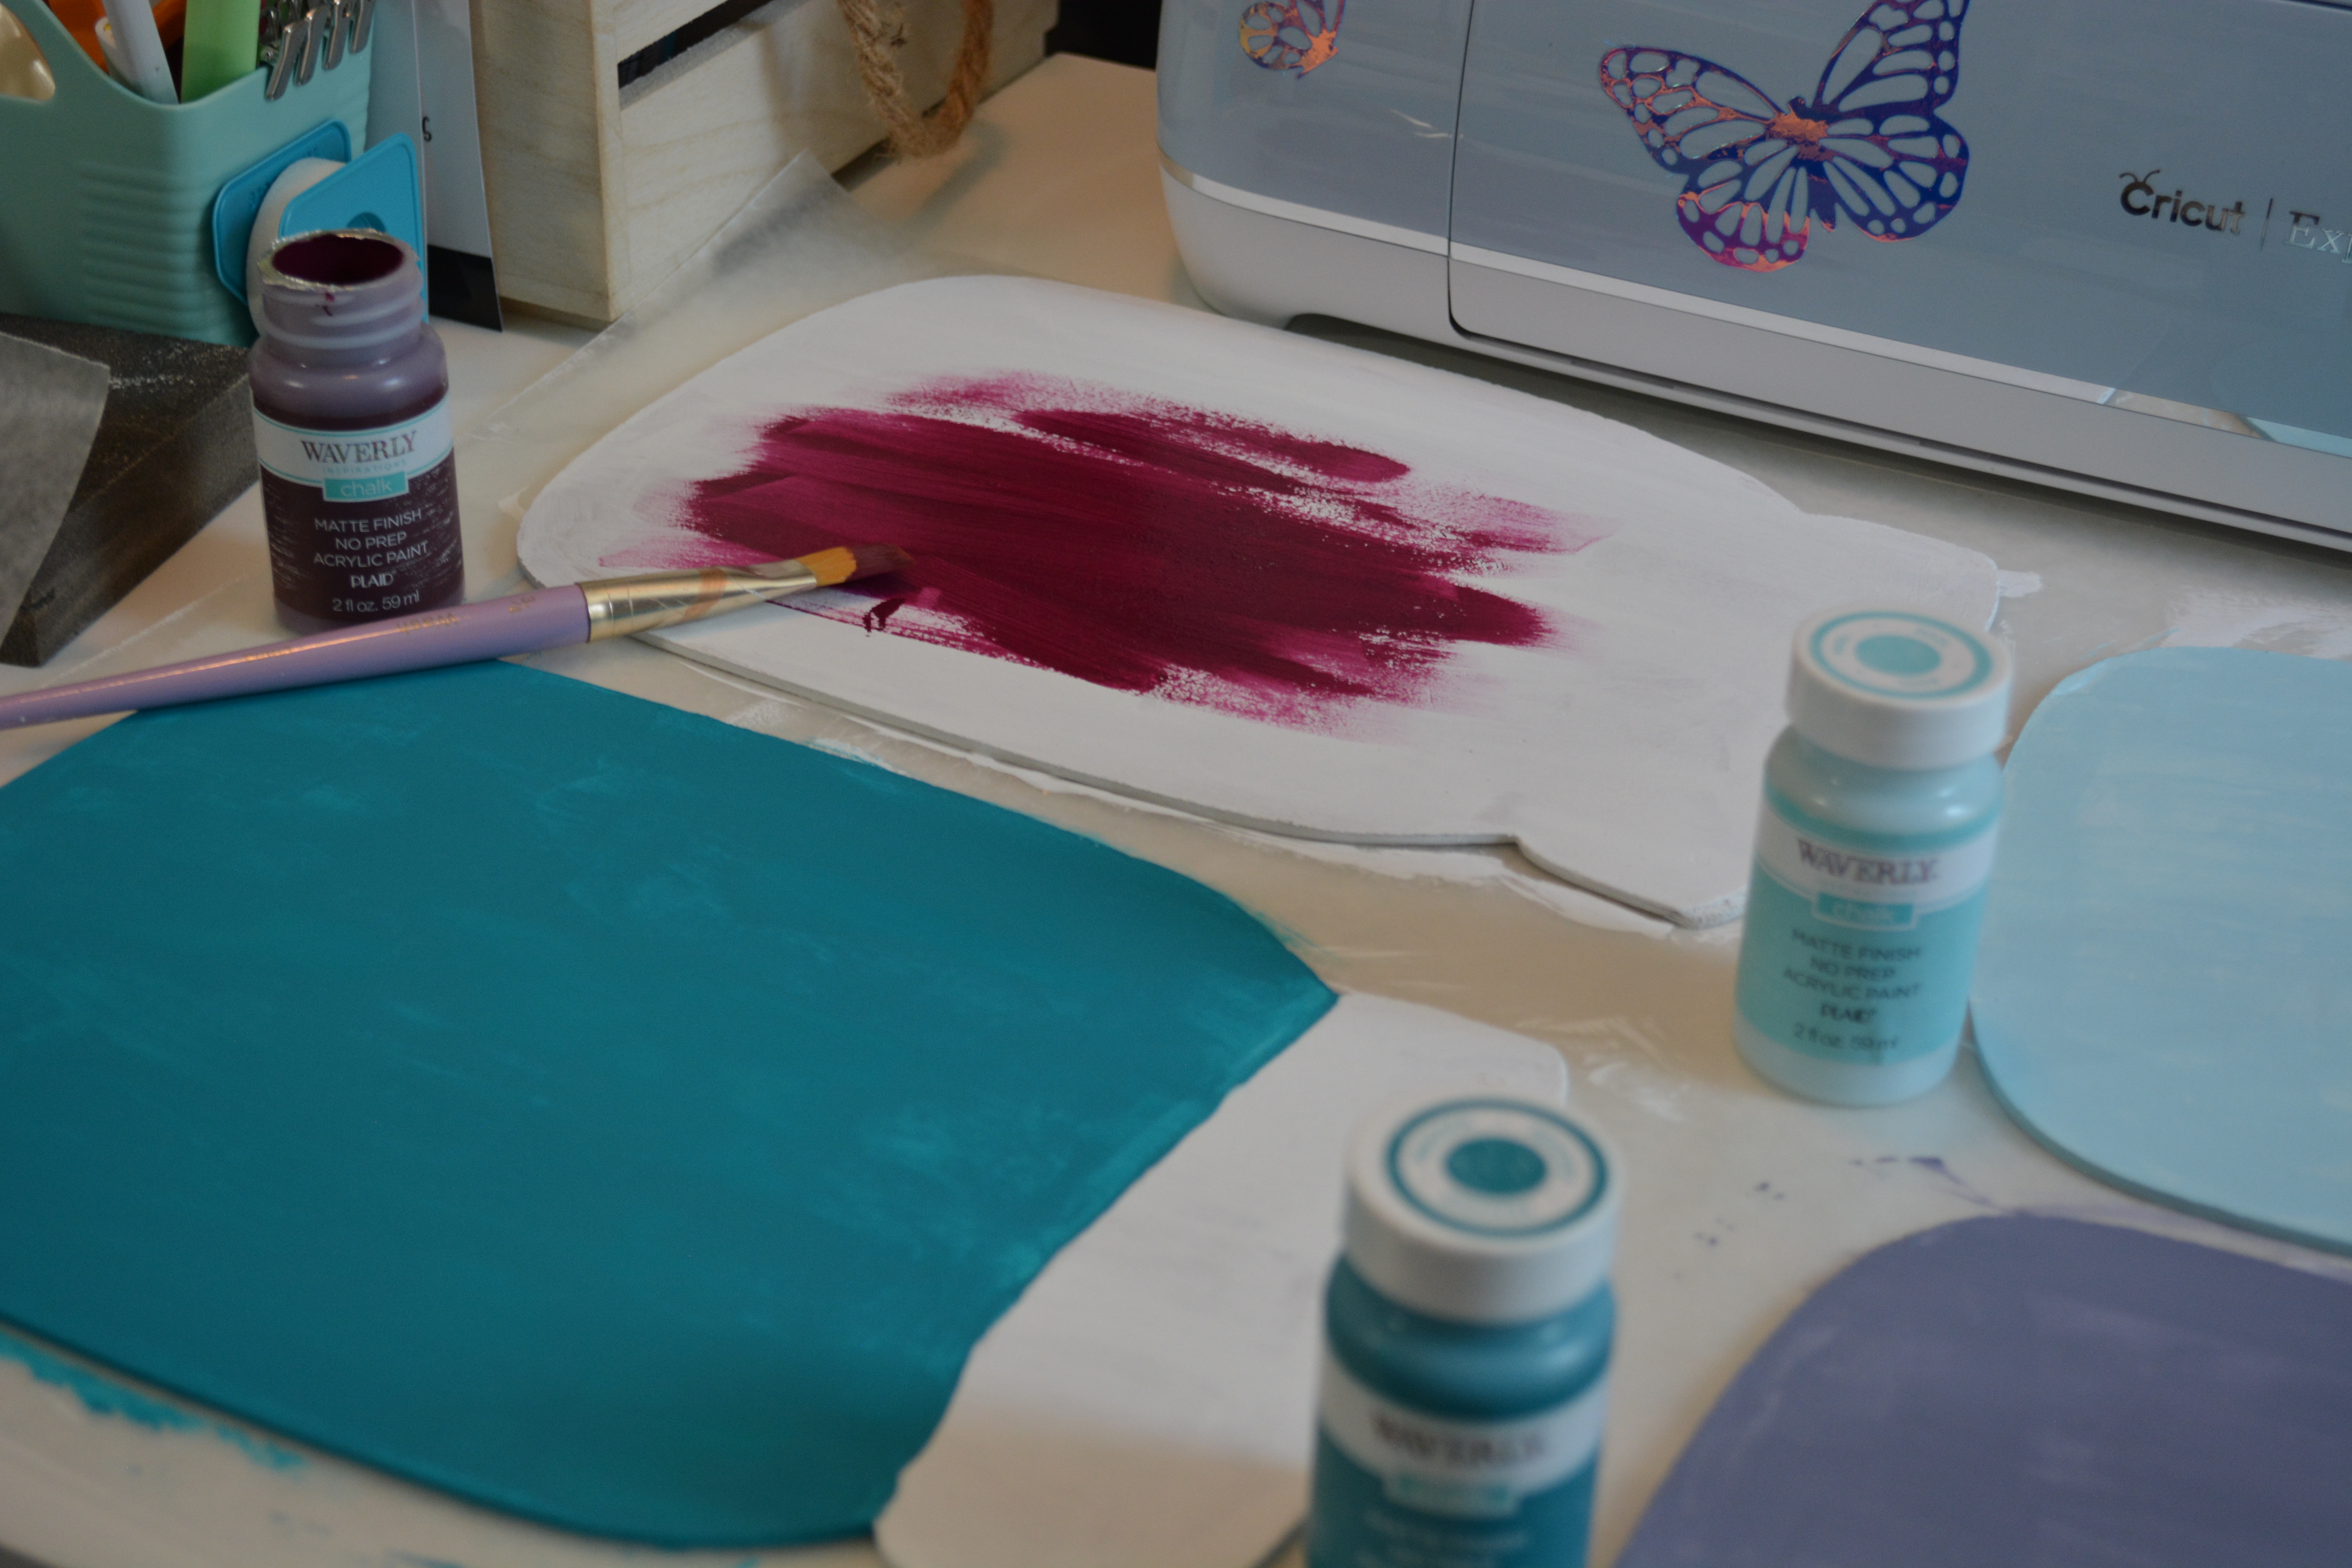
SHELVES!!! That is the first thing you will need. I got some shelves from Dollar General, Target, and a thrift store. If you want to change the color of the shelves you will need paint of some kind. I used spray paint, chalk paint, and acrylic paint. To give a few of these shelves some personality I added some wood planks with saying on them that I used my Cricut to do. I used a few basic supplies like twine and hot glue too.

We are going to start with the shelf I found to hang our keys on. I got this one at Dollar General on clearance. It was white and I did not want it to blend in with my walls so I spray painted it with this rust color. I took the wood piece off of the shelf first. Please do spray paint in a well ventilated area. I did 3 light coats of spray paint on each side of the wire part to the shelf. After that I did 2 coats of polyacrylic over it. Then I added the wood piece back on.
I was watching a YouTube video the other day and I saw where they added the saying “Come Home Safely” on a key holder and I loved the saying on it. It is something that we will read every time we walk out the door of our home. To add this to the shelf, I took a wood plank I got from Hobby Lobby and painted it with a little blue paint and water mixture. I cut the words out with my Cricut and some metallic vinyl and added the words to the plank. Then I used some ribbon to help me hot glue the plank to the shelf. Finally, I hung the shelf on my wall and that was it. You can do this project very quick and can accomplish it in a day. Spray paint makes things go a lot faster.
This next shelf started as a table top shelf. I made a mistake from the get go and I should have known better. The surface of the shelf is slick and I should have primed it with chalk paint first. That is not what I did first and man did I pay the price. I used Dark Navy Apple Barrel paint to start painting this shelf. After two coats of paint, I could still see a lot of white through it. So I went over the whole shelf with Ocean Chalk Paint from Waverly and then did two more coats of the Dark Navy over it.
My next issue was that I needed to figure out how to hang a shelf that was not meant to be hung. My husband had a few ideas but I did not want to see all the metal hardware that it would take to hang it. After some thought I decided to drill some holes in what would be the top and bottom of the shelf and then looped twin through the holes. I tied knots where they were needed and then hung it up. It is a shelf that looks very different and I love it!!


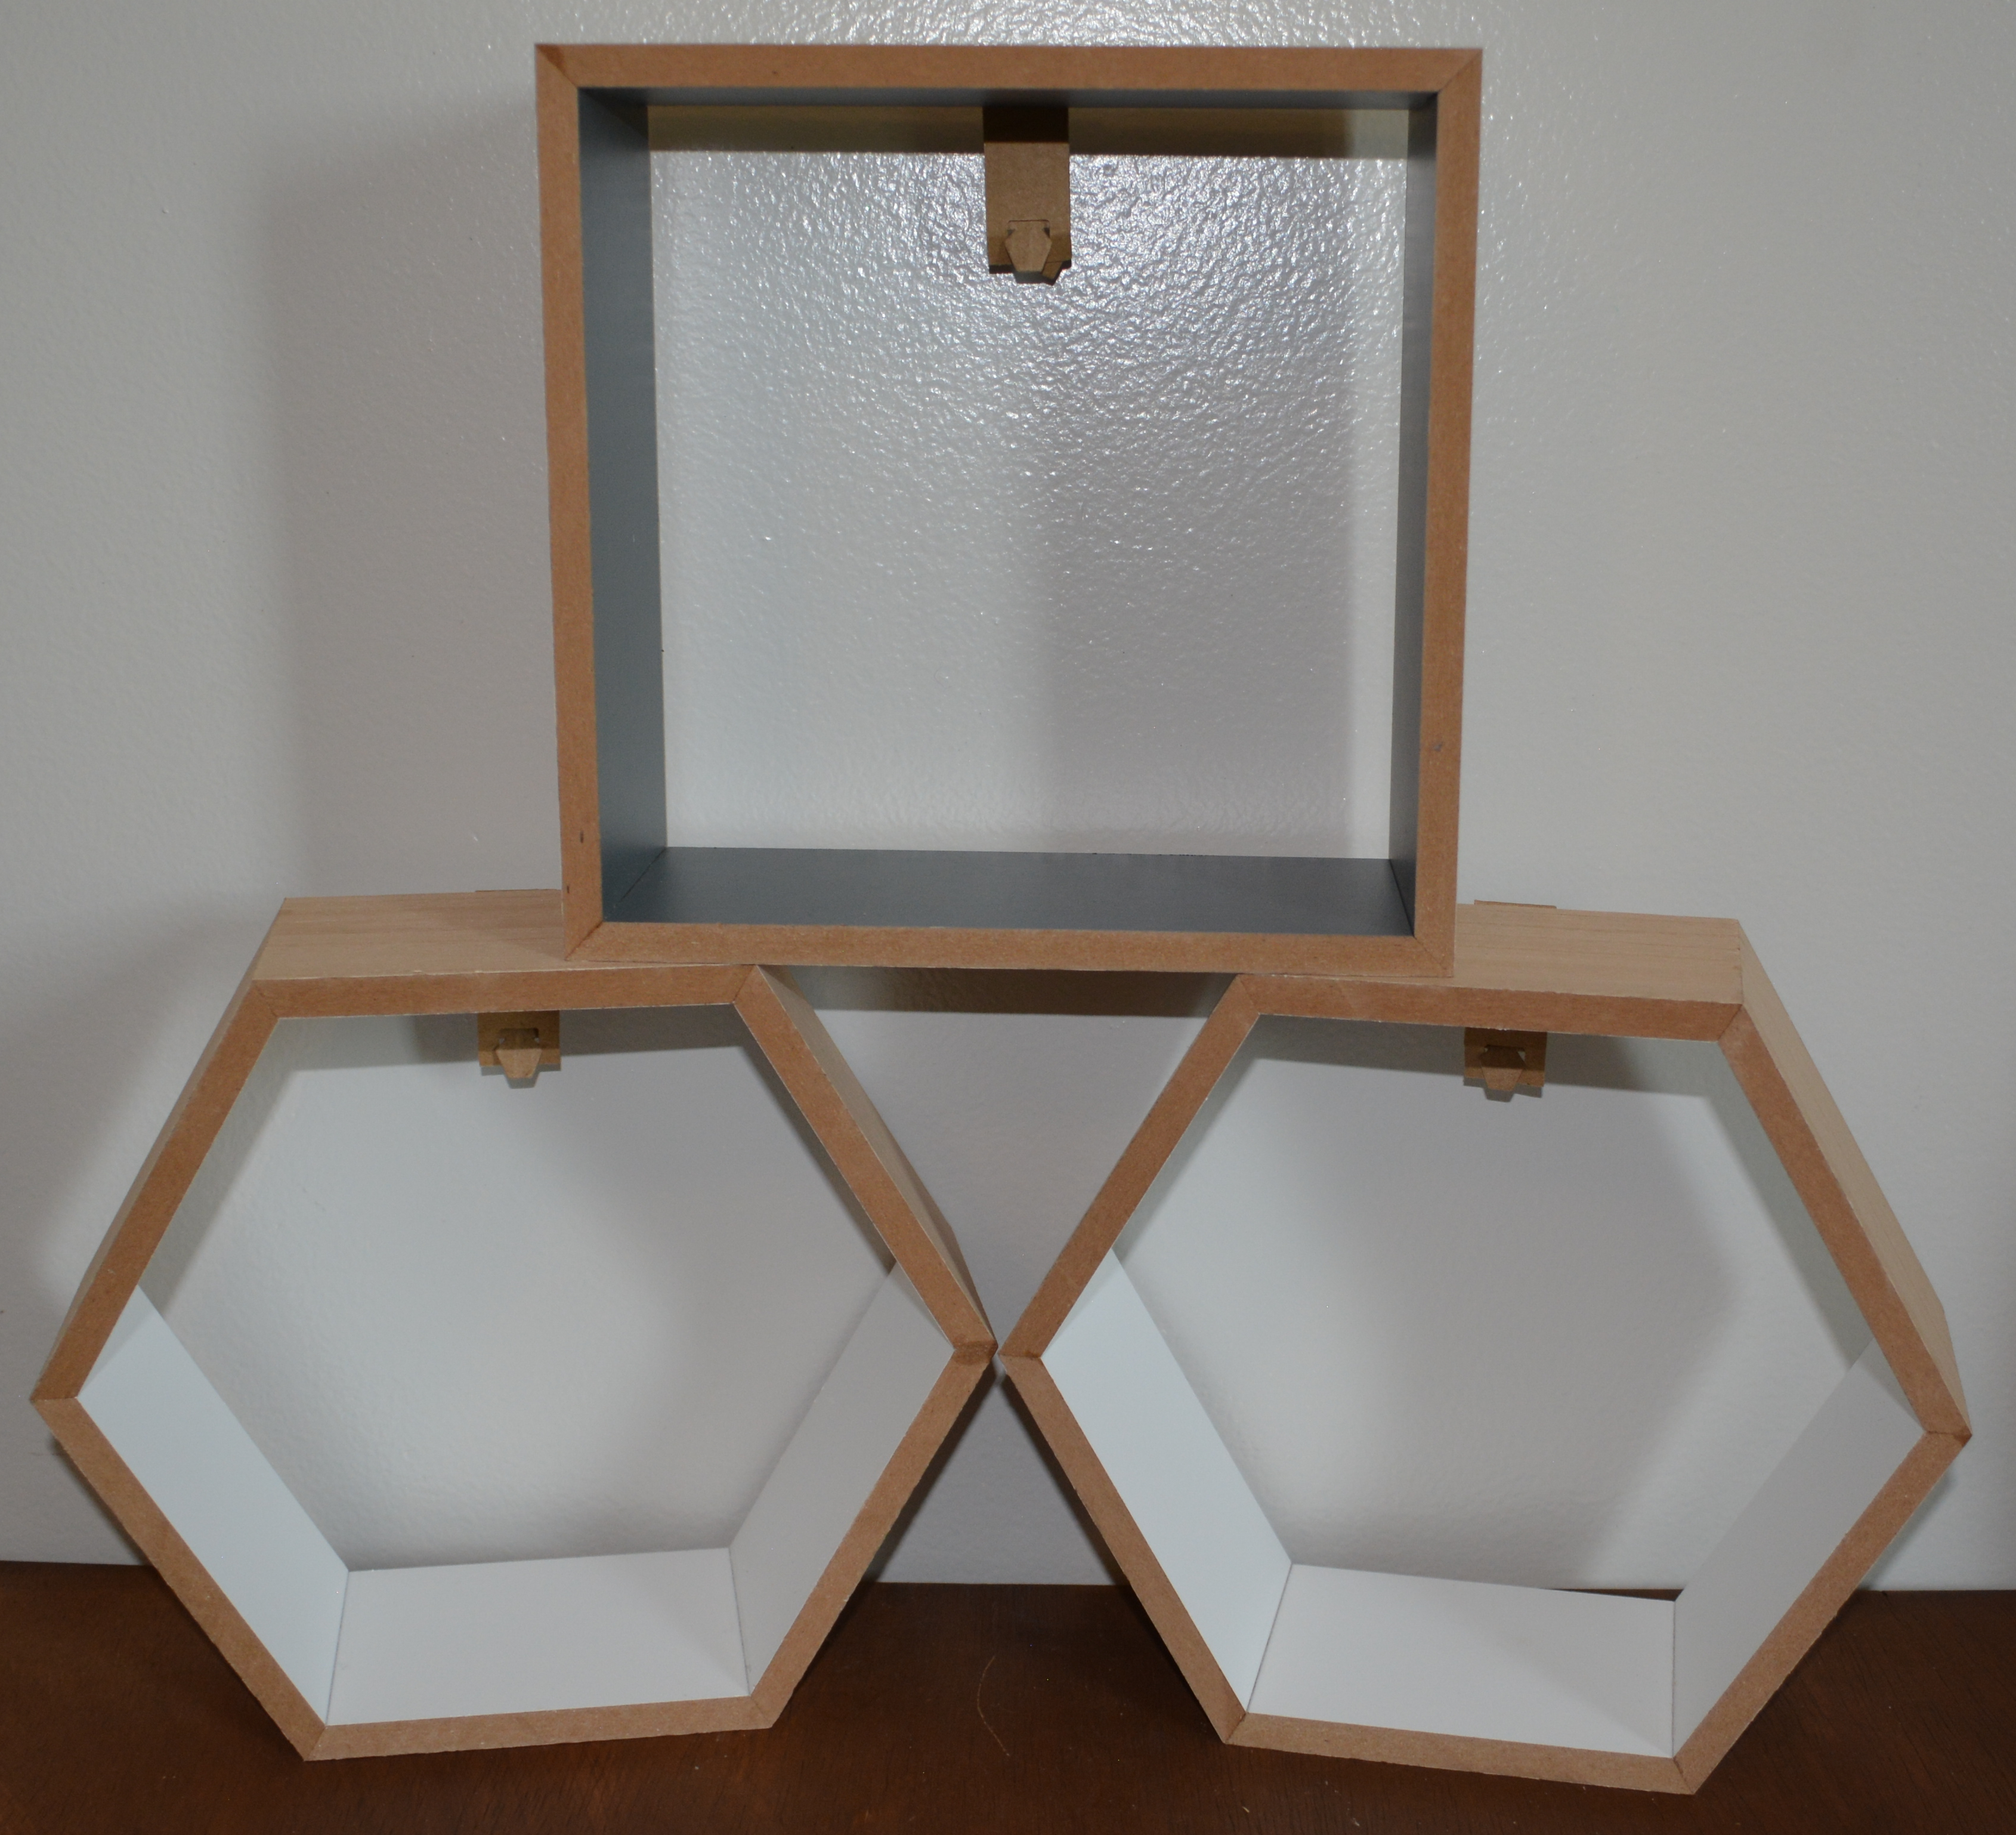
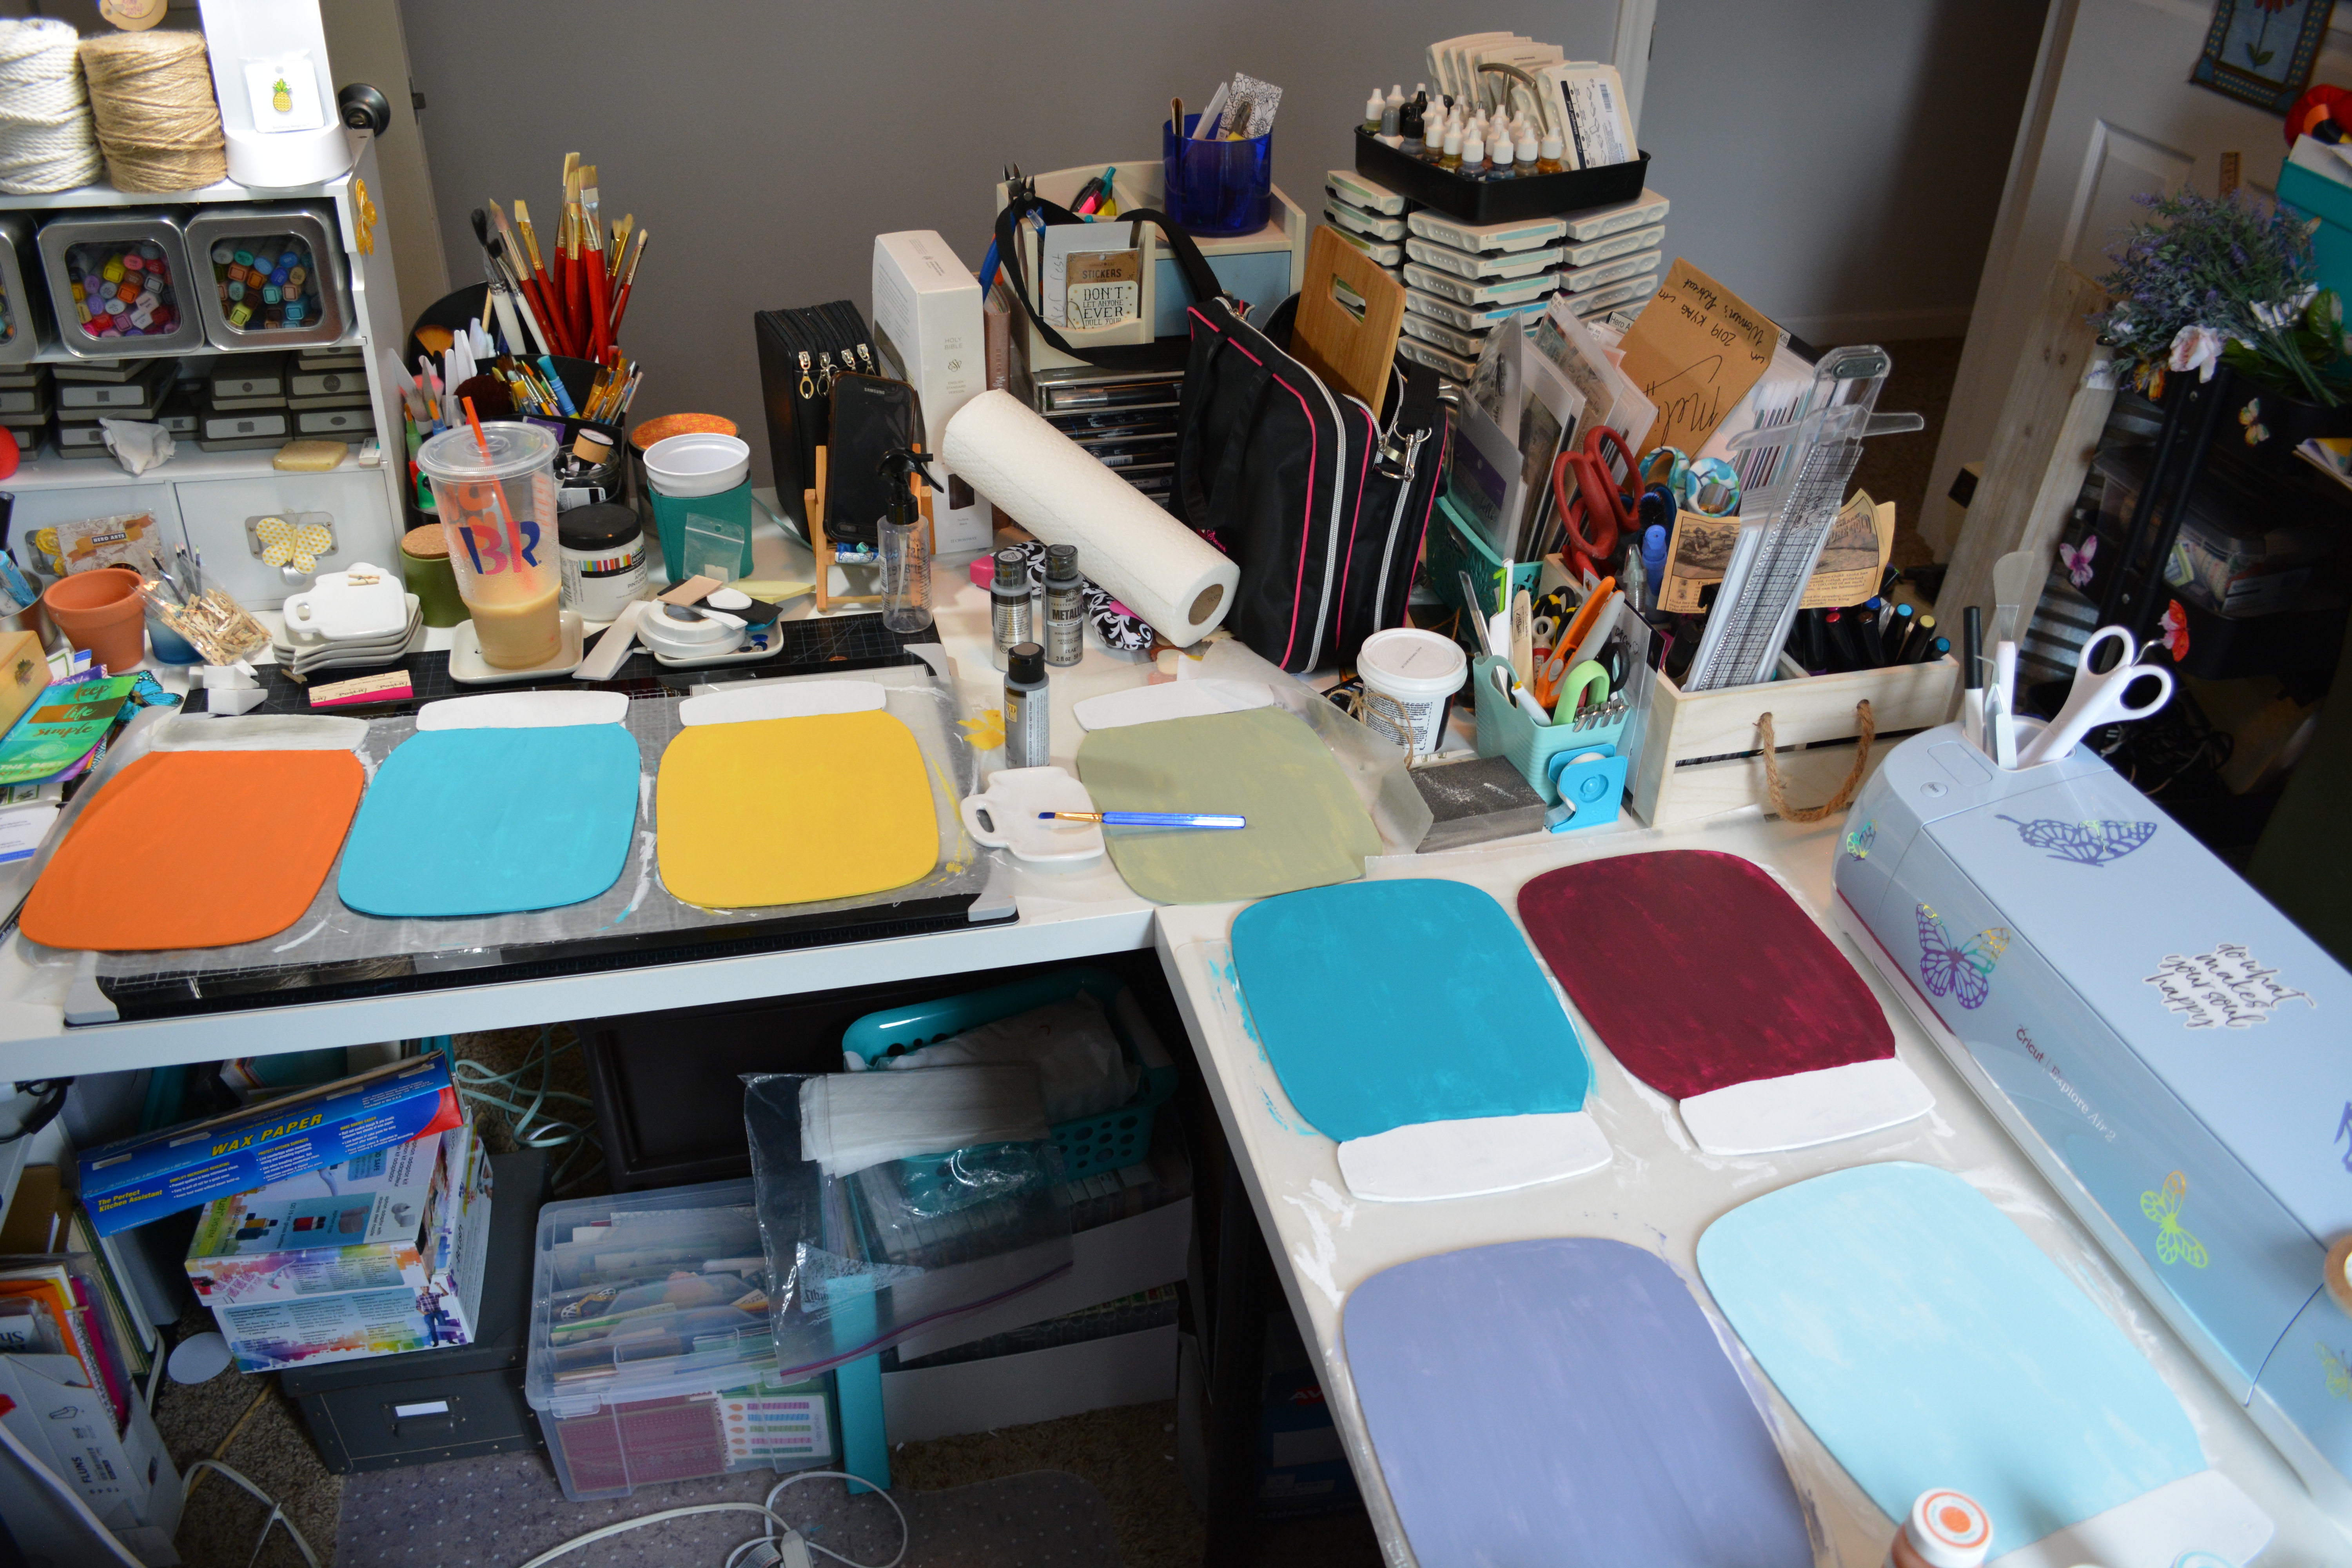
These shelves are from Target. I was able to find 2 of each kind of shelf. I did not want them all the same color on the inside so I painted the inside of one grey and the inside and outside edge of another with Dark Navy Apple Barrel paint. I hung the shelves one on top of the other with space in between each one for more shot glassed on the tops of each shelf. They work great with the tall shot glasses we have.

I found this old shelf at a thrift store. I did not like the heart on it but I knew I could make it work. To start I painted one coat of outdoor grey chalk paint on it. After that was dry, I used some heavy grit sandpaper on the shelf to take some of the paint off all the edges and also off the sides.
Now lets cover that heart!! I took a wooden plank from Hobby Lobby and painted it with a water and white chalk paint to give it a white wash. I wanted the words ” I would rather be someone’s shot of whiskey, Than everyone’s cup of tea!” on the plank. I thought about using my Cricut but the words would be really small and hard to work with if I cut them out. So I typed it out in Cricut Design Space and did a print and cut. It printed out on my printer and then the Cricut cut the paper in a rectangle that will fit on the plank. I used a glue stick to put it on the plank. The paper on the plank was bright white and did not go with the rustic vibe of the shelf. So I took a bit of Antique Wax and VERY lightly brushed over the edges of the plank and over the top of the words. I attached the plank to the shelf with hot glue. It was perfect!!

I do not have the before pictures of these two shelves. I used the same method of painting the grey paint on them and then sanding all the edges of the shelves So simple and easy!!


It was a lot of fun doing all the shelves. Each one was done a bit differently. I am excited to display all the shot glasses and cups that have been in a bin for years. They show the journey my husband and I have taken with all the places we have been. It was really neat to relive a few of the places we have been and show our boys all the places we have visited over the last 20 years. Let me know if you try some of these techniques in making over shelves or any other pieces. Thrift stores are great places to look!!
Thank you for joining me today. Please join me next week for Christmas in July!! I will be flipping some thrift store finds.
If you like this post please Like and Share it!! It would also really help me if you Subscribed to my blog, Instagram and Facebook page.
Have a wonderful weekend.
Melissa McGuire
Yellow Butterfly Craft Designs
Supplies
Shelves- Dollar General, Target, Thrift Store
Waverly Chalk Paint in White and Ocean- Walmart
Dark Navy Apple Barrel Paint- Walmart
Wooden Planks- Hobby Lobby
Twine- Dollar Tree
Surebonder Hot Glue Gun and Hot Glue Sticks- Hobby Lobby
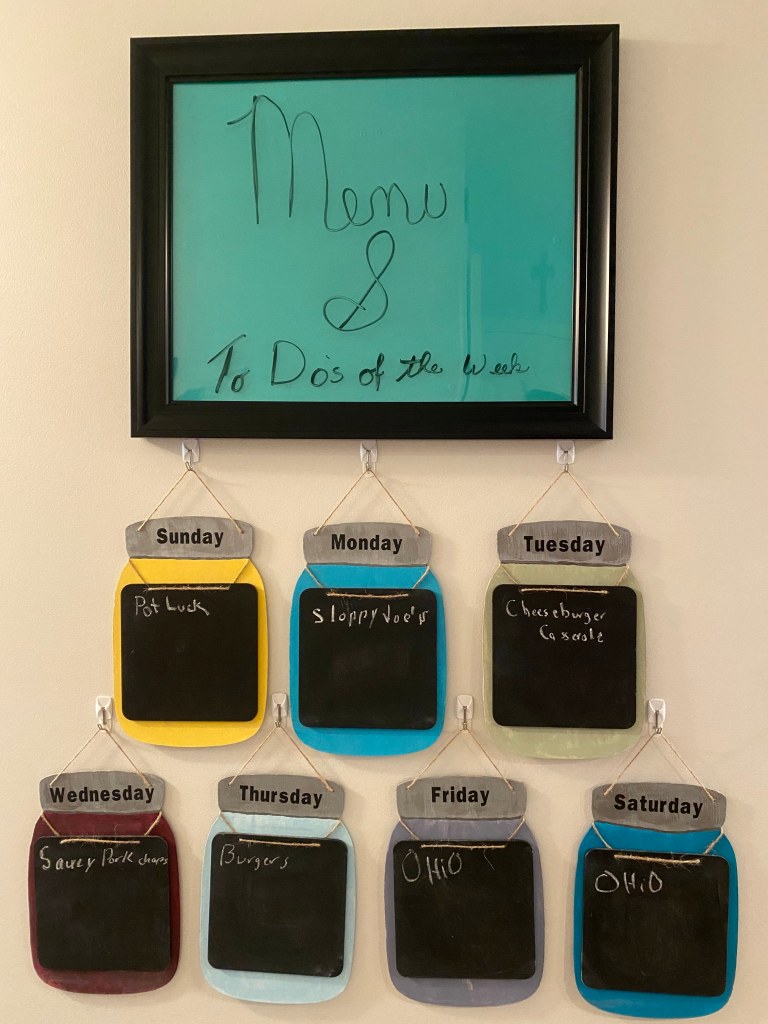
I have had this craft done for a while and have not posted it. It was one of the first crafts I took pictures of before I started my blog. If you know me you know that I LOVE mason jars!! I am excited to finally have these mason jars up and ready for use. The inspiration for this project came when the calendar that had my menu board on it ran out and I needed a new one.
In my house, my family will ask me a million times what is for dinner or what the plans are for the day. Well now I can direct them to this menu and To Do station. (please ignore my poor hand writing on the frame above) Come along with me as I show you how I made these.
Lets Get Started
Supplies


I found these mason jars a few years ago at Dollar Tree but you can get wooden mason jars several places now. You do not have to go with mason jars, you could use circles or squares. The possibilities are endless. I also used chalk paint, silver metallic paint, a scraper, chalk boards, twine, a Cricut and vinyl, and hot glue.
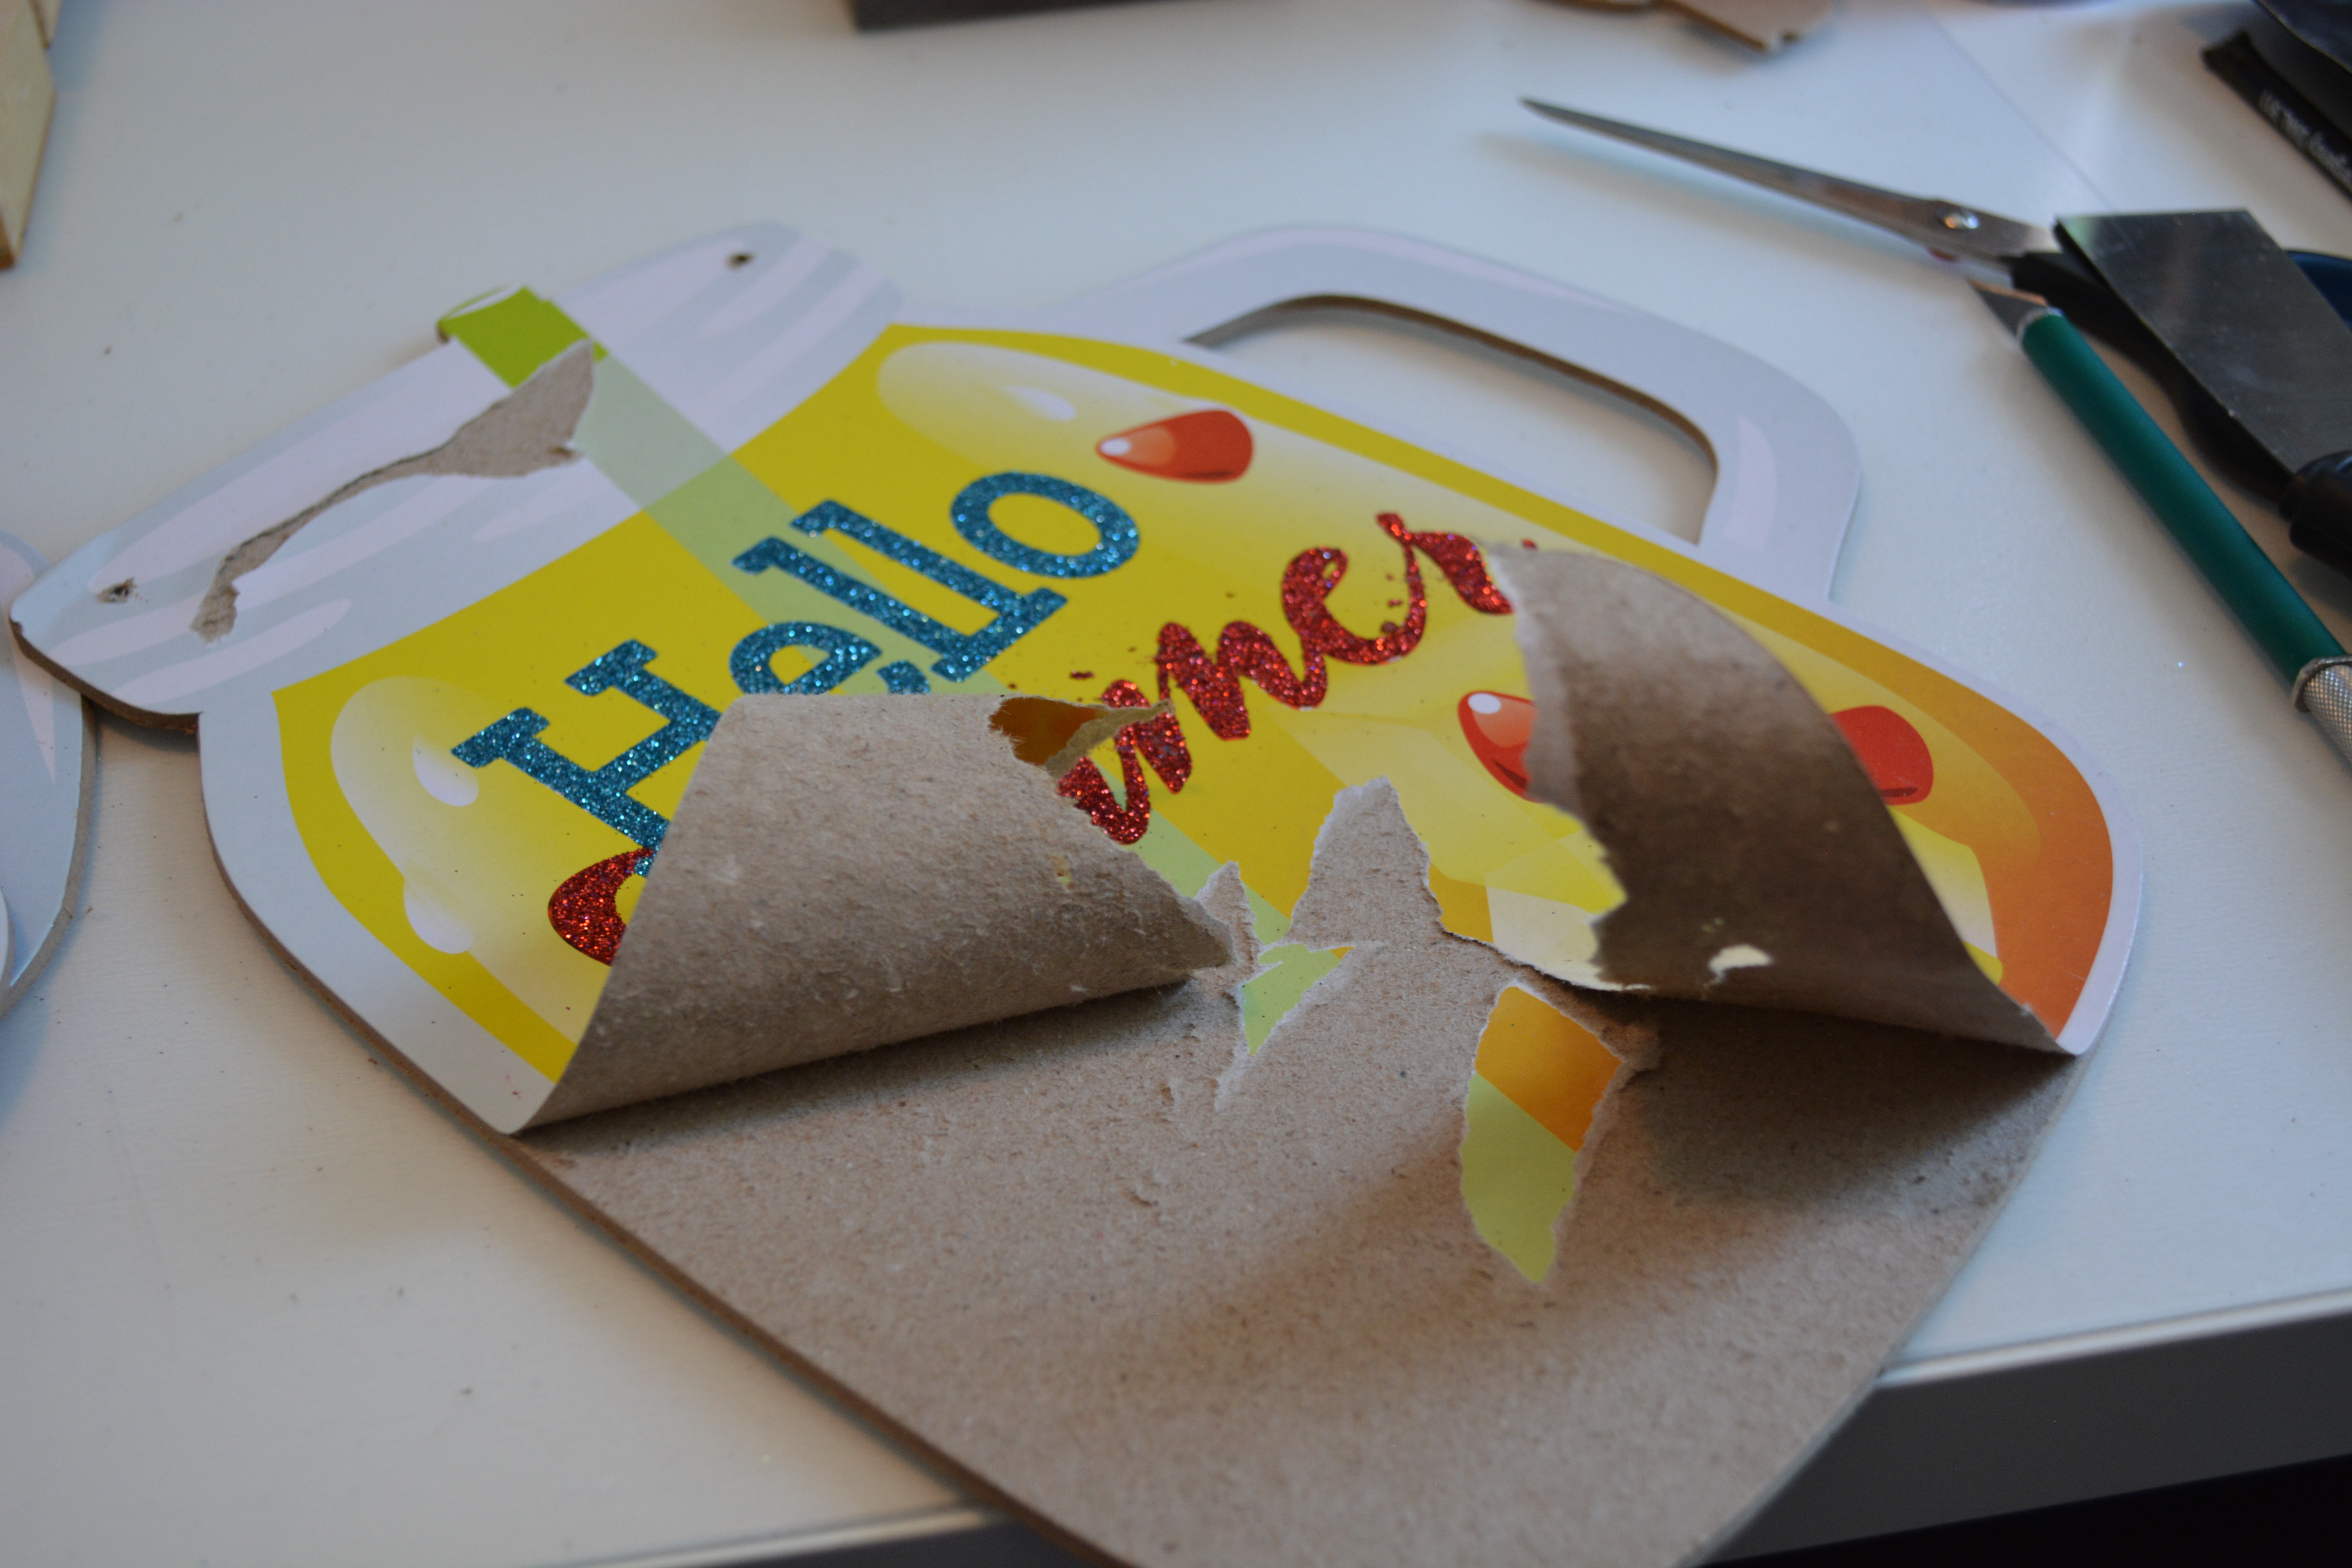
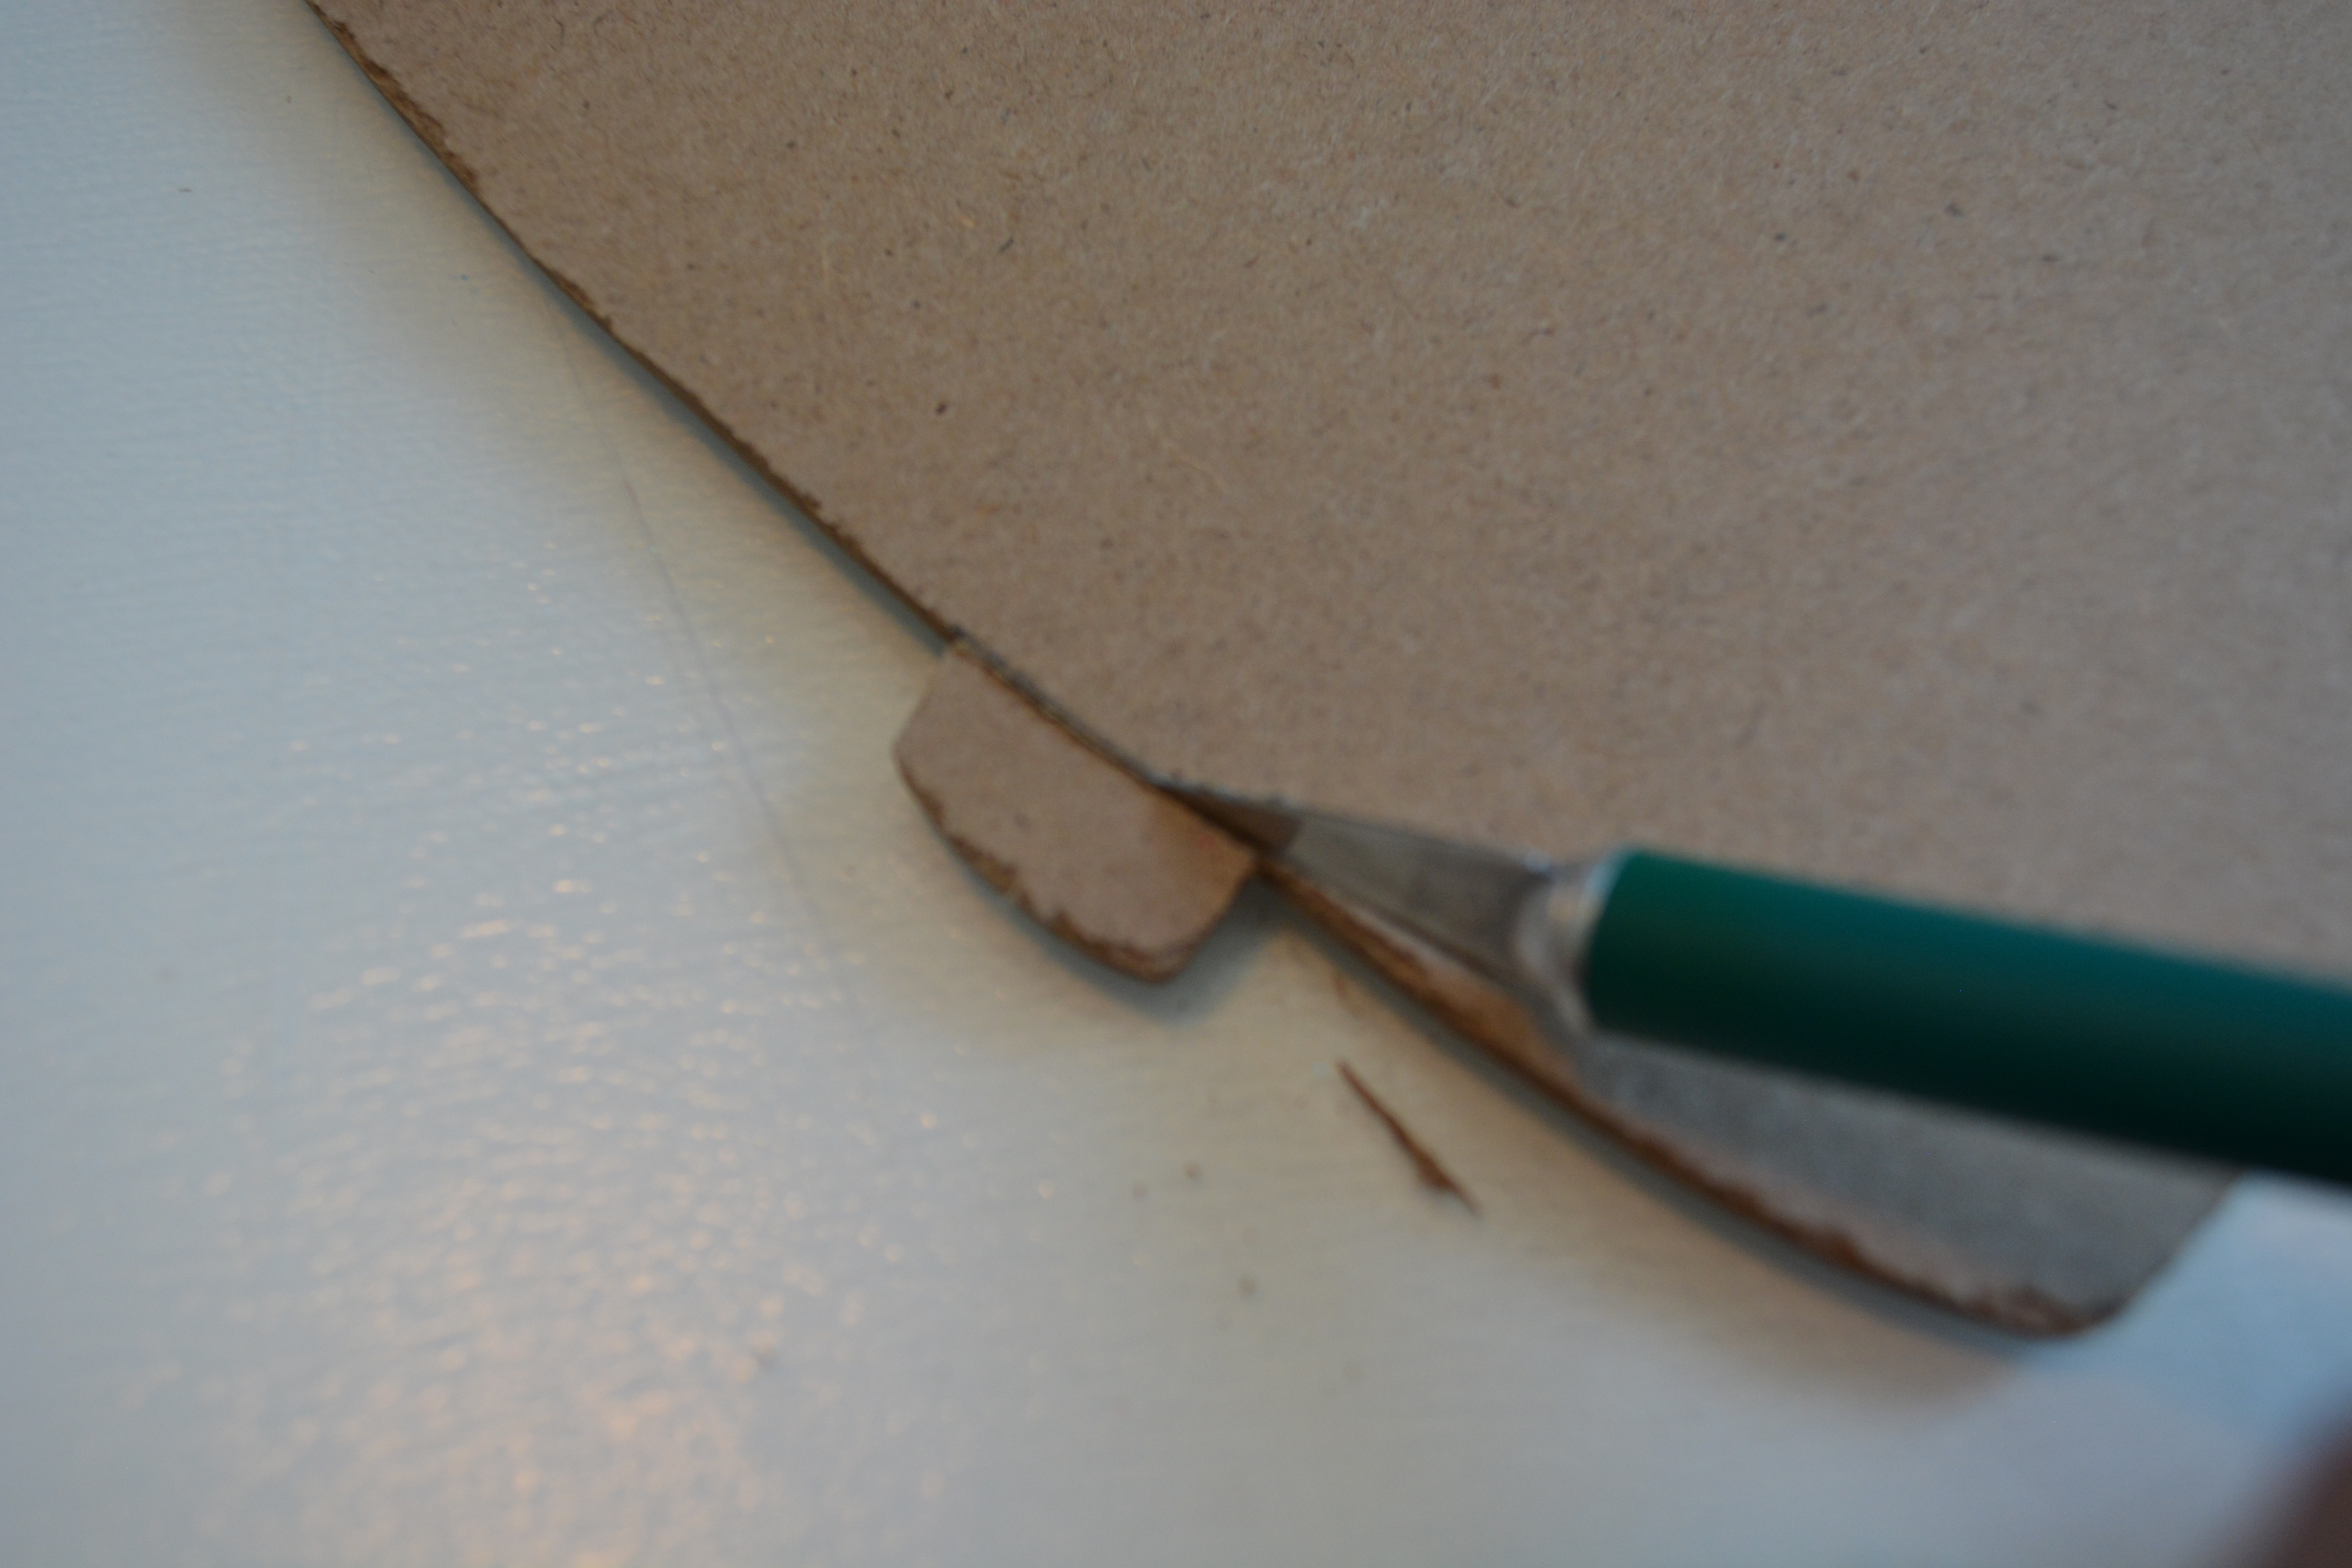

To get started I popped the pineapple piece off with a scraper on all 7 mason jars. Then I peeled the paper with all the glitter off the wooden jars. Next I used an X-Acto knife to cut off the straw piece and handle on all of the jars. I also took the twine hanger off.

Now its time to paint. As you can see I used several colors of Waverly Chalk Paint. But first I primed each jar with White Waverly Chalk paint so that all the jars had the same base and color. Then I did one coat of colored paint on each jar. One coat of paint made the jars look a bit real. It gave the paint some depth because a tiny bit of the white shows through in places. If you want to do the top part of the jar silver like a real jar then use some masking tape or washi tape to tape off the top so that you do not get your colored paint on it.

Once you have the bottom painted of all 7 jars, take the tape off and you can start painting the top part of the jars to make it look like they have lids. I will warn you, this takes several coats of paint. Once all the paint was dry, I took a black paint marker and drew a line dividing the lid from the rest of the mason jar.


Its time to add the chalk boards. For each jar, I added some twine through the holes on on the chalk boards and pulled the twin to the back of the mason jar right at the neck of the jar. Then I hot glued the twine down. On the front of the jar I glued the chalk board down too.
I used my Cricut and permanent vinyl to add the days of the week to the top of each mason jar where the lid would be. If you do not have a Cricut you can use stickers or write them on yourself. (you can see my hand writing, that’s why I use a Cricut)
Finally I added the twine hangers back onto the jars.

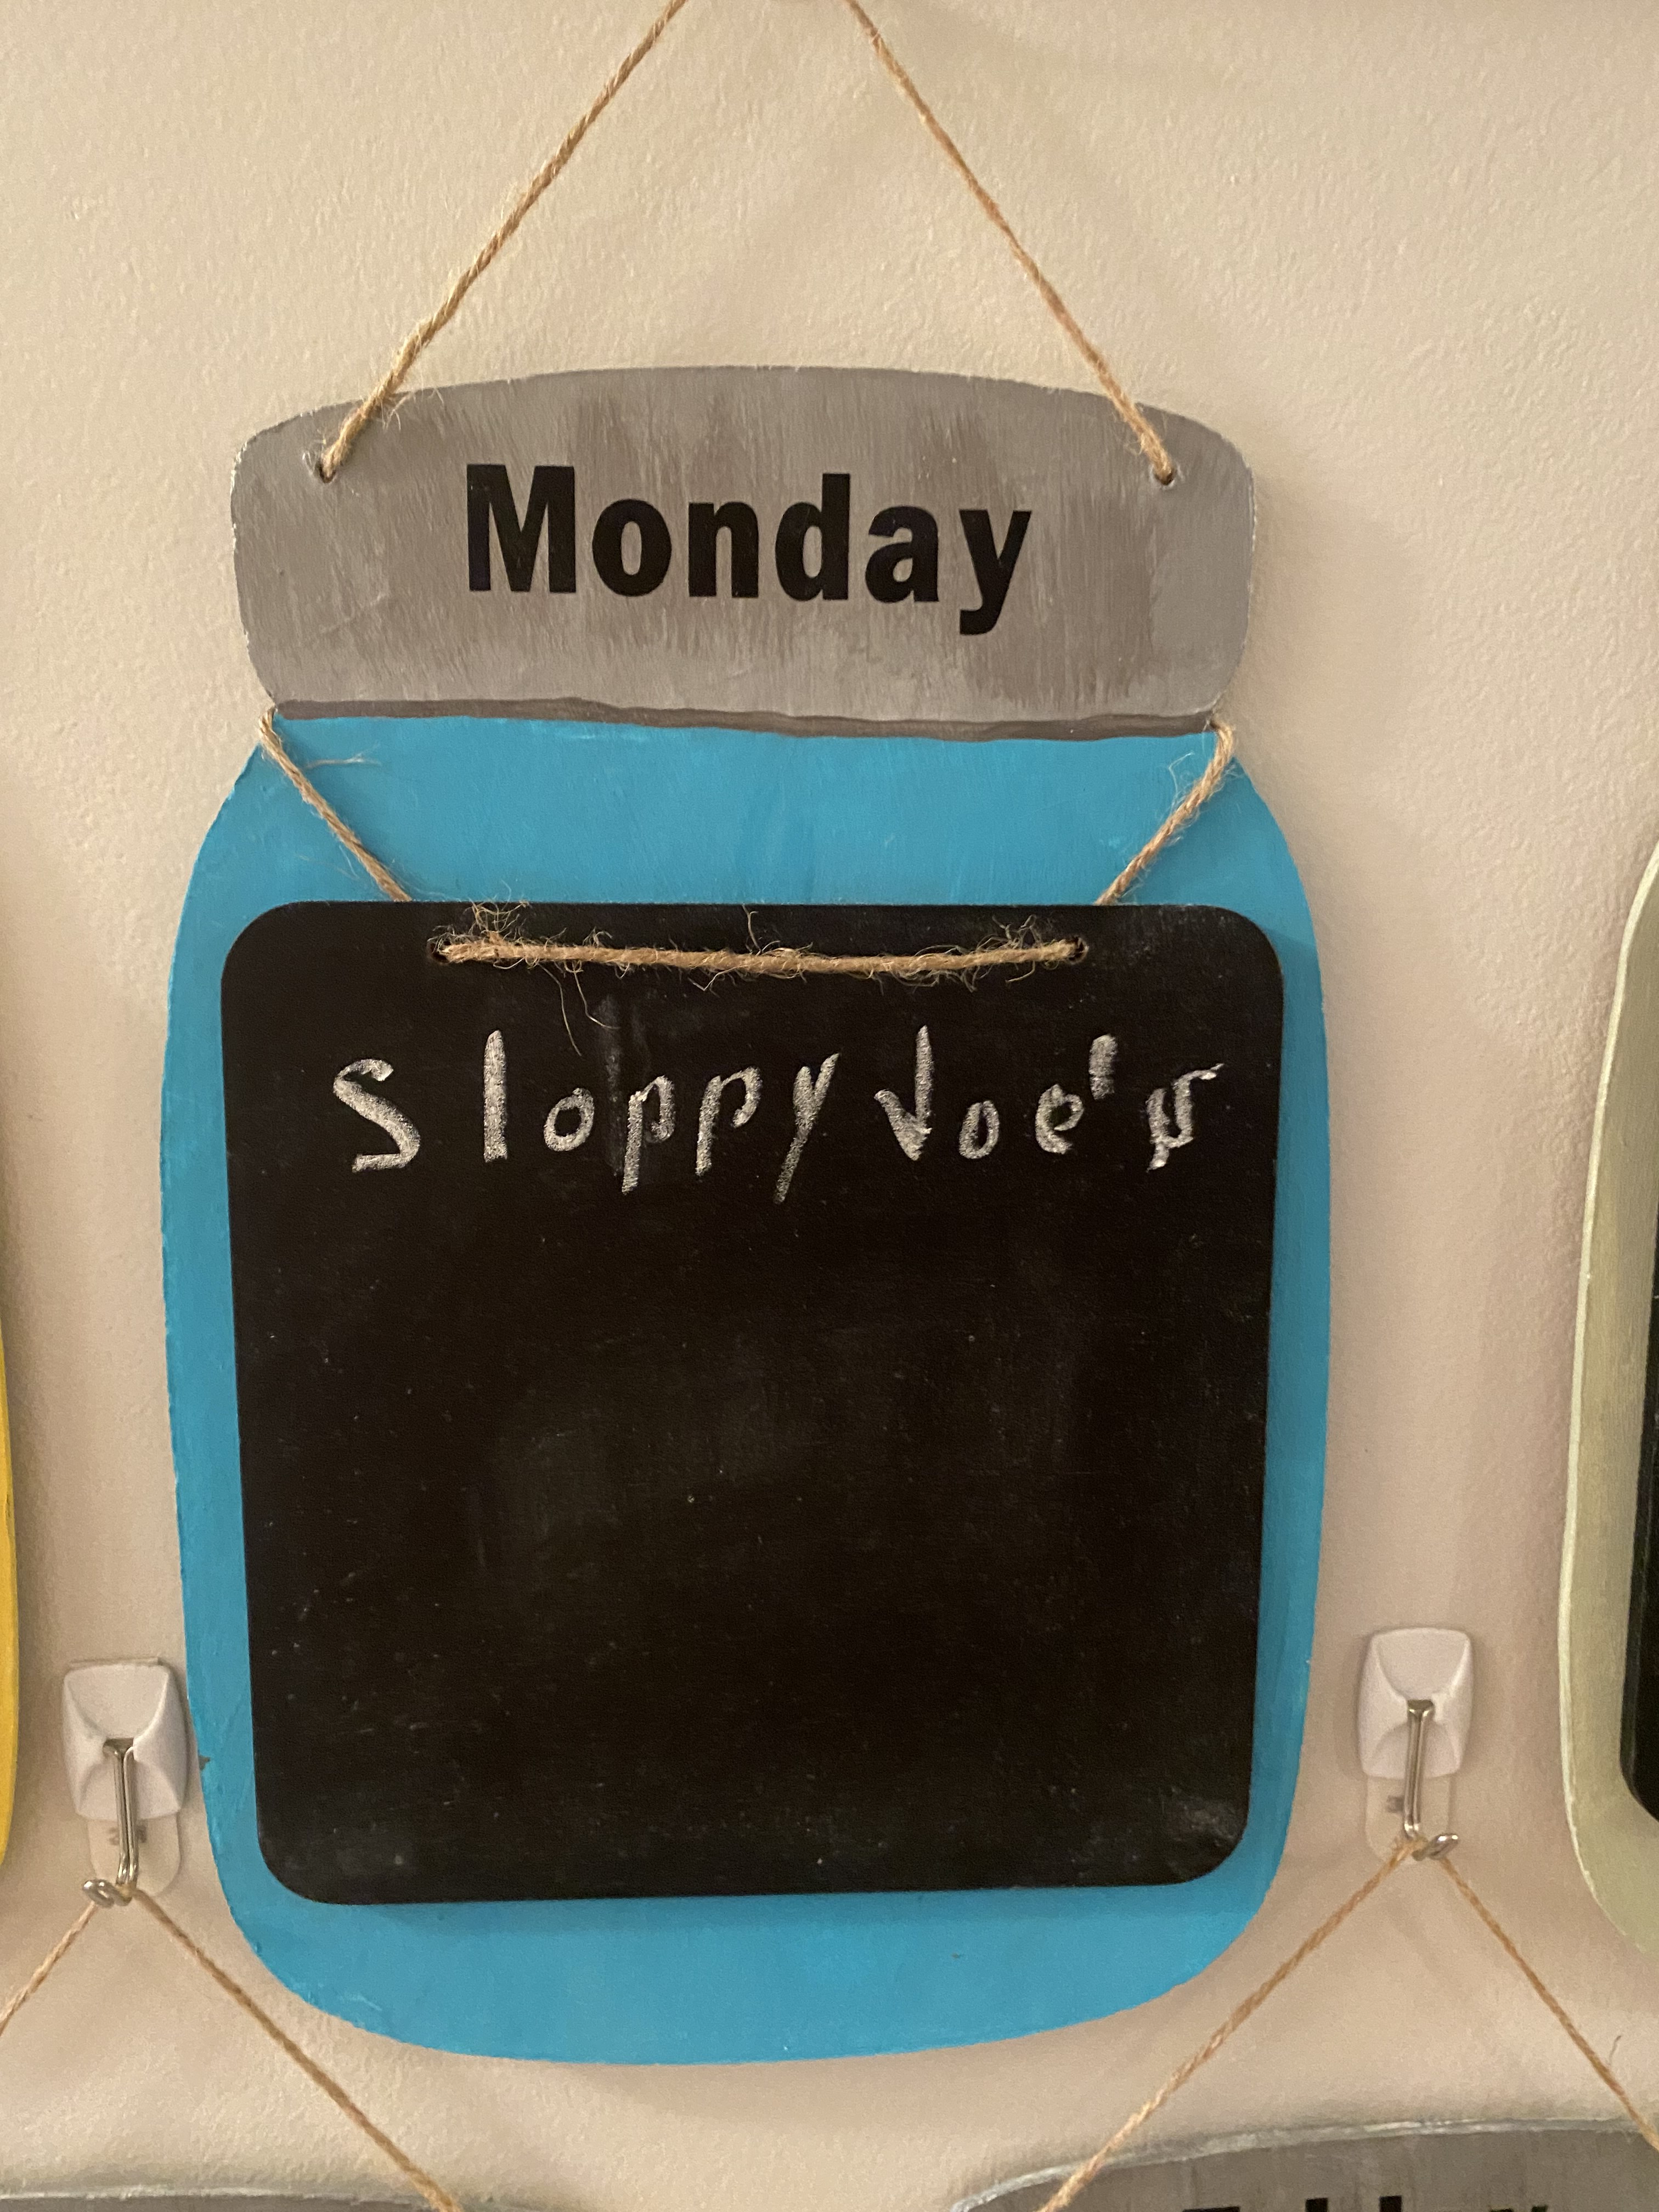
I love these so much. It was a lot of work but I feel like it really paid off. Normally I would do everything one color but I want a more colorful kitchen so I picked colors that are in my kitchen, These are not only cute but functional. Make sure you prime the chalk boards by rubbing chalk all over them then erasing them. That way when you go to write on them the chalk will write. I hung these up with 3M hooks. If I decide I want them somewhere else, I can easily move them.
Thank you so much for joining me today. I have a Christmas in July post coming soon and Yellow Butterfly is moving to YouTube so be on the look out. Please Like, Comment, Share, and Subscribe. Also find me on Instagram and Facebook under Yellow Butterfly Craft Designs.
Have a wonderful weekend!!!
Melissa McGuire
Supplies
Wooden Mason Jars- Dollar Tree
Chalk Boards- Michael’s Craft Supply
Waverly Chalk Paint- Walmart
Twine- Hobby Lobby
Silver Metallic Paint- Walmart
Surebonder Hot Glue Gun and Hot Glue Sticks- Hobby Lobby
Cricut- Michael’s Craft Supply
651 Black Vinyl- Michael’s Craft Supply
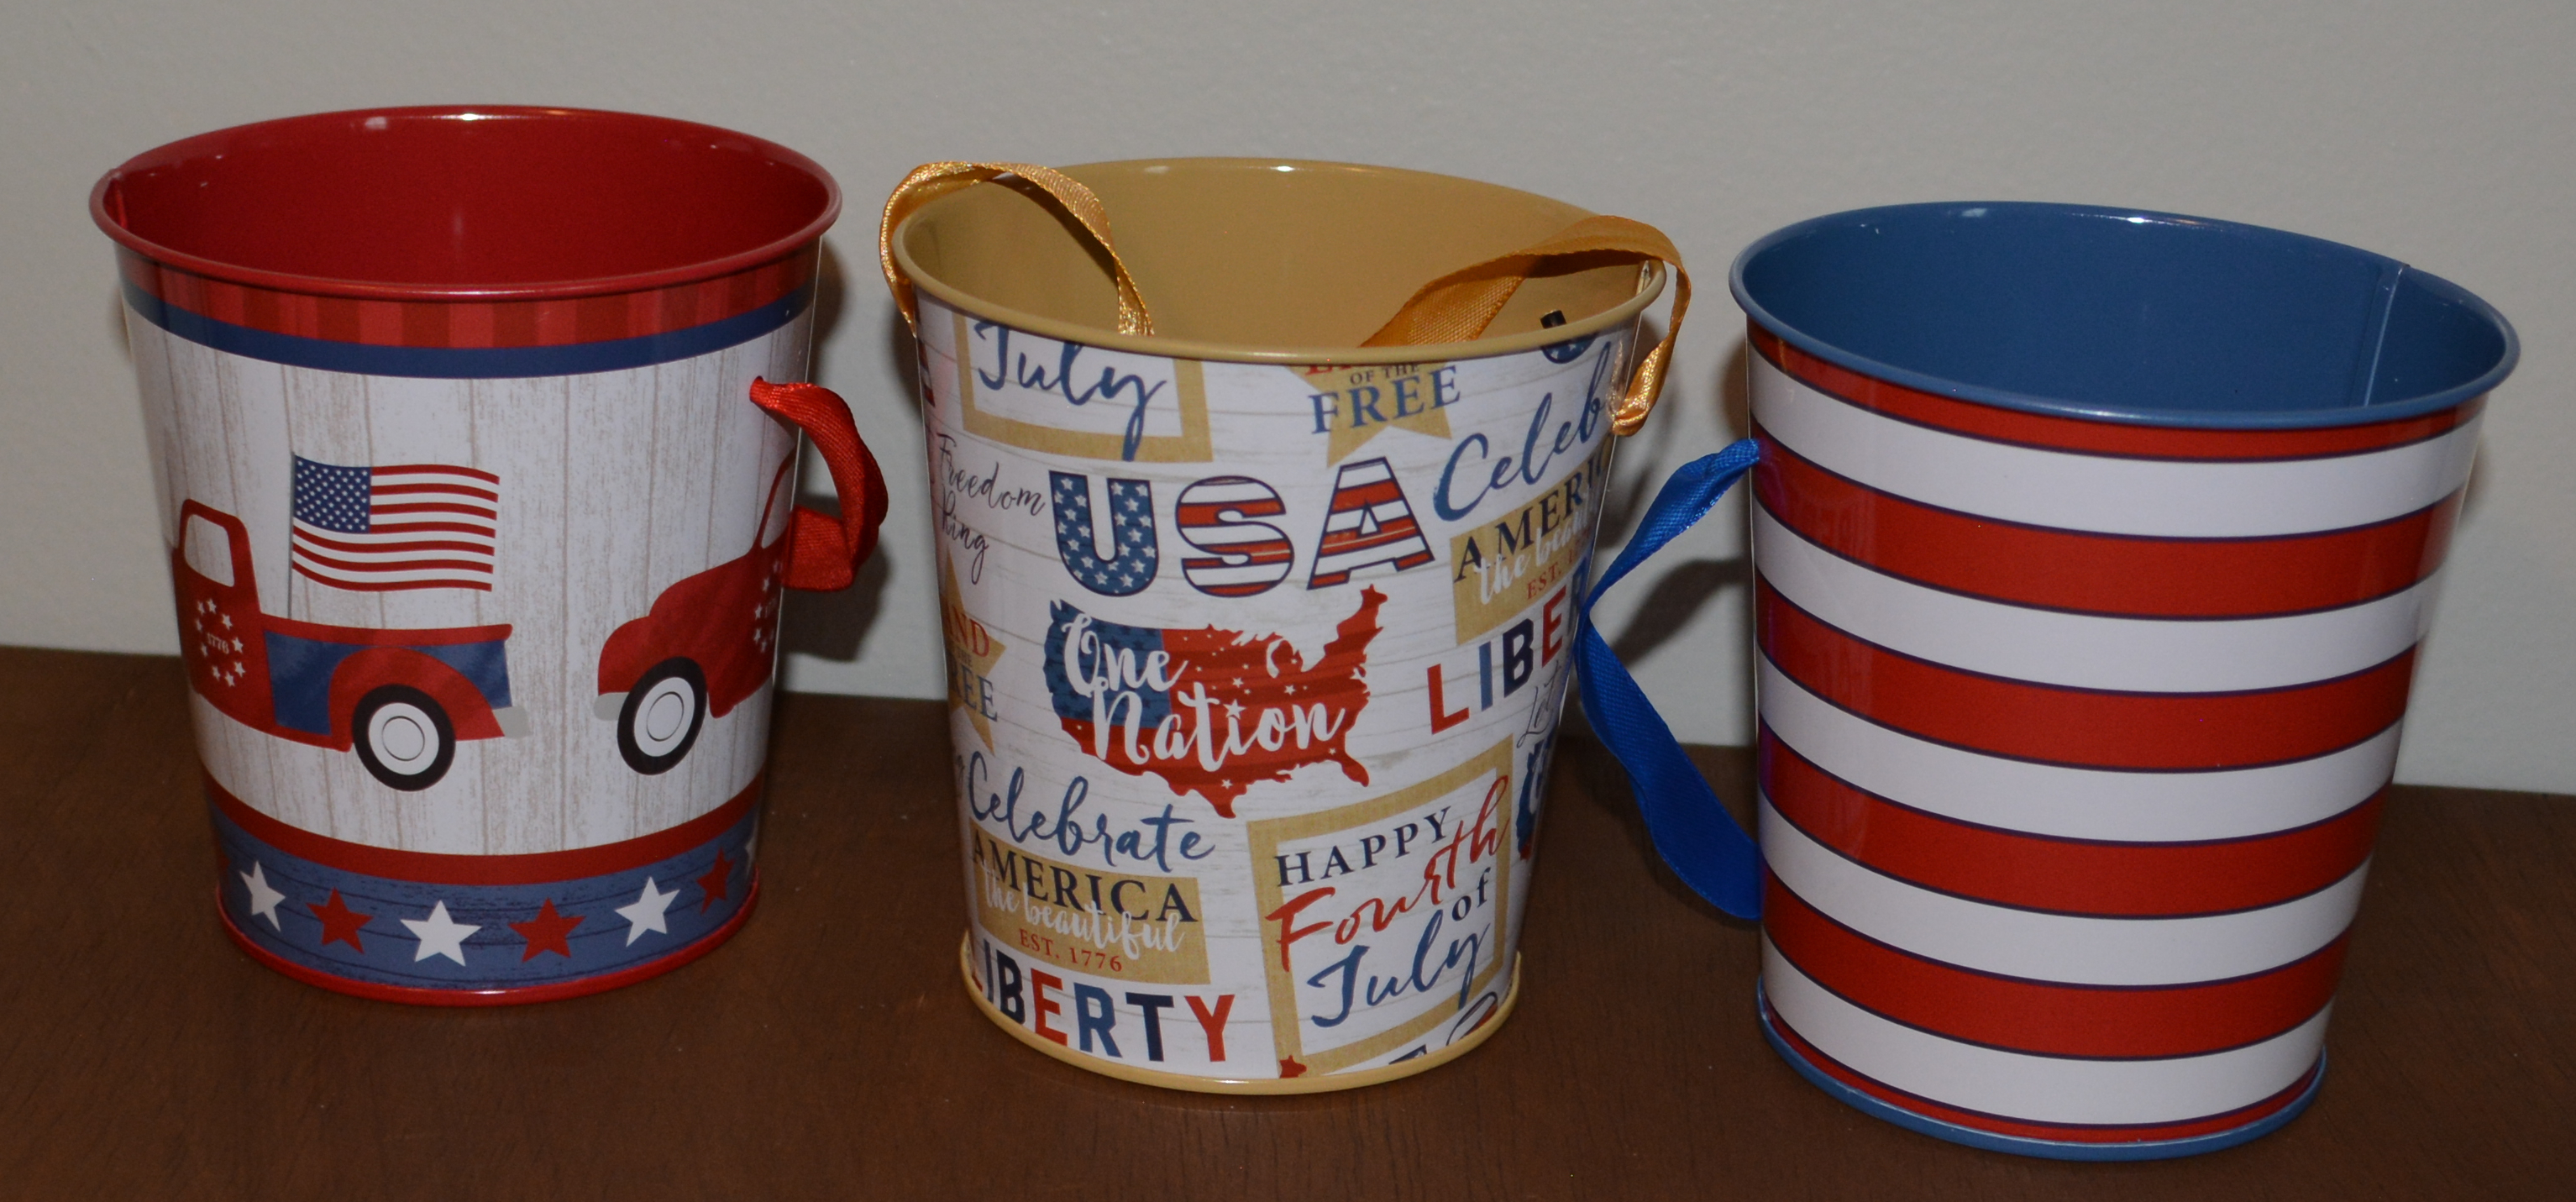
Welcome to day 4 for the 4 Days of the Fourth of July!! Happy Independence Day!!!! We are celebrating and spending time with some of our great friends that have become family. My boys love to swim and grill out. They also love the fire works. It is also the day that we reflect on why we have our freedom and that freedom is never free. There were those who paid the price for us to be free. What do you do on the Fourth of July?
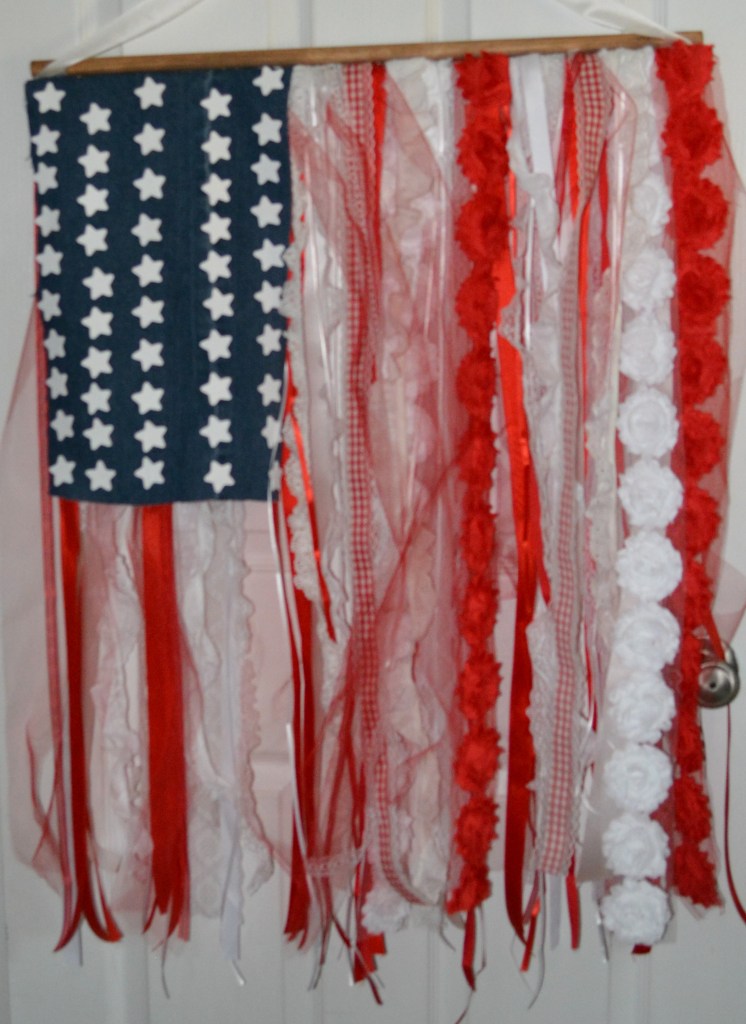
Now lets get to our final project. I have wanted to make a ribbon flag for I don’t know how long. My ribbon stash has been out of control for a while so I figured this was the perfect way to use some of it up.
Lets Get Started
Supplies
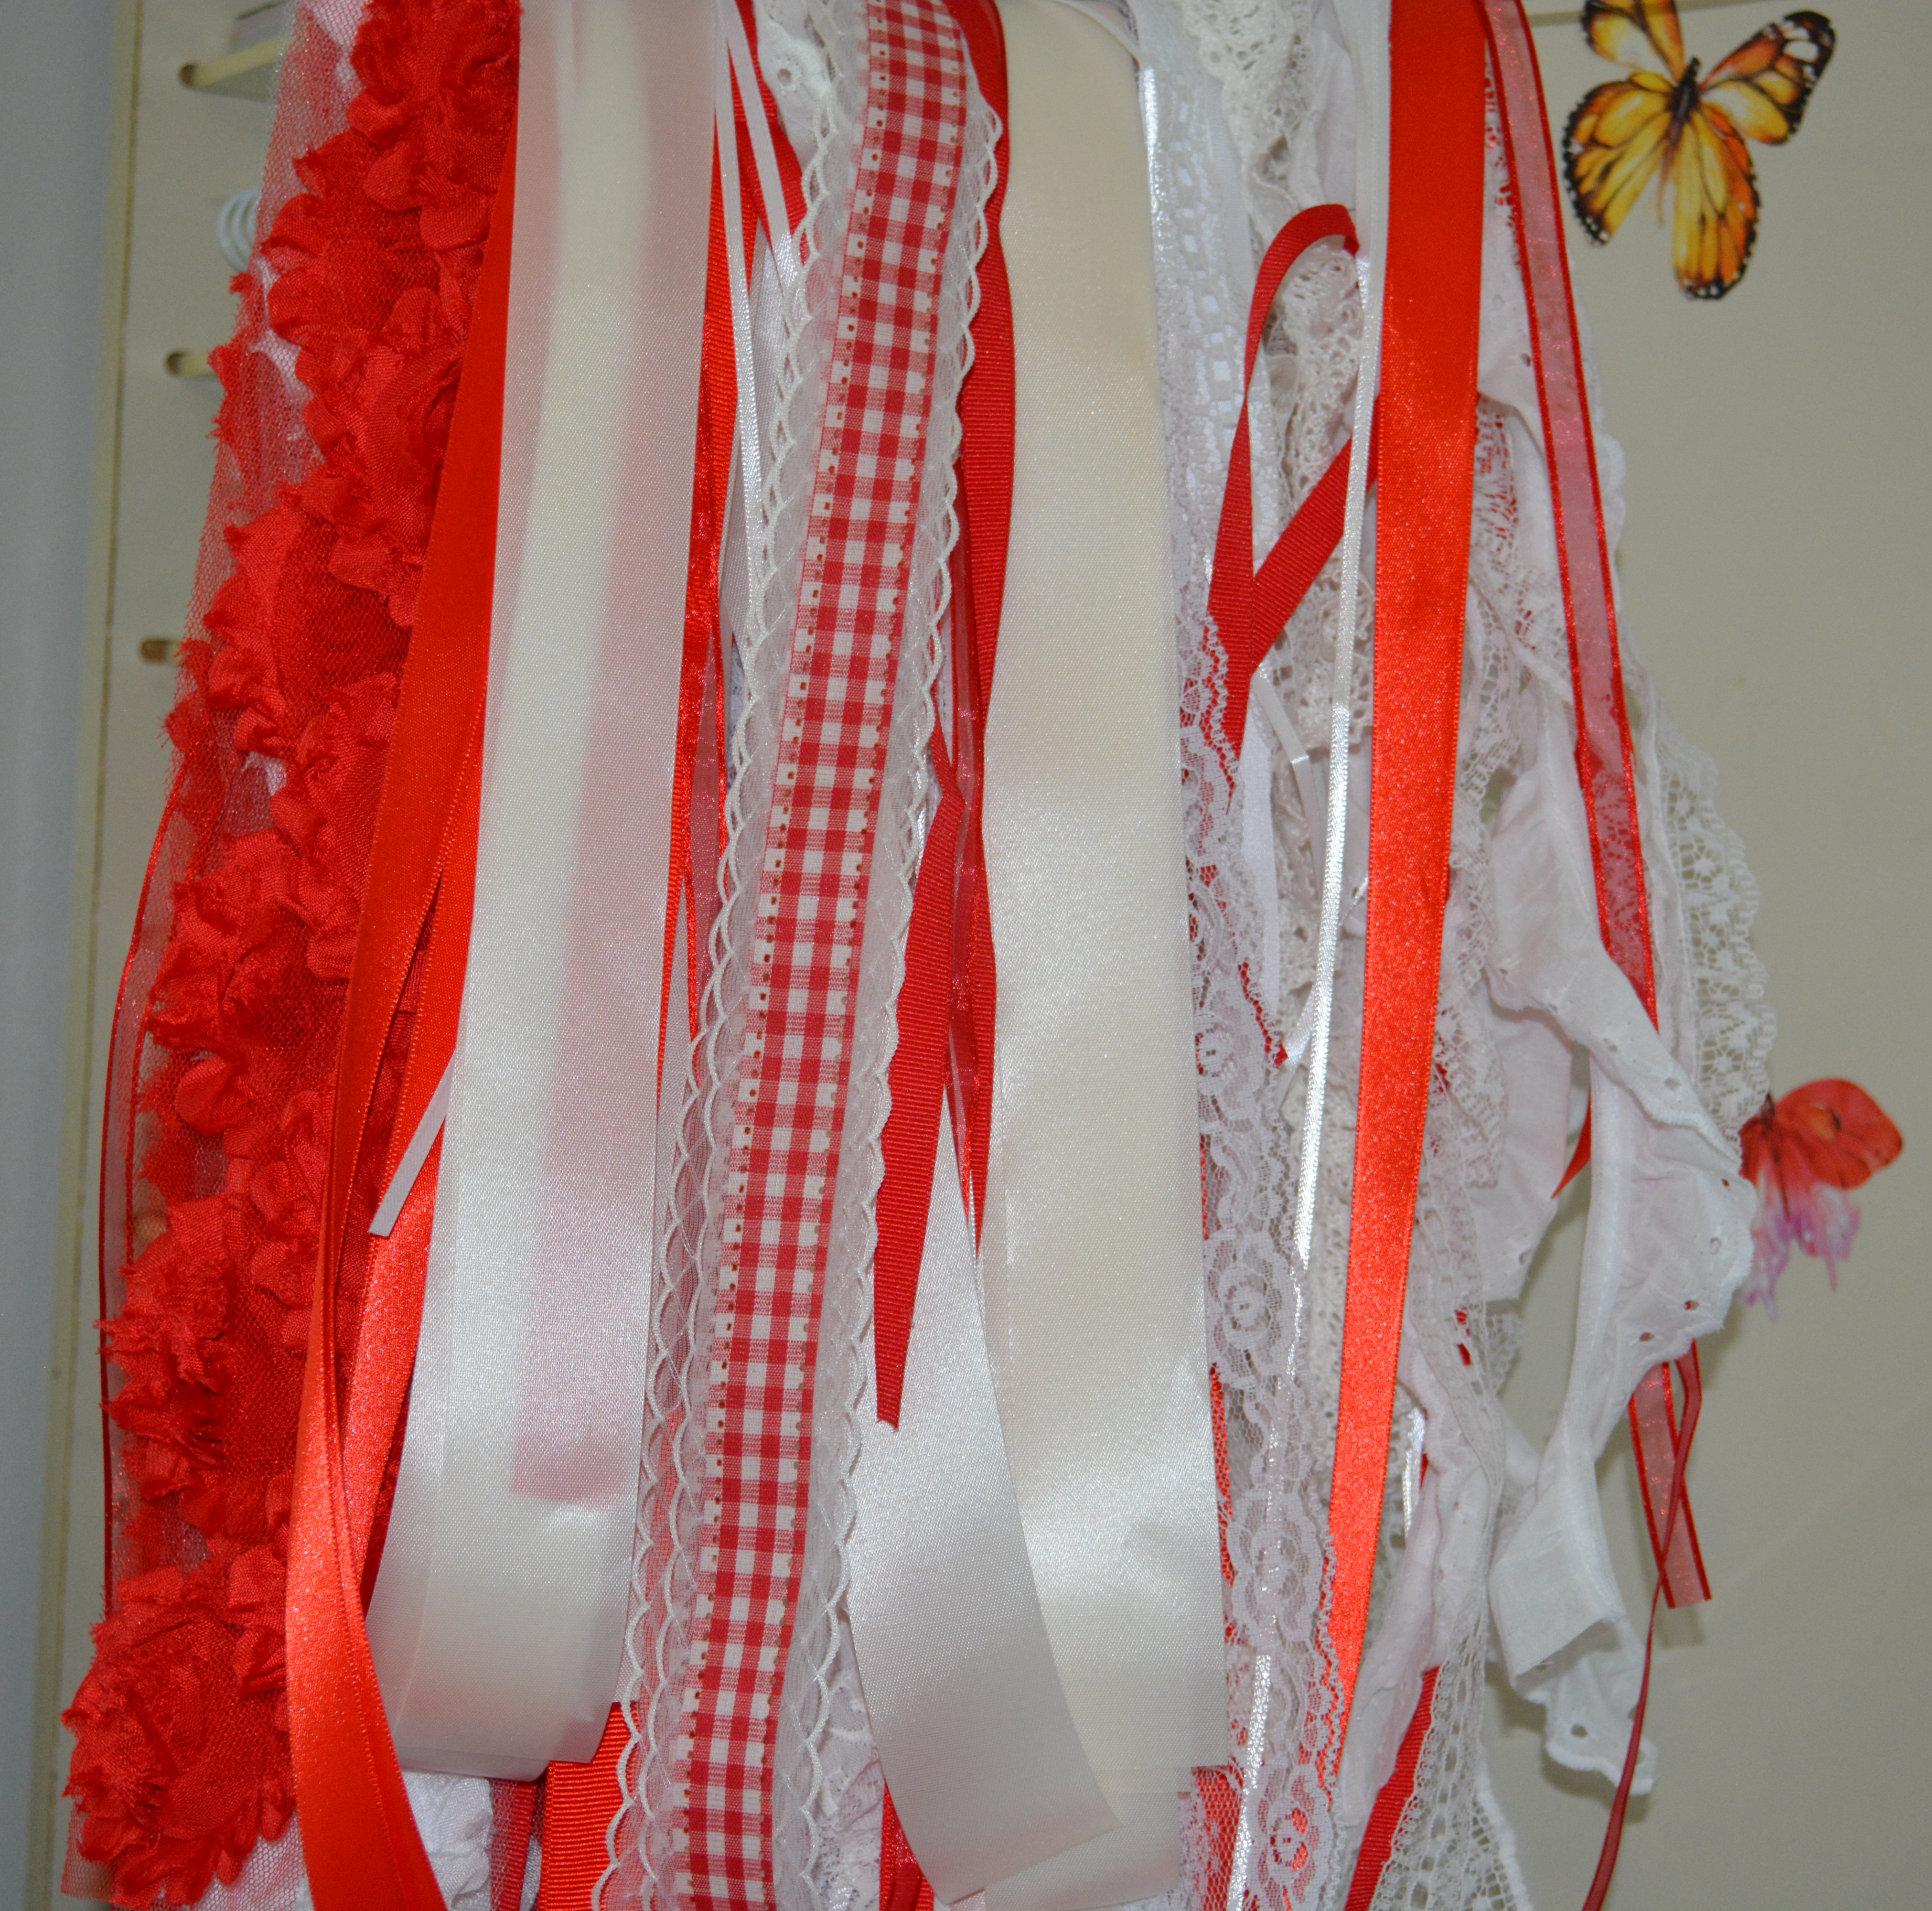

The supplies for this project are pretty simple. You need dowel rods, ribbon, wooden stars, a pair of old jeans, and hot glue. The size of the dowel rods are up to you. It depends on what size flag you want to make.
Now lets talk ribbon. For this flag you want several different kinds of red and white ribbon. It is the perfect time to use up scraps if they are long enough. I used around 8 or 9 different types and widths of ribbon and lace. The lace is special because it is from my mom’s craft stash and she is no longer on this earth.

To start this project I had my husband cut down my dowel rods. I started cutting my ribbon. Each ribbon strip is about the same length but not exact. The length of the rods and ribbon will depend on how big of a flag you want to make. After the dowel rods were cut, I used a mix of Antique Wax and water to make a stain and applied it to the rods. You can leave yours all natural if that is what you like.

I looked at a US flag to see how many stripes of each color there was. 13 stripes in all. I picked out ribbons of each color to start with. I glued a red ribbon to each end and one in the middle of one of the rods. Then spaced out the other 4 red pieces of ribbon. Now its time for the white ribbon. I just glued it in between the red ribbons. Now you have a guide to start layering ribbon on top of. I glued the plainer ribbons on the bottom and the lace and more texted ribbon on the top. Just keep making layers with all the ribbon making sure to keep the stripes of the flag.
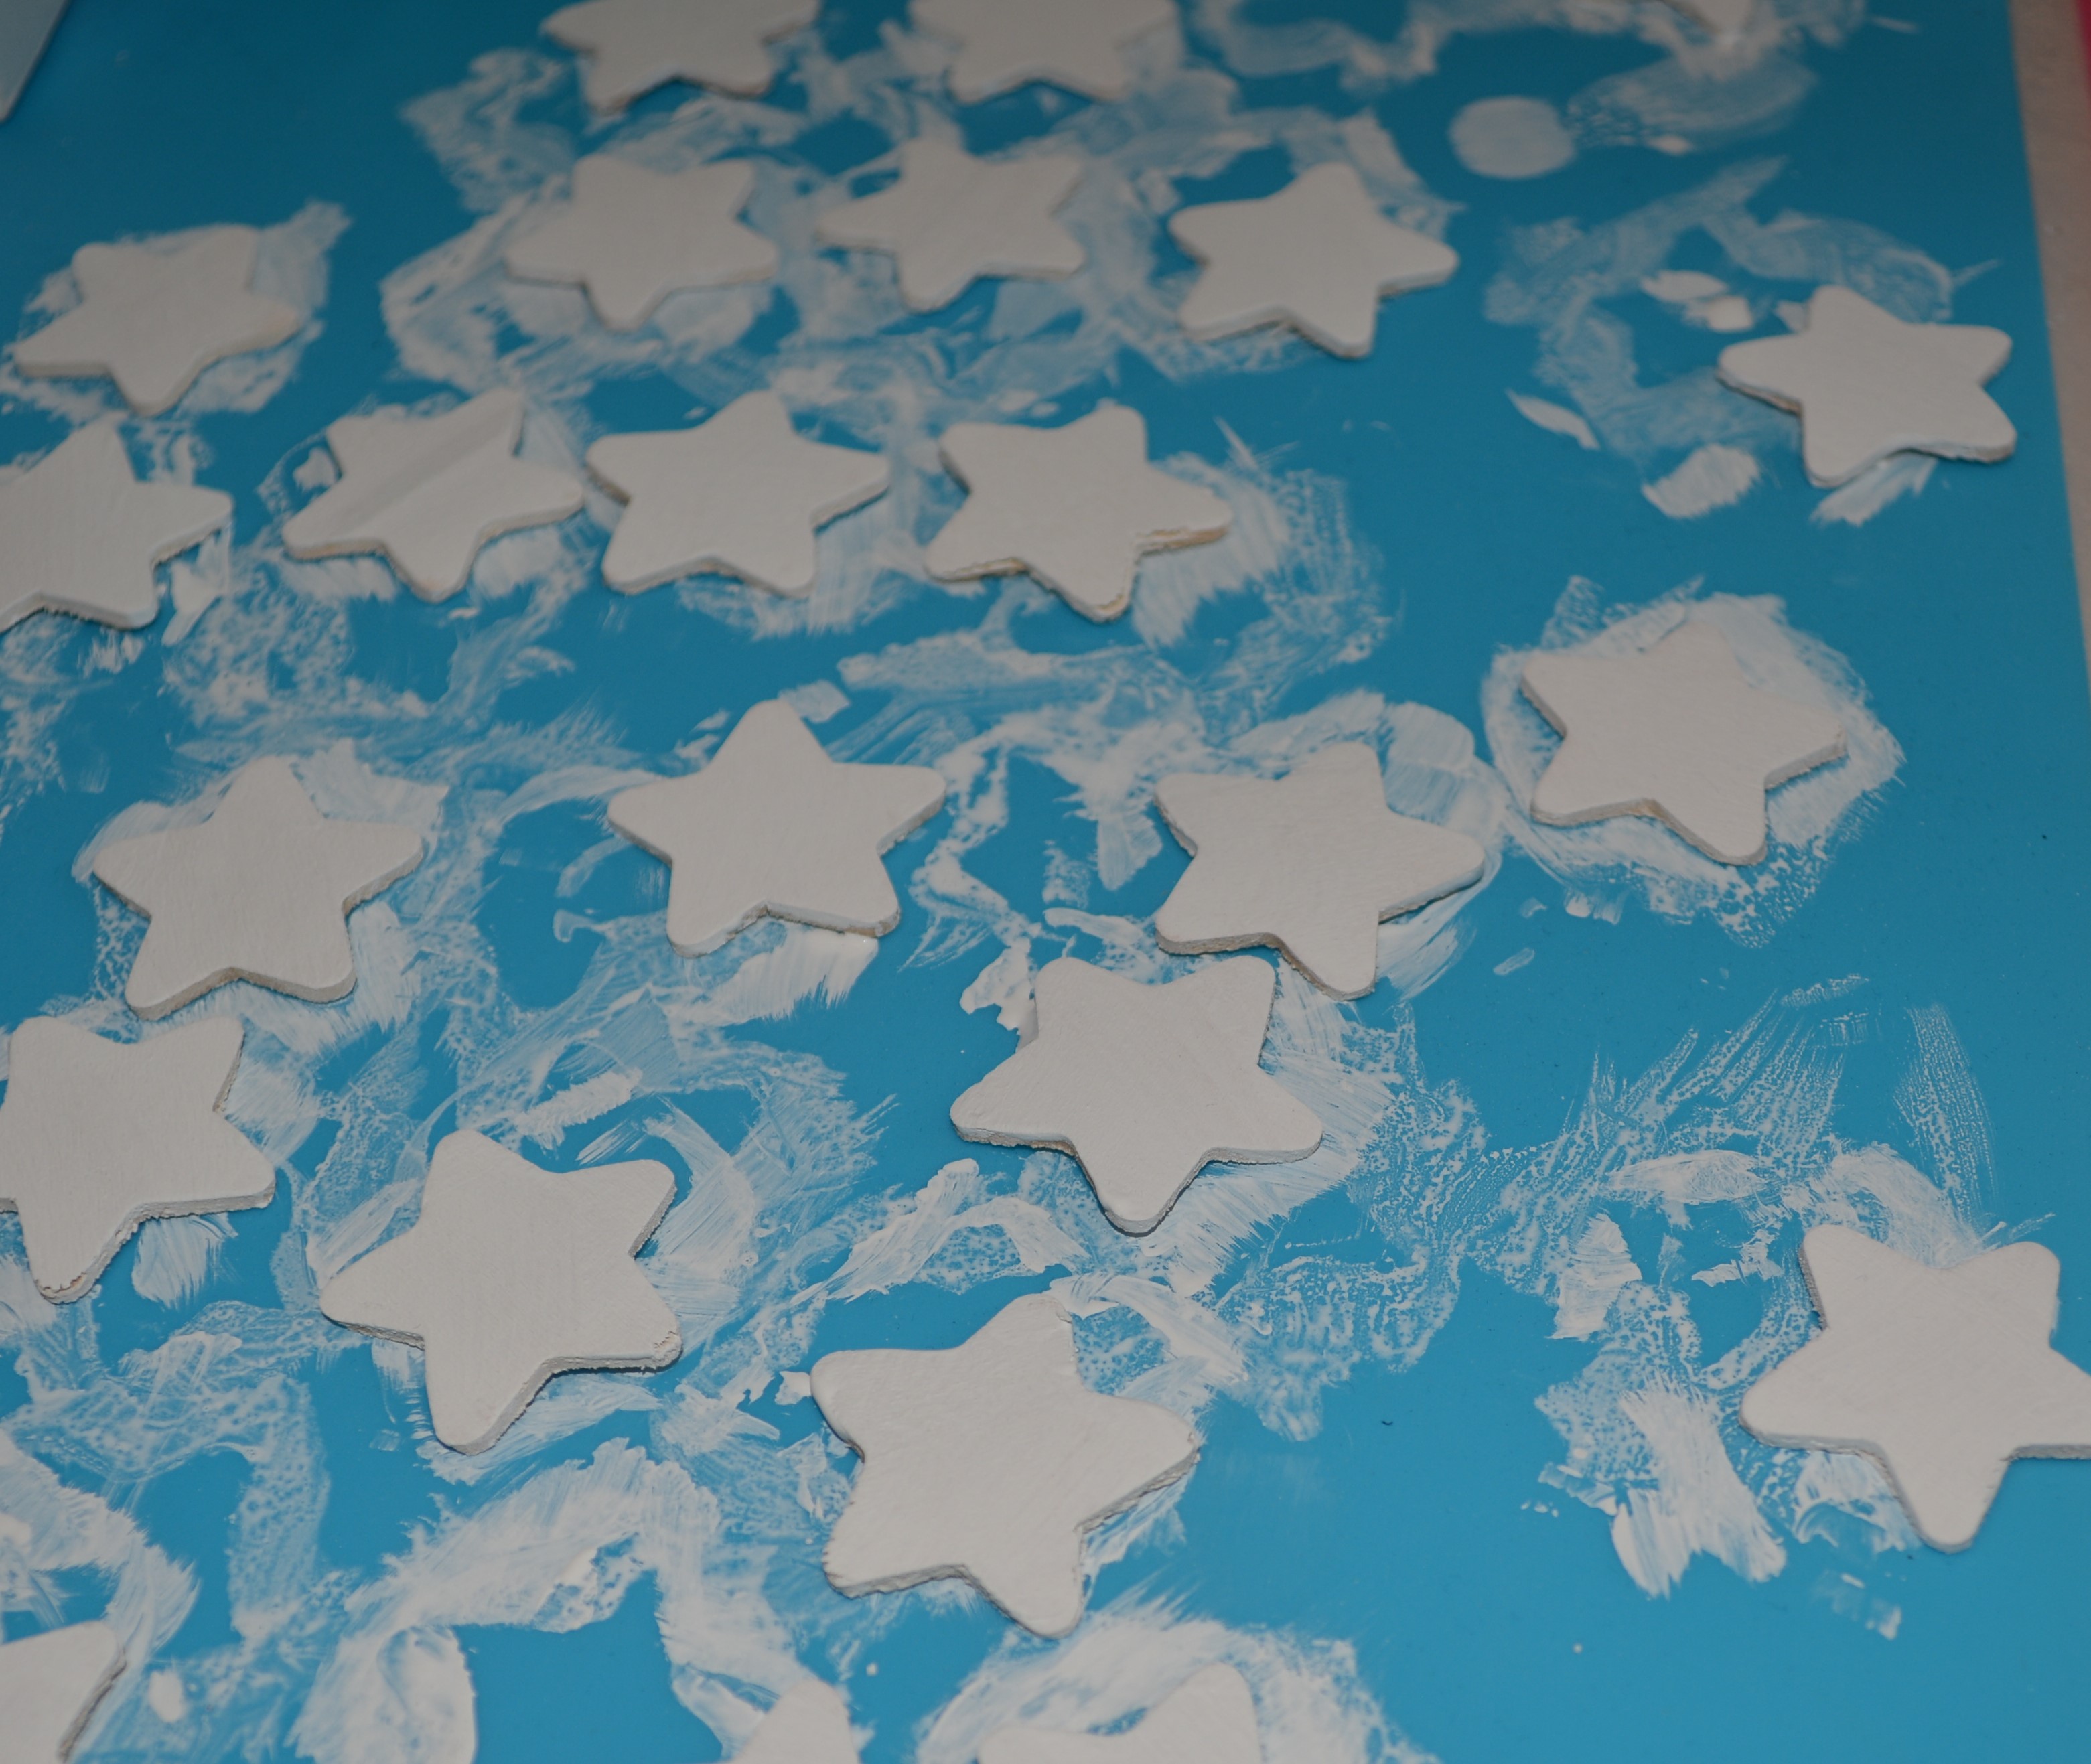
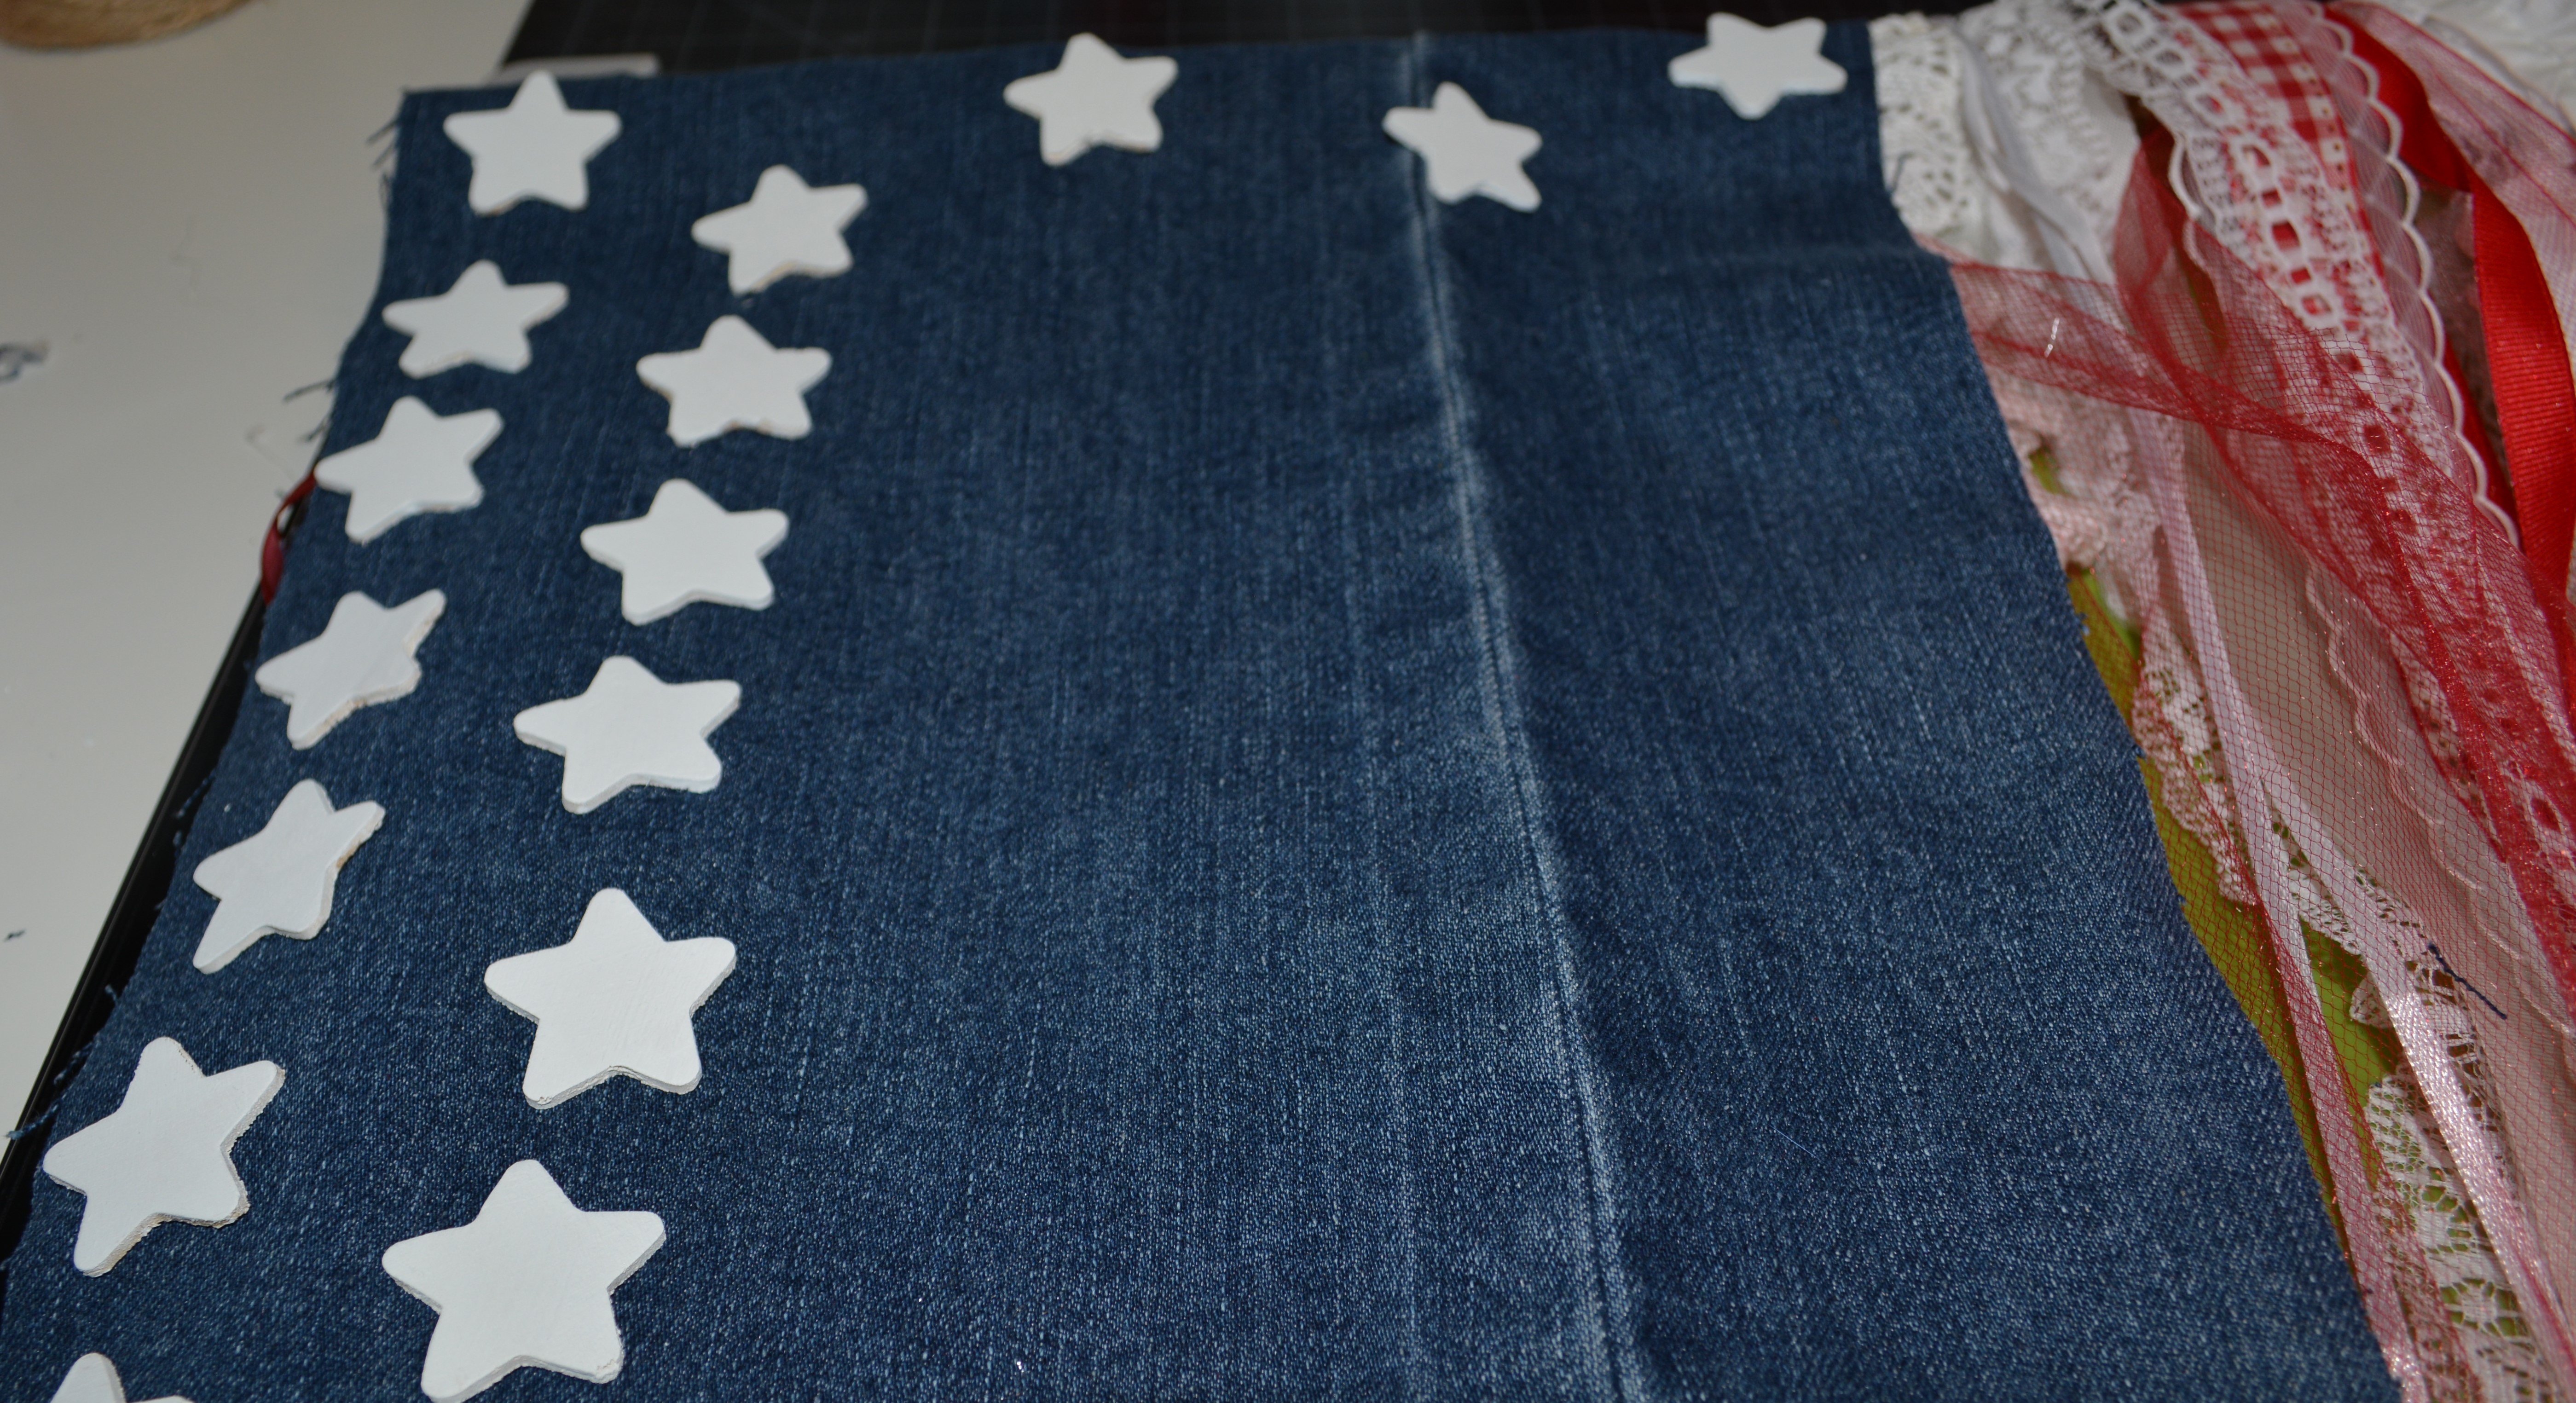
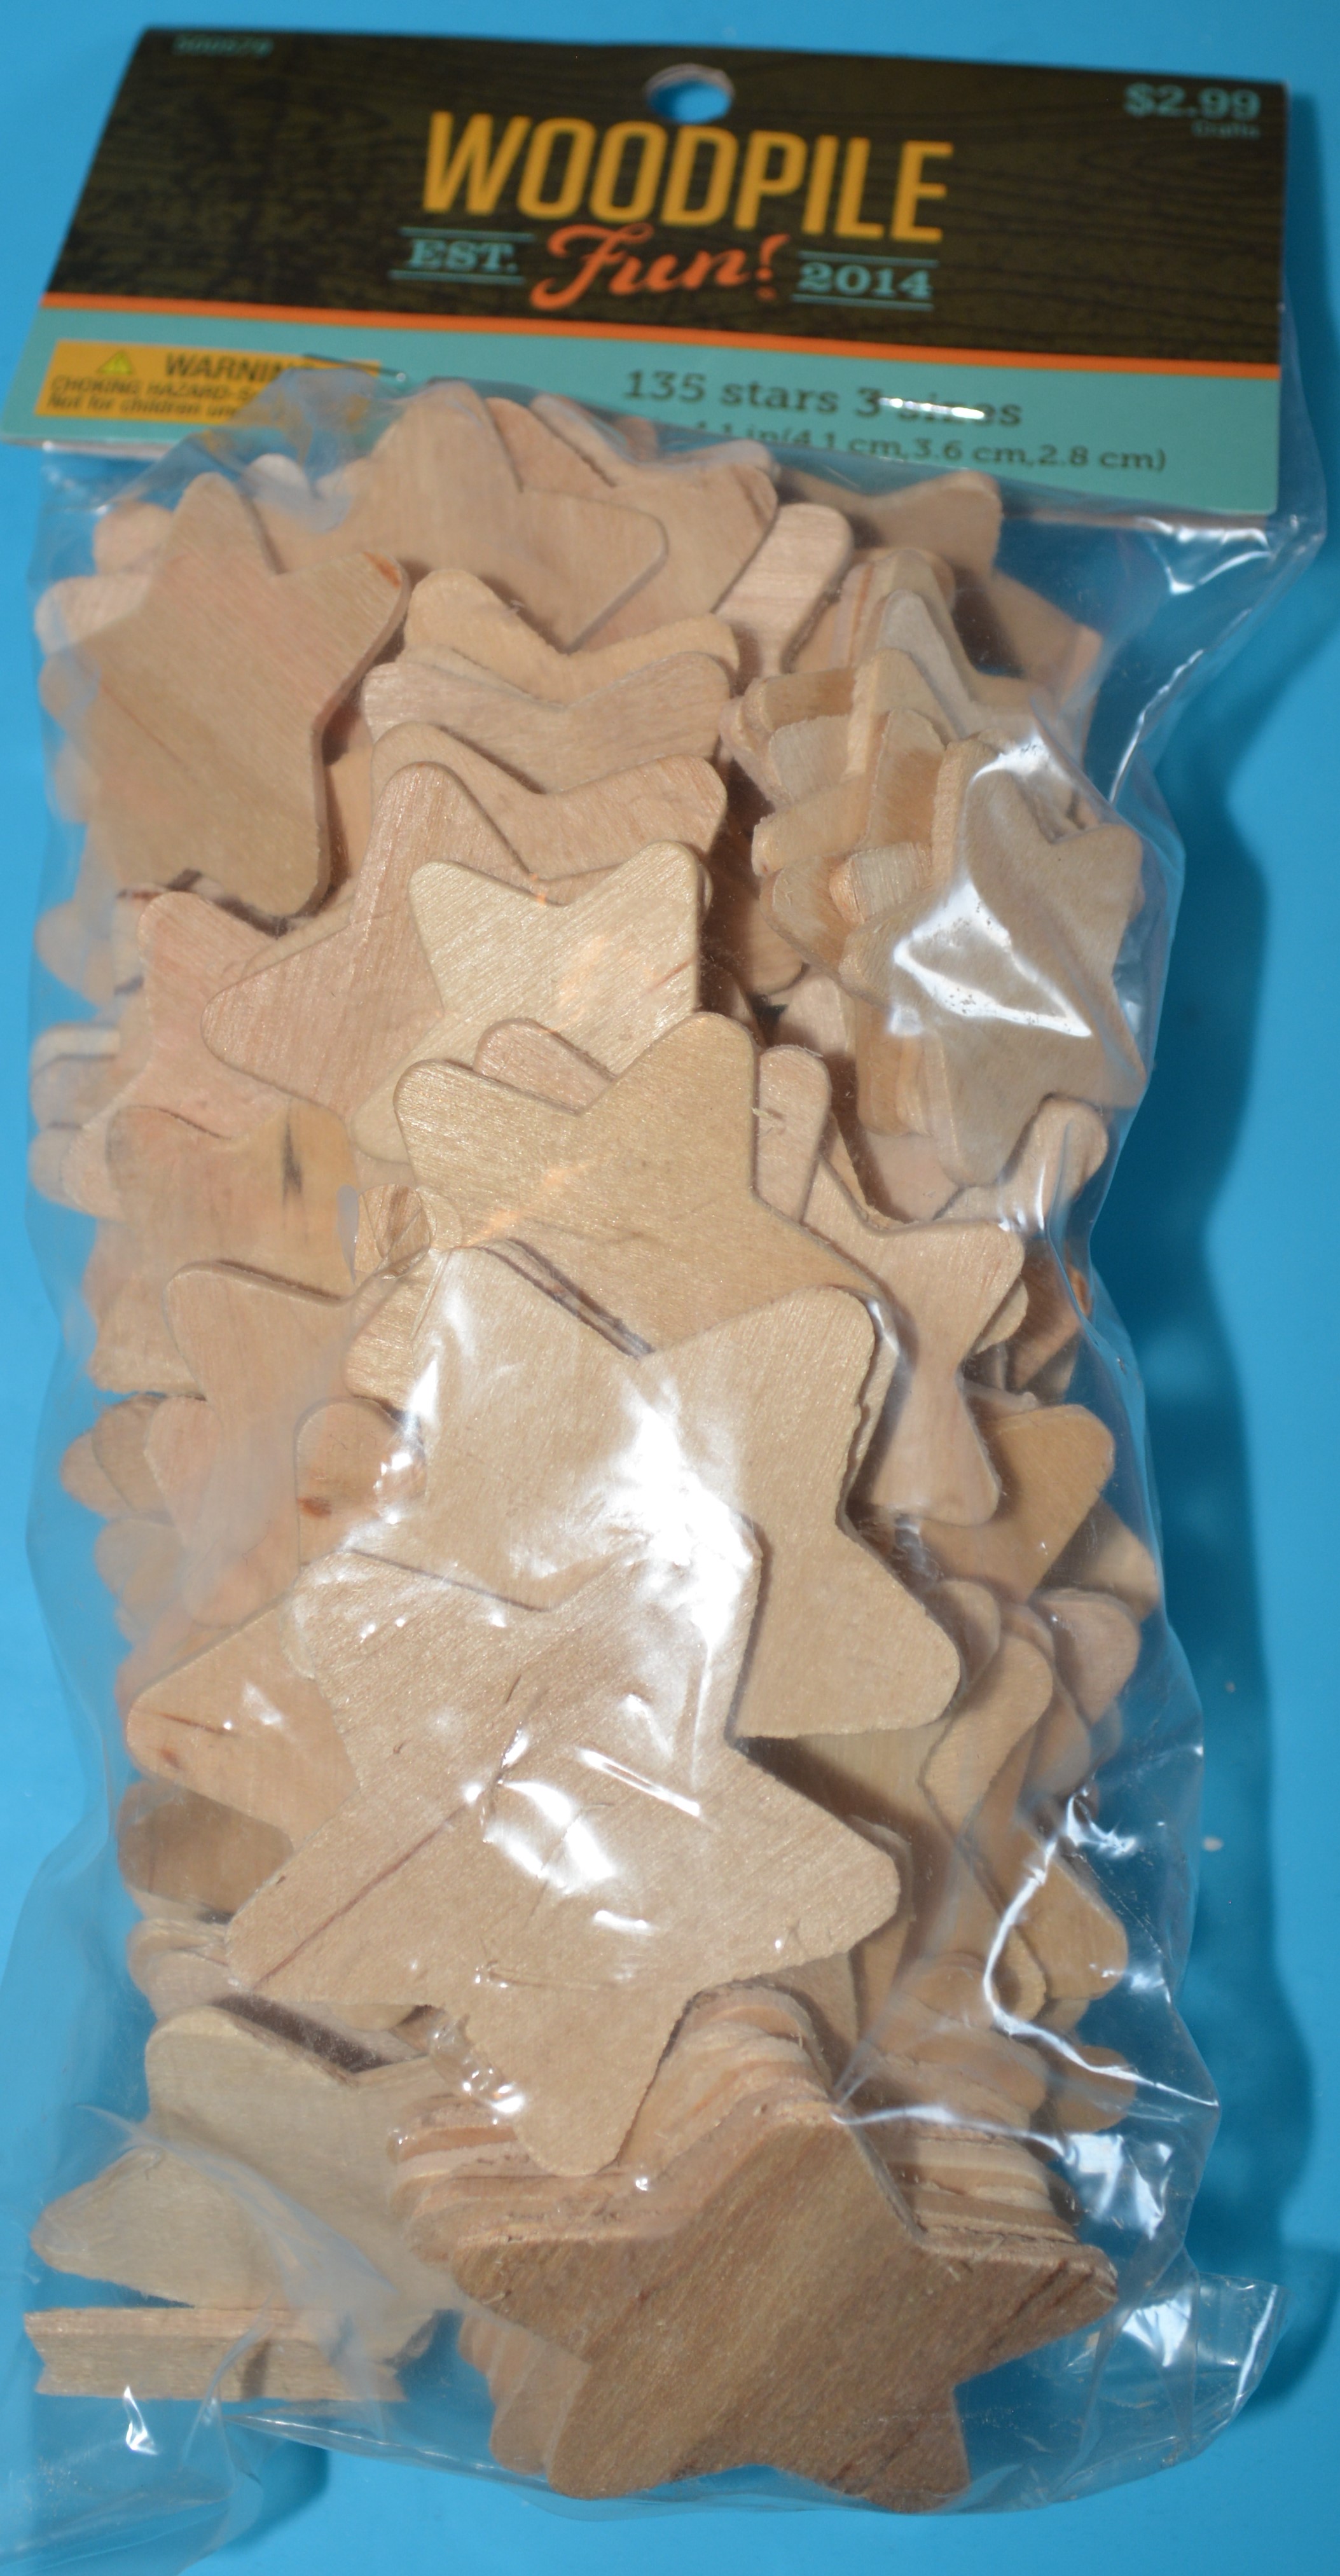
Once all of your ribbon is glued down, it is time to add the blue for our flag and the stars. I got an old pair of jeans at the thrift store. Yesterday I used those jeans to cover a cross wreath. Today I am cutting out a rectangle to serve as the blue piece to my flag. Make sure to take into account the part of the material that will be glued to the rod. From there I laid out 50 small stars I got from Hobby Lobby and I painted them with 2 coats of White Waverly Chalk Paint. While the stars are drying, I glued the jeans to the dowel rod in front of the ribbon. Once the stars were dry, I glued them down on the jean piece.

The final steps are to glue a piece of ribbon as a hanger. Then remember that other dowel rod. Take it and glue it right over top of where you glued all the ribbons down. This will hide all you glue and hold the hanger stable. That’s it!! Your done!!!
What a way to finish up our last few days of patriotic decor. I think this flag is my favorite out of everything I made this year. It is amazing. You could use this to make any kind of flag you wanted. Just pick your colors and follow the same steps. Please try it!!
Thank you for joining me!! Please Like, Share, Comment, and Subscribe. Also find me on Instagram, and Facebook under Yellow Butterfly Craft Designs.
I have some fun stuff coming up. I have some selves to DIY, things with lemons, and some fun honey themed crafts. Also fall is coming up fast!! Dollar Tree and Hobby Lobby are already putting up fall stock.
Have a wonderful and happy Fourth of July!! Please be safe too!
Melissa McGuire
Supplies
Dowel Rods- Hobby Lobby
Ribbon- Anywhere I find it cheap or on sale
Jeans- Thrift Store
Waverly Chalk Paint in White- Walmart
Wooden Stars- Hobby Lobby
Waverly Antique Wax- Walmart
Surebonder Hot Glue Gun and Hot Glue Sticks- Hobby Lobby
Gorilla Hot Glue Sticks- Walmart


Welcome back to day 3 of the 4 Days of the Fourth of July! Today we are going to look at a few wreaths. Both of these are made with items you might not think to use. I love a great wreath. I am not much on the big puffy ones though with lots of tulle. I had a lot of fun thinking outside of the box for these projects. Keep reading to see how far out of the box I went.
Lets Get Started
Project 1
Supplies


For this first wreath you will need some kind of wreath form. I got these small ones at Dollar Tree and they come 2 to a pack. To fill in the wreath I used scarfs from Dollar Tree. I also used wooden letters and a garden stake.

The first thing I did for this project was to paint my letters. If you do not want to paint your letters, that’s okay. My USA was black and I wanted them to match the scarves better. The next thing I did was start on the wreath. To do this I took a small piece of the scarf and pushed it up through the back of the wreath form and slid it to the edge of one of the side wire pieces. Then I took another small piece of the scarf and pushed it though the inside piece of the wreath. You will be creating loops alternating between pushing them through the bottom and top sections of the wreath form. I used 5 scarfs to go around this small form. If you get a bigger wreath form, you will need more scarfs. You repeat these steps all the way around the wreath. If you smash the scarfs together tight enough in each section (there are 4 sections) then you will not need to glue the scarf to the form.
The truck on the wreath is from a Dollar Tree garden stake. I just pulled the stick off of it. Then I hot glued the truck to the scarf wreath. Finally I glued each wooden USA letter on the top and that was it.

The old truck is still one of my favorite things. What do you think of the scarfs?? They make a really full wreath. If yours is not looking full then open the scarf loops and it will fill out. Keep your eye out for the small garden stakes too especially at Christmas. They can be the perfect addition to a craft project.
Project 2
Supplies
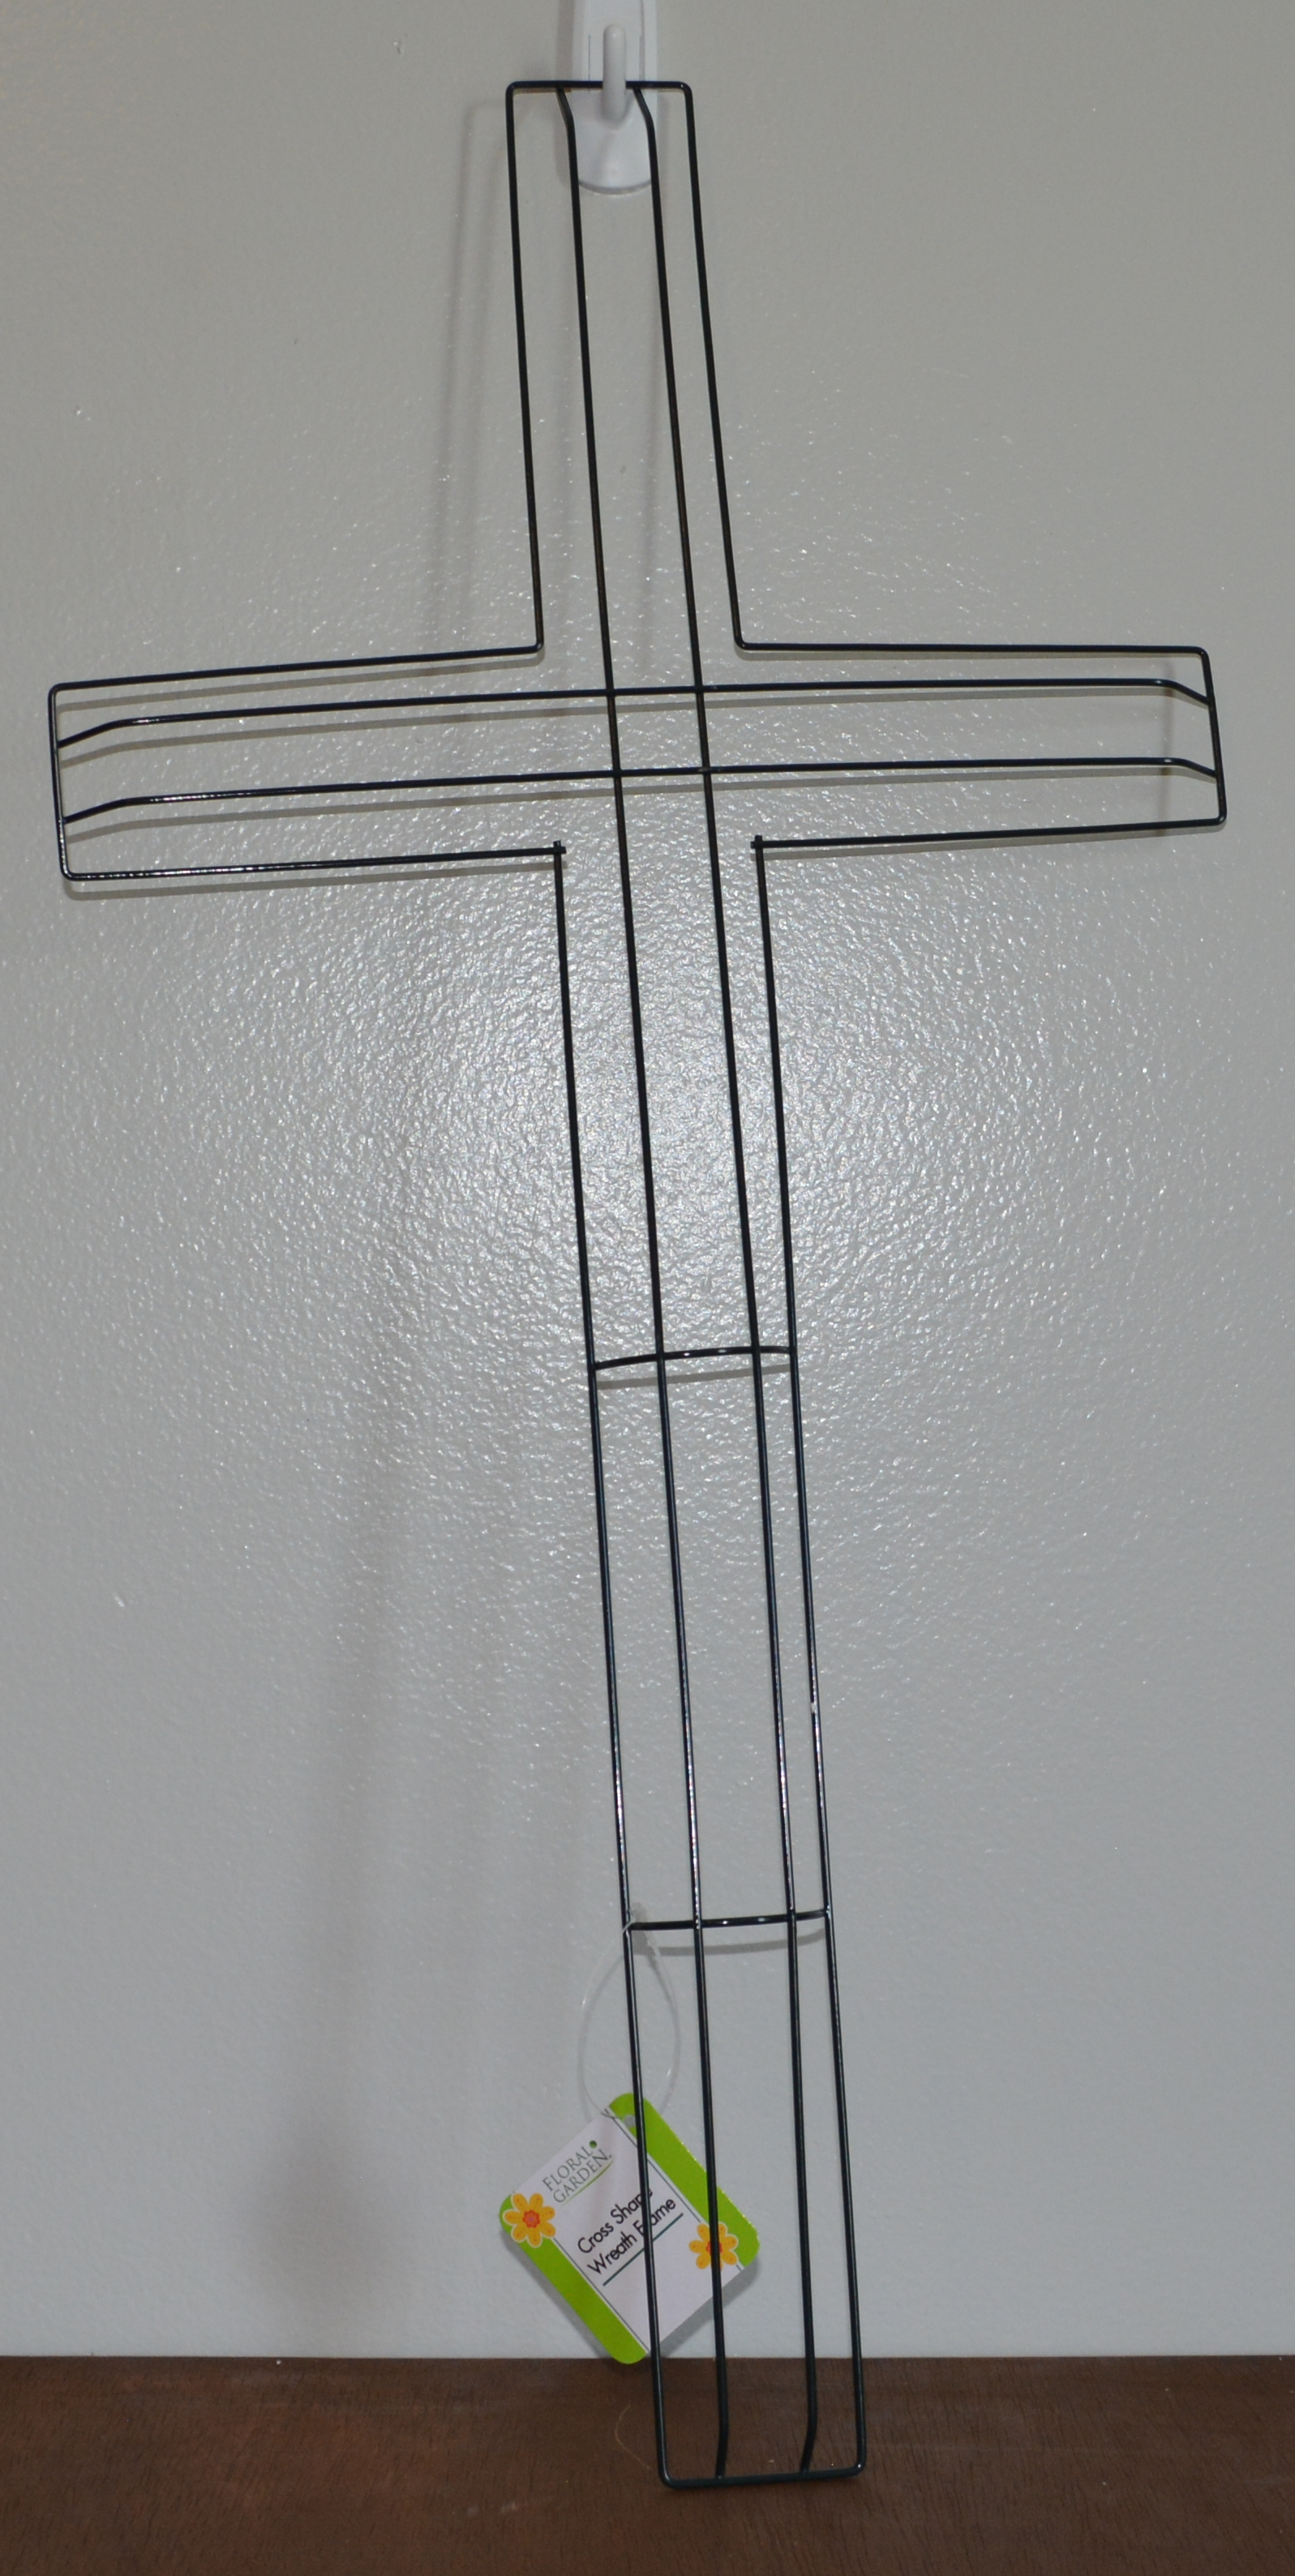

Lets move onto Project 2. You will need a cross wreath form or you can make one out of cardboard or foam board. A wooden plaque in a shape you like. I also used to tulle and paint. The unexpected item I used was a pair of blue jeans. I got a pair from a thrift store.

I started this project by painting the wooden plaque I had so it could be ready when I needed it. I painted it white with Waverly Chalk Paint. While that was drying I cut two strips from the pair of jeans. I made sure I laid the wreath form on the jeans and then cut the strips at least an 2 inches wider than the wreath form. That way you have enough material to wrap around the wreath form. I used two strips because it was much easier to do, one for the long side and one for the width. Once cut, I laid the jean strips right side down and placed the wreath form in the middle of the strip. After that I would pull up small pieces of the jean strip and start gluing it to the back of the form. I did this all the way around the wreath until the whole thing is covered.
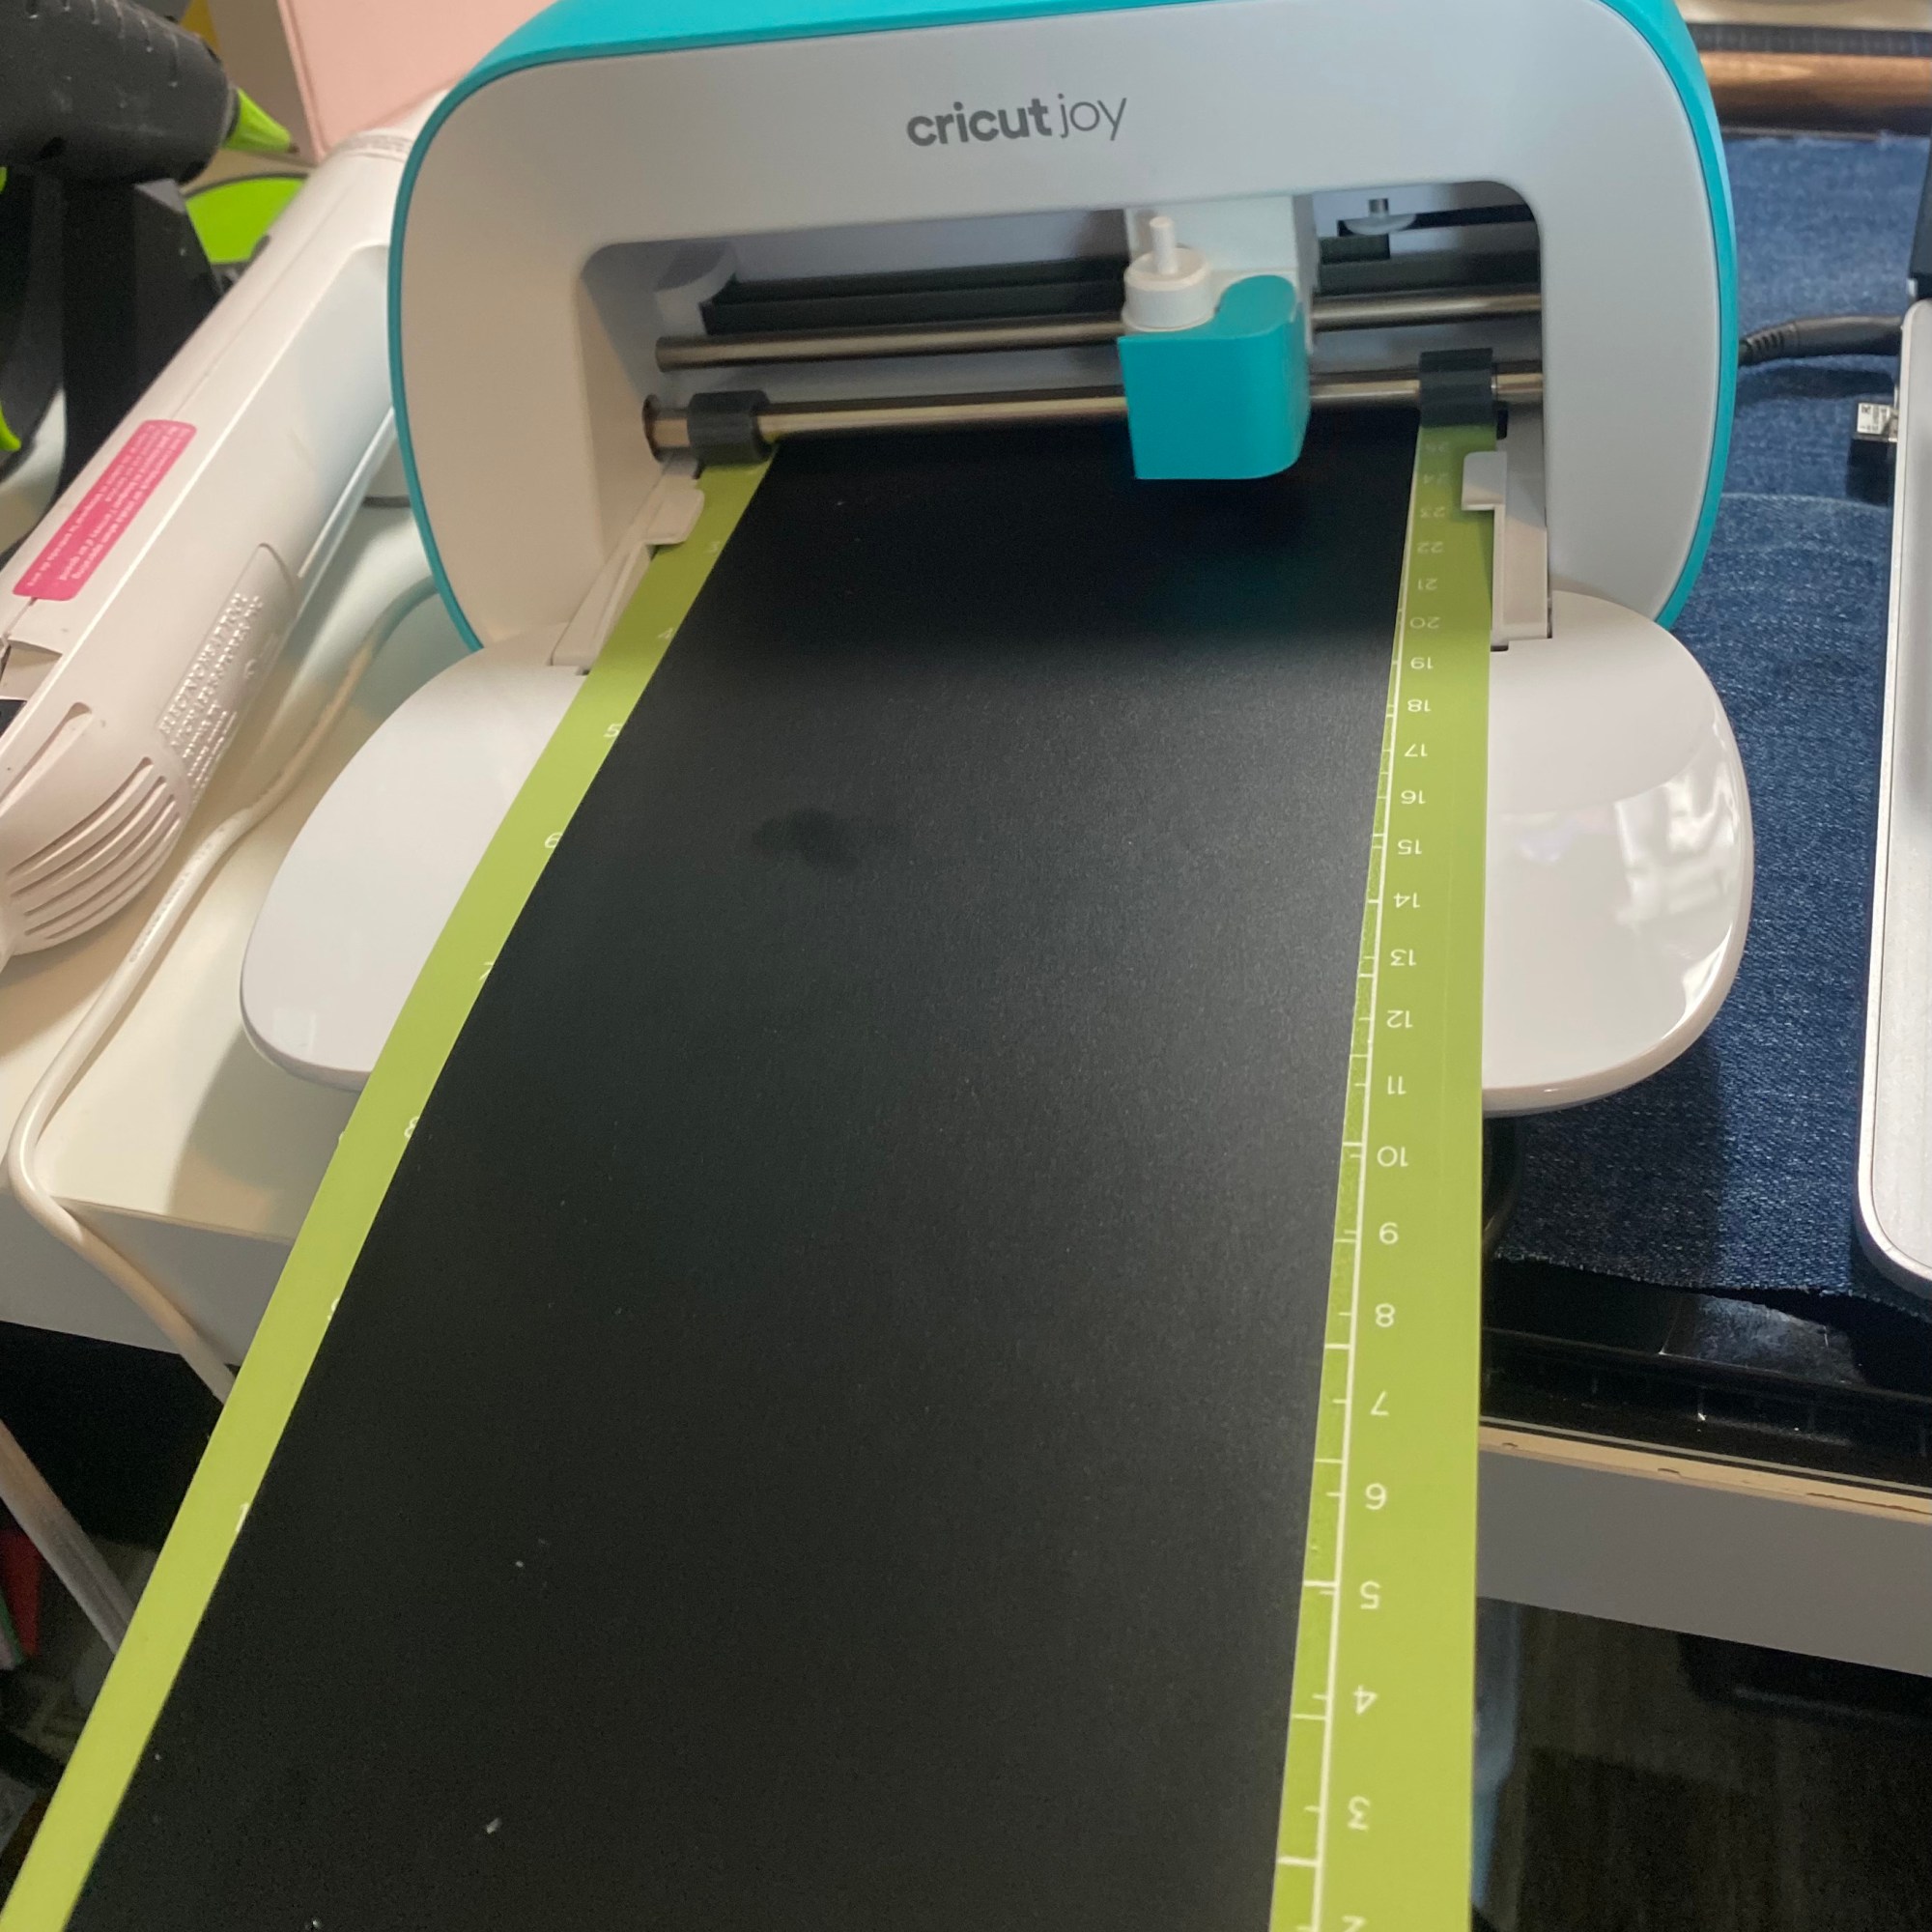
I wanted to words “All gave some, Some gave all” on the plaque. I used Cricut Design Space and my Cricut Joy to cut out the words and then applied them to my plaque after it was completely dry. The last thing I did was cut strips of tulle in red slightly longer than the plaque and in white slightly longer than the red. I hot glued the tulle in the middle of the cross, white first then the red. You will need lots of glue for this. Once the tulle is glued down then glue your plaque on top of that. And your done!! The bow is optional. I thought it needed something more. You could add flowers if you wanted.

This cross touches my heart. The words on the plaque are very dear to my family. We understand what that sacrifice is like. My husband served in the US military for over 15 years and we lost a few friends a long the way. I am proud to have this hanging in my home and I just love what it represents.
I truly hope these wreaths give you some inspiration to try out some different materials when crafting. I am going to try and use other new materials to stretch my creativity. You could use old scarfs from family member or old jeans from a child. Make wreaths into memory pieces. That would be amazing!!
I hope you have a wonderful day and join me on the 4th of July for one more project. Please find me on Instagram and Facebook under Yellow Butterfly Craft Designs and Like, Share, Comment, and Subscribe to all of my media platforms.
Thank you for joining me,
Melissa McGuire
Supplies
Project 1
Small Wreath Forms- Dollar Tree
5 Scarfs- Dollar Tree
USA Wooden Letters- Michael’s Craft Supply
Truck Garden Stake- Dollar Tree
Crimson, White, and Ocean Waverly Chalk Paint- Walmart
Project 2
Cross Wreath Form- Dollar Tree
Tulle- Hobby Lobby
Wooden Plaque- Dollar Tree
Jeans- Thrift Store
White Waverly Chalk Paint- Walmart


Welcome to day 2 of the 4 days of the Fourth of July!! Today we are going to make a few things for a 3-tiered tray or just a table top. I can not wait to show you how I created these 5 projects!! I love them all!!
I am going to show you how to do each project and at the end of the blog post I will show you how I styled everything.
Lets Get Started
Project 1
Supplies


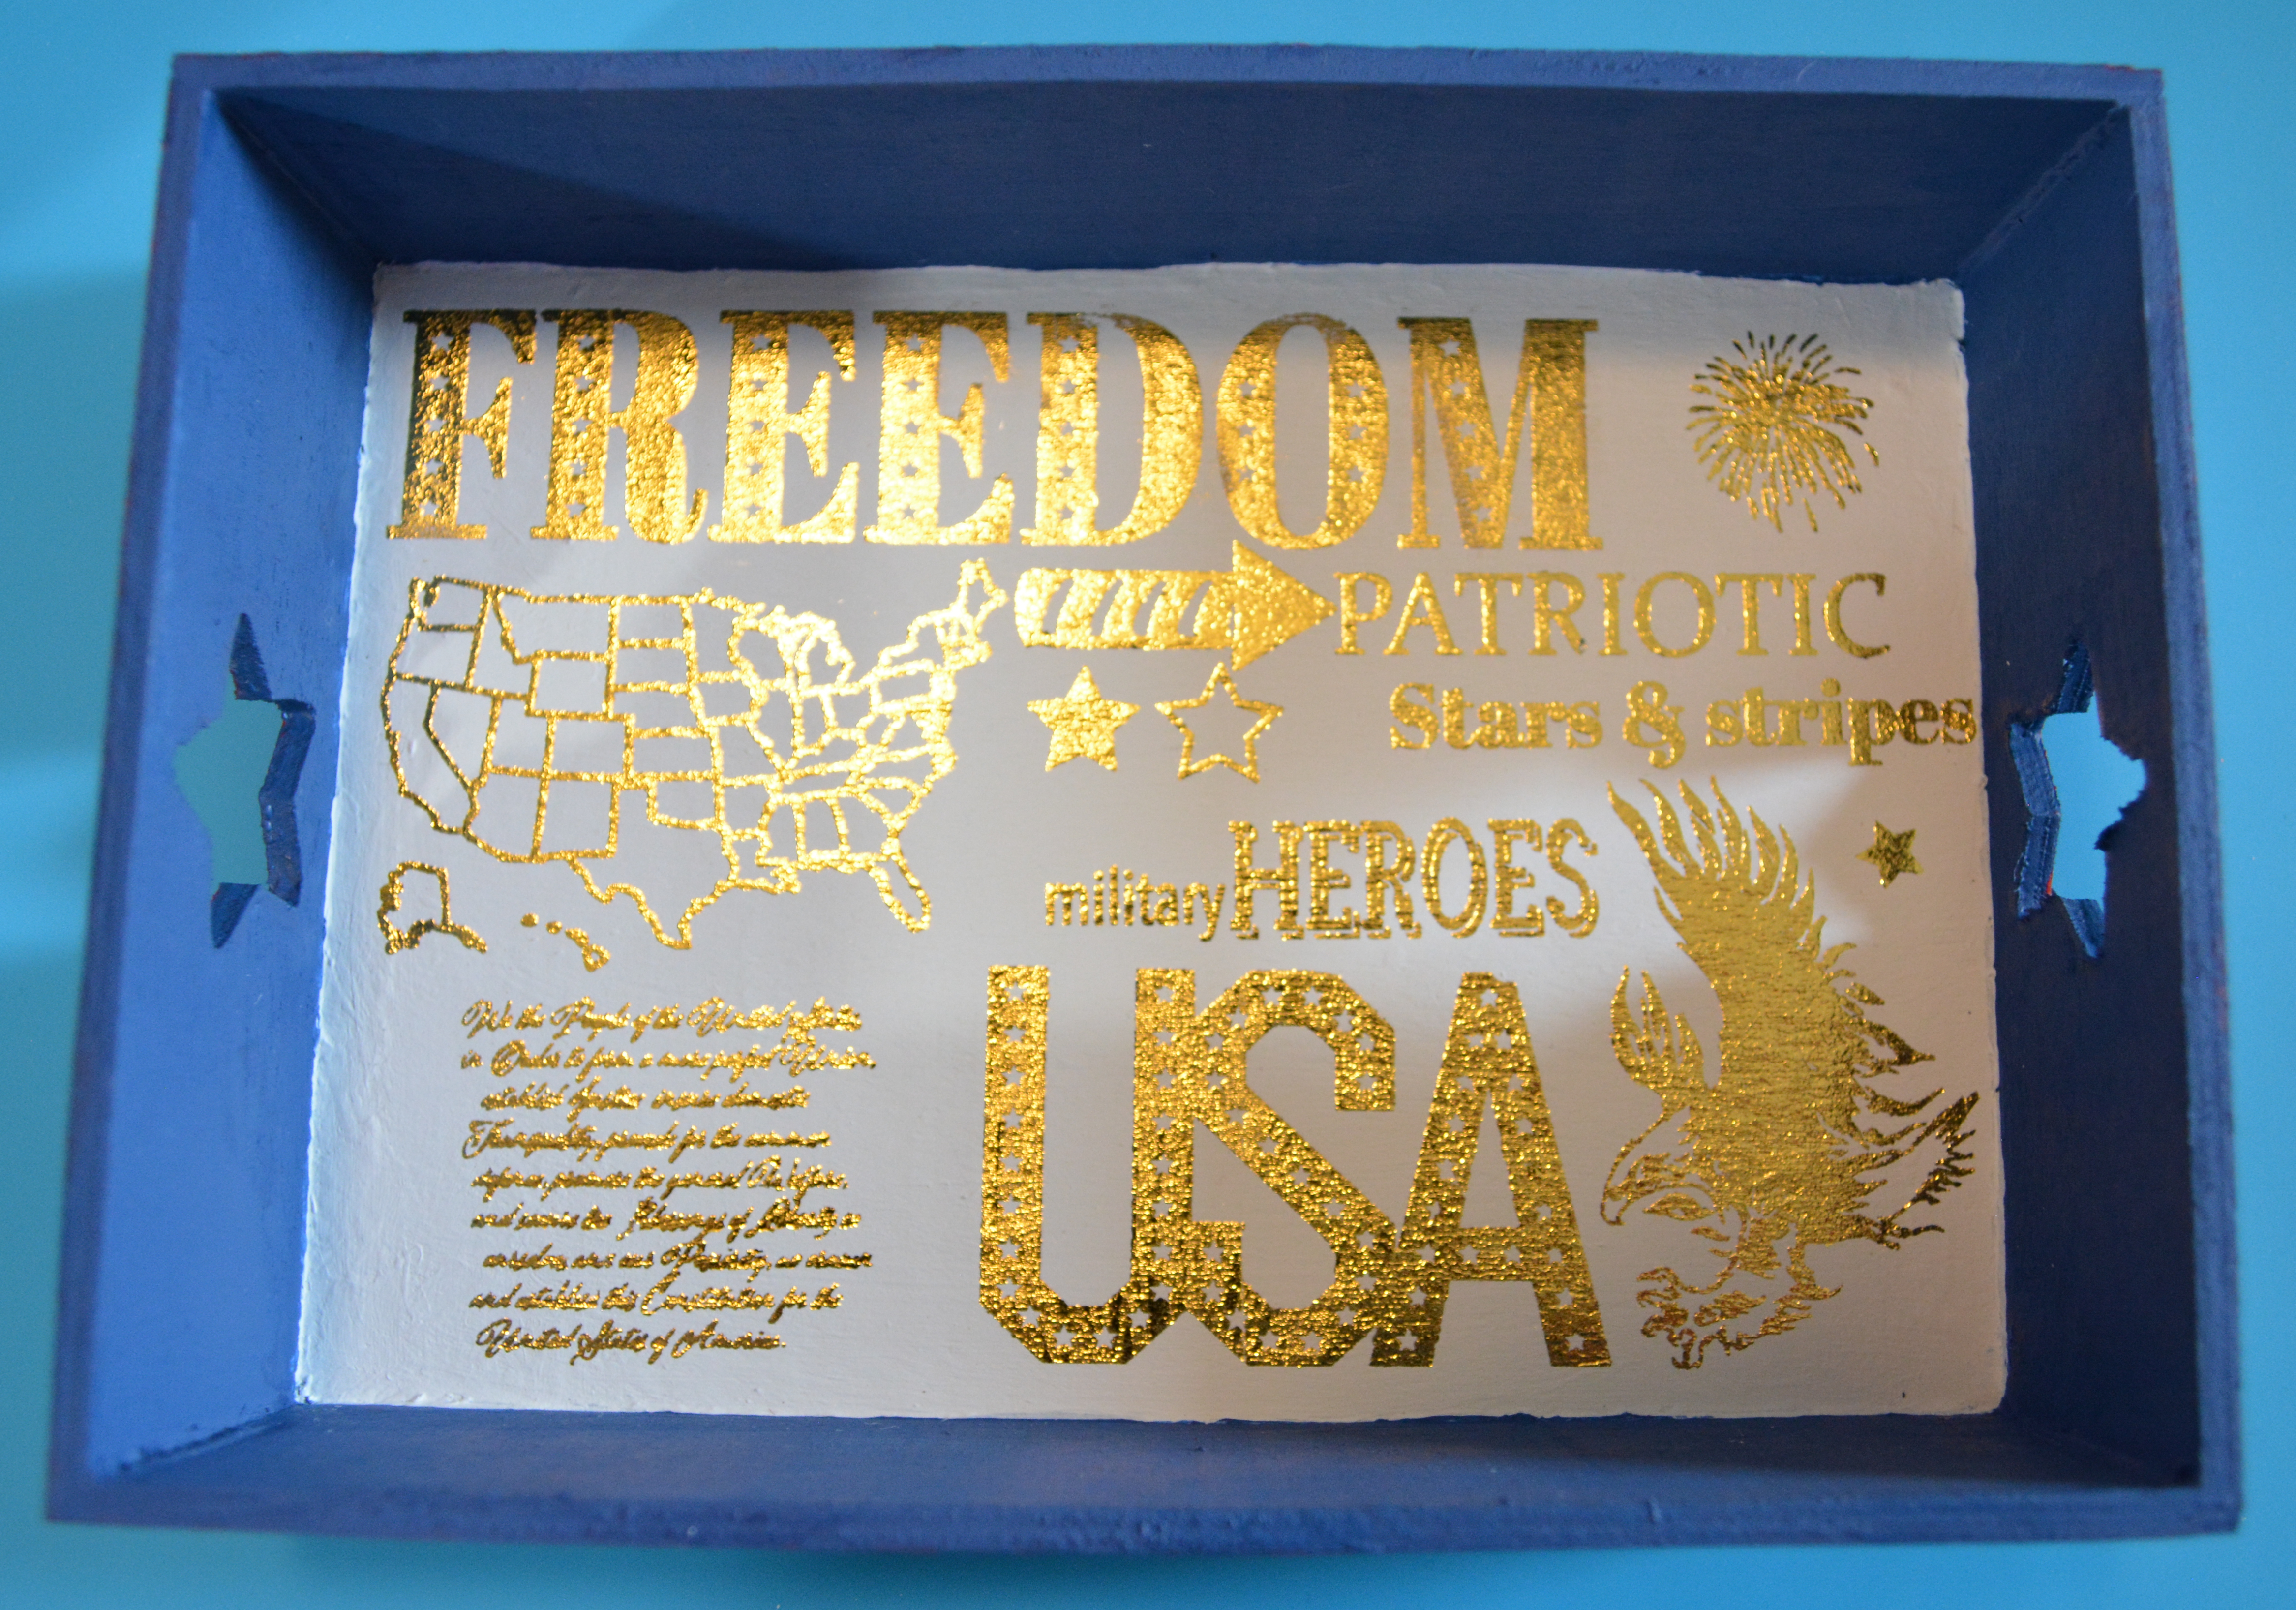
Lets dive into Project #1 and the supplies you will need. I found the house card holder at Dollar Tree along with the paper trays. I also used my Cricut Joy, white chalk paint, and hot glue. If you do not have a Cricut or other kind of cutting machine then you can use stickers, stencils, or print stuff off of the computer.
The first step is to pop off the door and the roof of the house. That makes it easier to paint it. I do not like the heart in the middle of the house and it does not go well with my Patriotic theme. I had to do some thinking to fill in that heart. I tried wood filler but it would not dry. So I put a piece of tape on the back to cover the heart and then filled the heart little by little with hot glue leaving a bit of room at the top and added wood filler to fill the heart the rest of the way. Once it was dry, I sanded the front of the house and I painted the house with White Waverly Chalk paint. I did 2 coats of the paint and the second coat was really thick because I wanted some texture to the house.
After it dried completely, I cut a truck out of one of the paper trays. Then I hot glued it to the front of the house. I wanted to add words to the house that said “Home of the Brave”. For the words I used my Cricut Joy and some 651 Black Vinyl. To do this I measured the open space on the house, sized my saying to the right size and cut it out. I used Dollar Tree contact paper as transfer tape to apply the words to my house. I also hot glued the roof piece back on and the card holder is done!!
Project 2
Supplies

Amazon to the rescue for Project #2! I love the little rolling pins that everyone has in the 3-tiered trays so I got on Amazon and ordered some. To go a long with the Patriotic theme I used some red and white chalk paint and some navy blue acrylic paint. My Cricut Joy helped with the words but you can use stickers, stencils, or print things off the computer to add to the rolling pins. I also added some twine and tulle.


Like I start most of my projects, I painted the rolling pins. You can use masking tape and tape them off but I just free handed it and took my time. The first thing I painted was the middle of each rolling pin. One with Waverly Chalk Paint in Crimson and the other in Navy Apple Barrel Acrylic paint. Once they were dry, I used Waverly Chalk Paint in White to paint the handles. If I got any paint where I did not want it, I just touched it up.
Cricut Design Space is a great please to look for words and saying. That is where I found the “Honor” and “Freedom” words. Just like the last project, I cut the words out of 651 vinyl and used Dollar Tree contact paper to apply the vinyl to the rolling pins. The final step for this project was to tie some tulle on the handle of one pin and wrap the handles of the other pin with twine and hot glue it in place. We are moving right along!! On to Projects #3 and #4
Project 3 and 4
Supplies


We are going to talk about Projects 3 and 4 together. They use the same supplies. On both projects I used red, and white chalk paint, and rub on transfers from Dollar Tree. I also used navy acrylic and blue chalk paint. Project 3 is a small tray from Dollar tree and Project 4 if a calendar also from Dollar Tree.
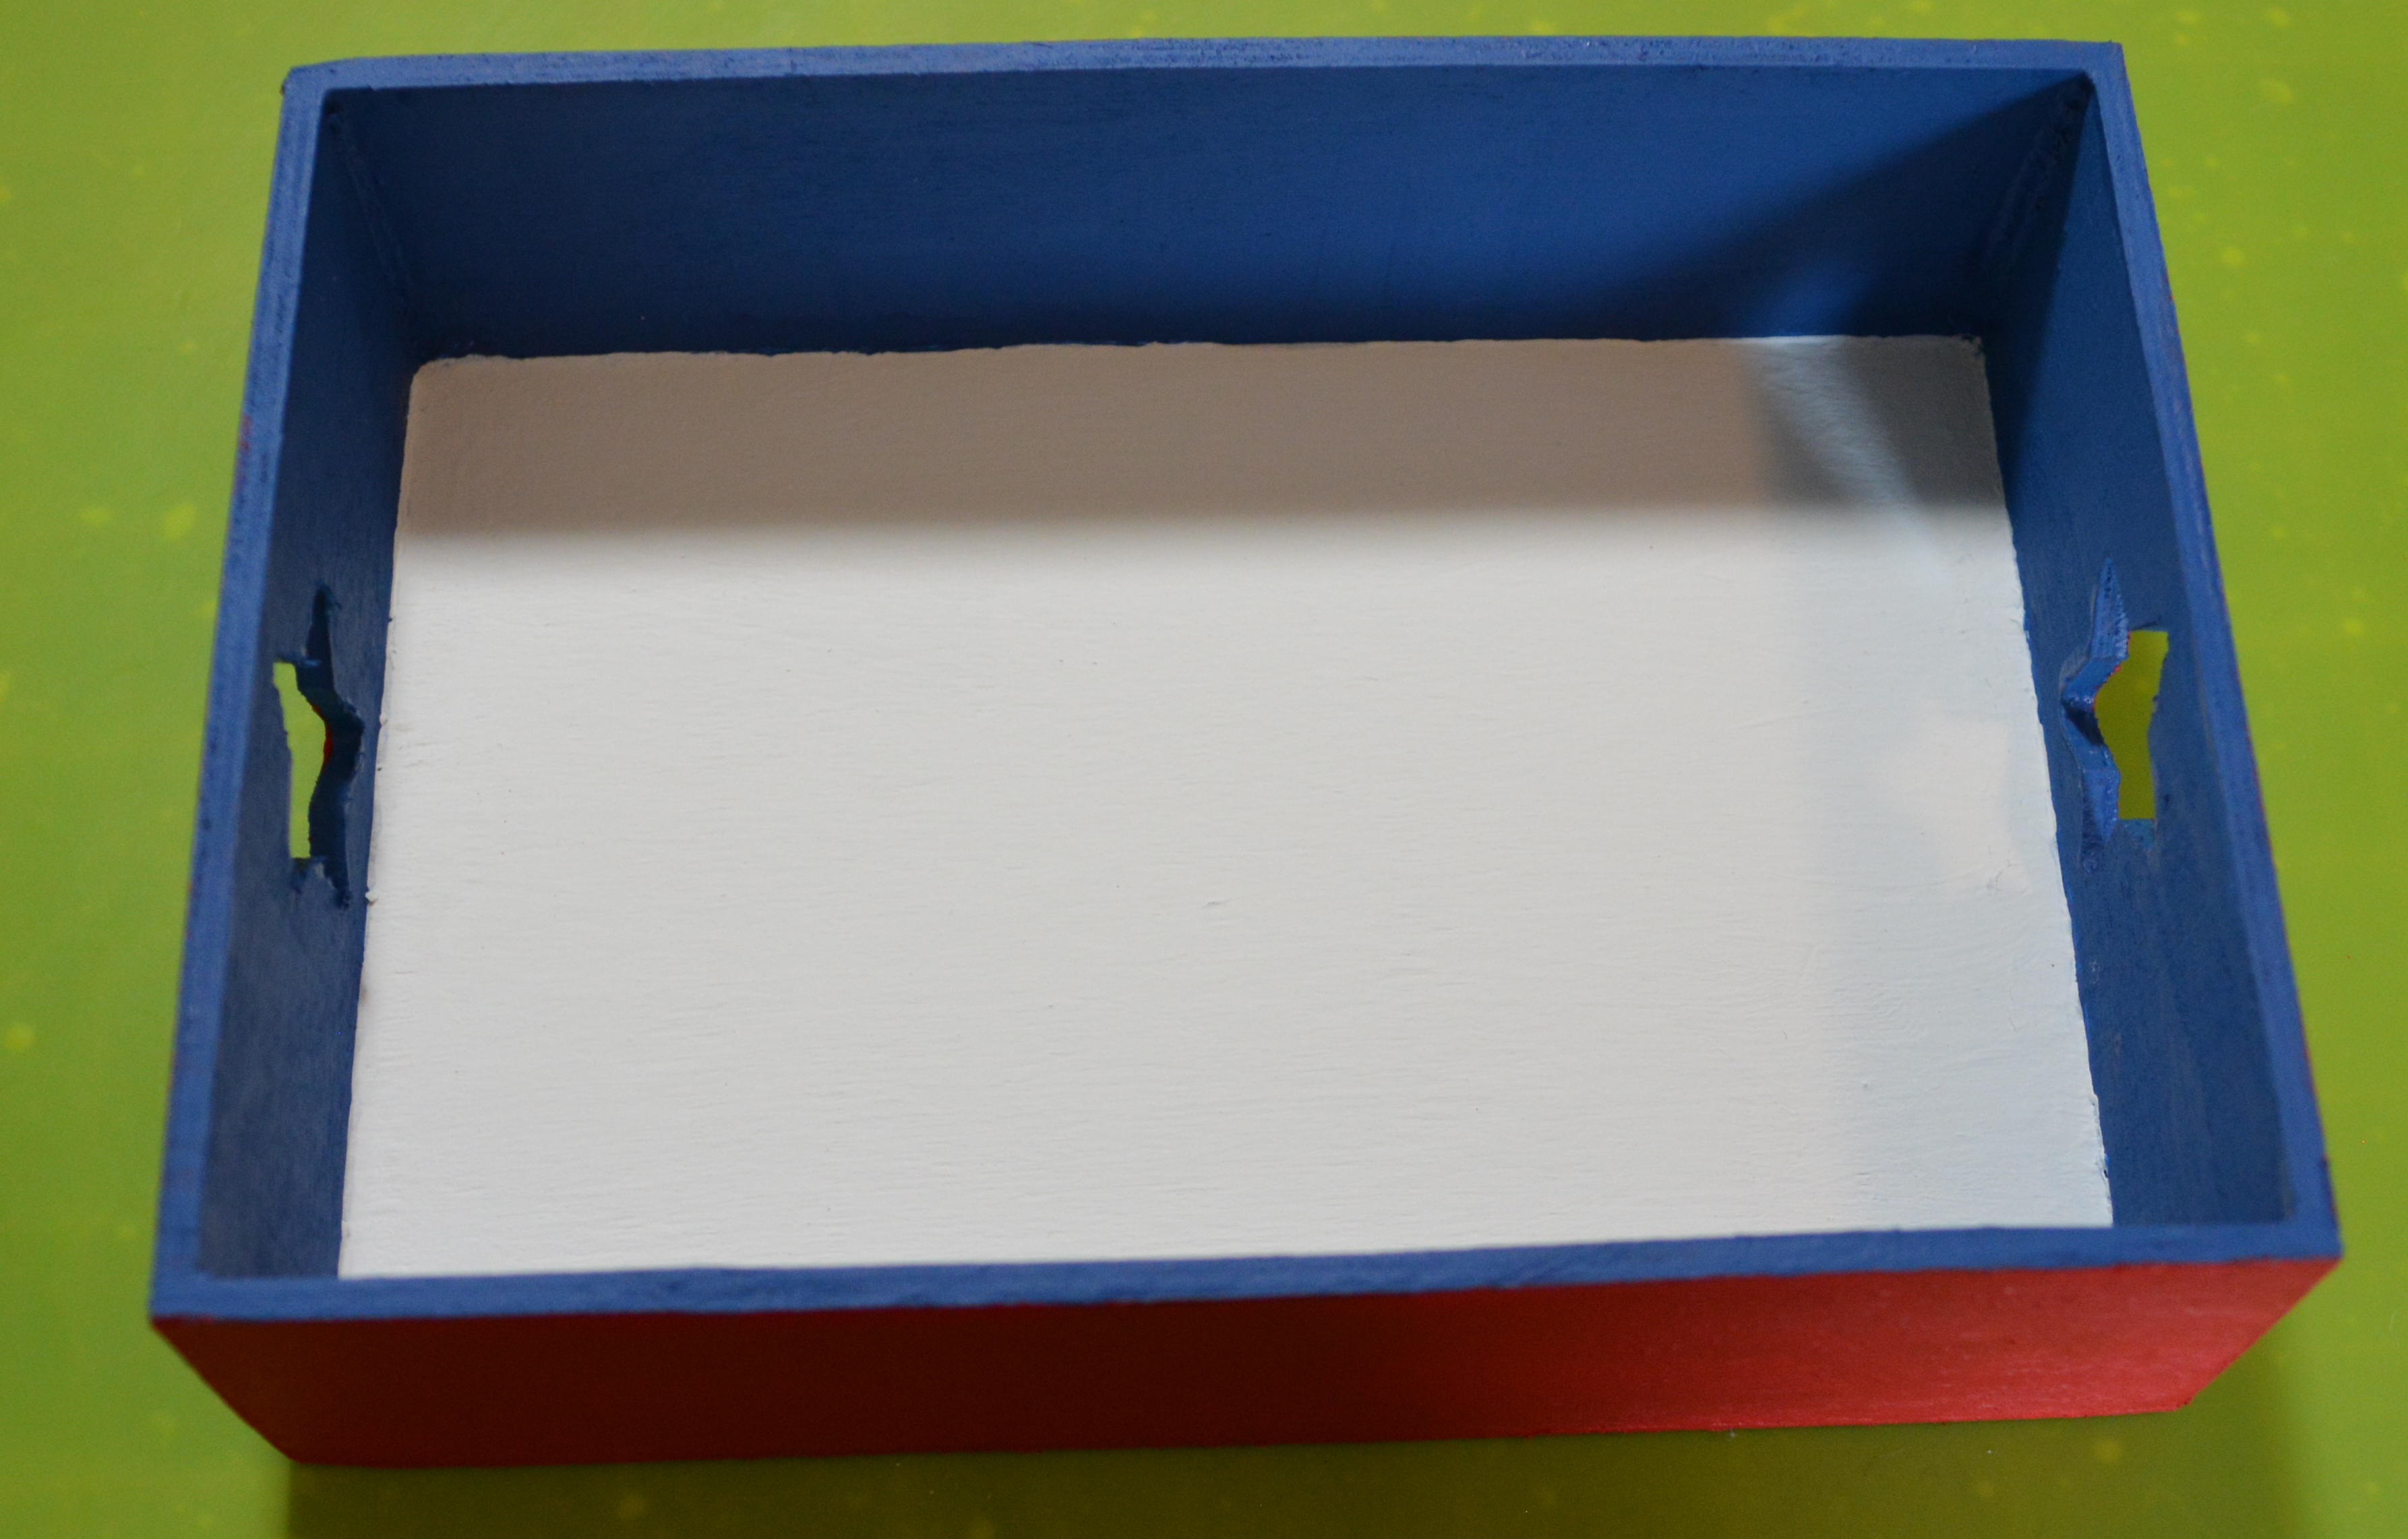


With both projects I started by painting them. The tray I painted the inside with White Waverly Chalk Paint, the inside edge with Ocean Blue Waverly Chalk Paint, and the outside of the tray with Crimson Waverly Chalk Paint. The calendar is painted with Navy Apple Barrel Acrylic Paint, Crimson Waverly Chalk Paint, and White Waverly Chalk Paint. To do the edges of the calendar red I put down some masking tape and painted the red on. Then took the tape off. Each piece took 3 coats of paint to cover it.
Now lets look at these rub-on transfers. When you take them out of the package the have 2 sheets. The top sheet holds the transfers and the bottom protects the transfers from transferring until your ready to use them. Make sure they stay together until you are ready. For both projects I cut the words and shapes out that I wanted and then laid everything out to make sure they all fit on the tray and on the calendar. Once I was sure everything would fit, I pulled the backing off the transfer, laid the transfer on the project and used a Popsicle stick to put pressure on the transfer. After rubbing all over the transfer, slowly pull up the top sheet and make sure the image transferred. If it did not, lay it back down again and rub on it some more. If something transfers that you did not want, use an eraser to remove it. Once you add all the transfers you want you are done!! YAY we are onto our final project!!
Project 5
Supplies

For this last project you will need three books. I also used stamps, black ink, paint, and ribbon.
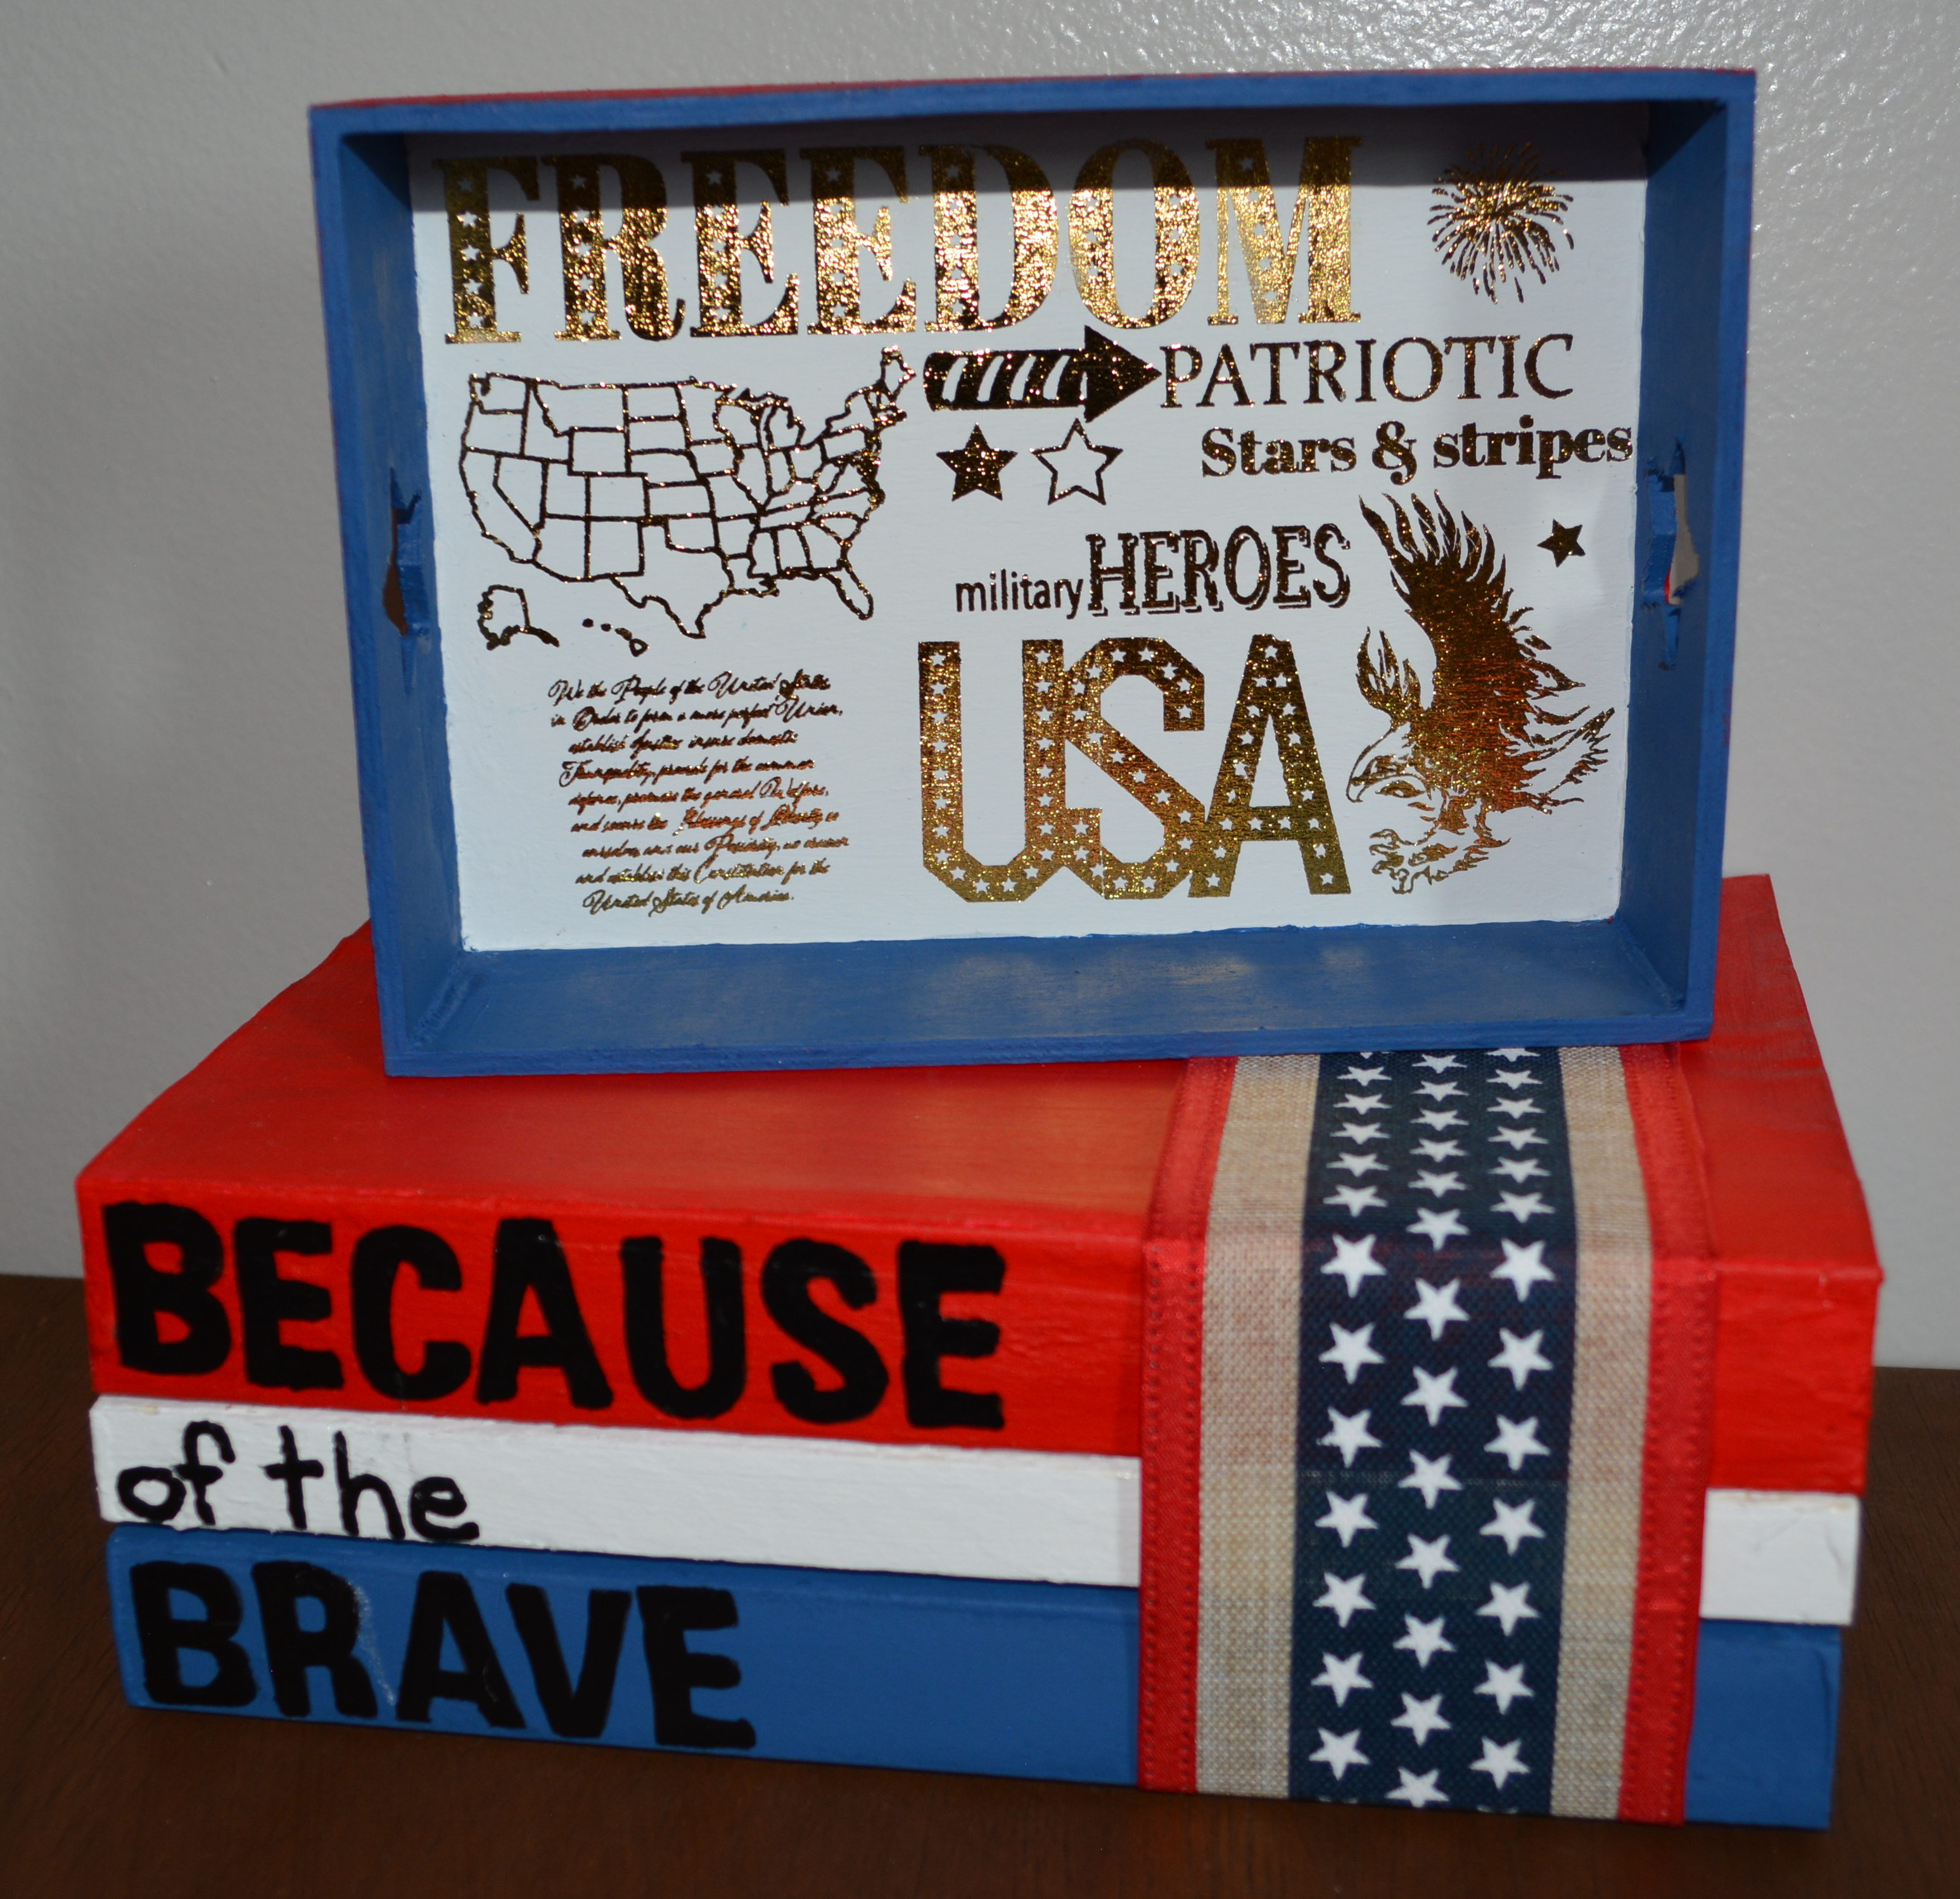
To start this project, I ripped the covers off the books. One of the spines of the books was rough and bumpy so I used wood filler to smooth it out. Next I used a glue stick to glue down a few pages of each book on the top and bottom. After the glue dried, I started painting. The top book is in Crimson Waverly Chalk Paint, the middle one is White Waverly Chalk Paint, and the bottom book is done in Ocean Waverly Chalk Paint. Each book took 2 coats of paint. Once the books were dry, I used a letter stamp set to stamp out “BECAUSE and BRAVE” in black stamping ink. The words “of the” I wrote out by hand. First in pencil and then over the pencil with a black Arteza Paint Marker. If the stamps did not stamp clearly, I went over the letters with the paint marker too.
The final step for these books was to wrap ribbon around them and glue it with hot glue. I just used one piece of ribbon. You could layer ribbon or make a bow to add to the top of the books. I wanted to be able to stack stuff on top of the books without any issues. We are done!!!


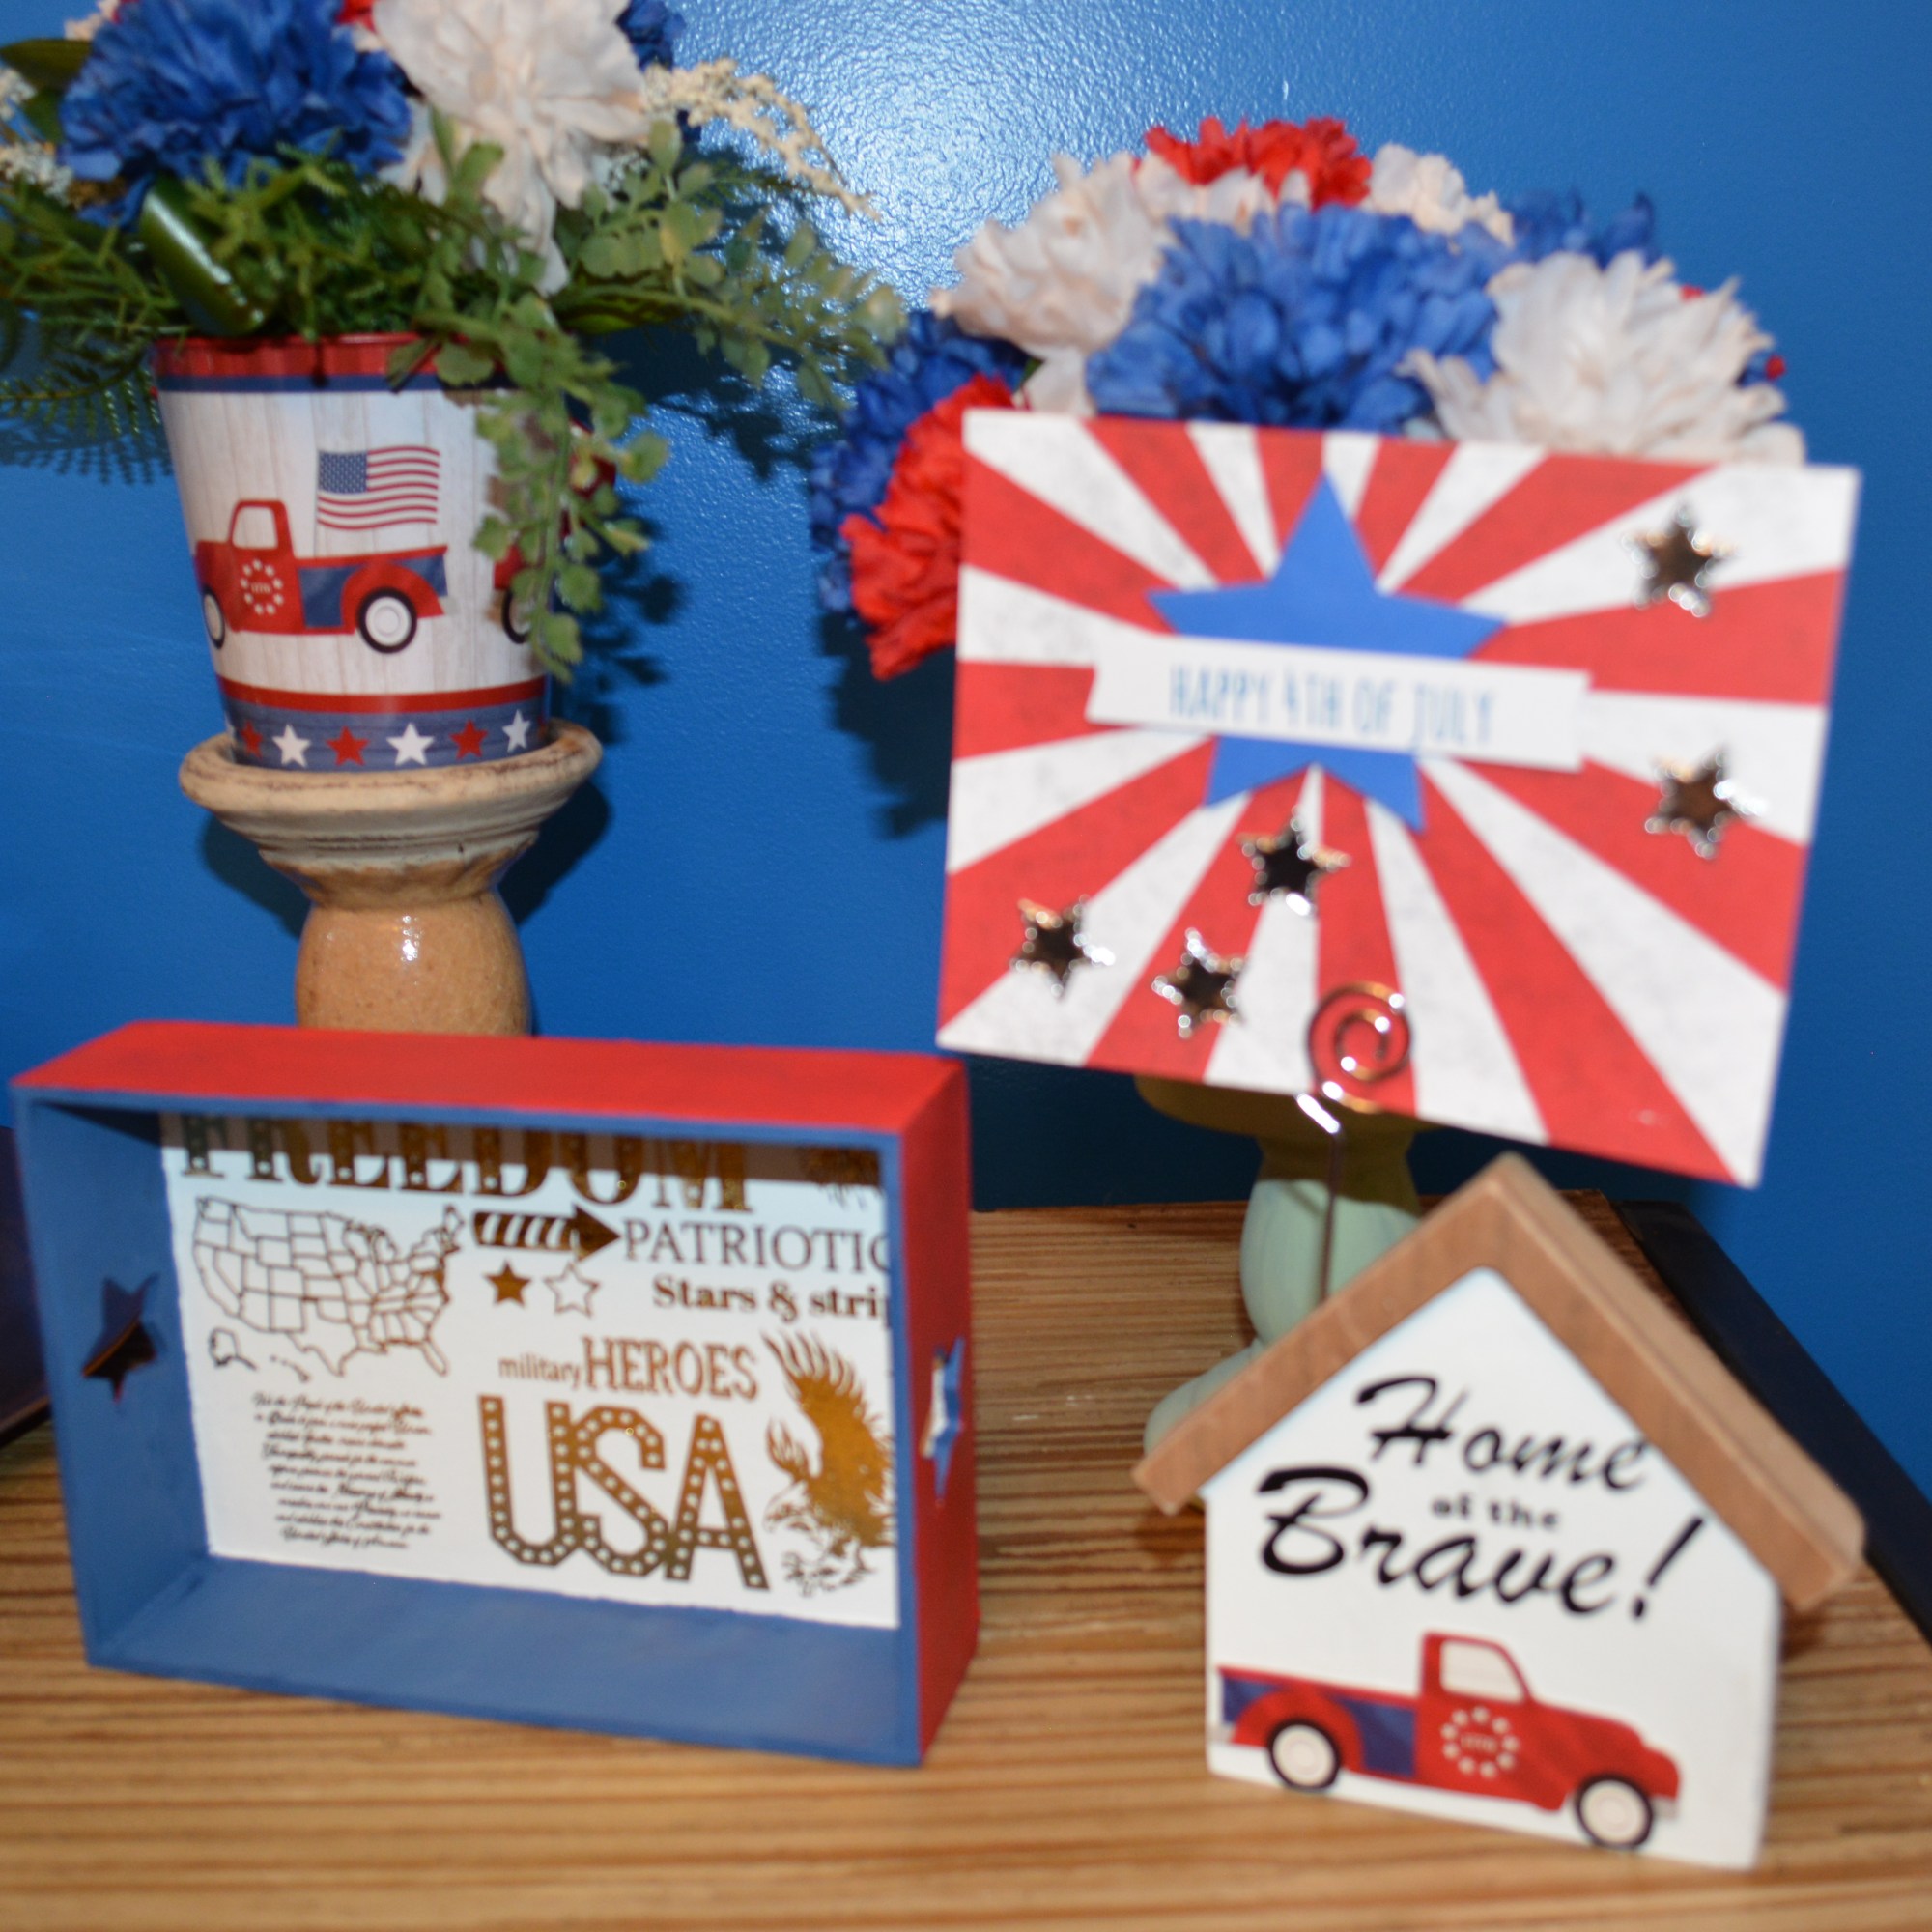

How amazing does all these projects look together? I put all the projects on a cart in my dinning room. They are with the flower arrangements I had on the blog from yesterday. Each piece is unique and special. Even though I used different shades of some of the blues and reds, it all goes together and complements each other to make one cohesive look. The smaller pieces could easily be put on a 3-tiered tray or on a small shelf. The possibilities are endless.
Thank you so much for joining me on day 2 of the 4 days of the Fourth of July! I hope you are finding some great inspiration and motivation to get crafting.
Have a wonderful day and I will see you tomorrow for some wreaths!
Melissa McGuire
Supplies
Project 1
House Card Holder- Dollar Tree
Paper Trays- Dollar Tree
White Waverly Chalk Paint- Walmart
Cricut Joy- HSN
651 Vinyl- Michael’s Craft Supply
Project 2
Rolling Pins- Amazon
Crimson and White Waverly Chalk Paint- Walmart
Navy Apple Barrel Paint- Walmart
Red Tulle- Michael’s Craft Supply
Twine- Hobby Lobby
Cricut Joy- HSN
651Vinyl- Michael’s Craft Supply
Project 4 and 5
Calendar- Dollar Tree
Tray- Dollar Tree
Crimson, Ocean, and White Waverly Chalk Paint- Walmart
Navy Apple Barrel Paint- Walmart
Rub-0n Transfers- Dollar Tree
Project 5
Books- Dollar Tree
Crimson, Ocean, and White Waverly Chalk Paint- Walmart
Ribbon-Michael’s Craft Supply
Letter Stamp Set and Black Ink- Hero Arts
Black Arteza Acrylic Marker- Amazon


Hello again!!! I know it has been a while! Life happens sometimes and I had to step away for a bit but now I am back and we are jumping right into Patriotic decor. The 4th of July is a big deal in my house because we are a retired military family. My husband served our country in the air force for over 15 years. He was deployed or had to work over the 4th of July so many times so we would celebrate it when ever we could even if that meant we went to the fire station to do it.
Over the next 4 days I will be posting some Independence Day inspiration. Keep in mind just because this decor is all red, white, and blue you do not have to use the same colors. Today we are going to start with flowers!! I have 3 different fake flower arrangements to show you.
Lets Get Started
Project 1
Supplies
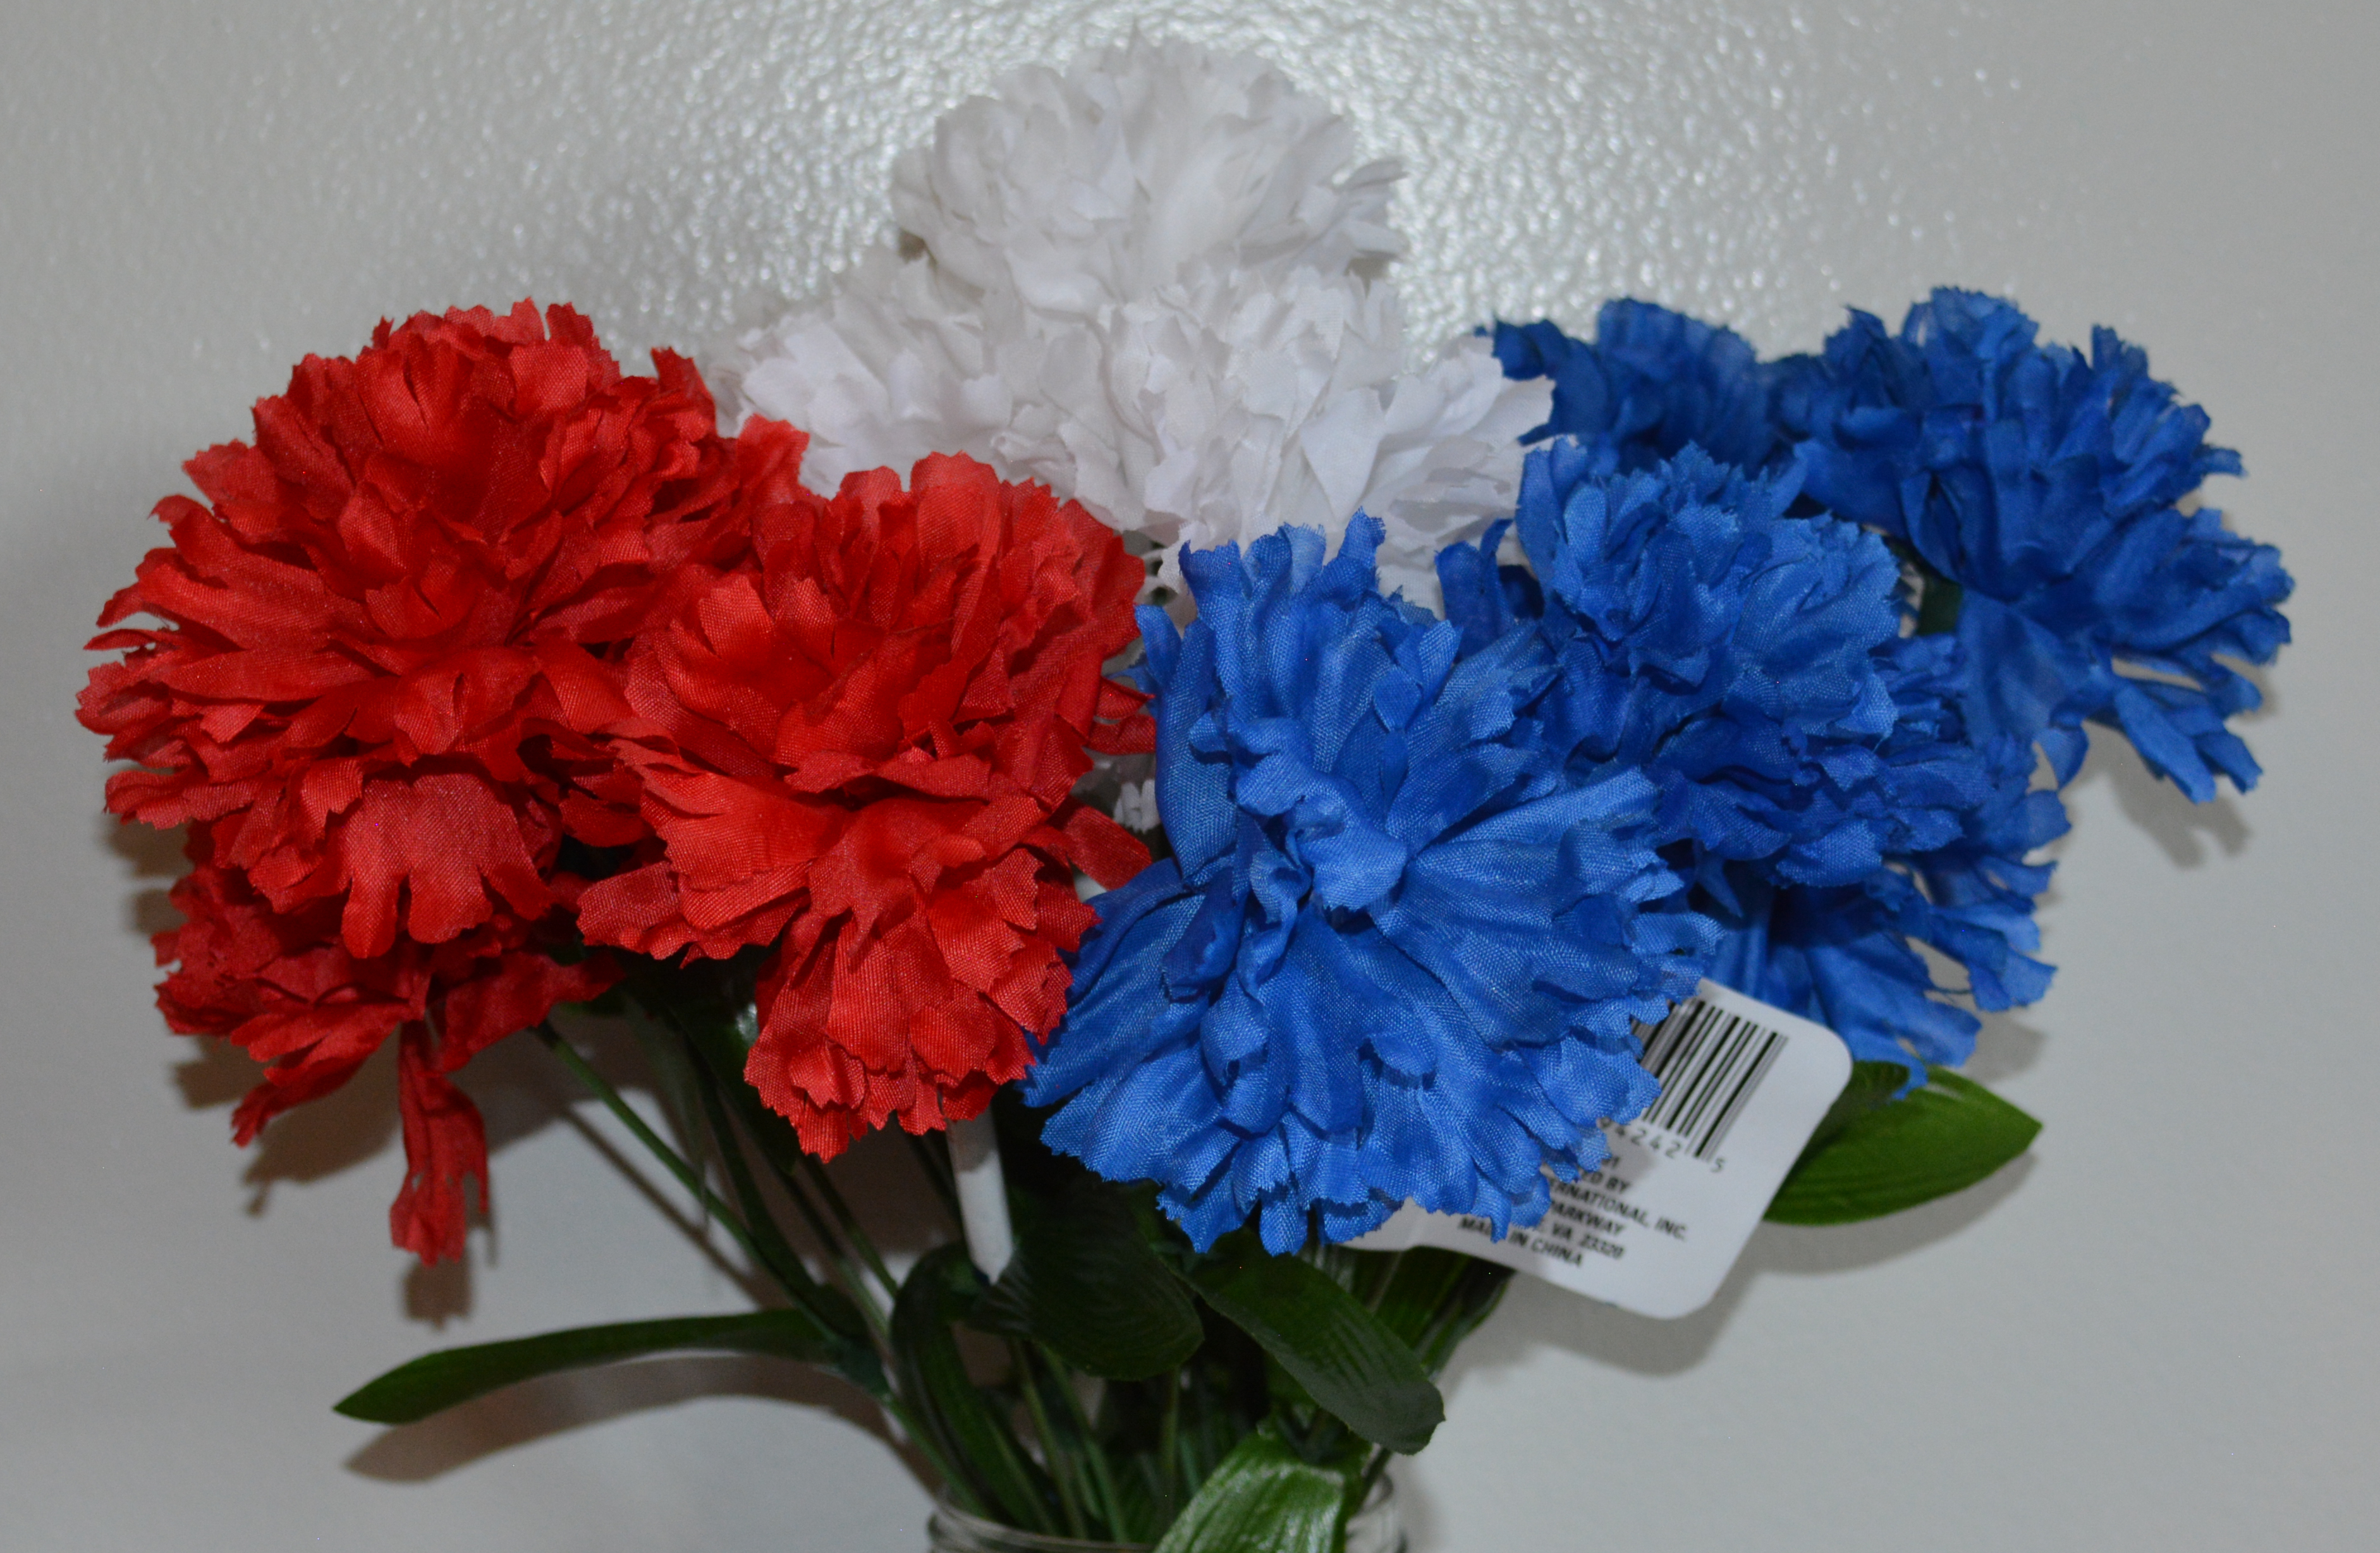

We are going to start with the simplest project. For this first one you will need some red, white, and blue flowers. I also filled in with greenery so that the buckets looked fuller. I am using Dollar Tree buckets as my flower pots. Finally the last thing you will need is either flower foam or a pool noodle.

First thing I did was put floral foam in the bottom of the buckets. If you need to use some glue to hold it in place. I used hot glue. If you do not have floral foam, you can use a pool noodle. Next I arranged the red, white, and blue flowers in the buckets. Once I liked the way they looked, I thought it looked bare. As I looked around my flower stash I saw a big bunch of greenery. It was all from Dollar tree and I used several different kinds to fill out the buckets.
I will show you how I did each set of arrangements and then at the end of the blog post I will show you how I styled everything.
Project 2
Supplies

Time for project #2! You will need some more flowers, flower foam, and twine. This time I used terracotta pots. I also used some white chalk paint and some navy acrylic paint.
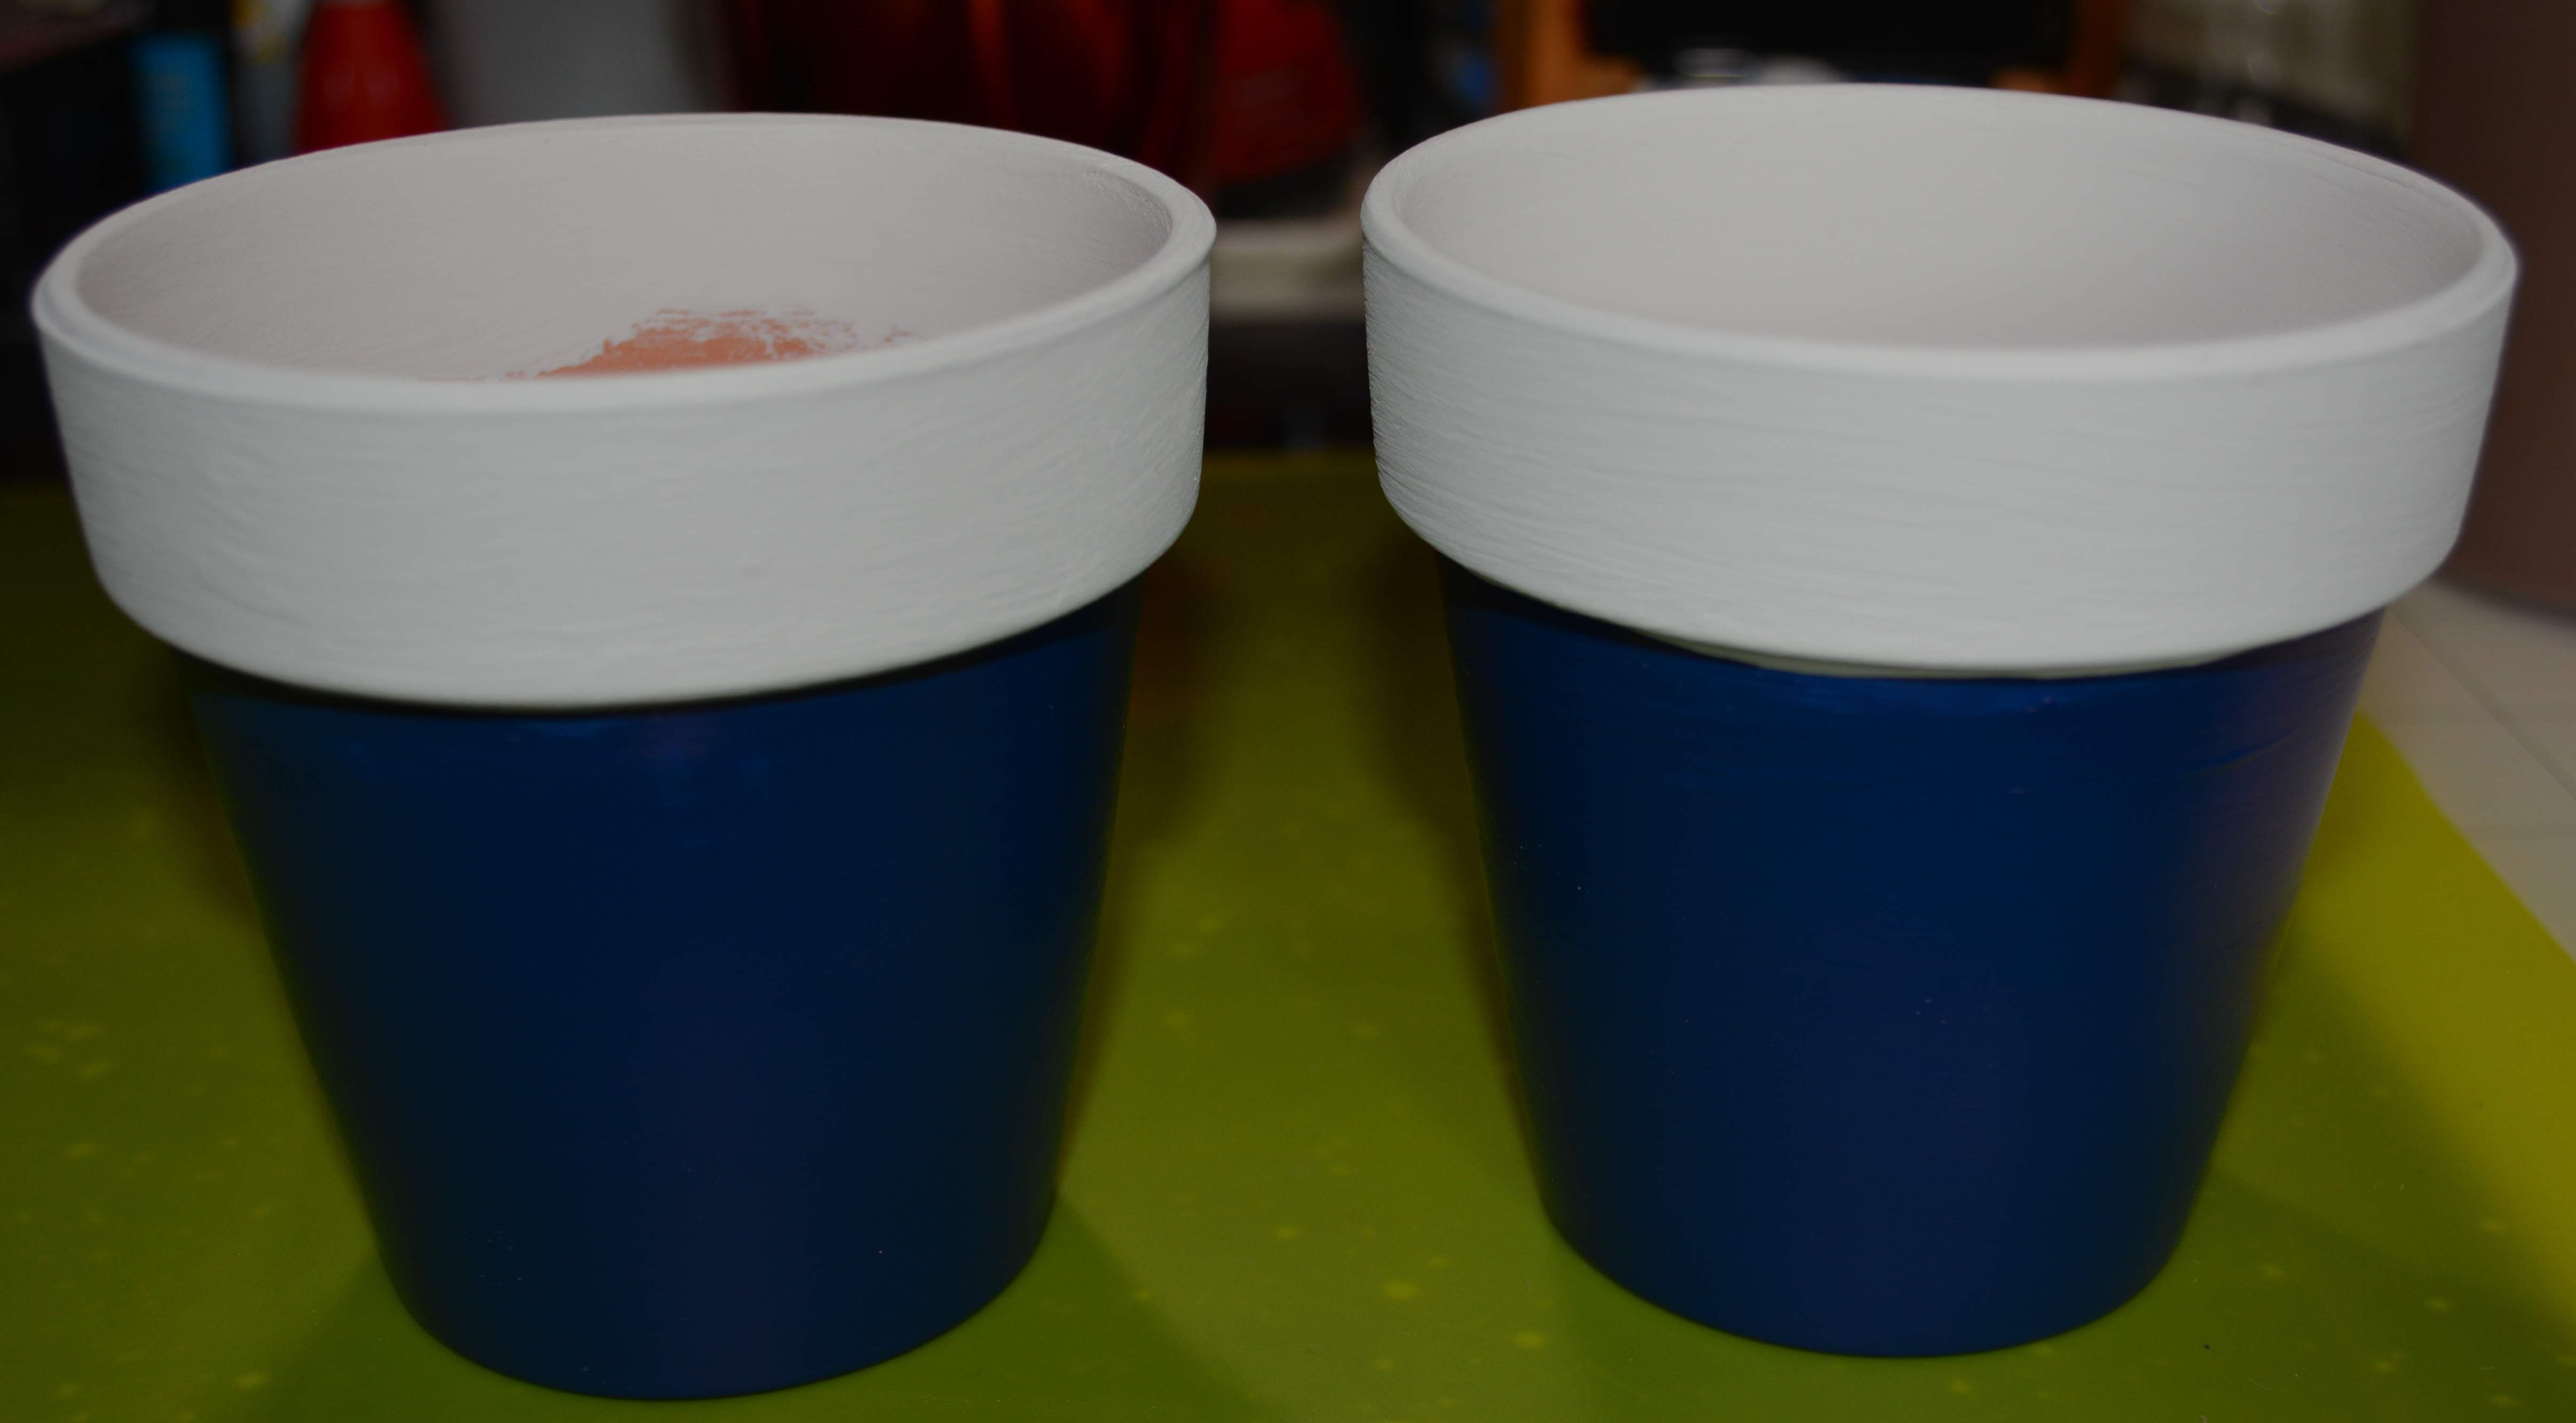
We are going to paint these pots. First I painted the navy blue acrylic paint on the pots. It only took one coat of paint to cover the bottom half of these pots. Once that was dry, I used masking tape to protect my navy paint and then painted the top part of the pot with white chalk paint. Please pick the paint colors you like.
Next I glued some twine around the pots right under the white top. I wrapped it around twice and glued little by little as I wrapped the twine so that it would not slide down and off the pot. Then I tied 2 simple bows and glued them onto the twine that is on the pots.
The last thing I did was hot glued some floral foam to the bottom of the pot and added the flowers. I cut the flowers off of the big stem that they come on so I have individual stems and not one big one. That way I can cut the stems as short as I need to. And with that, project #2 is done!!!
Project 3
Supplies

We are going to use a different product for this project. We are going to use alcohol inks and a blending tool. I also used a small pitcher from Dollar Tree. You can use any container that has a non-porous surface to do this project. So something that is slick like metal, glass, or something that has a clear coat on it. And just like the other projects you will need a few flowers.


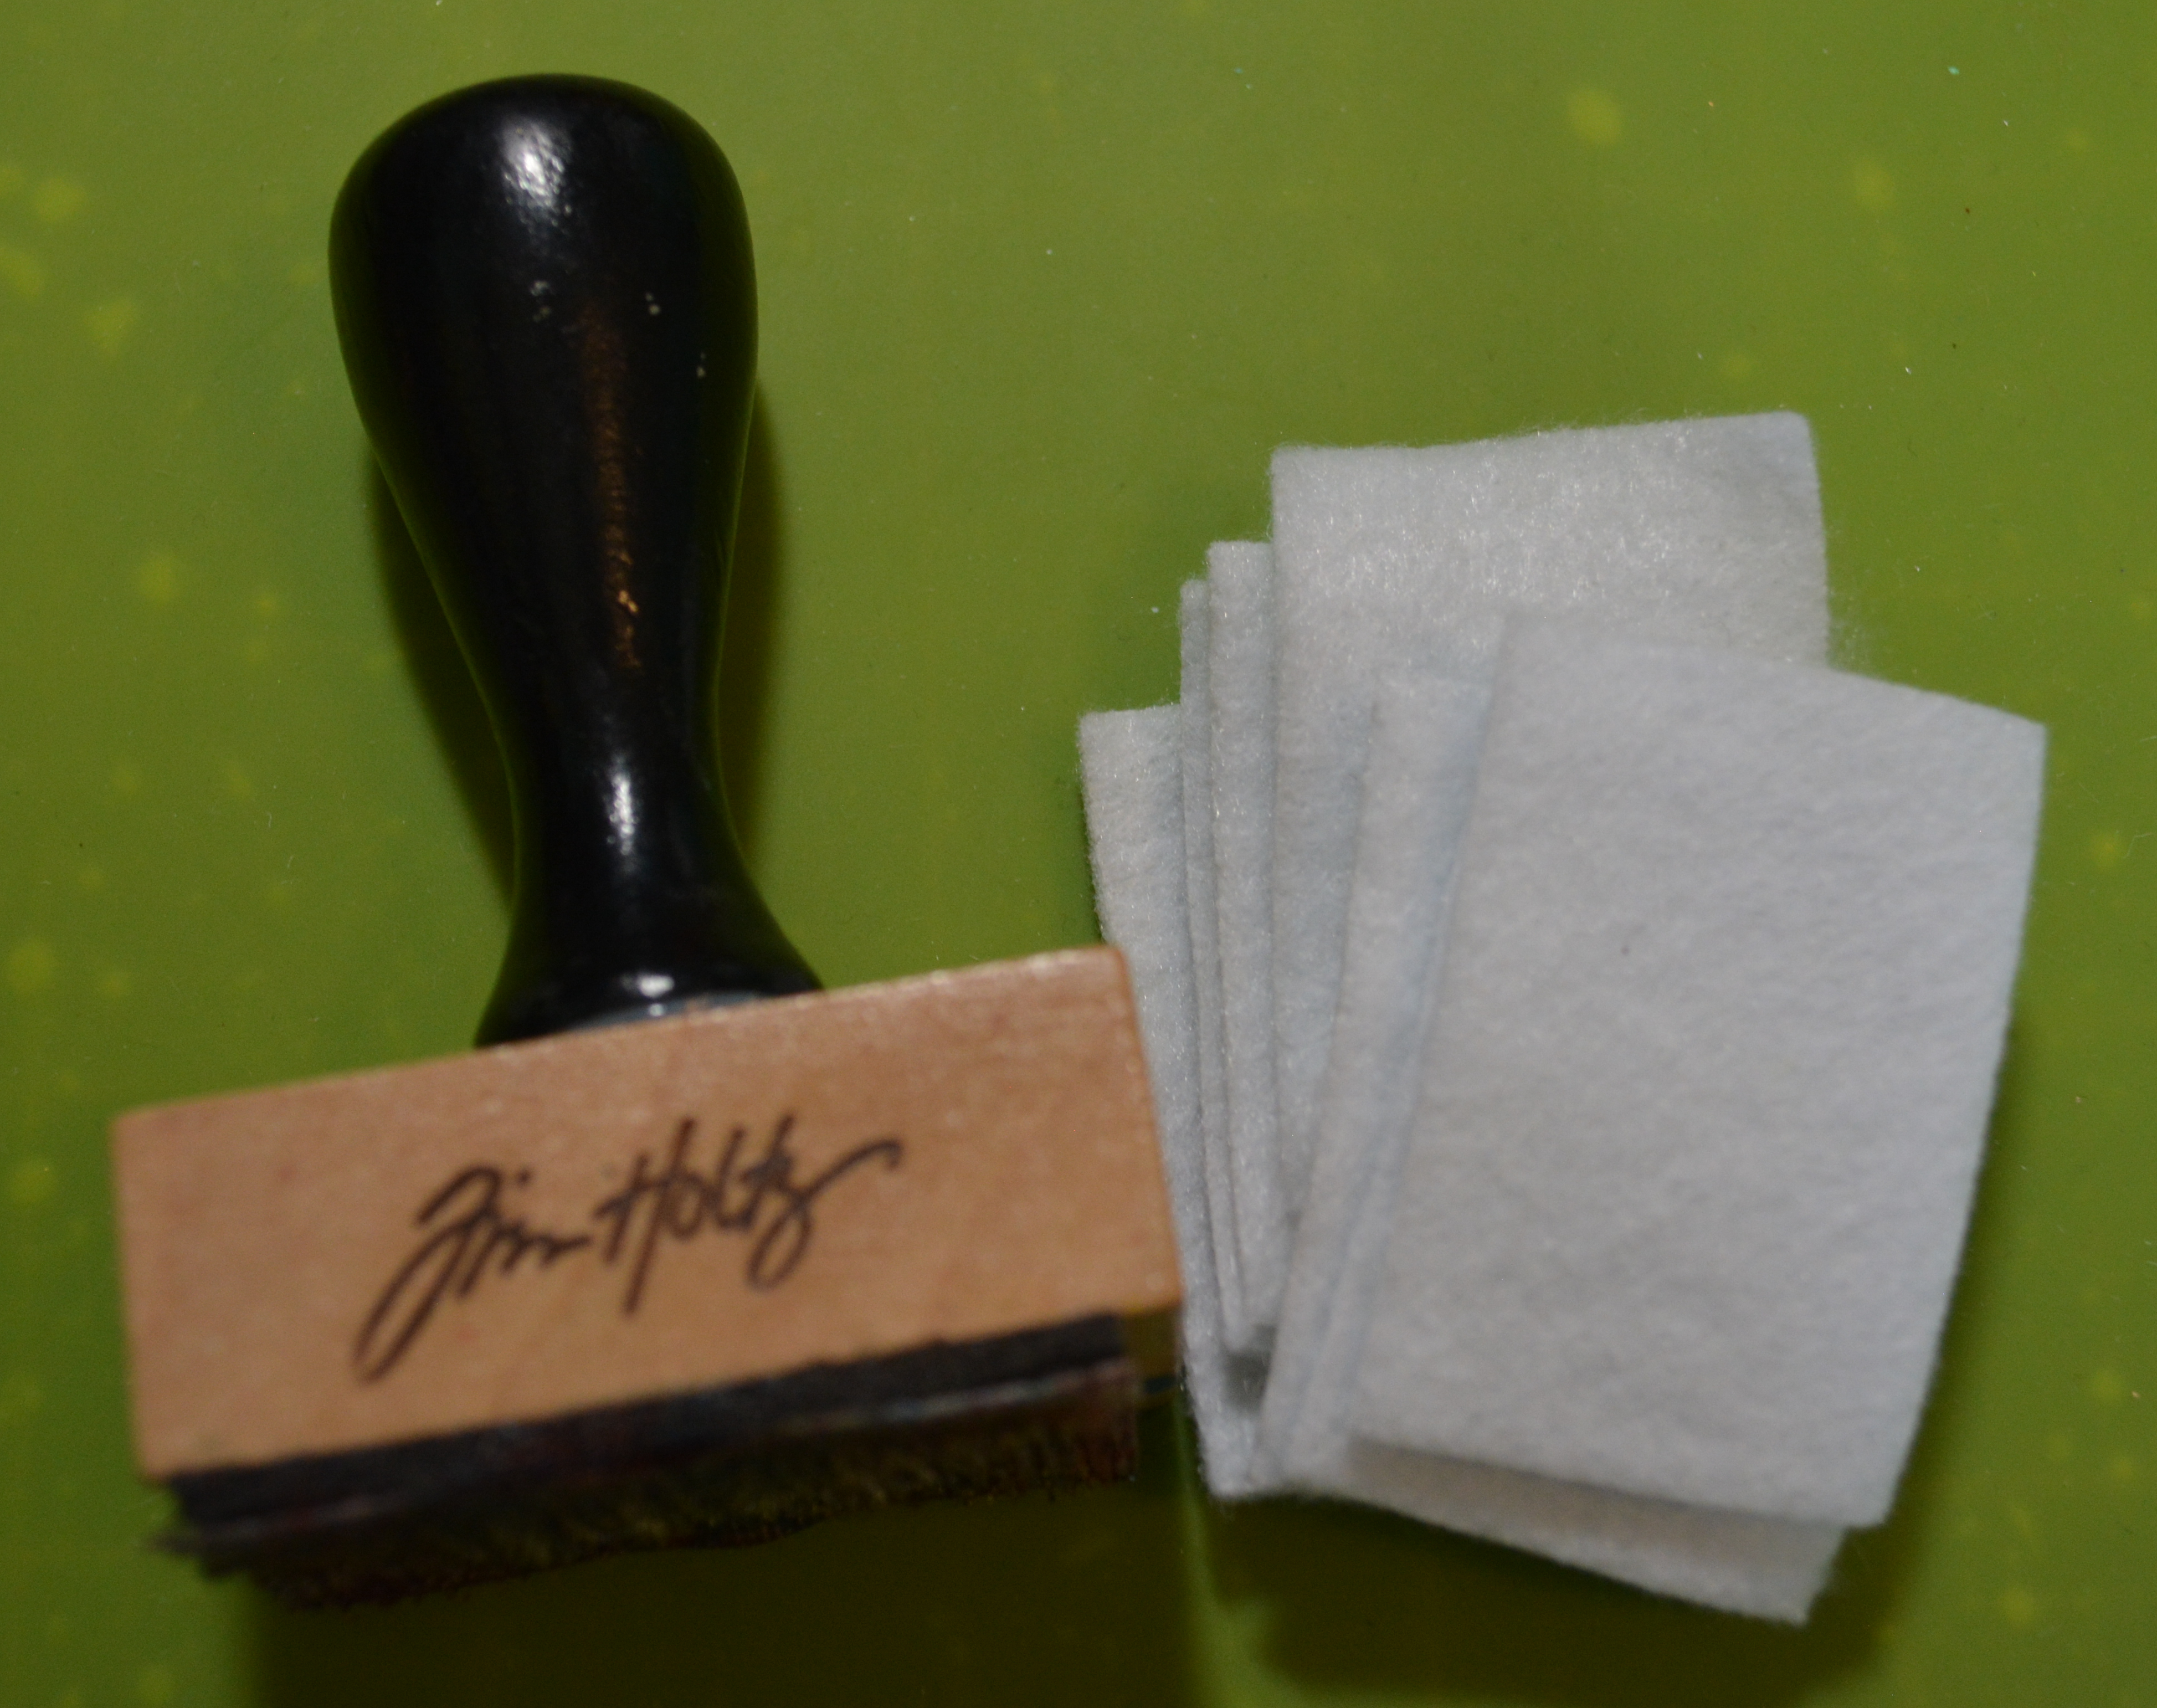
To start our final project, I took some fingernail polish remover and a cotton ball and used the polish remover to get the words and animals off the pitcher. Next I took a Tim Holtz blending tool and felt pads to apply alcohol ink to the pitcher. Alcohol ink gives a marbling affect. If you do it on clear glass, it will look like it is stain glass. It is a really fun and cool to use. To use the ink, add a felt pad to the blending tool then put a few drops of ink on the felt pad and pounce it around the pitcher. The ink drys quickly. Once the first color is dry, on a clean felt pad, add a few drops of the next color of ink and pounce it around the pitcher. You can go back and forth as many times as you want between the two ink colors. Keep in mind the more ink you add, the more it will blend. Since I used Denim and Watermelon alcohol ink, I had to make sure I did not mix them to the point that the ink was purple.
Another thing you can do is use the blending solution to spread the ink out more or blend it together. Now if you do not like how the pitcher is looking, you can put rubbing alcohol on a paper towel and wipe down the pitcher. It will remove all the ink. Then you can start all over again!!


You can see the picture on the left how the ink blended but you can still really see the red and blue colors individually. Alcohol inks are really fun and you can use them in a few different ways.
Since this pitcher is so small I only used 3 flowers. And that’s a wrap!!! Project #3 is done!!
Styling the Projects

What do you think? These small flower arrangements are so cute!! They are simple and easy to do. Each has its own character and can be switched up to fit your style. In our home our decor is Patriotic themed so these flowers I could keep up all year long if I wanted to. I have these on a cart I have in our dinning room. I use candles sticks to add some height to the flowers so that the flowers are not all the same height and it has some interest.
Thank you so much for joining me today. Remember I will be posting 4 days in a row so please come back tomorrow for day 2!!
God Bless You and God Bless America!
Have a wonderful day,
Melissa McGuire
Supplies
Project 1
Buckets- Dollar Tree
Floral Foam- Dollar Tree
Red, White, and Blue Flowers- Dollar Tree
Greenery- Dollar Tree
Project 2
Terracotta Pots- Dollar Tree
Navy Acrylic Paint- Walmart
White Waverly Chalk Paint- Walmart
Twine- Dollar Tree
Masking Tape- Dollar Tree
Floral Foam- Dollar Tree
Red, White, and Blue Flowers- Dollar Tree
Project 3
Pitcher- Dollar Tree
Alcohol Inks- Hobby Lobby or Michael’s Craft Supply
Blender Tool and Felt Pads- Hobby Lobby or Michael’s Craft Supply
Red, White, and Blue Flowers- Dollar Tree

St. Patrick’s Day is fast approaching but Easter is right around the corner too. It seems to be really early this year. Hopefully that means spring weather is following!!
This week I wanted to make a few Easter signs out of Dollar Tree products I found. I love to give Dollar Tree products an upgrade and tailor them to the season we are in. It is so much fun to look at the before and after pictures of signs that have been redone and given a face lift.
Lets Get Started
Supplies


I found two different signs at the Dollar Tree that I thought would be perfect for Easter signs. The first one is the wedding sign on the left and the other was the plant sign on the right. I also used some Waverly Chalk Paint in White, Truffle, Hazelnut, and Maize. You will need some form of glue too and I used some wood filler.
The words I cut out using my Cricut machine. You can use stickers, print things off the computer, or free hand them. The other thing I used was carrots from Dollar Tree. They have them every year.


Lets start off with the wedding sign. I spread a thick coat of wood filler over it. I did this because the words looked like they were pressed into the sign so if I painted it, the words would show right through. After that dried I panted over the sign with a mix of Hazelnut chalk paint and Truffle. When you use a dark and light color, it can make the sign look like a piece of wood. I went over the sign a few times with these colors to get the look I was going for. It helps to have a light hand with the dark color.
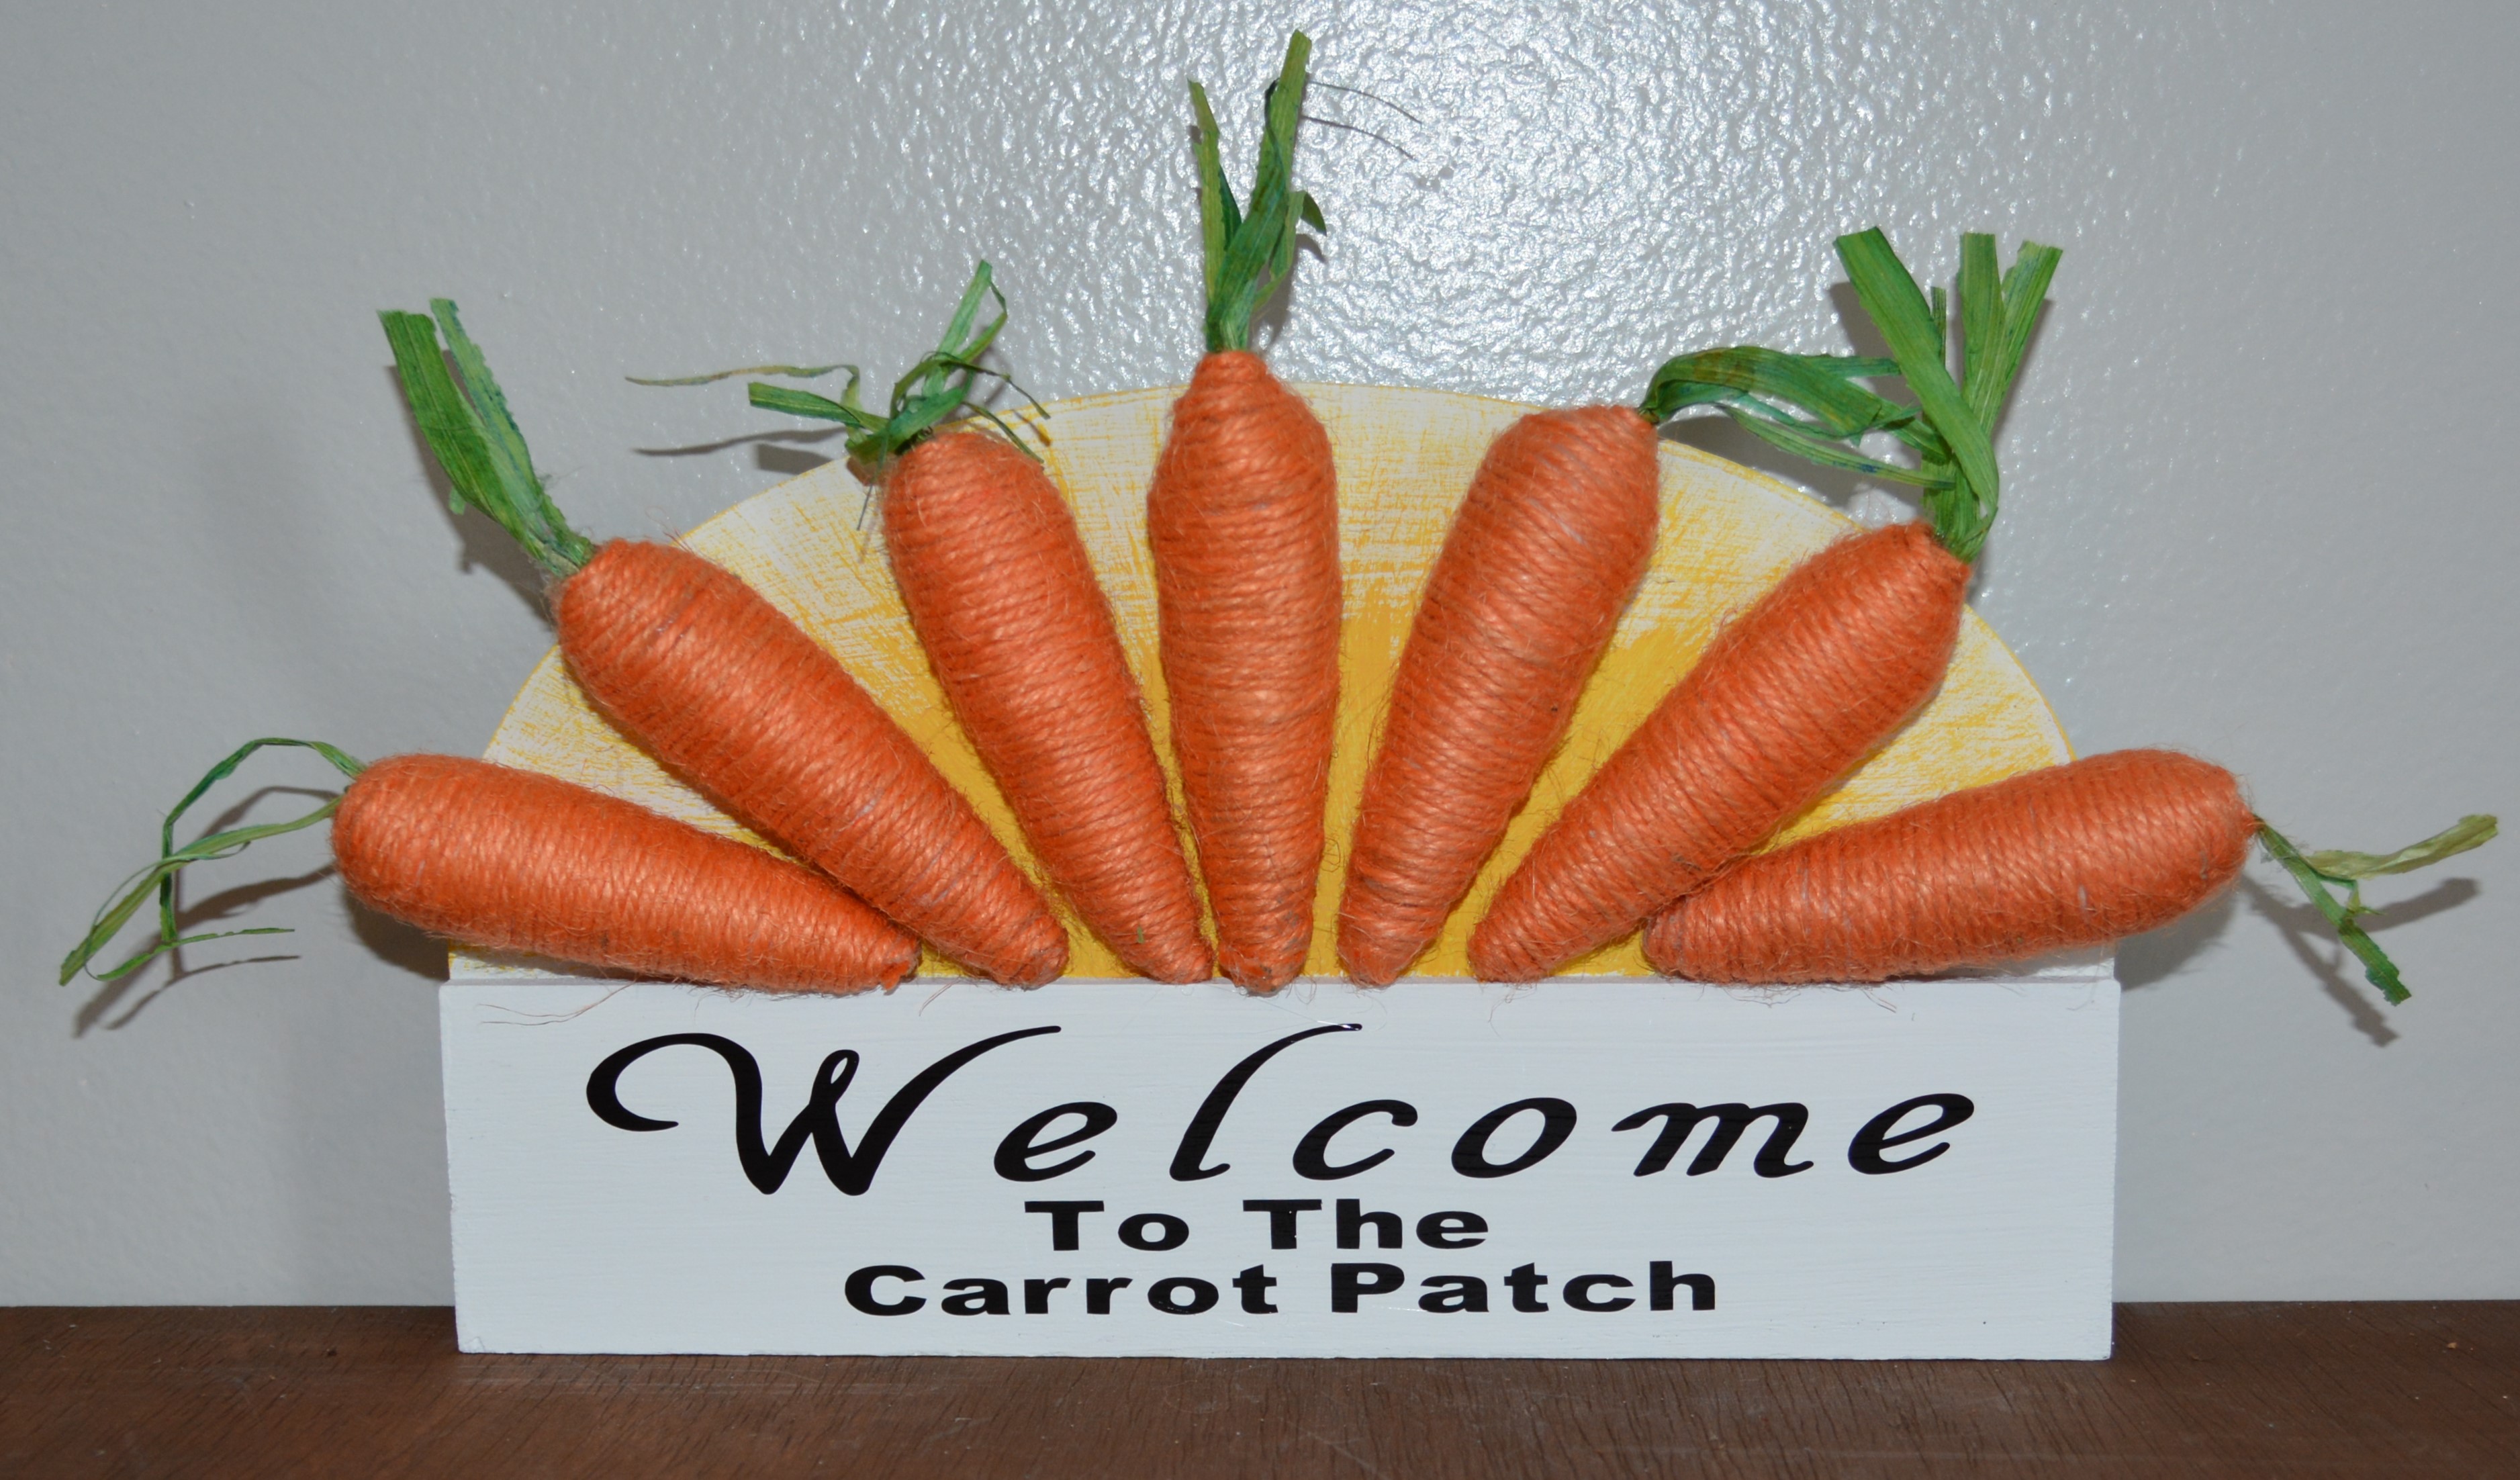
As for the planting sign, I pulled the metal piece off and then painted the whole thing White with the Waverly Chalk paint. Front and back. Next I took a fan brush and the Maize Waverly Chalk Paint and brushed it on the arched part of the sign to make it look like the sun was rising. Once the paint was dry, I laid out the carrots in a fan pattern and hot glued them to the top part of the sign. I used 7 carrots so you will need 2 packs of them.
The final step was to add the words and eggs. I used my Cricut and Orical 651 vinyl. In Cricut Design Space I made up two saying “Easter Egg Hunt” and ” Welcome To The Carrot Patch”. I also cut out two different eggs and layered vinyl behind both of them so make them two colors.
These two signs are super cute! They were really easy and cheap too. Remember you can use stickers or printables and glue sticks to put words or pictures on your signs. That makes it an easy DIY that is completely customizable. I think the bottom sign would look amazing painted white with the sun rays on the top part. Then put three crosses on it and the words “He Has Risen!” on the bottom. I might have to try that.
I hope you all are happy and healthy. I have a few more Easter project to show you over the next few weeks. Please Like, Share, Comment, and Subscribe. Also find me on Instagram and Facebook under Yellow Butterfly Craft Designs.
2 Corinthians 5:21 “For he hath made Him to be sin for us who knew no sin…”
Have a wonderful weekend
Melissa McGuire
Supplies
Wedding Sign- Dollar Tree
Plant Sign- Dollar Tree
Carrots- Dollar Tree
Wood Filler- Dollar Tree
Cricut Machine- Michael’s Craft Supply
Orical 651 Vinyl- Michael’s Craft Supply
Waverly Chalk Paint in White, Hazelnut, Truffle, and Maize- Walmart
Surebonder Hot Glue Gun and Hot Glue Sticks- Hobby Lobby

We have almost made to to March!!! There are a few holidays right around the corner. Most people do not decorate for St. Patrick’s Day but we do. March 17th is my husbands birthday so we decorate the house in green. When I decorate, I also put out a card holder of some sort. I did not have one for St. Patrick’s Day or for Easter so I decided to make some from the holders Dollar Tree sold for Valentine’s Day. Some might think it is odd to have a card holder as regular decor but in my kitchen it is a must. I have a friend of mine who sends me a hand made card every month and this is where I love to display it. She lives in Hawaii so seeing the card on my counter is a great way to think of her often!
Lets Get Started
Supplies
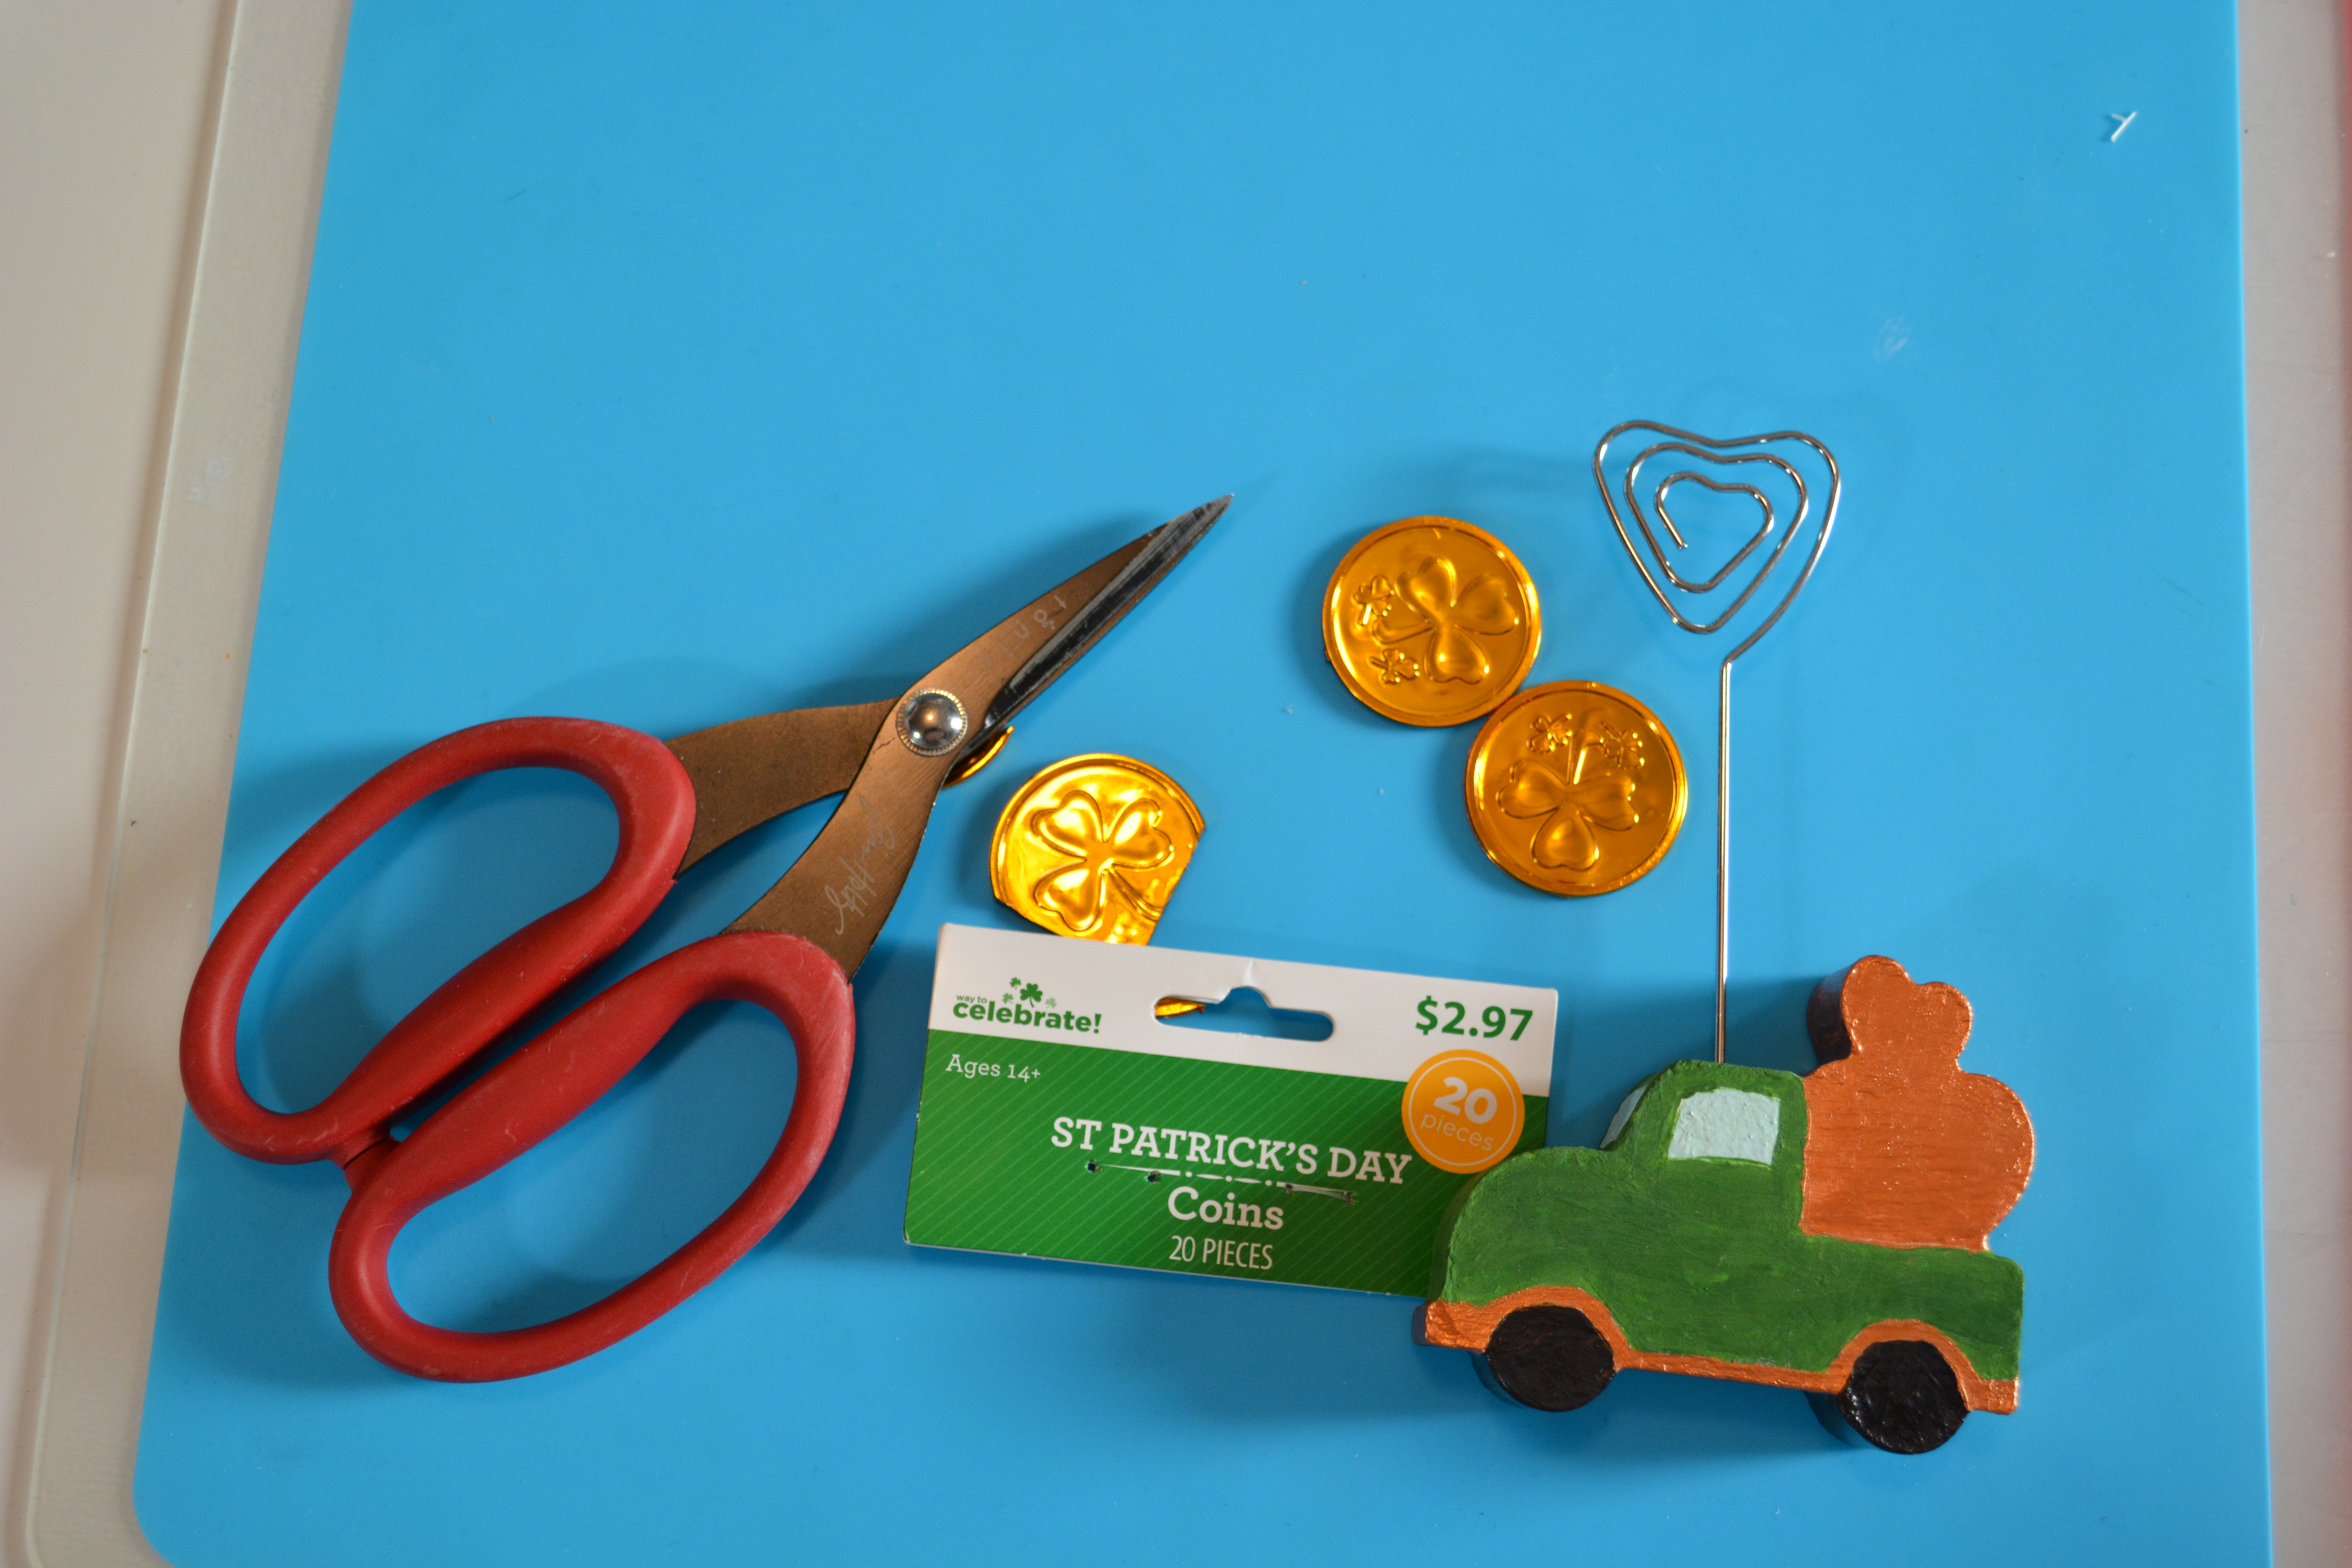
For this project I used these 2 card holders from Dollar Tree. One is a truck and one is a mason jar. They both need a face lift. I used chalk paint, acrylic paint, and Mod Podge along with several paint brushes. Towards the end of the project I used some strong scissors, fake gold coins, hot glue, and a window sticker.


To start off, I pulled the tops out of the holders. I had to twist them a bit but they finally came out. Then I popped the heart off the truck and the gem stone from the mason jar. That was rough. I stabbed myself with a knife in the process so please be careful. I did sand both pieces down a bit too because there was some glue still left on them from the embellishments.
Once your pieces are prepped I advise you prime them. For this I used Waverly White Chalk Paint. It took a good three coats of chalk paint to cover everything. Once everything is primed and dry, it is time to draw out the truck. I wanted to make sure the truck looked like a truck still once it was finished. I used a pencil to draw on the features like the bumpers, windows, tires, and running boards. If you are unsure of what an old truck looks like, just google wooden painted trucks. Several come up.
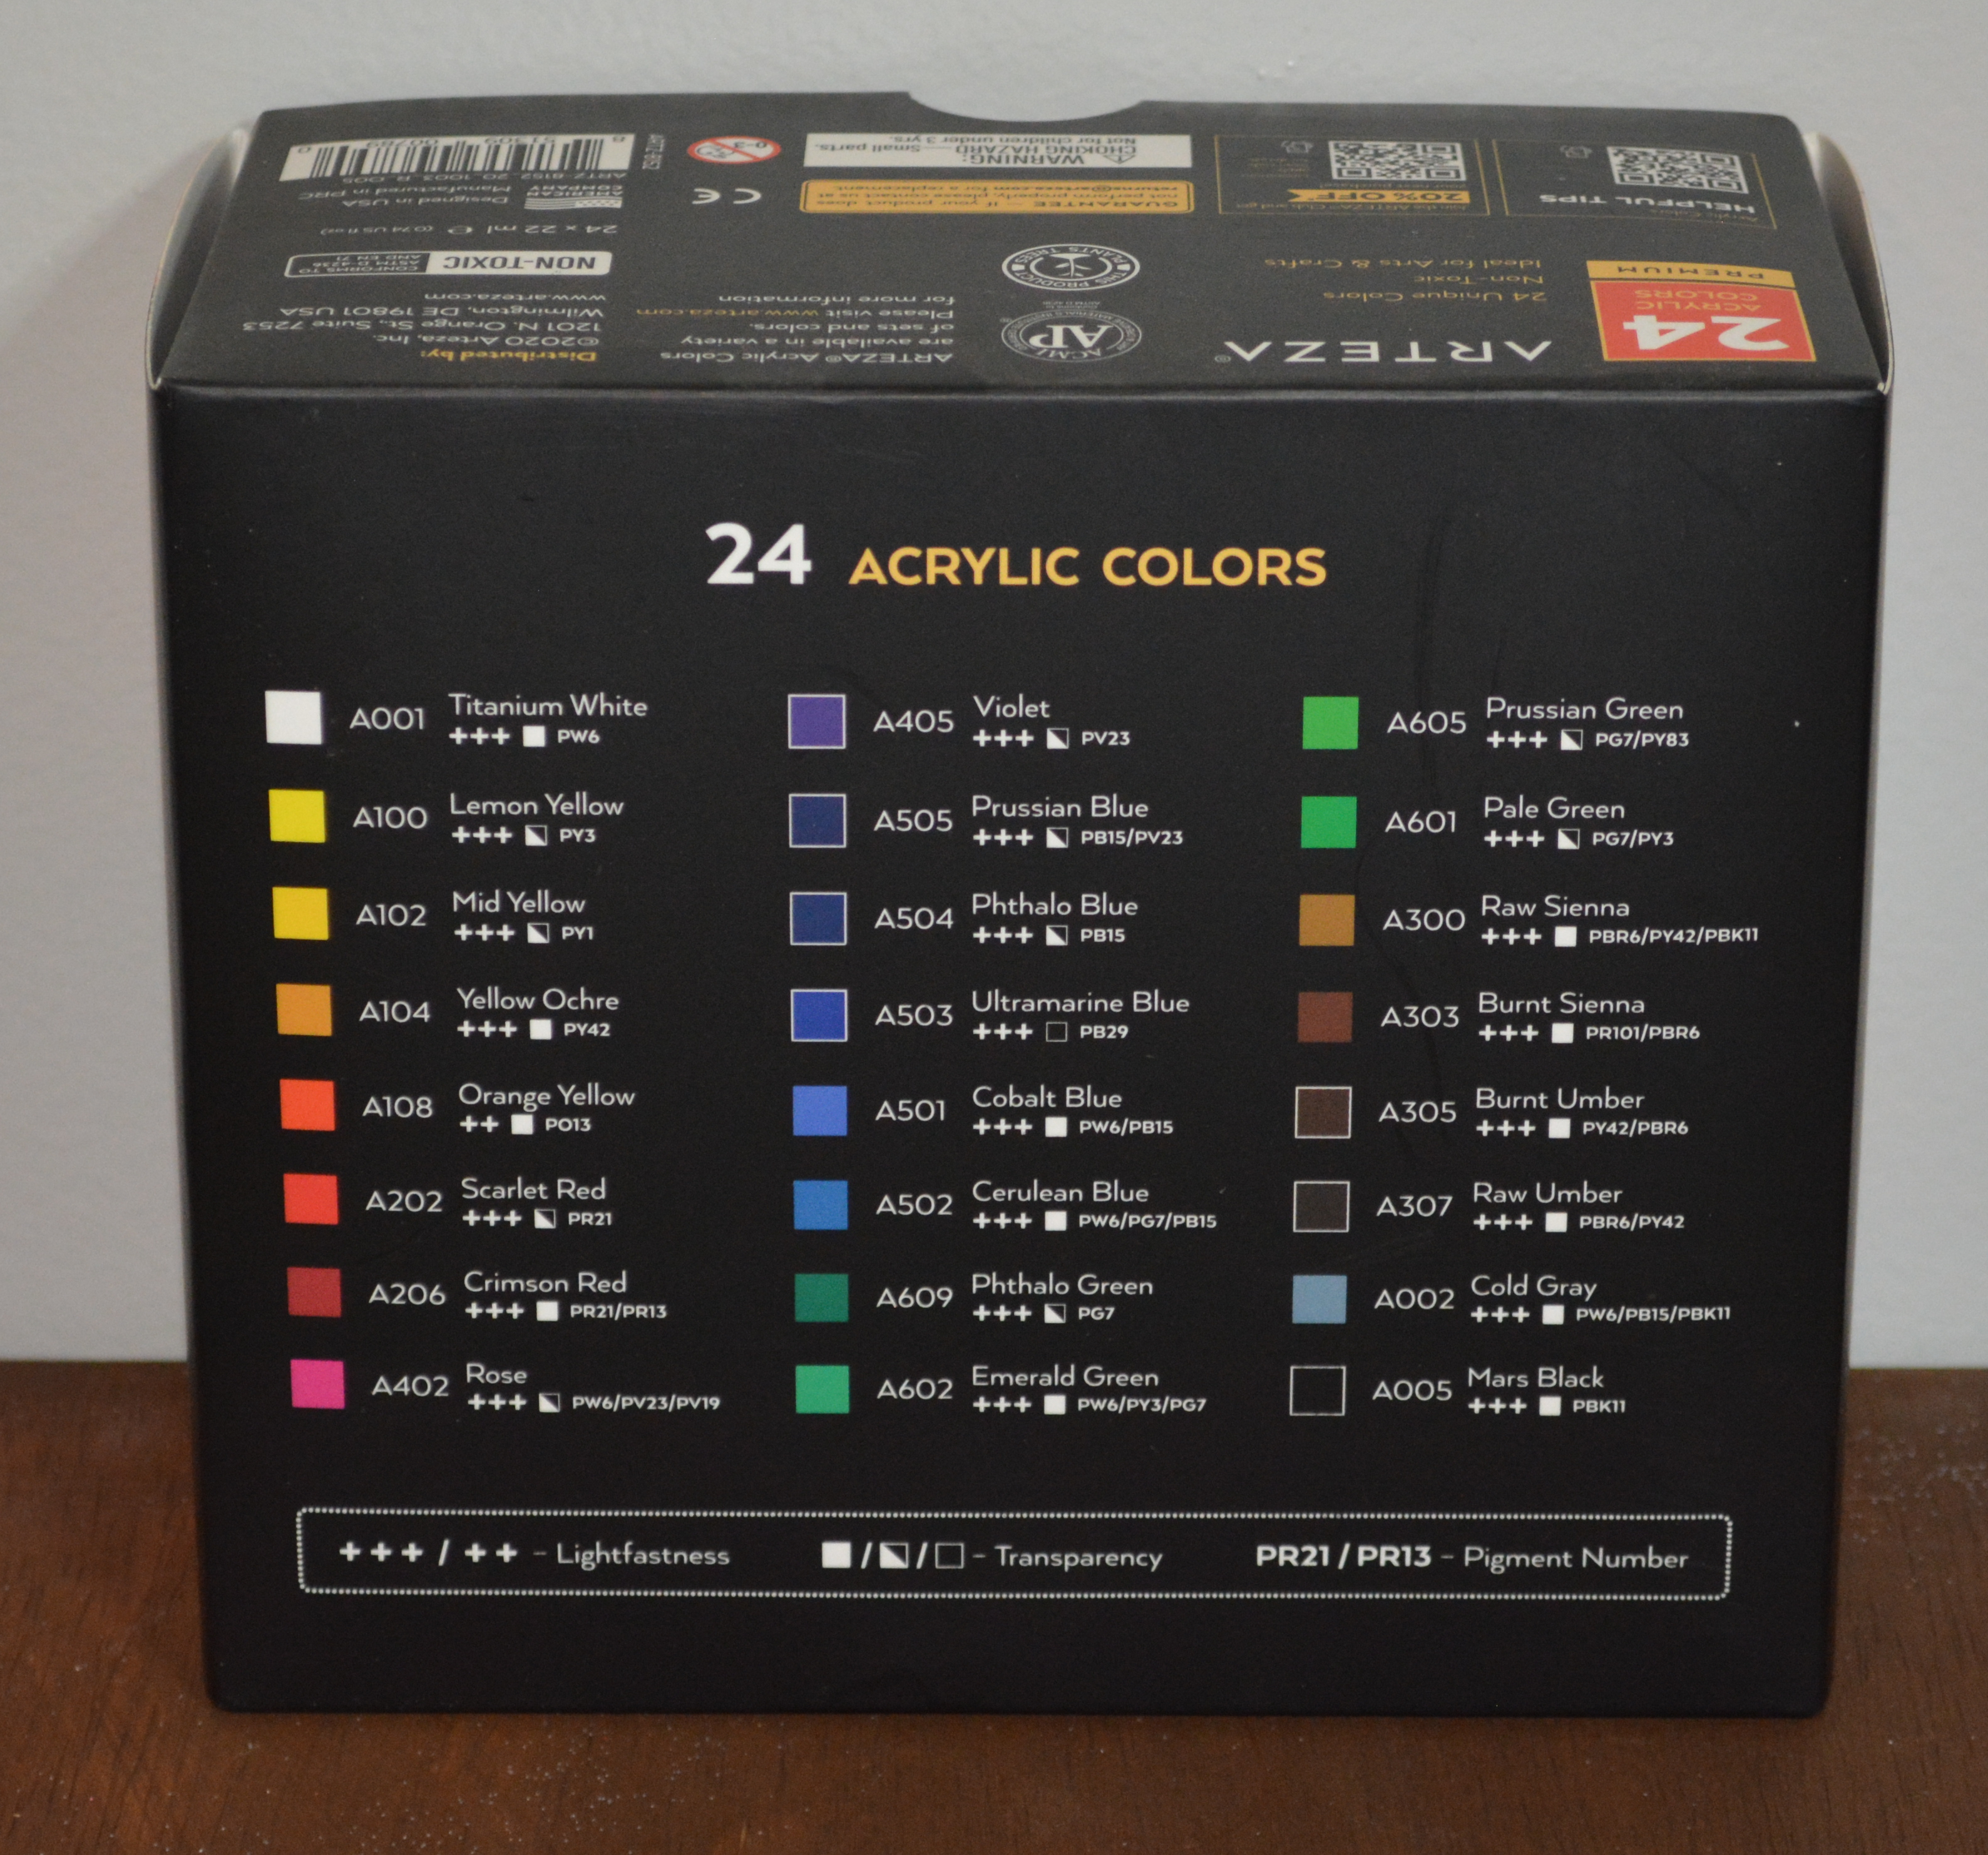
Now it is time to paint each piece. For the mason jar I used a Pool color so it would somewhat resemble glass. The truck I wanted to be green and used an acrylic paint from Hobby Lobby at first. The paint itself was terrible and would not cover at all. So I threw it into the trash and used the Arteza acrylic green paint to paint over it. The tires I painted with Ink Chalk Paint from Waverly. The penny color is a paint that was on clearance from Target. It is amazing and covers well. I was so surprised. It is a great color too.
After all of that was dry, I put two coats of Mod Podge on the mason jar. I used the glossy kind to make the it shine like a mason jar. The truck I did differently. I only put Mod Podge on the windows of the truck. That way they looked like glass.


It took me a while to figure out what to put on the mason jar. I thought about egg stickers or something like that. I looked at Walmart and Dollar Tree for some ideas but came up with nothing. So I shopped my stash and found this bunny that is a window sticker. I did add a bit of hot glue behind the ears to hold it in place. Then I put the card holder top back in it.
The bed of the truck had hearts on it from Valentine’s Day and I knew I wanted to cover them up. Gold coins were the perfect way to cover up the hearts. I cut one to make it look like it was down inside the bed of the truck. Use good strong scissors for this. I have scissors from Tim Holtz that are strong and can cut through almost anything. Then I hot glued 4 for coins around it. Finally I put the card holder back in.
Here are the finished projects. They are so cute and one of a kind. I love them. I can display cards in them proudly for the holidays. They will add to the decor in my kitchen for these two holidays where is it hard to find little things like card holders.
Let me know what you think of these projects. As always Like, Share, Comment, and Subscribe. You can find me on Instagram and Facebook under Yellow Butterfly Craft Designs.
John 3:16 For God so loved the world, that he gave his only Son, that whoever believes in him should not perish but have eternal life.
Have a wonderful weekend!
Melissa McGuire
Supplies
Truck and Mason Jar Card Holder- Dollar Tree
Waverly Chalk Paint in White, Pool, and Ink- Walmart
Arteza Acrylic Paint- Amazon
Penny Acrylic Paint- Target
Tim Holtz Scissors- Hobby Lobby
Gold Coins- Walmart, Dollar Tree
Bunny Window Sticker- Dollar Tree
Mod Podge- Any Craft Store
Surebonder Hot Glue Gun and Hot Glue Sticks- Hobby Lobby
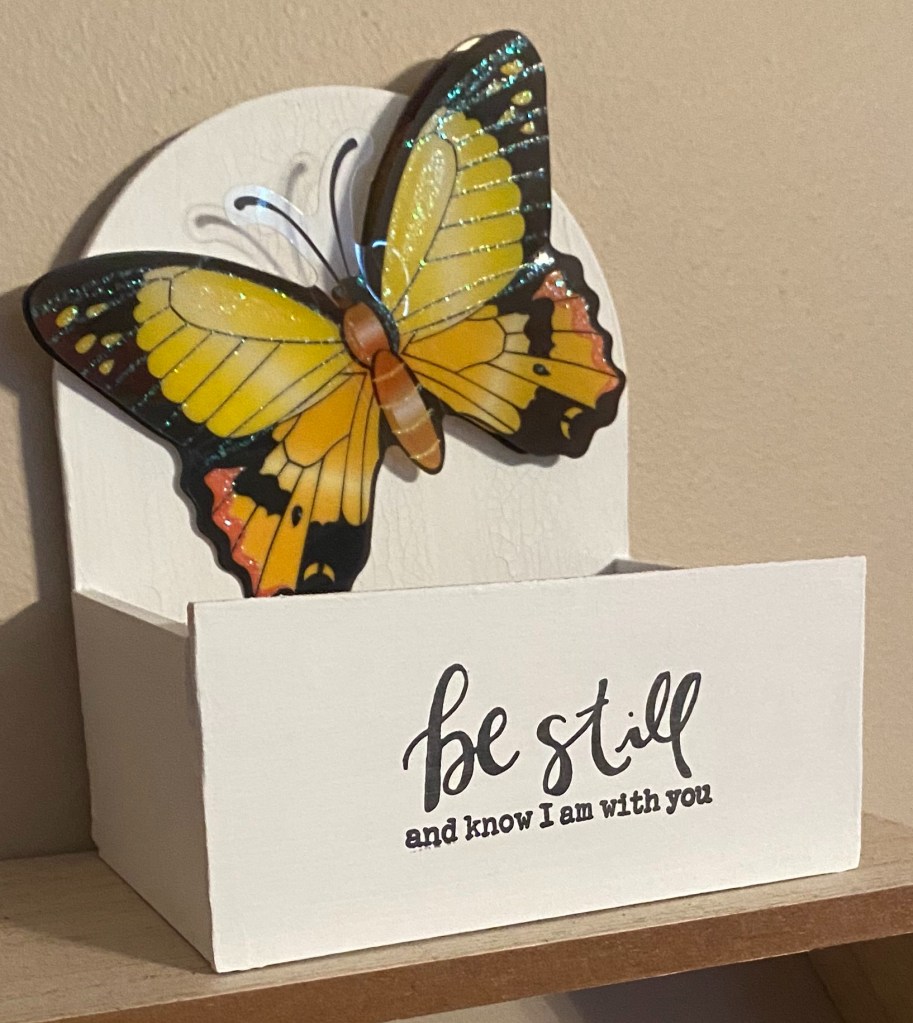
Remember a few weeks ago I make those cute Valentine’s leather earrings? Well I did not really have anywhere to store them. I have several pair of leather earrings and they are long and big. It is hard to put them in a regular jewelry box I also do not have room to hang storage on my wall. So I was excited to find this little container at Dollar Tree but I wanted to give it a makeover.
Lets Get Started
Supplies

Supplies are easy this week. You will need one of these little containers, some stickers and paint. I also used some stamps and ink. If you can not find this container then you can use a small box and one of the wood planks from Dollar tree to create your own container.
First I painted the container white with Waverly Chalk Paint. It took about three coats to cover all the colors.

My second step was to add the big butterfly sticker. I got these at Dollar Tree. You can use what ever image you want. You can even print an image out from the computer and glue it on.

Finally, I took black ink and stamped this saying on the front of the container. You can use stickers for this or print words out from the computer and glue them on. I have heard that using a glue stick works great for this kind of stuff.

Here is the finished project. As you can guess, I love yellow butterflies. They have special meaning to me. The saying is my favorite Bible verse. I have always struggled with being still and having faith. Any kind of reminder I can put out is helpful and I will see this container every day. It is perfect for just laying the earrings in it. They stay flat and I can put several in the container.
Thank you for joining me today. I have some St. Patrick’s Day and Easter crafts coming up. Along with spring sprinkled in. Please Like, Share, Comment, and Subscribe! Also find me on Facebook and Instagram at Yellow Butterfly Craft Designs.
Psalms 46:10 Be still and know that I am God.
Melissa McGuire
Supplies
Container- Dollar Tree
Butterfly Stickers- Dollar Tree
Waverly White Chalk Paint- Walmart
Black Versamark Ink- Michael’s Craft Supply
Christian Stamp Set- Michael’s Craft Supply
