Welcome to day 4 for the 4 Days of the Fourth of July!! Happy Independence Day!!!! We are celebrating and spending time with some of our great friends that have become family. My boys love to swim and grill out. They also love the fire works. It is also the day that we reflect on why we have our freedom and that freedom is never free. There were those who paid the price for us to be free. What do you do on the Fourth of July?
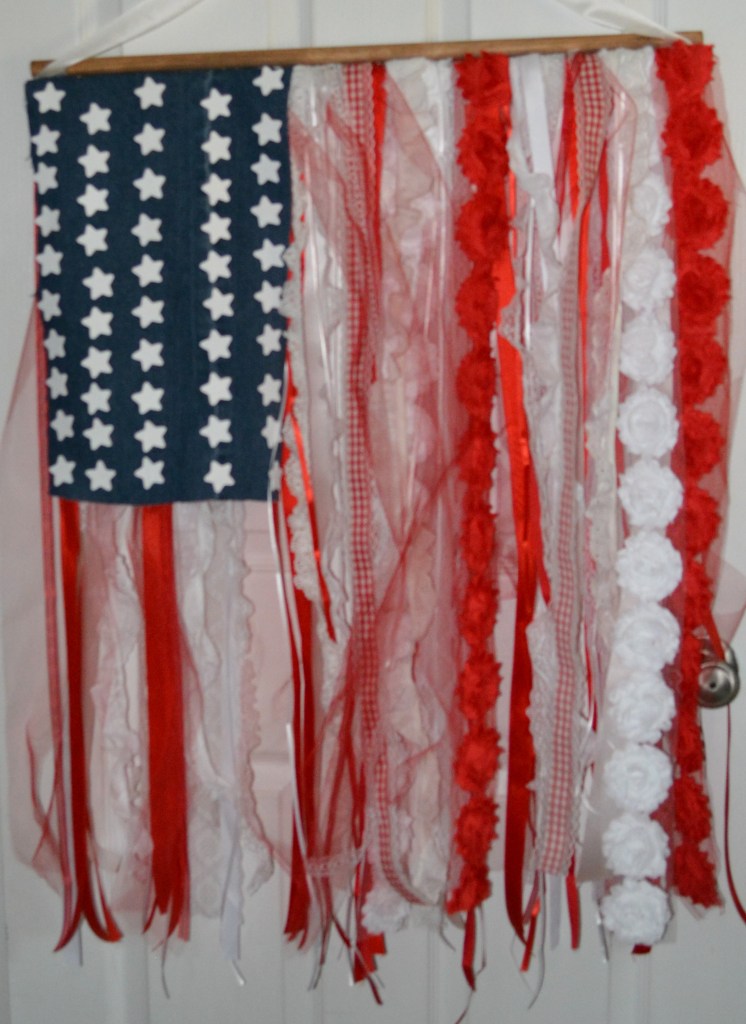
Now lets get to our final project. I have wanted to make a ribbon flag for I don’t know how long. My ribbon stash has been out of control for a while so I figured this was the perfect way to use some of it up.
Lets Get Started
Supplies

The supplies for this project are pretty simple. You need dowel rods, ribbon, wooden stars, a pair of old jeans, and hot glue. The size of the dowel rods are up to you. It depends on what size flag you want to make.
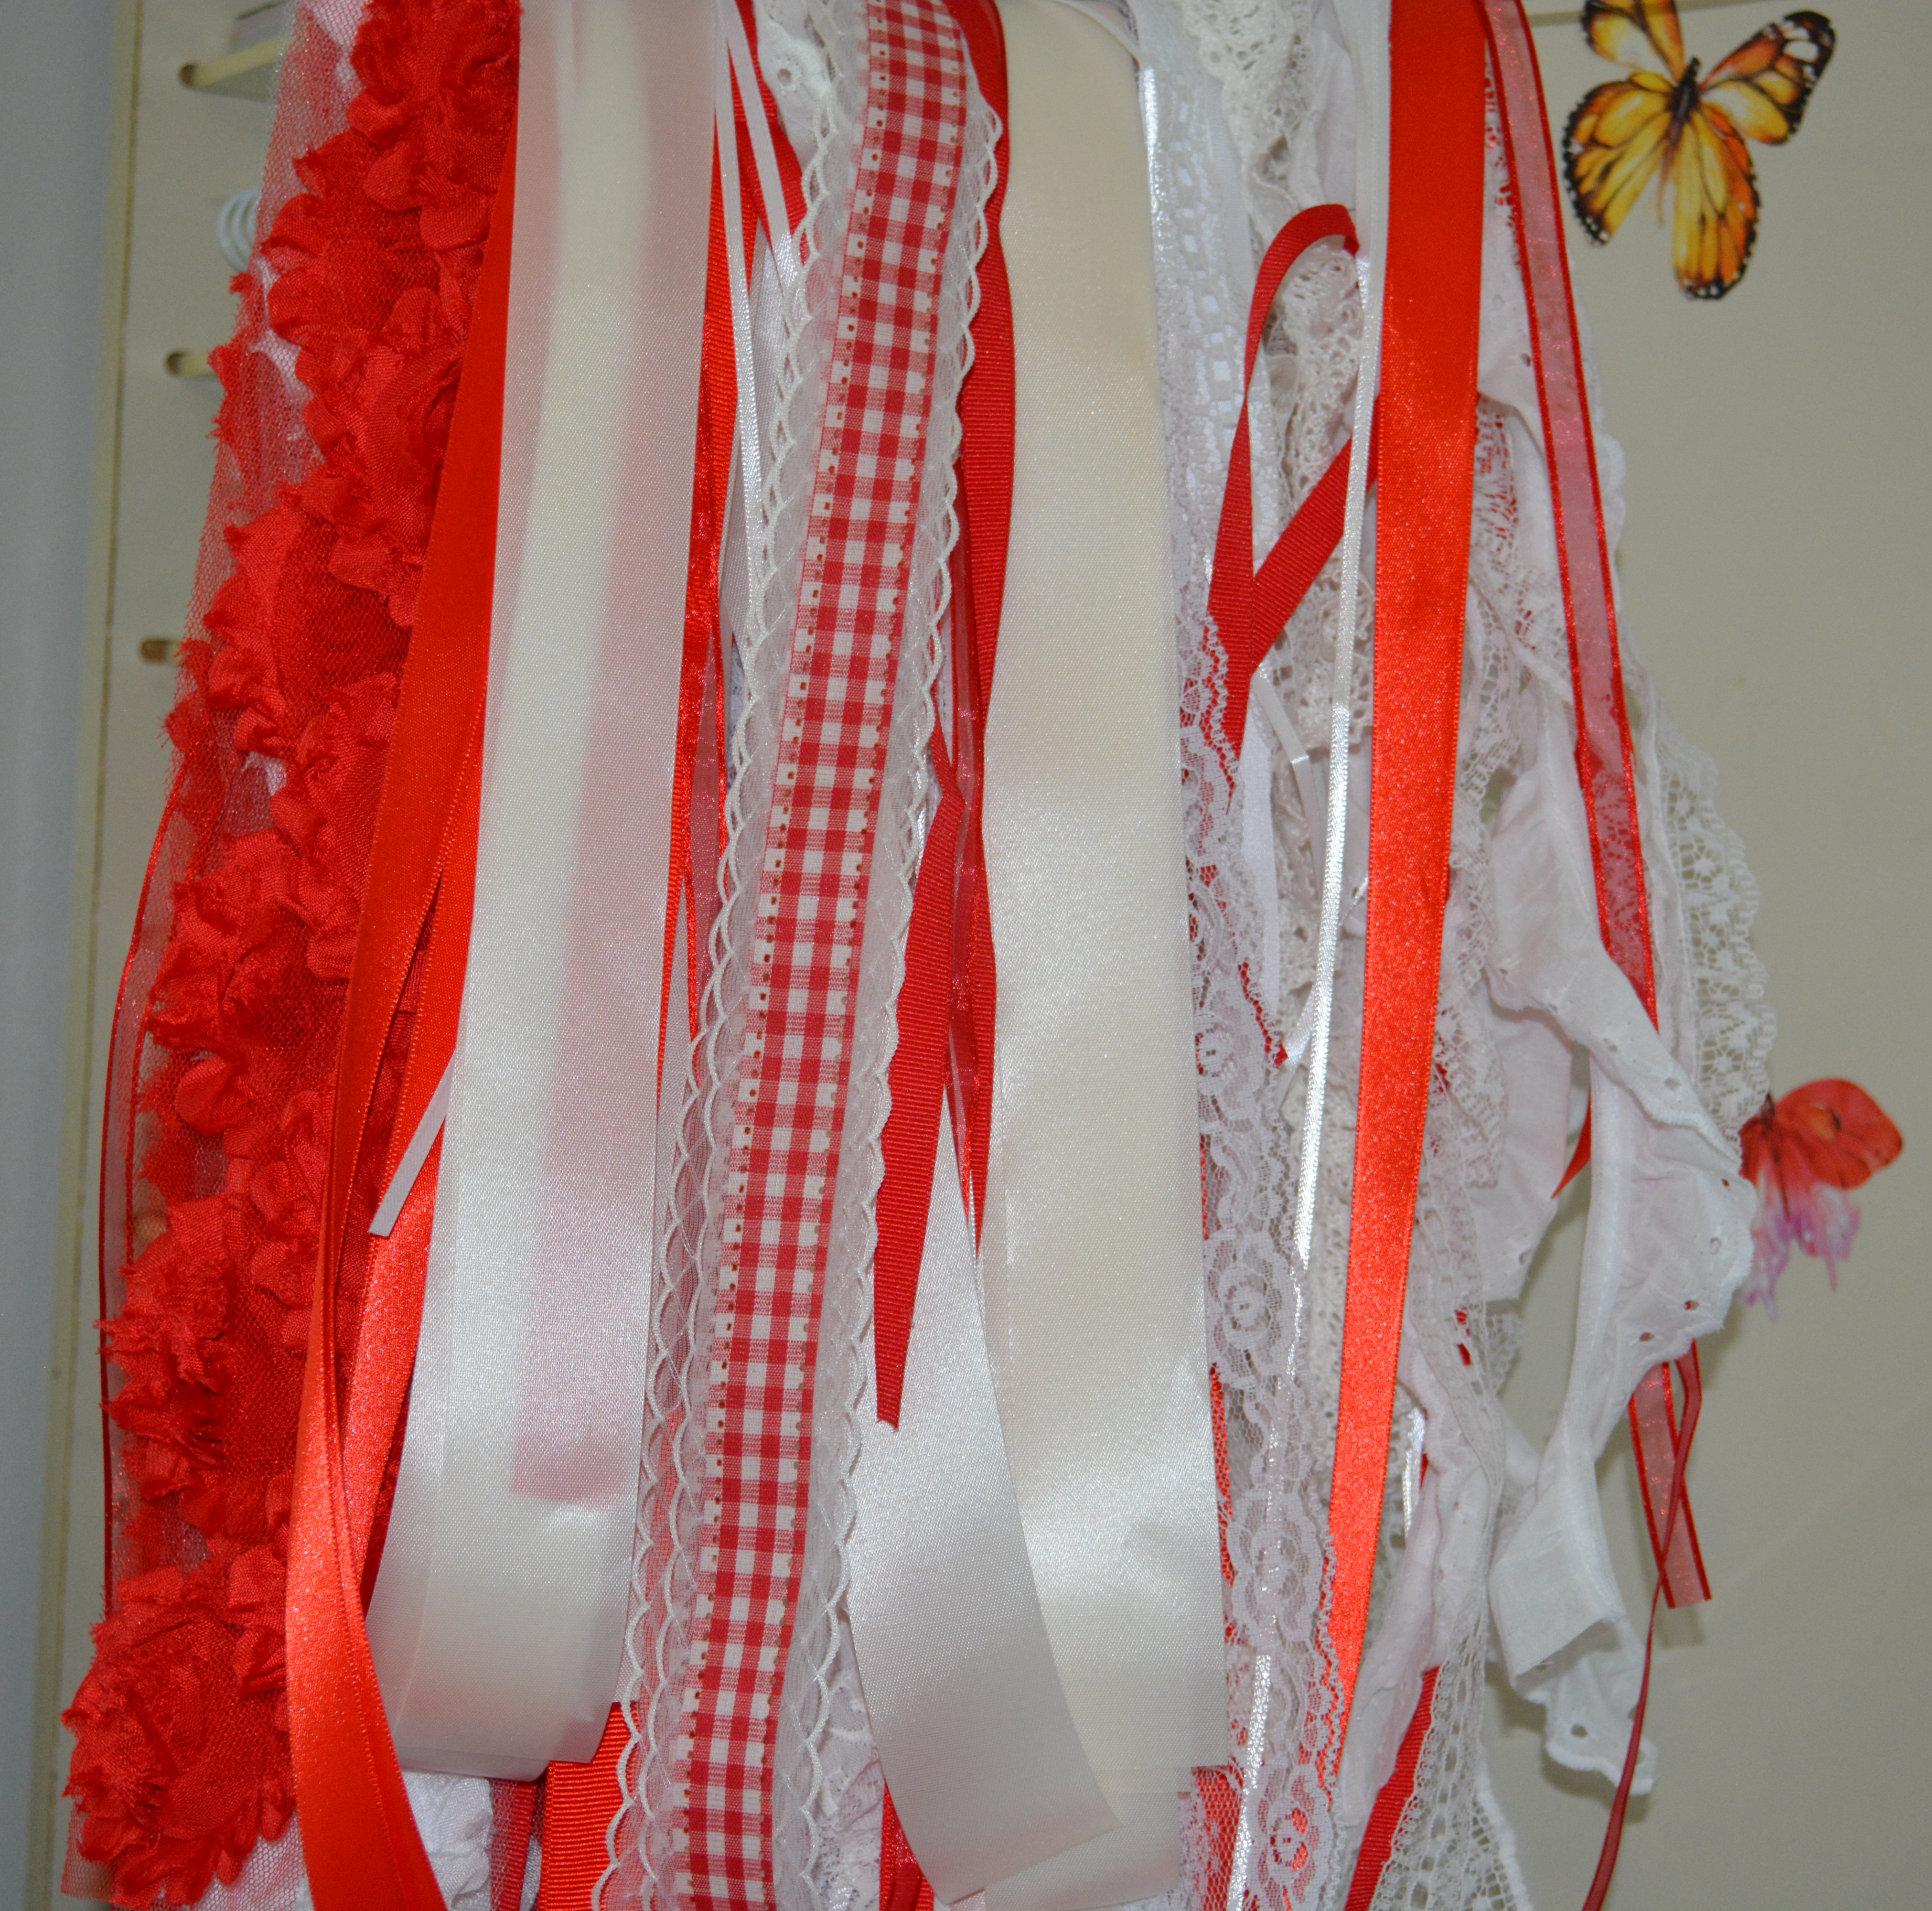
Now lets talk ribbon. For this flag you want several different kinds of red and white ribbon. It is the perfect time to use up scraps if they are long enough. I used around 8 or 9 different types and widths of ribbon and lace. The lace is special because it is from my mom’s craft stash and she is no longer on this earth.

To start this project I had my husband cut down my dowel rods. I started cutting my ribbon. Each ribbon strip is about the same length but not exact. The length of the rods and ribbon will depend on how big of a flag you want to make. After the dowel rods were cut, I used a mix of Antique Wax and water to make a stain and applied it to the rods. You can leave yours all natural if that is what you like.

I looked at a US flag to see how many stripes of each color there was. 13 stripes in all. I picked out ribbons of each color to start with. I glued a red ribbon to each end and one in the middle of one of the rods. Then spaced out the other 4 red pieces of ribbon. Now its time for the white ribbon. I just glued it in between the red ribbons. Now you have a guide to start layering ribbon on top of. I glued the plainer ribbons on the bottom and the lace and more texted ribbon on the top. Just keep making layers with all the ribbon making sure to keep the stripes of the flag.
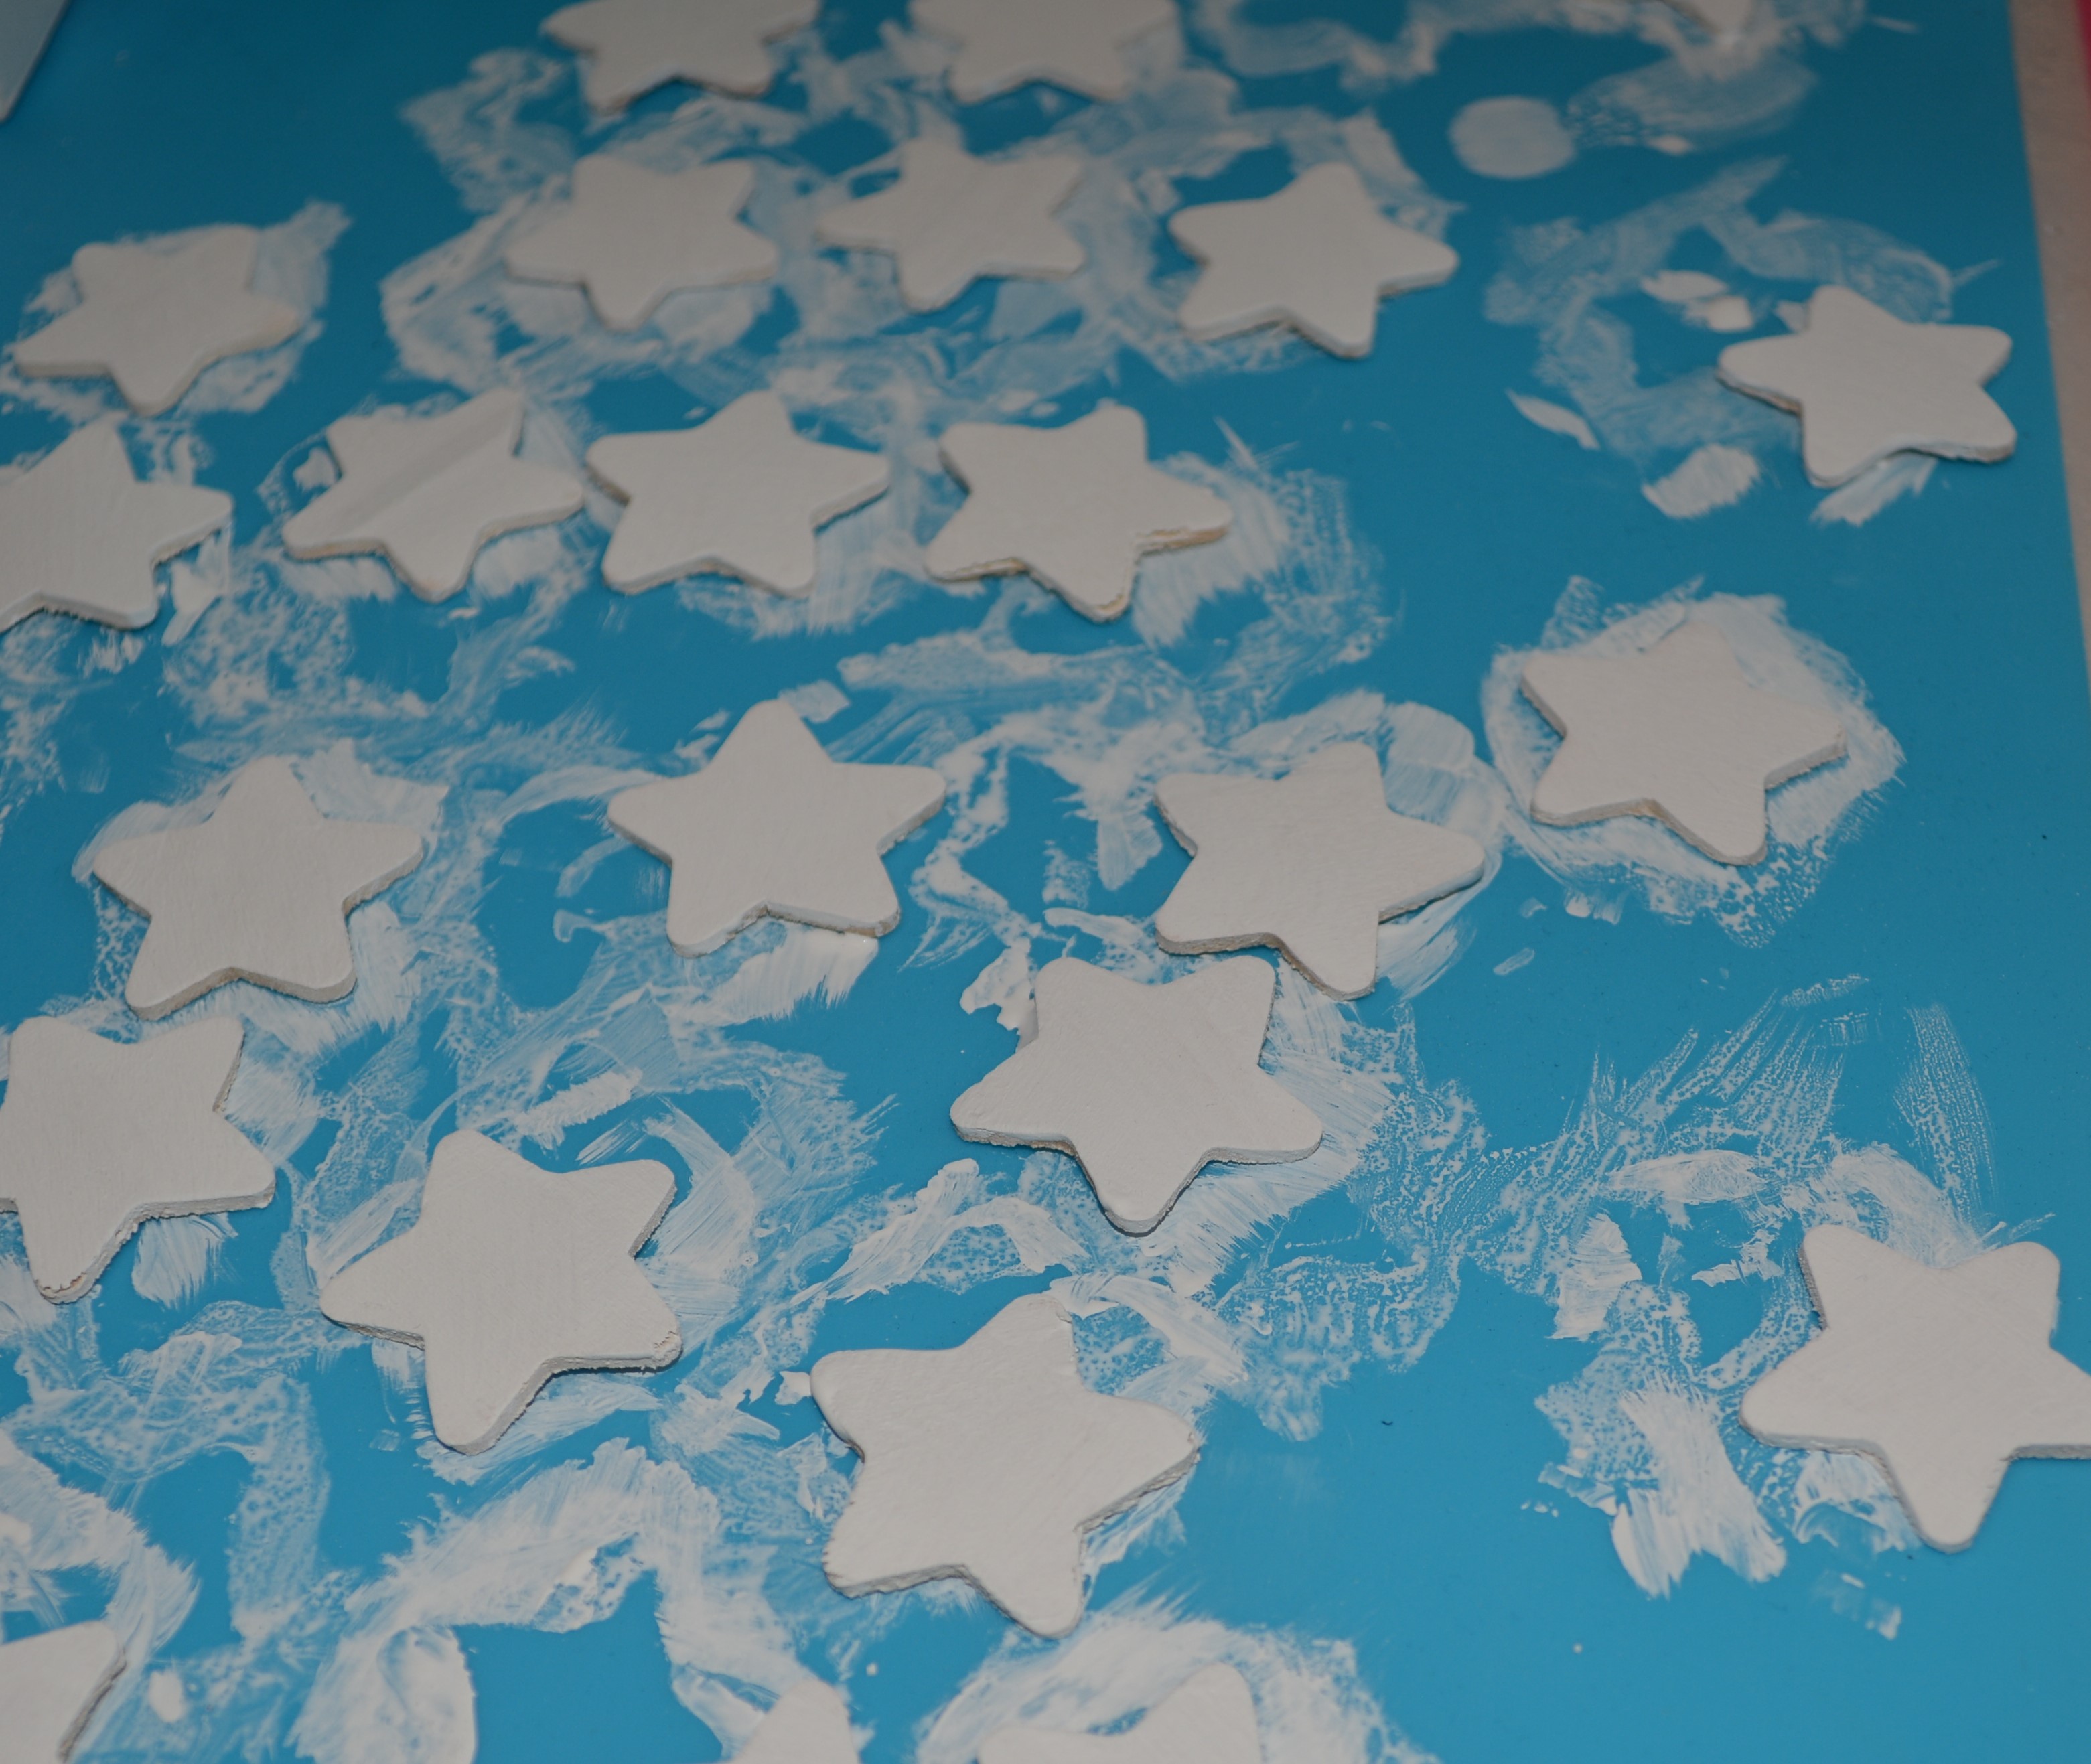
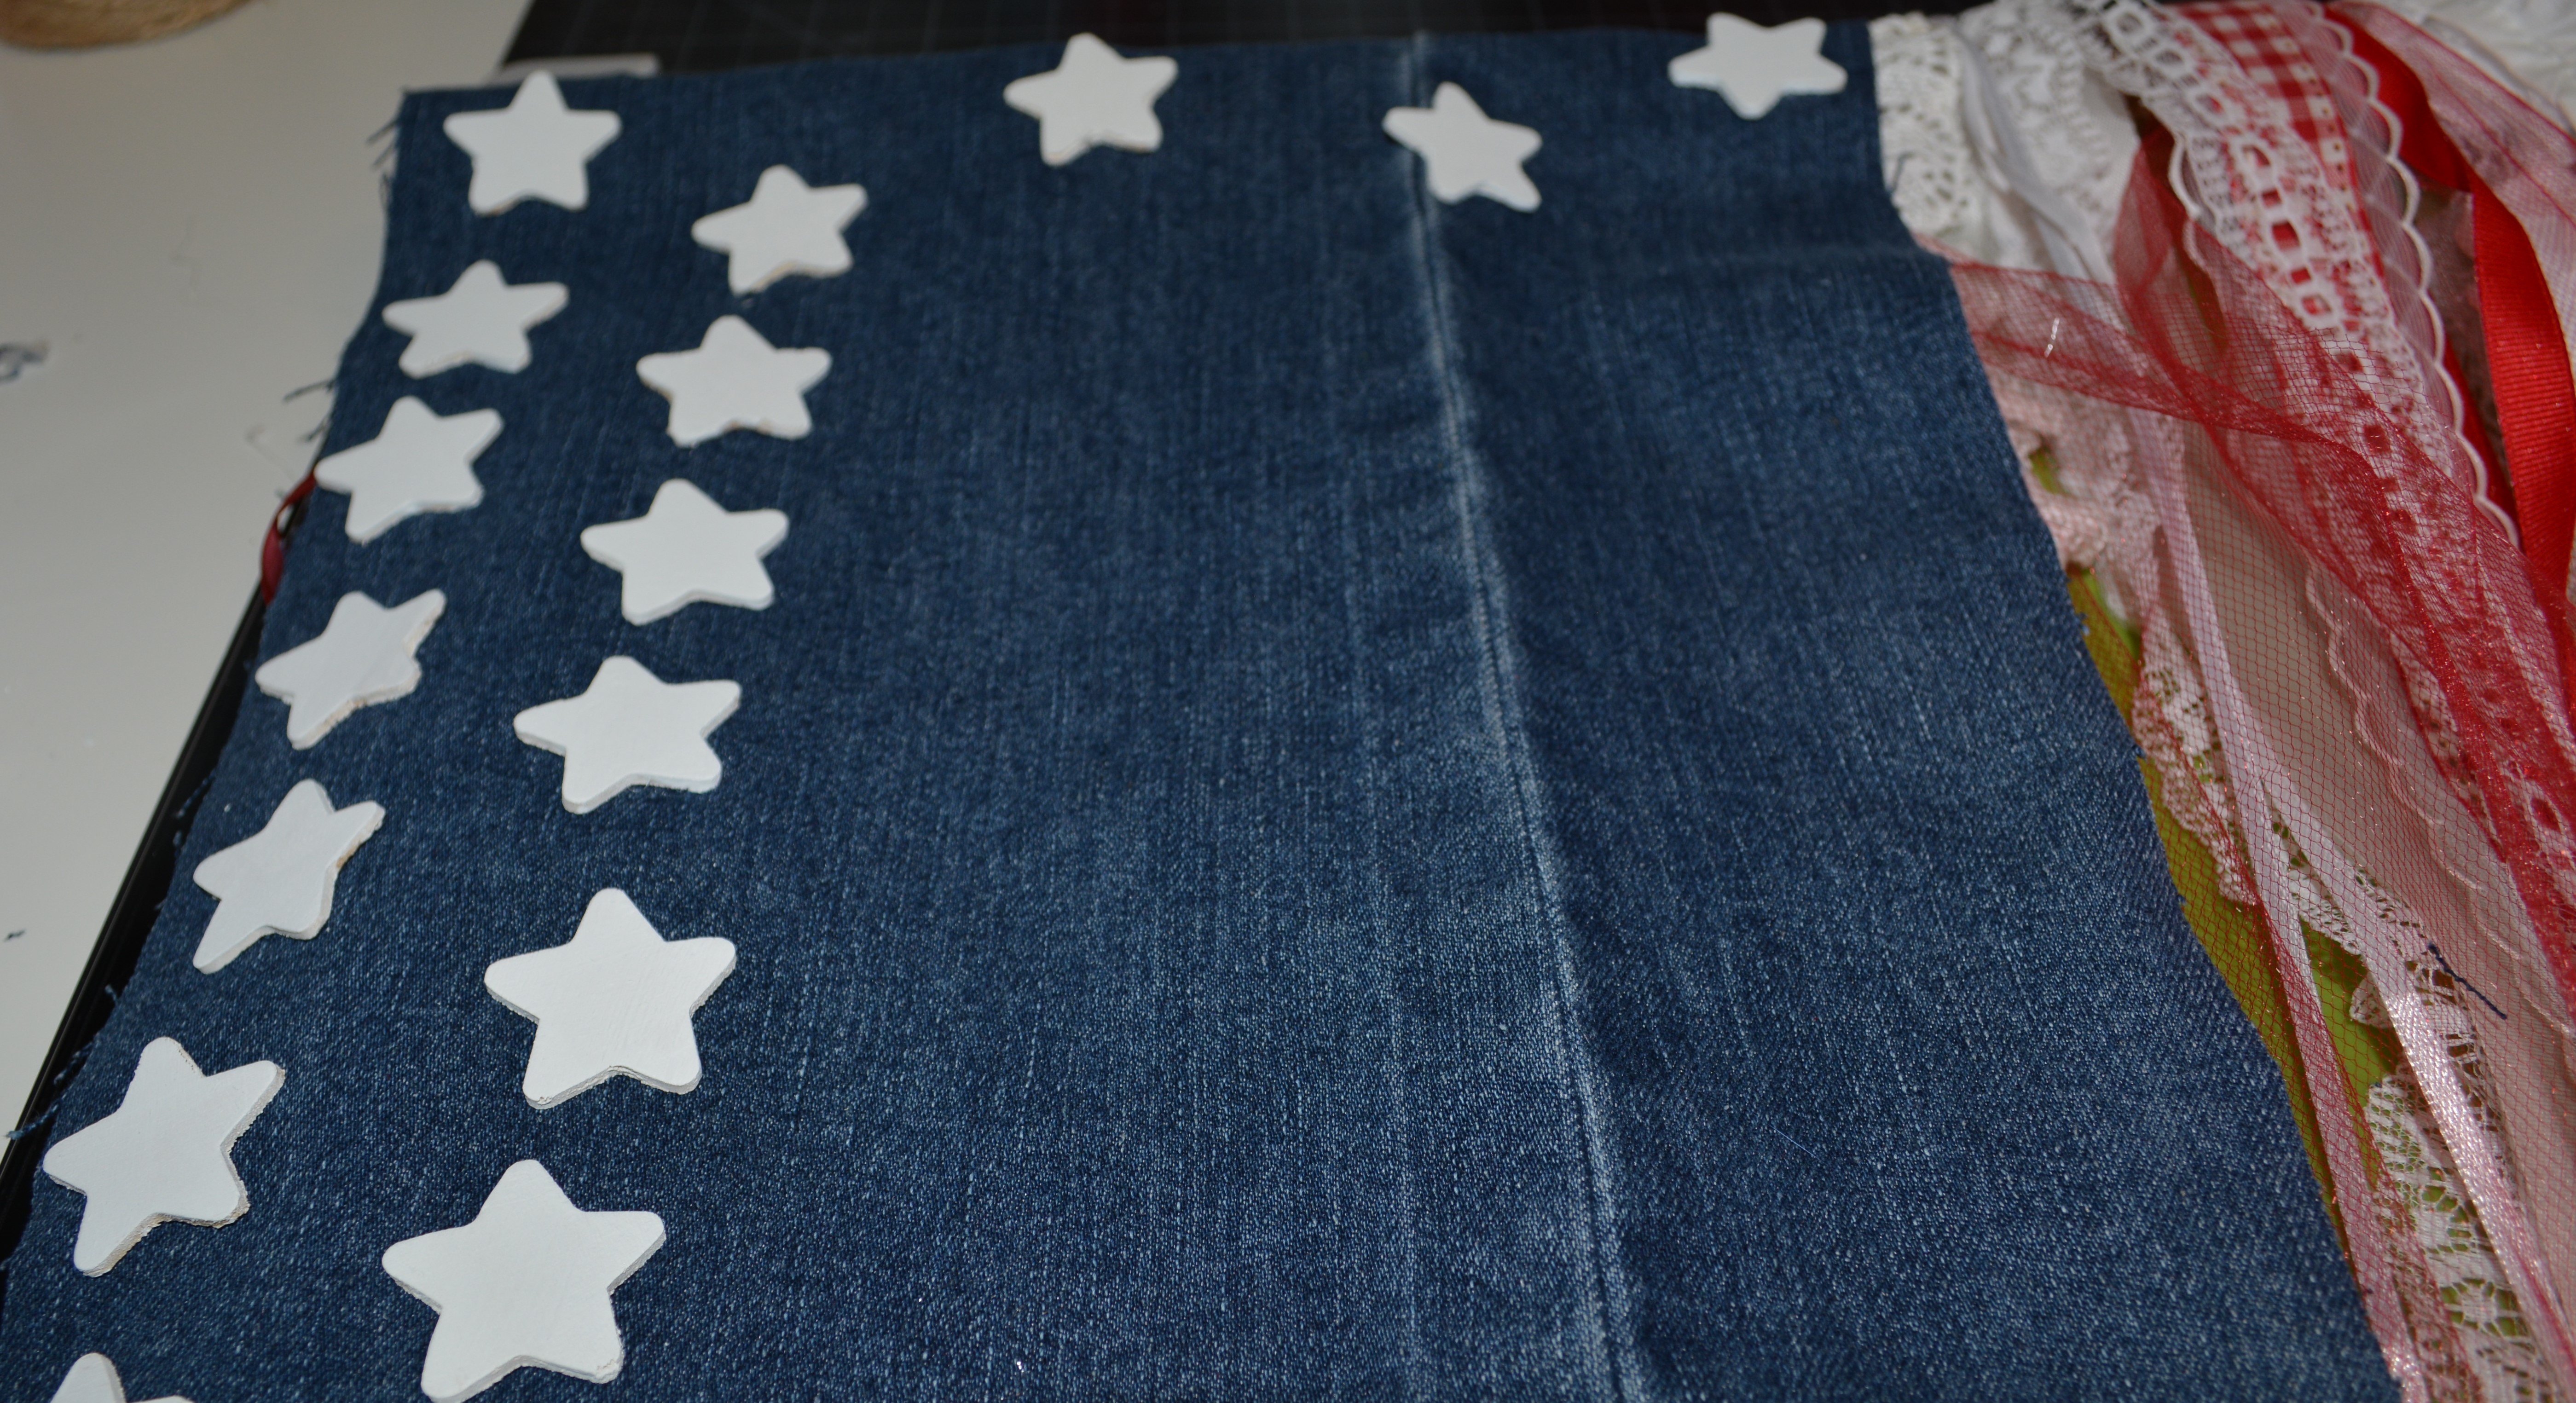
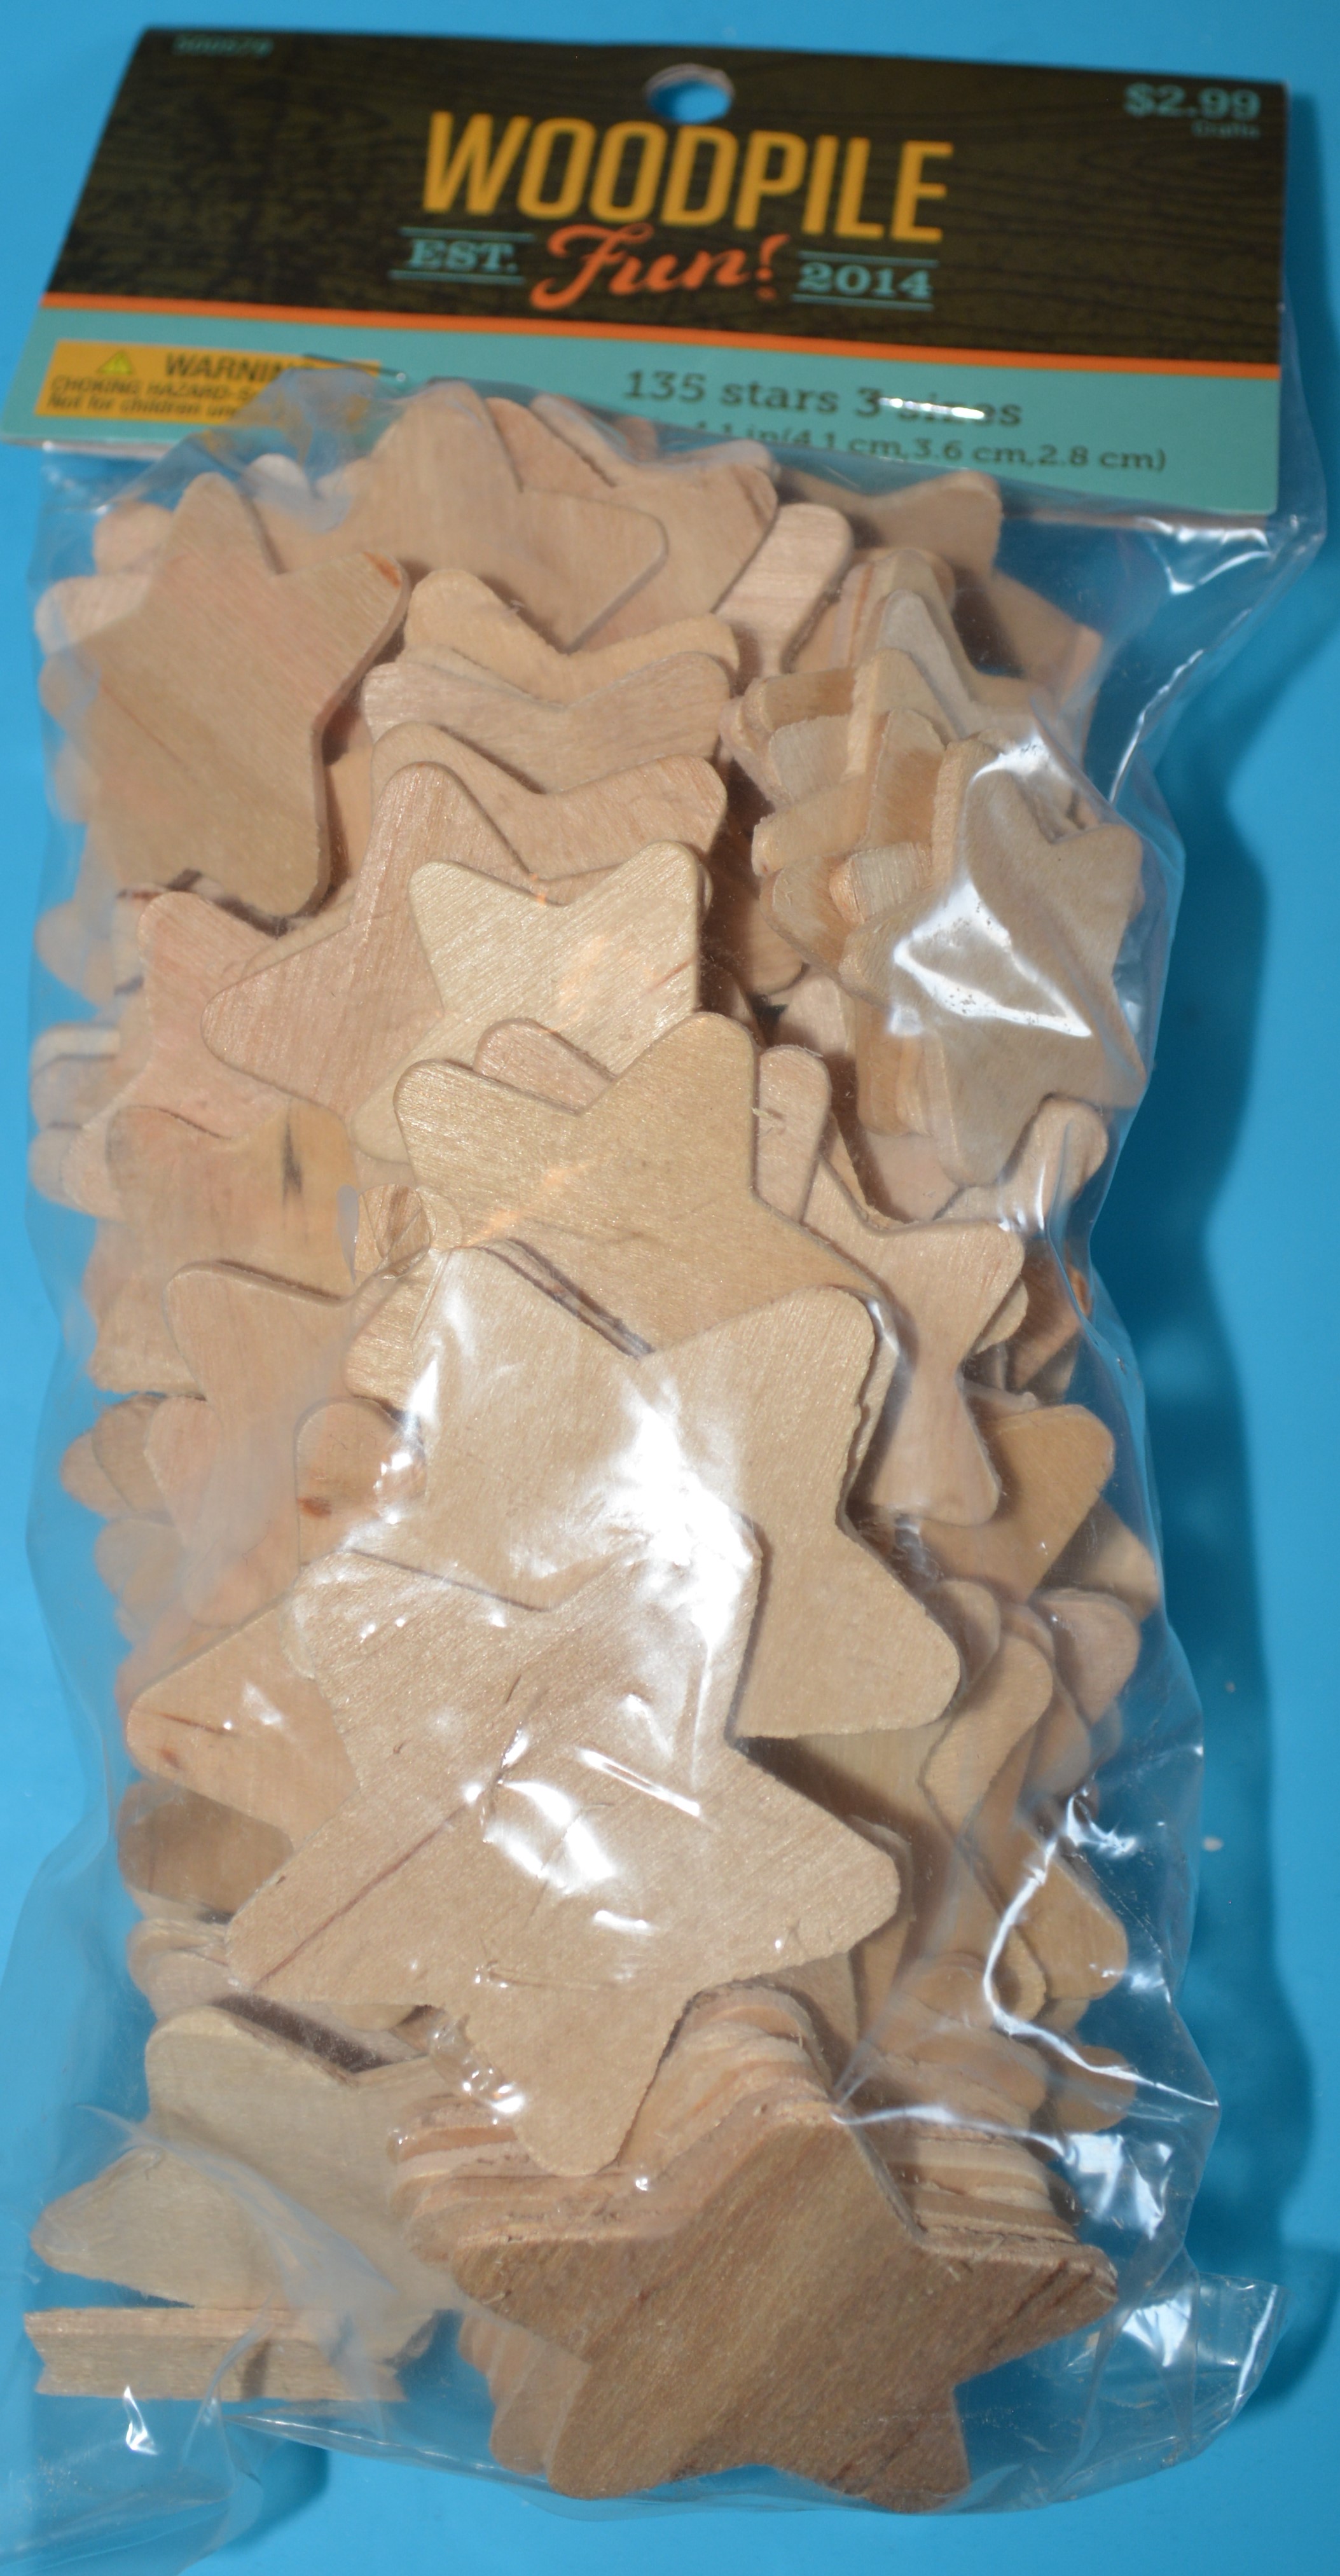
Once all of your ribbon is glued down, it is time to add the blue for our flag and the stars. I got an old pair of jeans at the thrift store. Yesterday I used those jeans to cover a cross wreath. Today I am cutting out a rectangle to serve as the blue piece to my flag. Make sure to take into account the part of the material that will be glued to the rod. From there I laid out 50 small stars I got from Hobby Lobby and I painted them with 2 coats of White Waverly Chalk Paint. While the stars are drying, I glued the jeans to the dowel rod in front of the ribbon. Once the stars were dry, I glued them down on the jean piece.

The final steps are to glue a piece of ribbon as a hanger. Then remember that other dowel rod. Take it and glue it right over top of where you glued all the ribbons down. This will hide all you glue and hold the hanger stable. That’s it!! Your done!!!
What a way to finish up our last few days of patriotic decor. I think this flag is my favorite out of everything I made this year. It is amazing. You could use this to make any kind of flag you wanted. Just pick your colors and follow the same steps. Please try it!!
Thank you for joining me!! Please Like, Share, Comment, and Subscribe. Also find me on Instagram, and Facebook under Yellow Butterfly Craft Designs.
I have some fun stuff coming up. I have some selves to DIY, things with lemons, and some fun honey themed crafts. Also fall is coming up fast!! Dollar Tree and Hobby Lobby are already putting up fall stock.
Have a wonderful and happy Fourth of July!! Please be safe too!
Melissa McGuire
Supplies
Dowel Rods- Hobby Lobby
Ribbon- Anywhere I find it cheap or on sale
Jeans- Thrift Store
Waverly Chalk Paint in White- Walmart
Wooden Stars- Hobby Lobby
Waverly Antique Wax- Walmart
Surebonder Hot Glue Gun and Hot Glue Sticks- Hobby Lobby
Gorilla Hot Glue Sticks- Walmart
