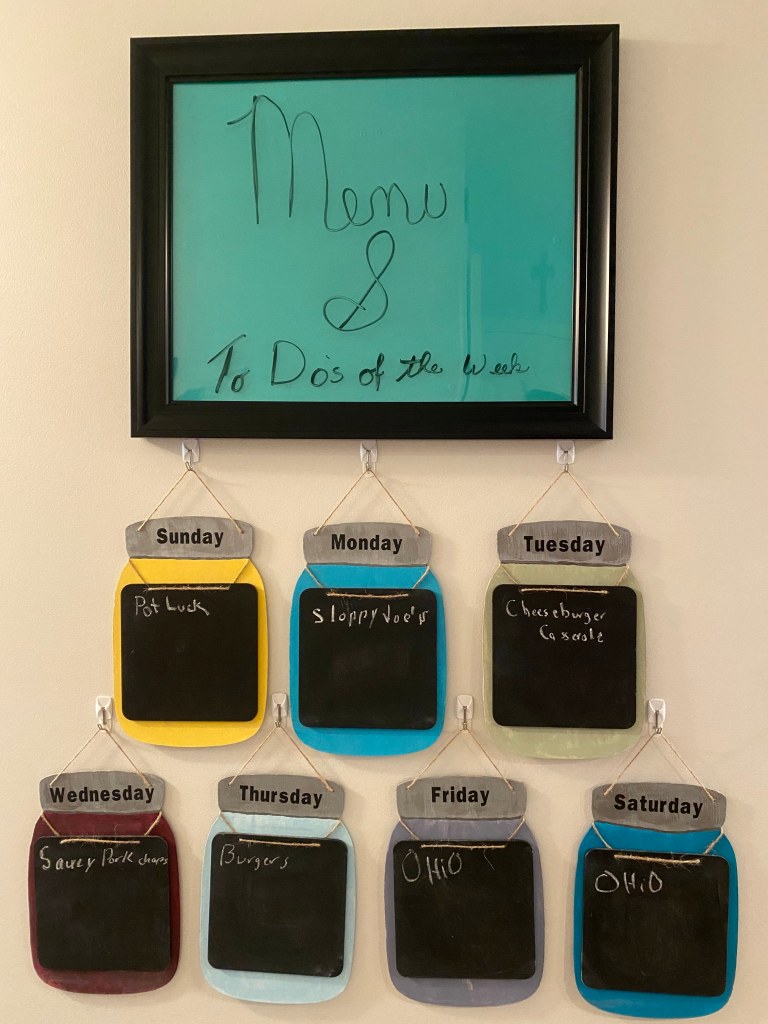
I have had this craft done for a while and have not posted it. It was one of the first crafts I took pictures of before I started my blog. If you know me you know that I LOVE mason jars!! I am excited to finally have these mason jars up and ready for use. The inspiration for this project came when the calendar that had my menu board on it ran out and I needed a new one.
In my house, my family will ask me a million times what is for dinner or what the plans are for the day. Well now I can direct them to this menu and To Do station. (please ignore my poor hand writing on the frame above) Come along with me as I show you how I made these.
Lets Get Started
Supplies


I found these mason jars a few years ago at Dollar Tree but you can get wooden mason jars several places now. You do not have to go with mason jars, you could use circles or squares. The possibilities are endless. I also used chalk paint, silver metallic paint, a scraper, chalk boards, twine, a Cricut and vinyl, and hot glue.
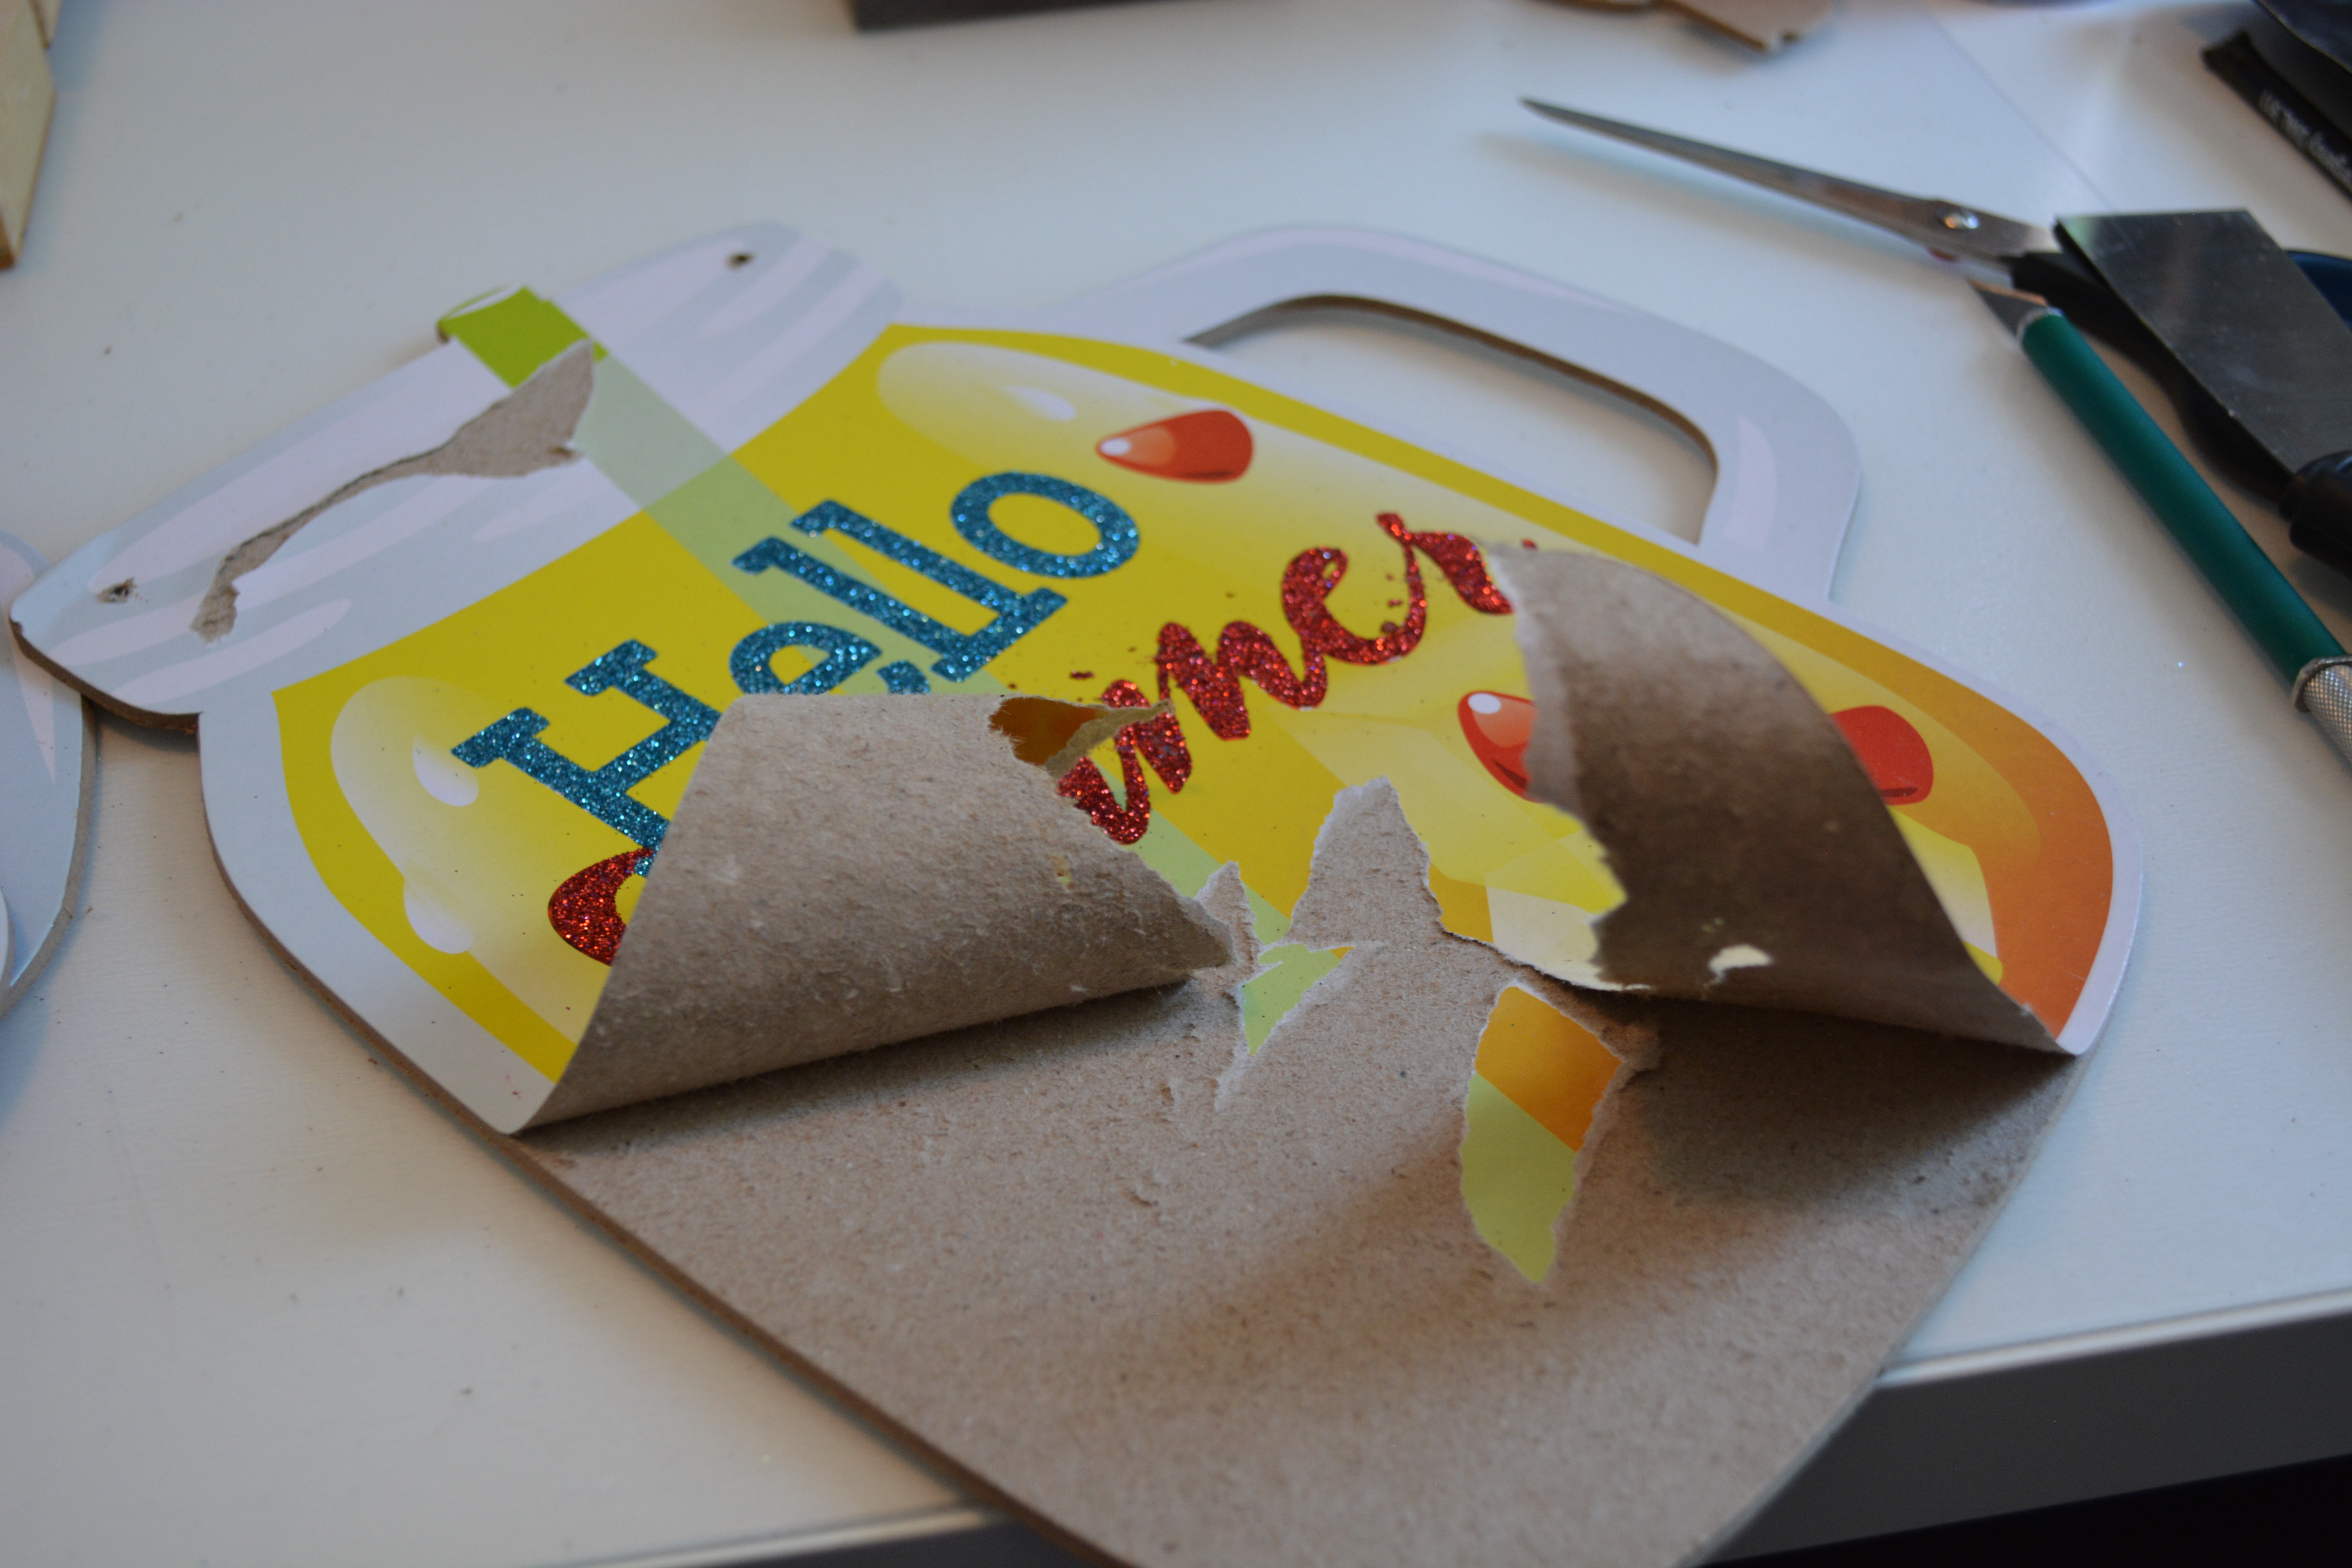
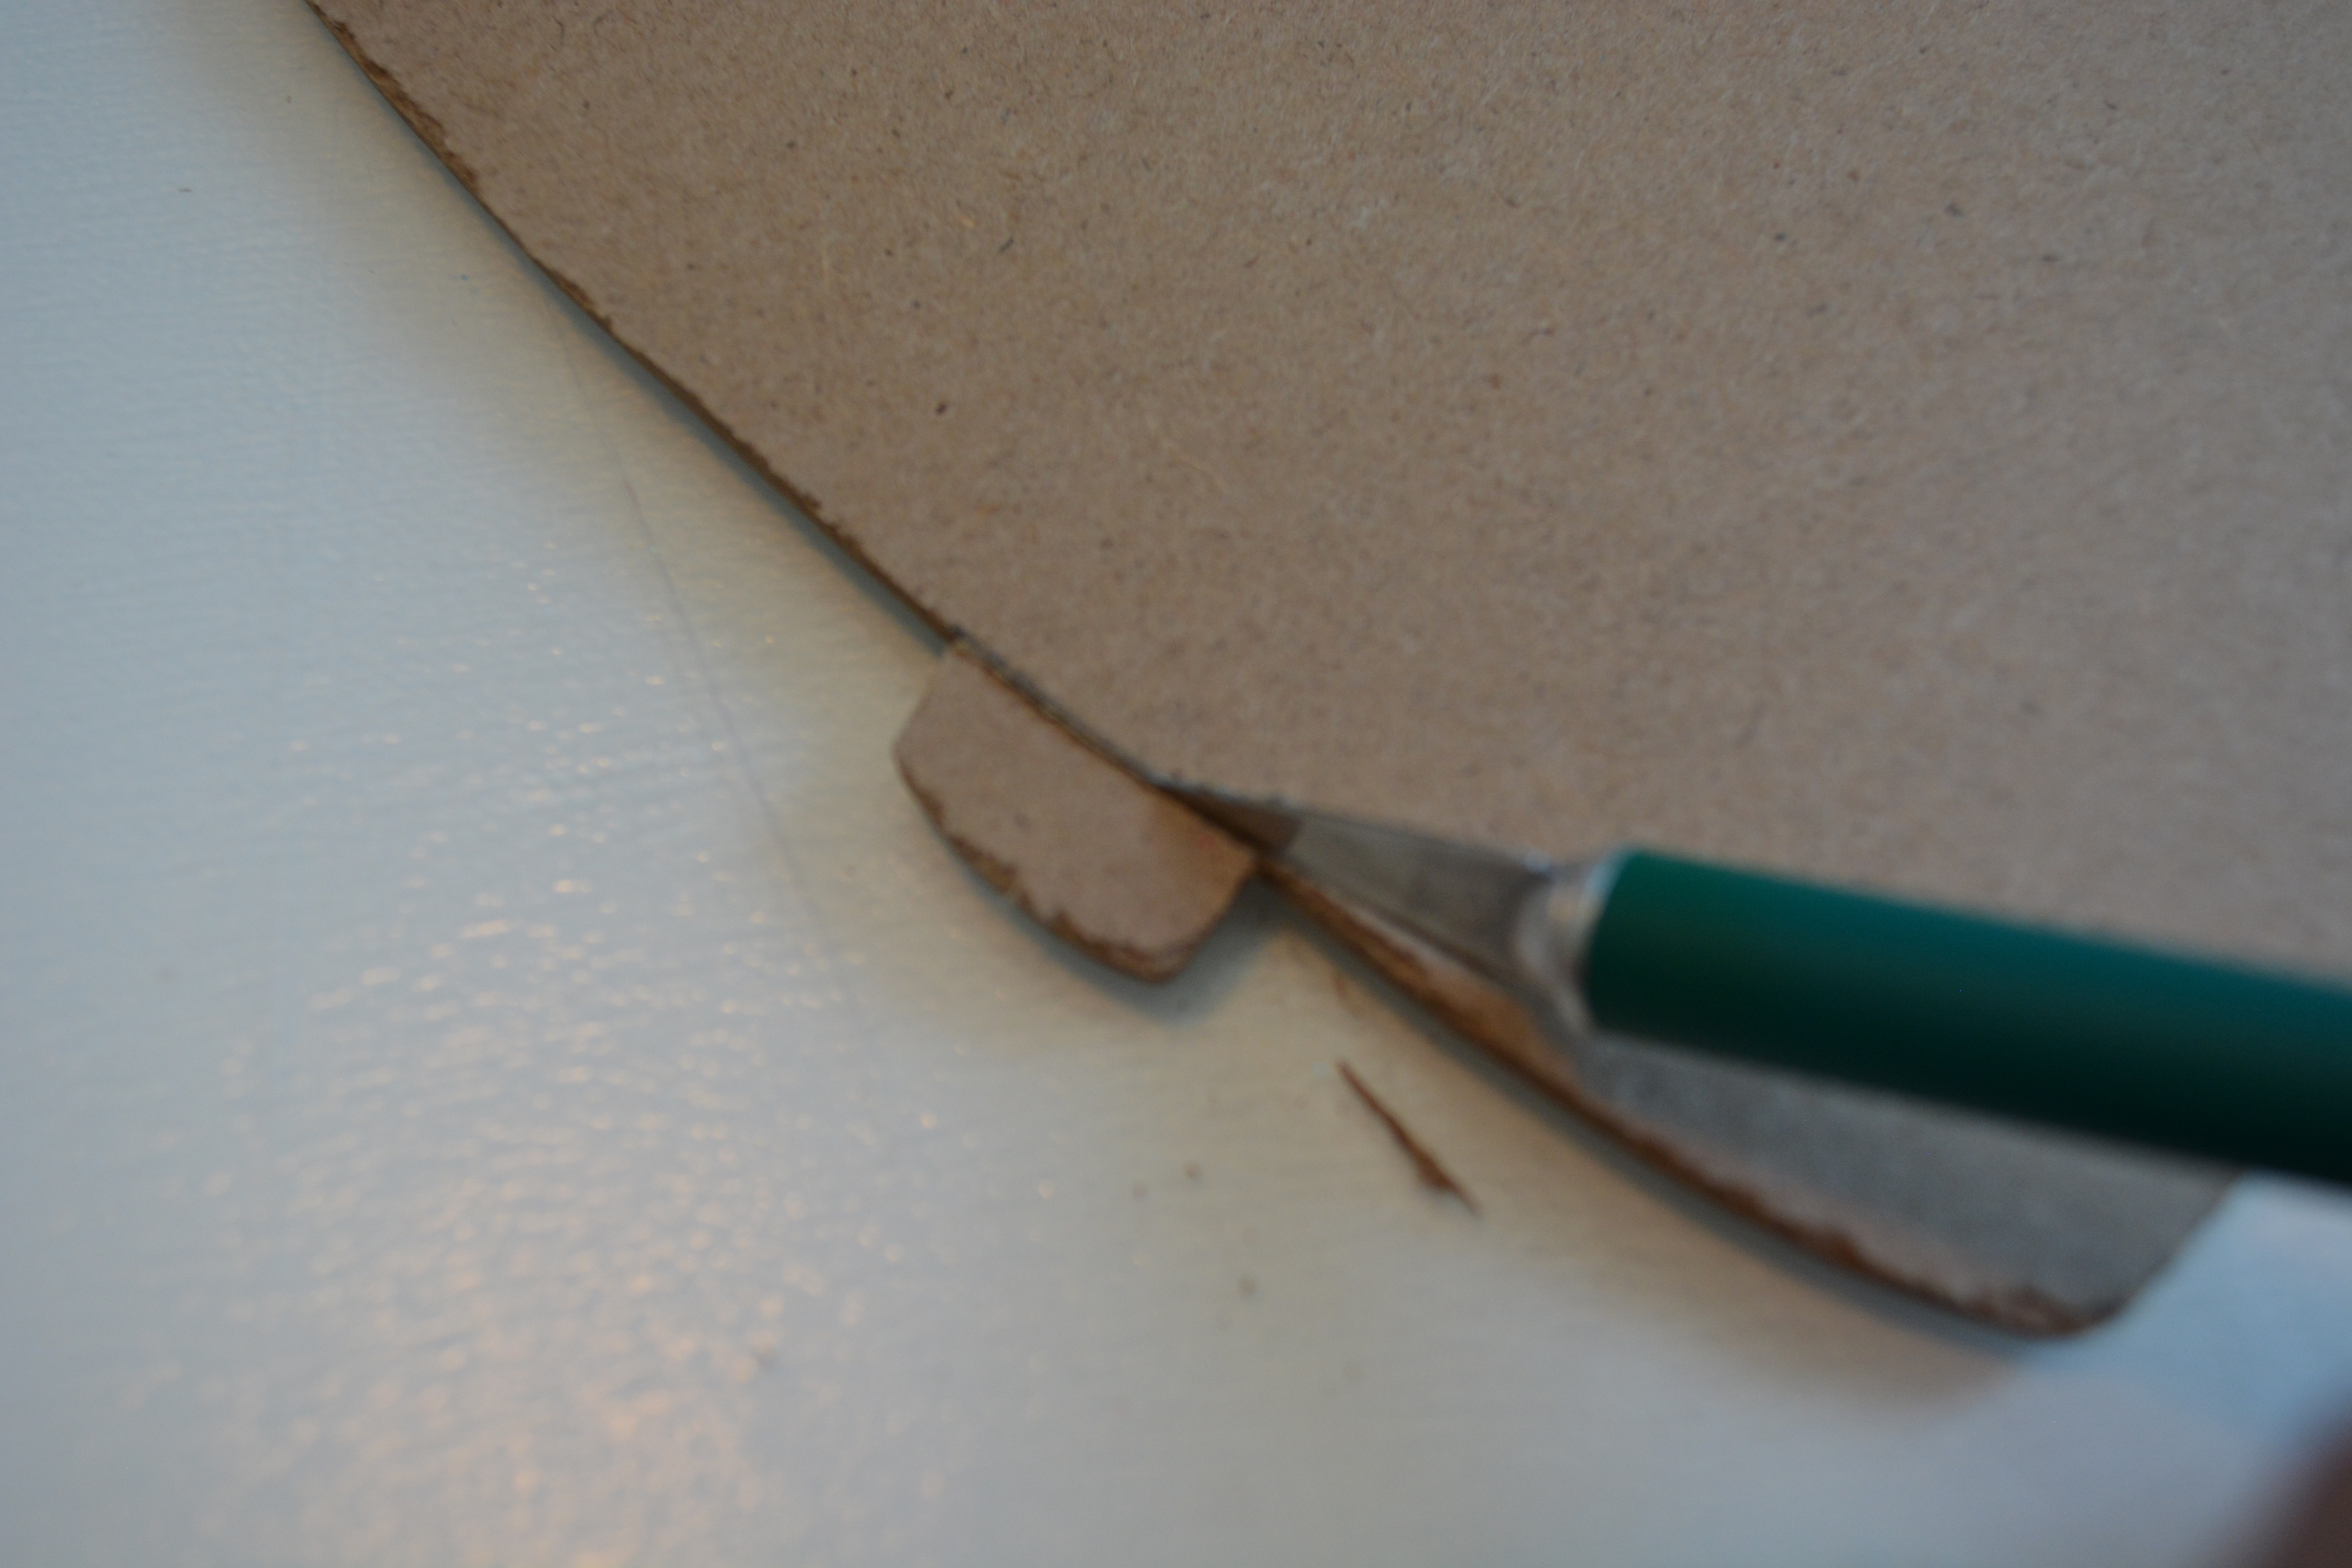

To get started I popped the pineapple piece off with a scraper on all 7 mason jars. Then I peeled the paper with all the glitter off the wooden jars. Next I used an X-Acto knife to cut off the straw piece and handle on all of the jars. I also took the twine hanger off.

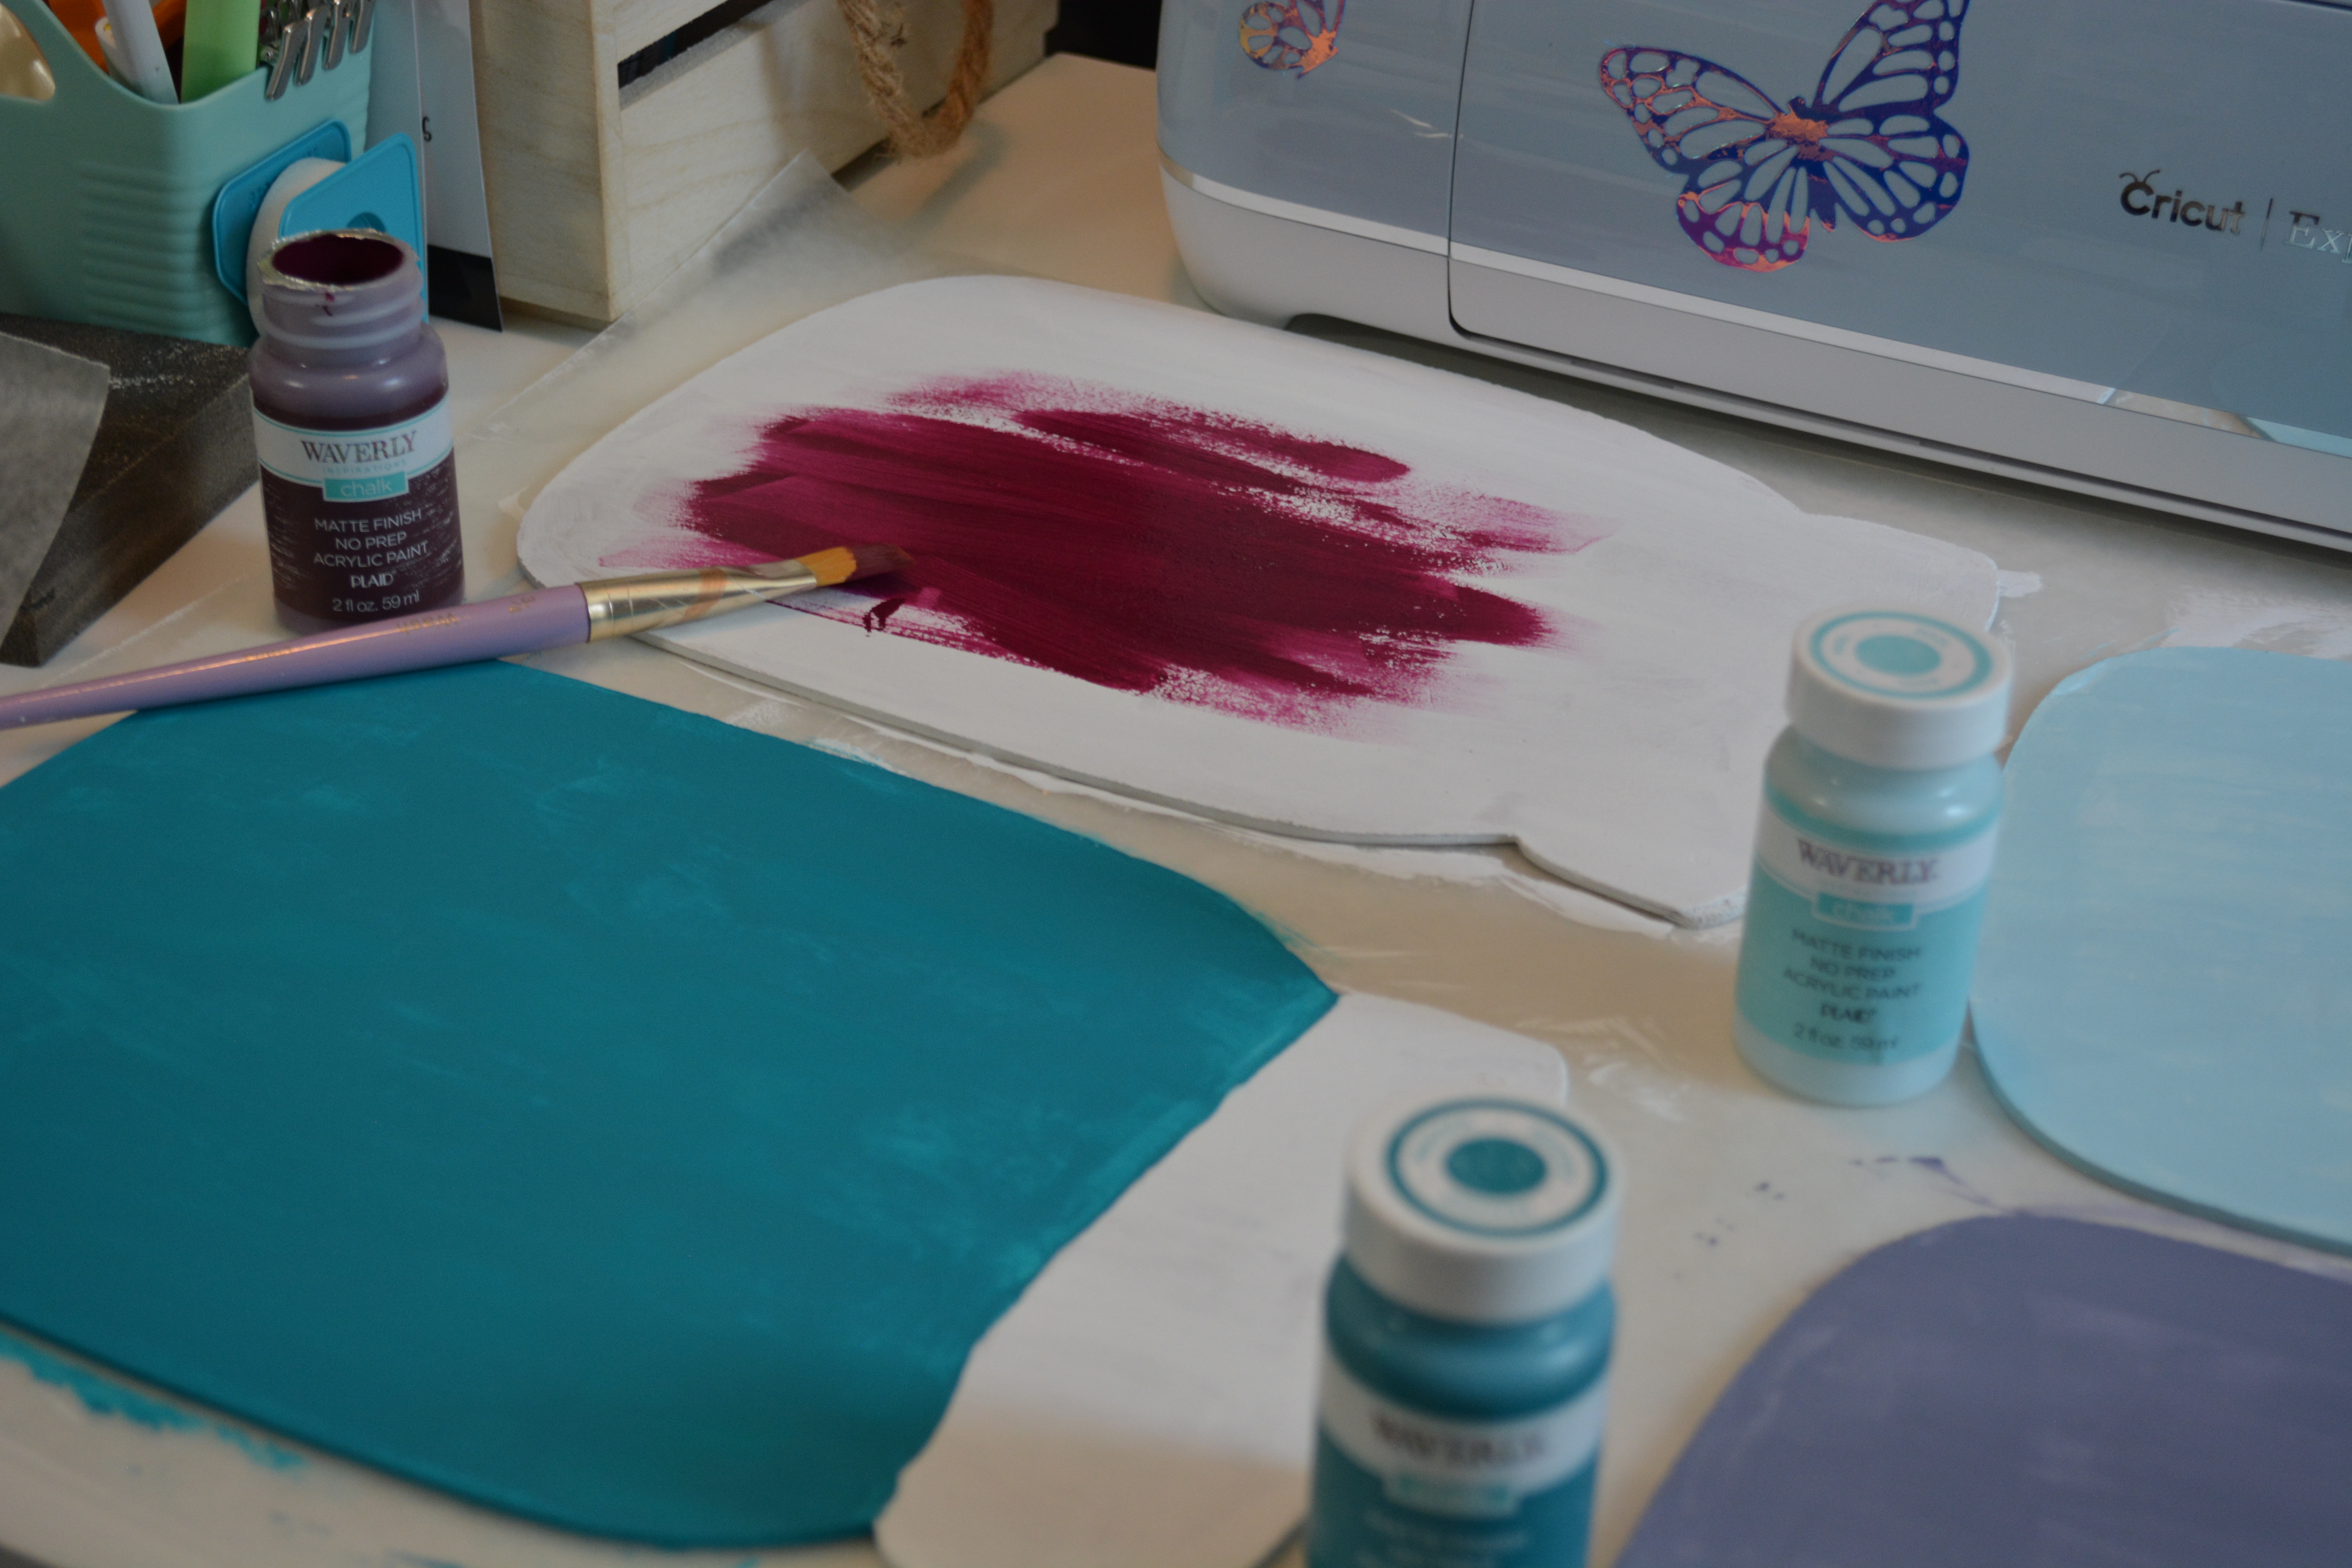
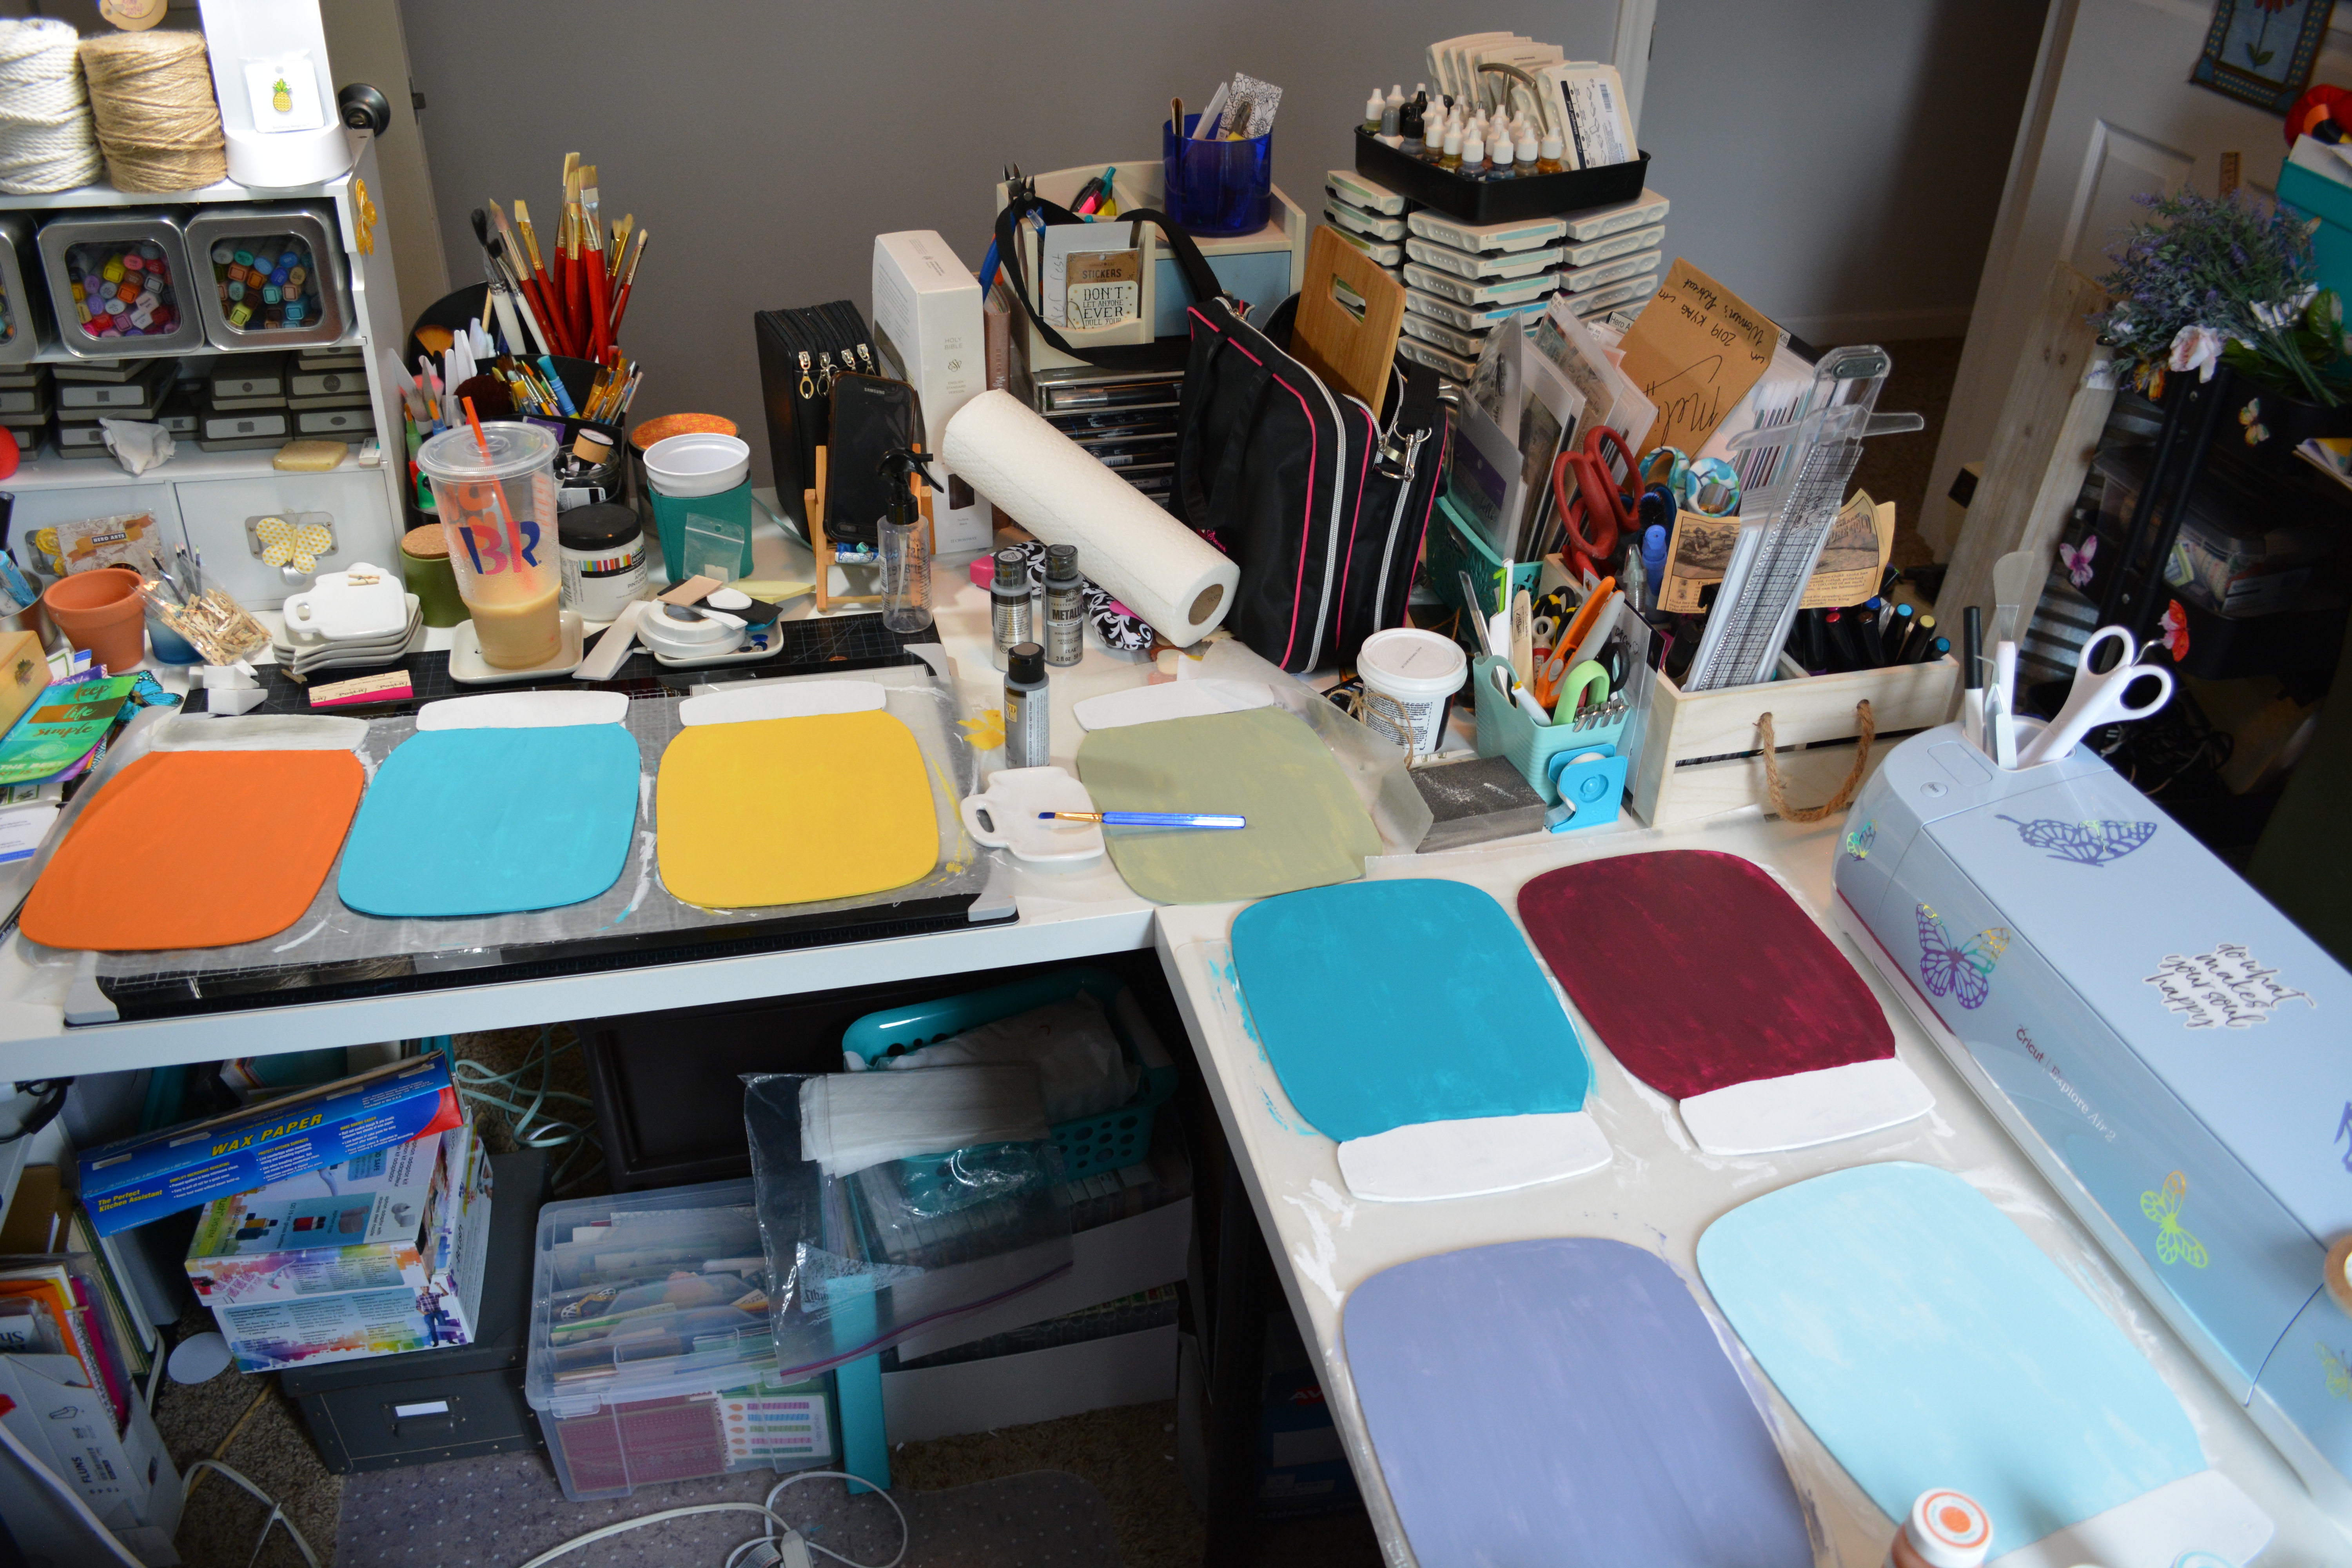
Now its time to paint. As you can see I used several colors of Waverly Chalk Paint. But first I primed each jar with White Waverly Chalk paint so that all the jars had the same base and color. Then I did one coat of colored paint on each jar. One coat of paint made the jars look a bit real. It gave the paint some depth because a tiny bit of the white shows through in places. If you want to do the top part of the jar silver like a real jar then use some masking tape or washi tape to tape off the top so that you do not get your colored paint on it.

Once you have the bottom painted of all 7 jars, take the tape off and you can start painting the top part of the jars to make it look like they have lids. I will warn you, this takes several coats of paint. Once all the paint was dry, I took a black paint marker and drew a line dividing the lid from the rest of the mason jar.


Its time to add the chalk boards. For each jar, I added some twine through the holes on on the chalk boards and pulled the twin to the back of the mason jar right at the neck of the jar. Then I hot glued the twine down. On the front of the jar I glued the chalk board down too.
I used my Cricut and permanent vinyl to add the days of the week to the top of each mason jar where the lid would be. If you do not have a Cricut you can use stickers or write them on yourself. (you can see my hand writing, that’s why I use a Cricut)
Finally I added the twine hangers back onto the jars.

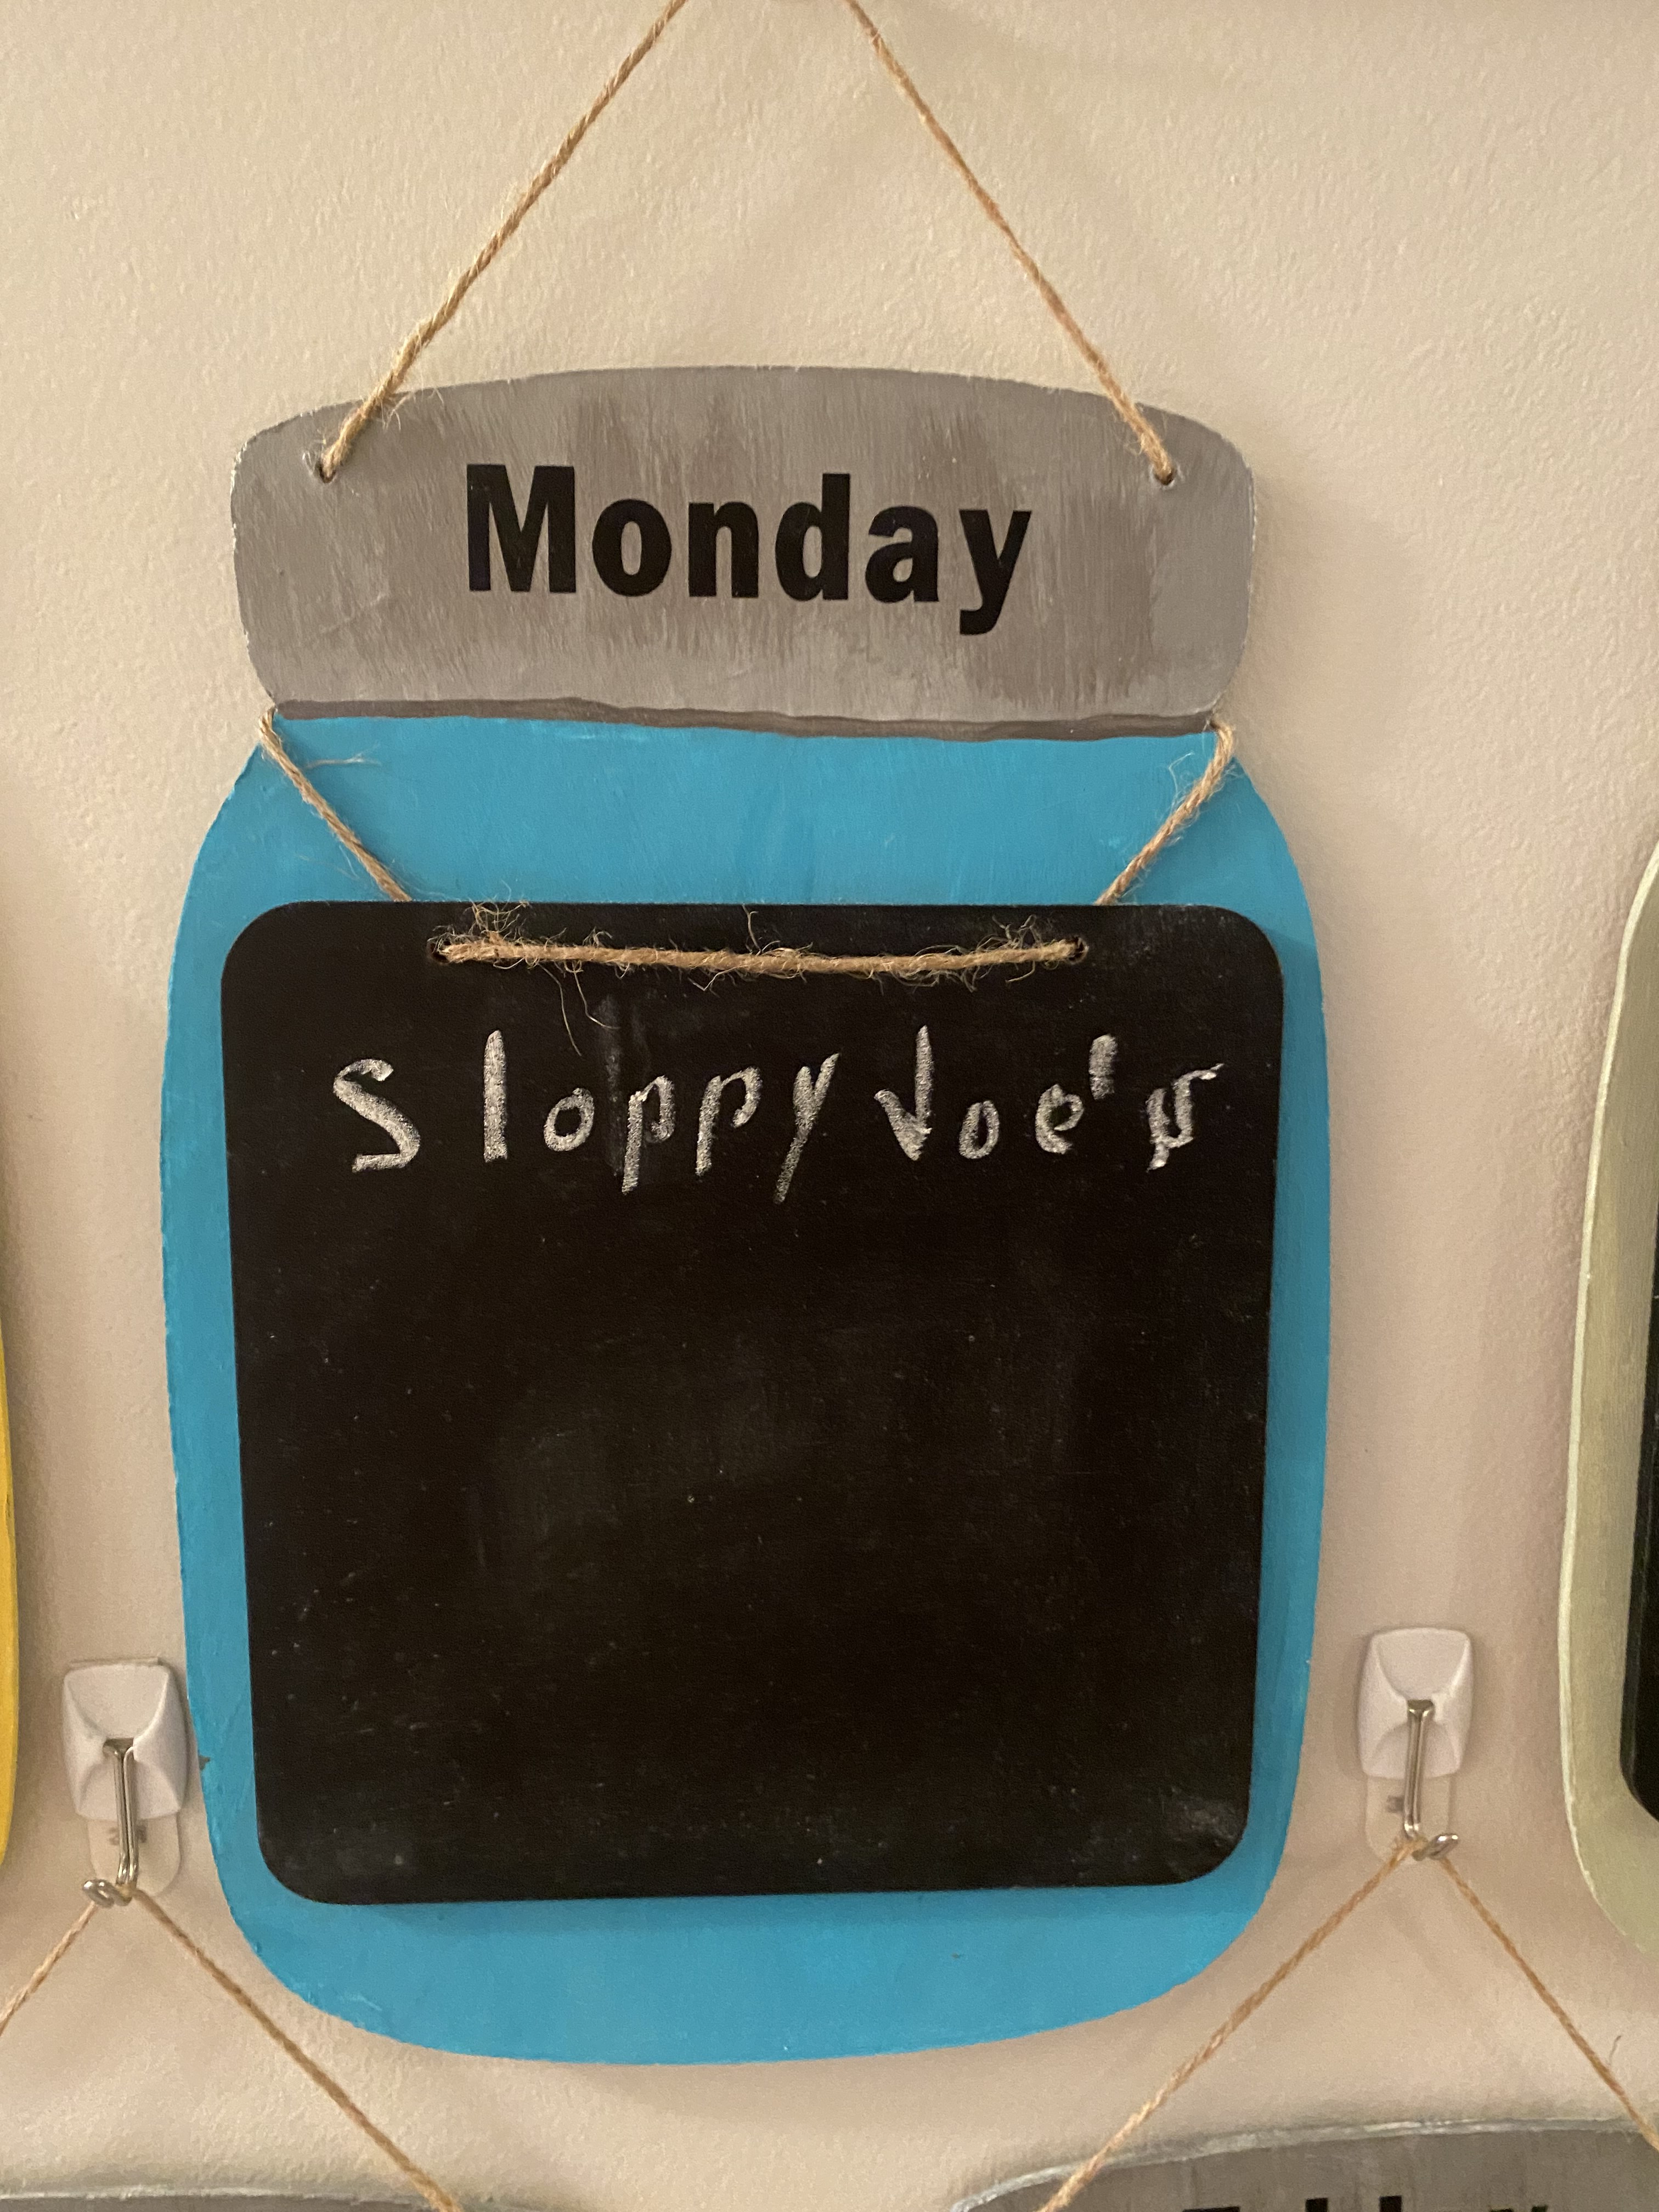
I love these so much. It was a lot of work but I feel like it really paid off. Normally I would do everything one color but I want a more colorful kitchen so I picked colors that are in my kitchen, These are not only cute but functional. Make sure you prime the chalk boards by rubbing chalk all over them then erasing them. That way when you go to write on them the chalk will write. I hung these up with 3M hooks. If I decide I want them somewhere else, I can easily move them.
Thank you so much for joining me today. I have a Christmas in July post coming soon and Yellow Butterfly is moving to YouTube so be on the look out. Please Like, Comment, Share, and Subscribe. Also find me on Instagram and Facebook under Yellow Butterfly Craft Designs.
Have a wonderful weekend!!!
Melissa McGuire
Supplies
Wooden Mason Jars- Dollar Tree
Chalk Boards- Michael’s Craft Supply
Waverly Chalk Paint- Walmart
Twine- Hobby Lobby
Silver Metallic Paint- Walmart
Surebonder Hot Glue Gun and Hot Glue Sticks- Hobby Lobby
Cricut- Michael’s Craft Supply
651 Black Vinyl- Michael’s Craft Supply
