

Do you have a bunch of projects that you have intended to do but have just not gotten to them? Well that’s how this post is going to go. I have had several little projects that I just needed to get done. I either have some holes in my decor that I need to fill or they are things that I keep putting off. So I decided to just knock them all out in one day. I am extremely happy I did. I hope that one or more of these projects inspire you to get those projects done that you have just not gotten to yet.
Lets Get Started
Supplies


A few of the things that I needed to get done were some water bottles for my kids, some blocks for my tiered trays, a plate for my craft room and finally a block that holds cards and pictures. All of these projects I used my Cricut, Cricut vinyl, and Orical 651 vinyl. I also used a few random pieces left over from other projects.

We can start with these blocks. I put some scrapbook paper on two of them with Mod Podge over a year ago. The other one I used shades of silver paint and a sponge to make it look galvanized. I knew I wanted words on at least two of them. So I went into Cricut Design Space and looked up things to do with Blessed. I found one plain Blessed saying and one that said Bless This Hot Mess. I cut each phrase out with Orical 651 vinyl and added them to the galvanized block and the block with the blue painted wood.
For the white wood block, I just wanted a shape of some sort. I literally looked around my desk to see what I could find. I save a ton of things I pull off of other projects. Little pieces here and there that I do not use right away. I found a galvanized heart that I pulled off a Dollar Tree sign last week. I did not want to leave it the same color so I roughly painted it with Dark Bronze paint. It took two coats. Now if you know me pretty well, you will know that I am very impatient. I can not wait on anything. So I took my heat gun to the paint on the heart to make it dry faster. Well I held the heat gun on the heart to long and the paint started to bubble. It was a happy accident and I loved the way it looked. I did that with each coat of paint I put on it. Once it was dry I hot glued the heart on to the block.
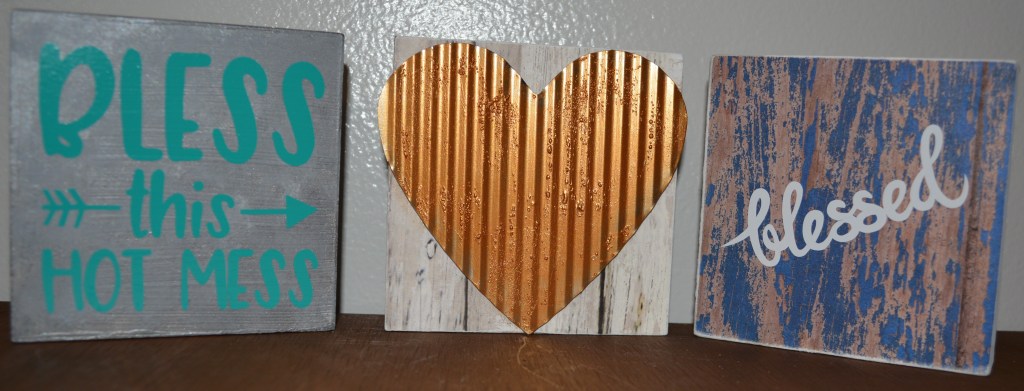
I can not wait to put these in my 3-tiered trays!! They are so cute. The blocks are about 3×3 in size and about an half an inch thick. So they are a great size to put in any small spots that are missing decor.
Lets move onto the next project!!

I have had this charger sitting around since just after Christmas. I wanted to put an inspirational quote on it to put in my craft room. Since I have been working on changing my life around a bit with losing weight and working on my mental and physical health, I wanted something to push me. The quote I settled on after reading a ton was “I Dare To Fail So I will Achieve Greatly.” I found an SVG of it and downloaded it into Cricut Design Space. Then I cut it out on some metallic Cricut vinyl. Once I weeded the vinyl, I used transfer tape to add it to the plate. I was not as careful as I should have been and I did not get the wording on the plate straight. Instead of wasting the vinyl and pulling it off to try again, I added a blue butterfly to the side of the plate to fill the space. Always see if you can save your project if you mess up. Sometimes the project turns out better than you expected it would.

I can not tell you how much a love this. It does not matter to me that the words are a bit off. Honestly it is a representation of how the day went as I was making all of these projects. Something went wrong on each one and I am happy it did because the end results are so much better than I expected the projects to be.
Two down, Two to go!!

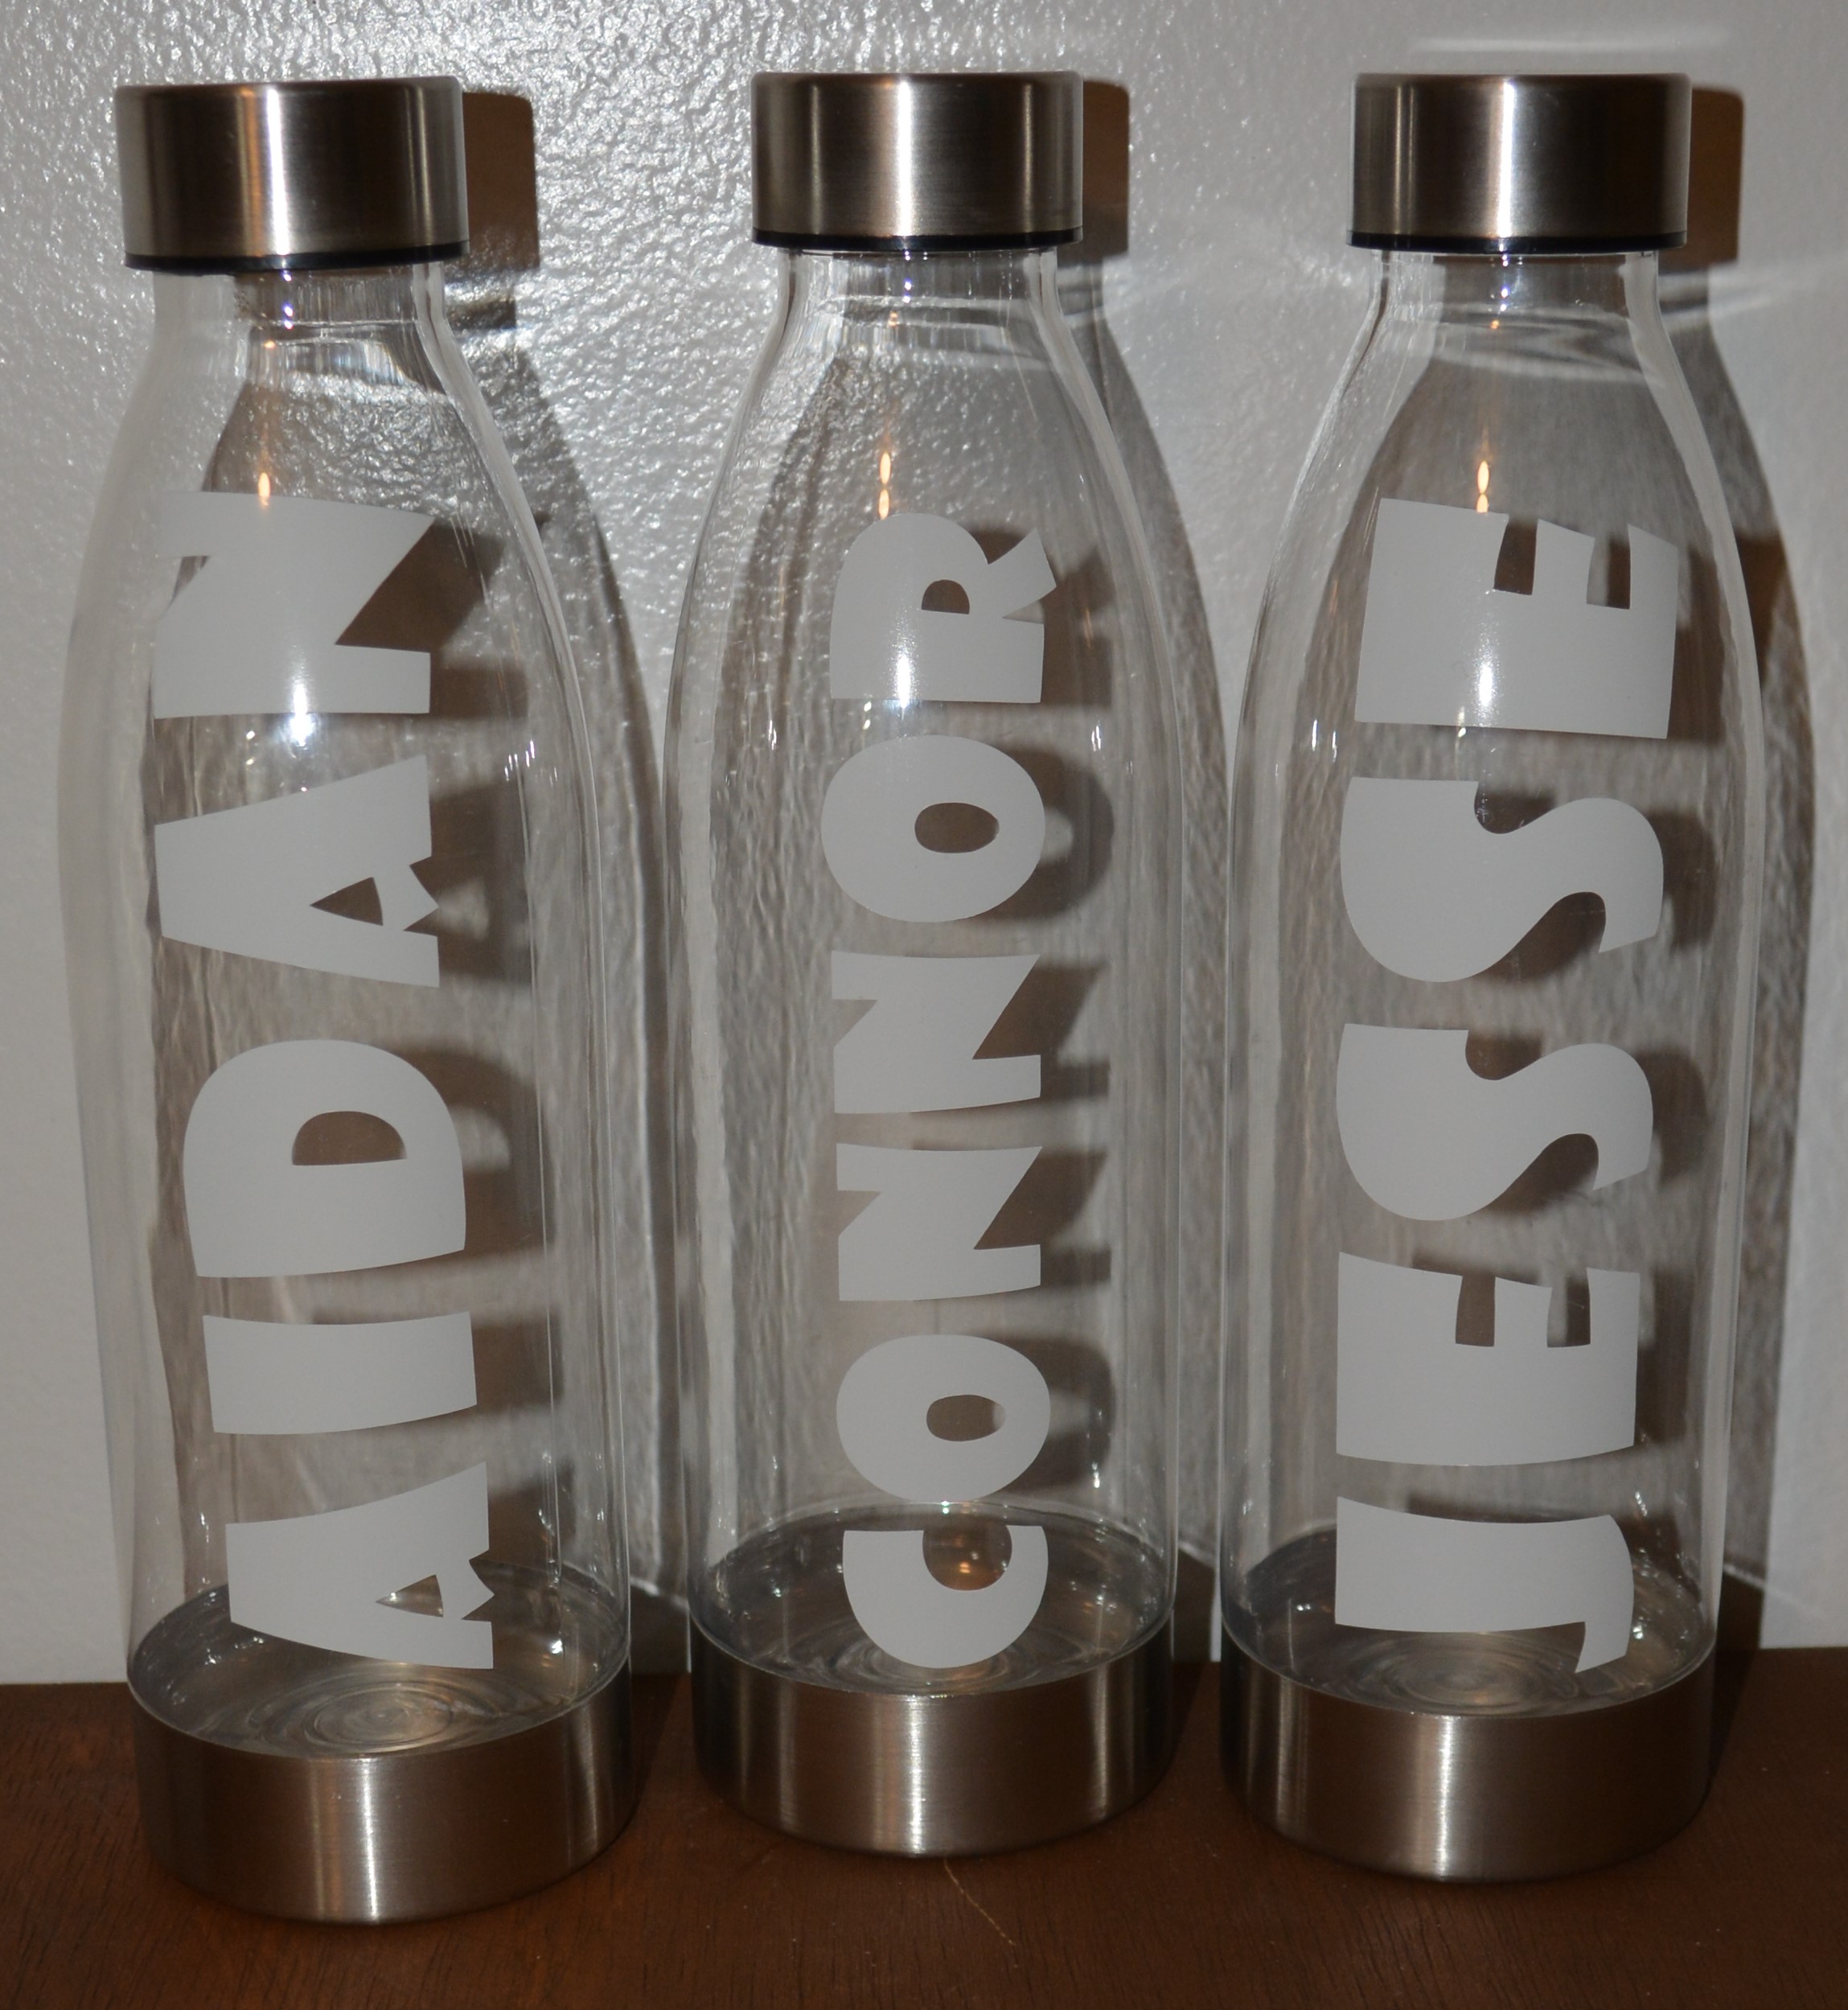
I have had these water bottles sitting my my craft room since last summer. They are around a $1.00 each at Walmart and I knew I wanted to put my kids names on them. I went back to my Cricut and into Design Space. I looked for a font that I wanted for all three and typed out their names and sized them. Then I cut them out, weeded the vinyl and then added their names to the bottles.
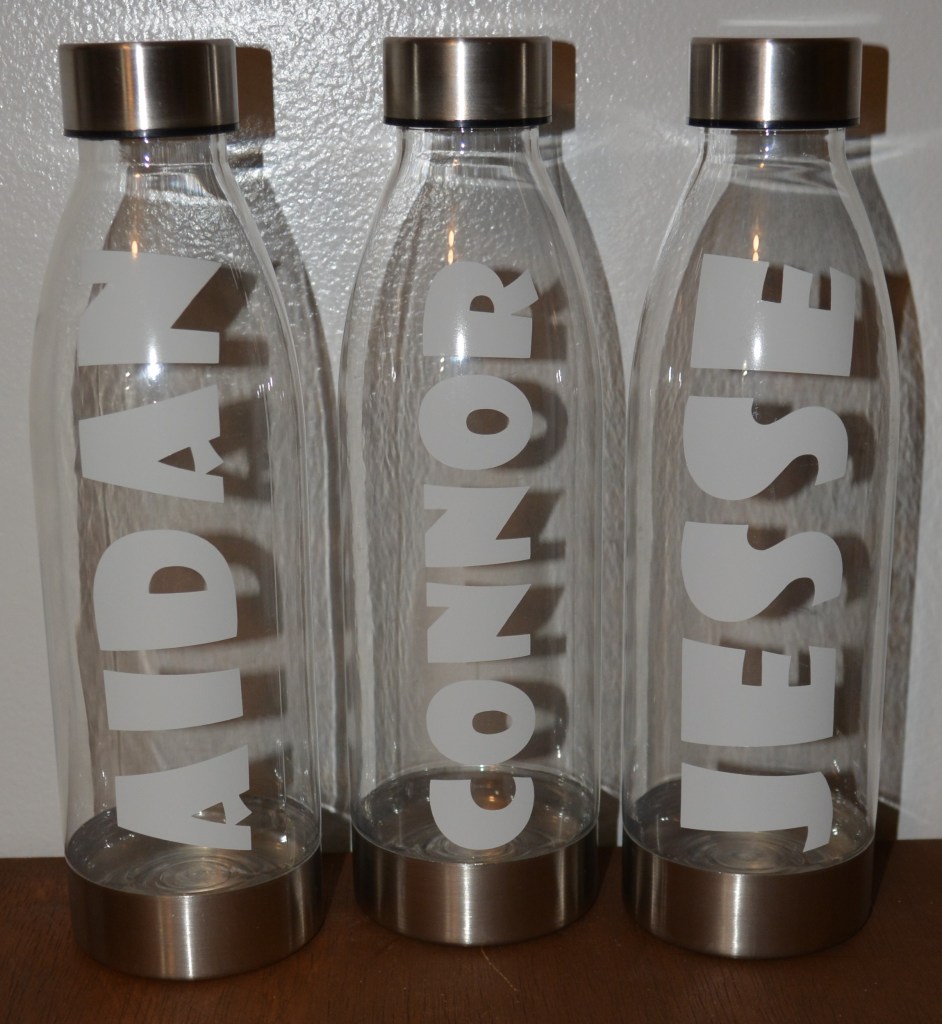
This was such an easy and cheap project. Now I could take the time to put Mod Podge over the letters but it is not that important to me. These might last my kids the summer. Since they are cheap, it is not a big deal to make them new ones next summer. I will say my kids were pretty excited about these though.
Final Project!!

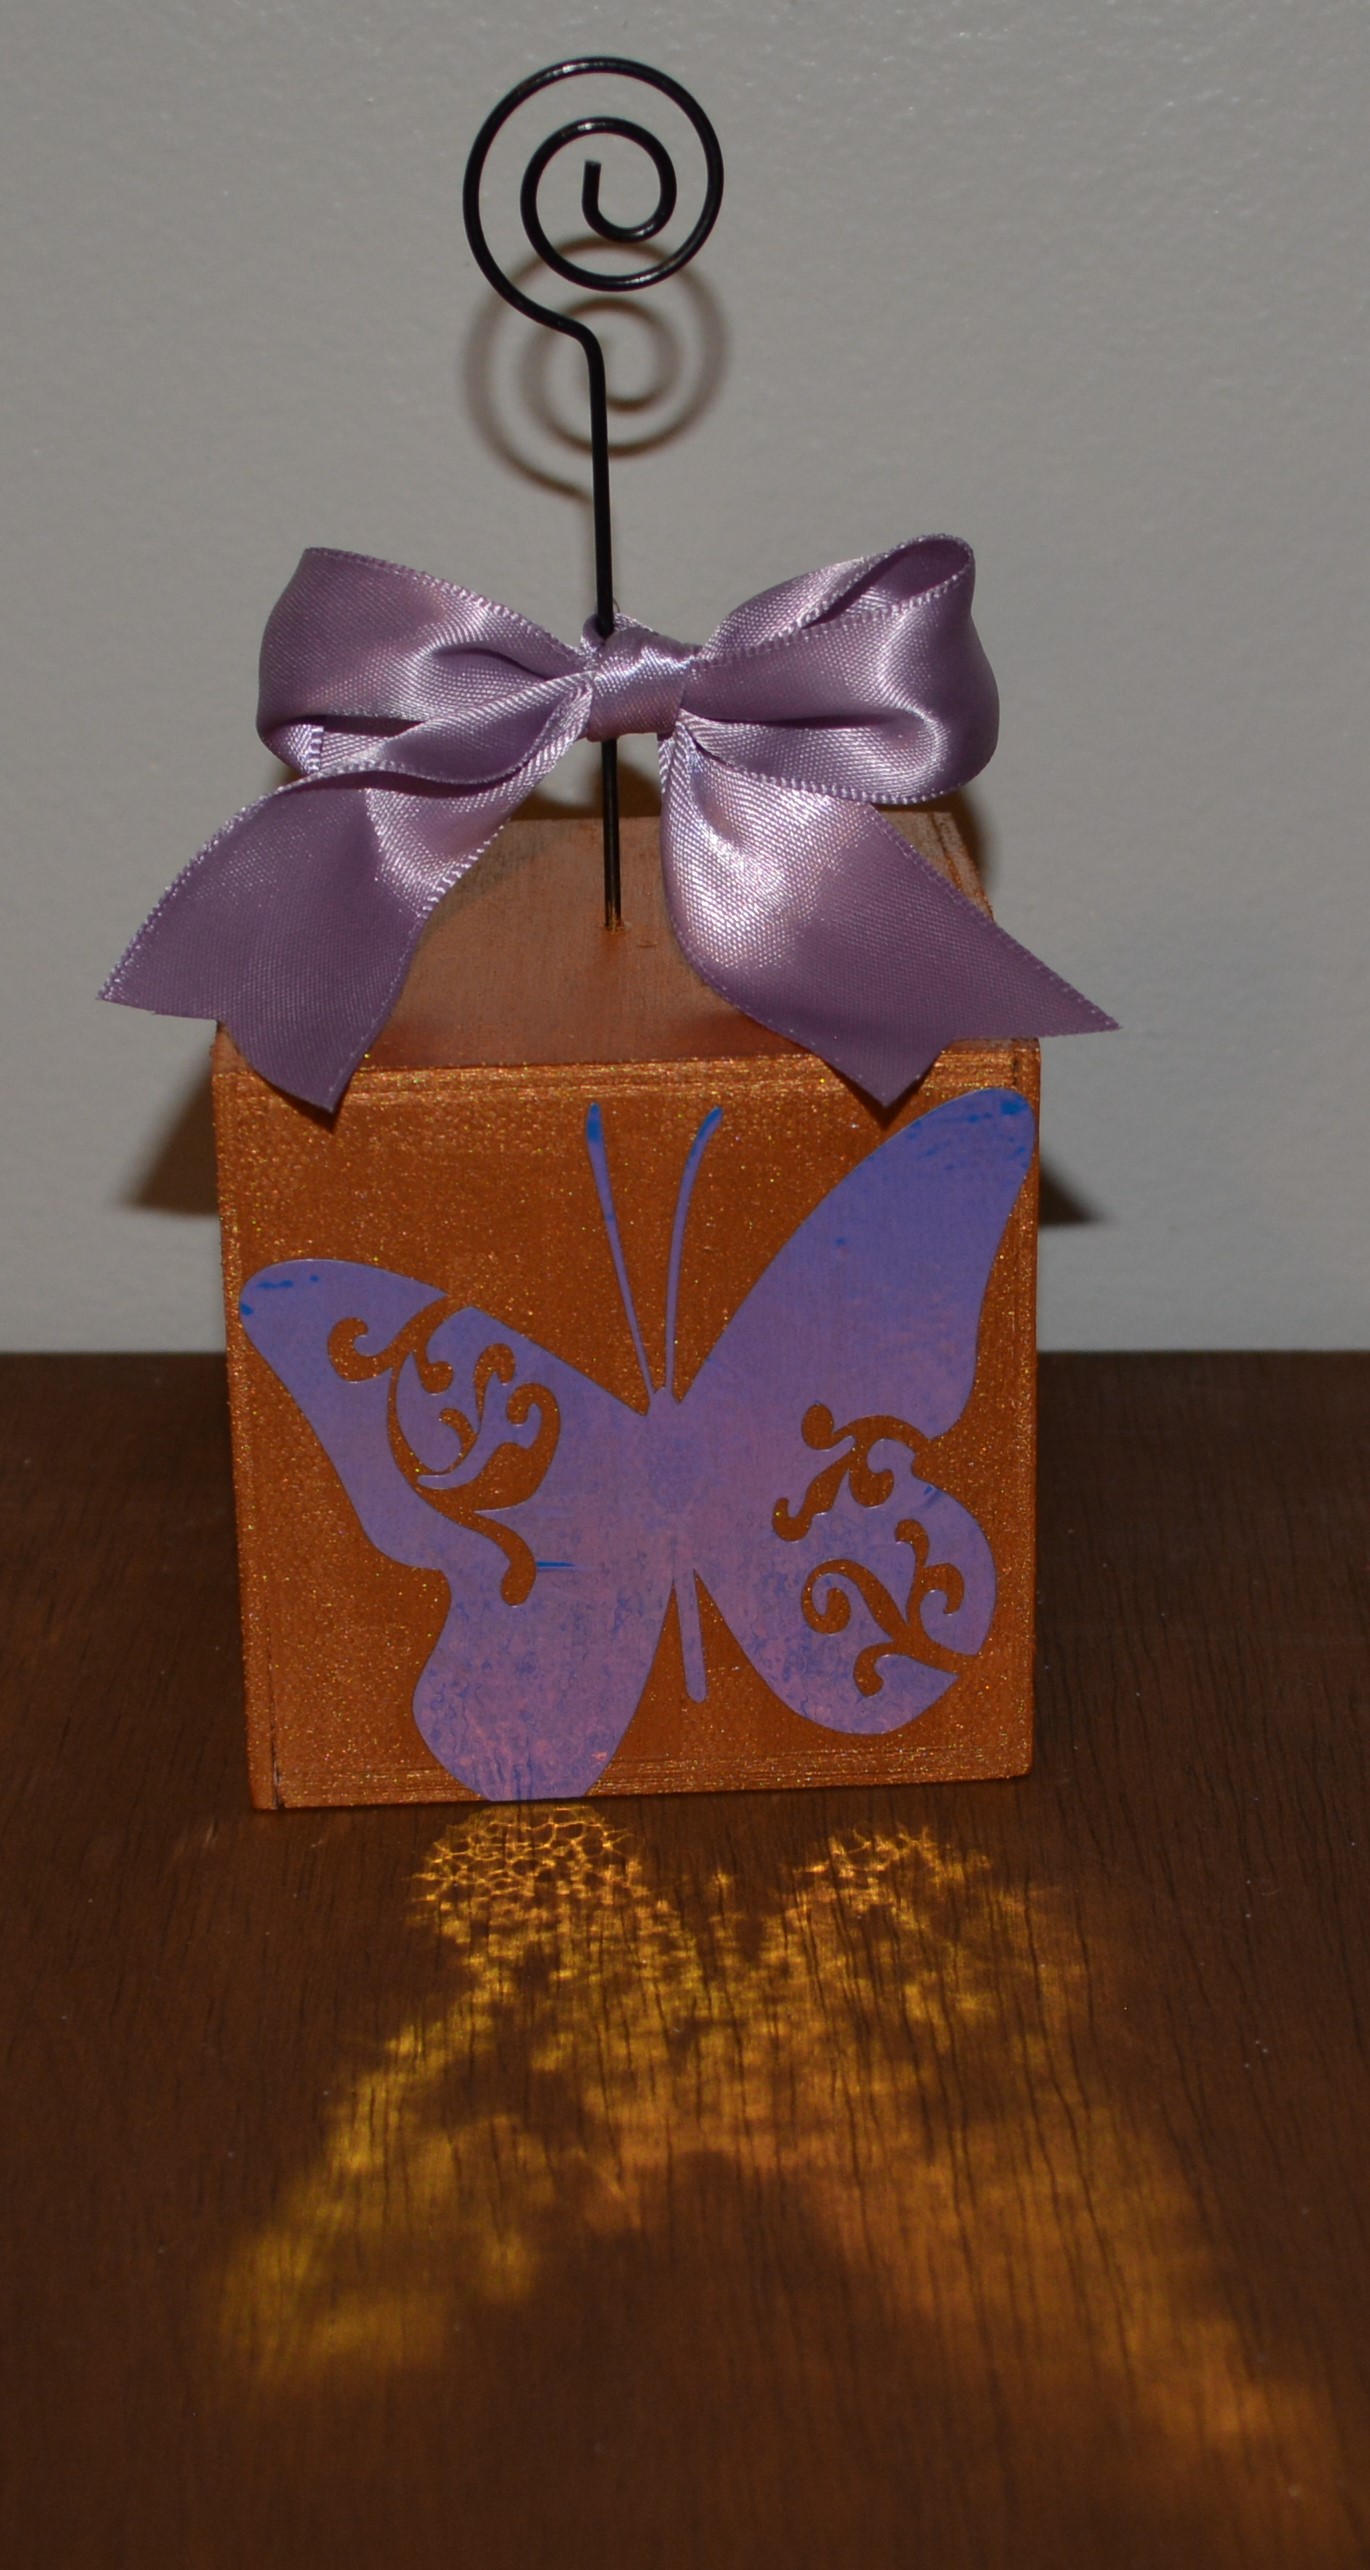
I forgot to take a before picture of this block that is a card or picture holder. A friend gave this to me a long time ago with some cute paper on it. The glue lifted from the paper and fell off so I decided to redo it. I painted the block with the Dark Bronze paint. It took two coats to completely cover it.
Once it was dry , I got back on design space and found a beautiful butterfly. I sized it and cut it out with metallic vinyl. Then I added it to the block. After that I found a ribbon that looked good with the colors and tied it in a bow around the wire holder. That was it!!! This was quick and now I can set this out and remember my sweet friend who made this for me to begin with.
There are always ways to get around not having a cutting machine like a Cricut. You can use stickers, rub-on transfers, or print things out on from the computer and Mod Podge them on. Even stencils would work. Use what you have.
I hope that these projects motivate you to get some of those half done or not even started projects done that are taking up space in your craft room. I am glad and excited I finished these. It feels good to have them done.
Please Like, Share, Comment, and Subscribe. Also please find me on Instagram and Facebook under Yellow Butterfly Craft Designs.
Have a wonderful weekend!!!
Melissa McGuire
Supplies
Blocks- Target
Paper- Hobby Lobby
Mod Podge- Hobby Lobby
Shades of Silver Paint- Walmart
Heart- Dollar Tree
Cricut- Amazon
Orical 651 Vinyl- Michael’s Craft Supply
Surebonder Hot Glue Gun and Hot Glue Sticks- Hobby Lobby
Charger- Dollar Tree
Butterfly- Random Plant Decoration
Water Bottles- Walmart
Dark Bronze Paint- Target
Block Card Holder- Any Craft Store
Ribbon- Hero Arts
