I love seeing what others got for Christmas. It is especially fun to see what people have gotten craft wise. I was given a few new crafting items for Christmas and thought I would share them with you.
The first thing I got is this Waffle Flower Water Media Mat. This mat is great for water color painting or ink blending. The mat is self is a bit sticky so I holds the paper still while you are working. I will use this mainly for card making and goes perfect with the next product I will be showing you.
Over the last year, I have become a big fan of Arteza products. So I had a few things on my wish list for Christmas. I was very excited to see these water color paints from my husband. There are so many different colors and I can not wait to play with these. They come in small tubes so they will last a long time. I can use these with the water media mat!!
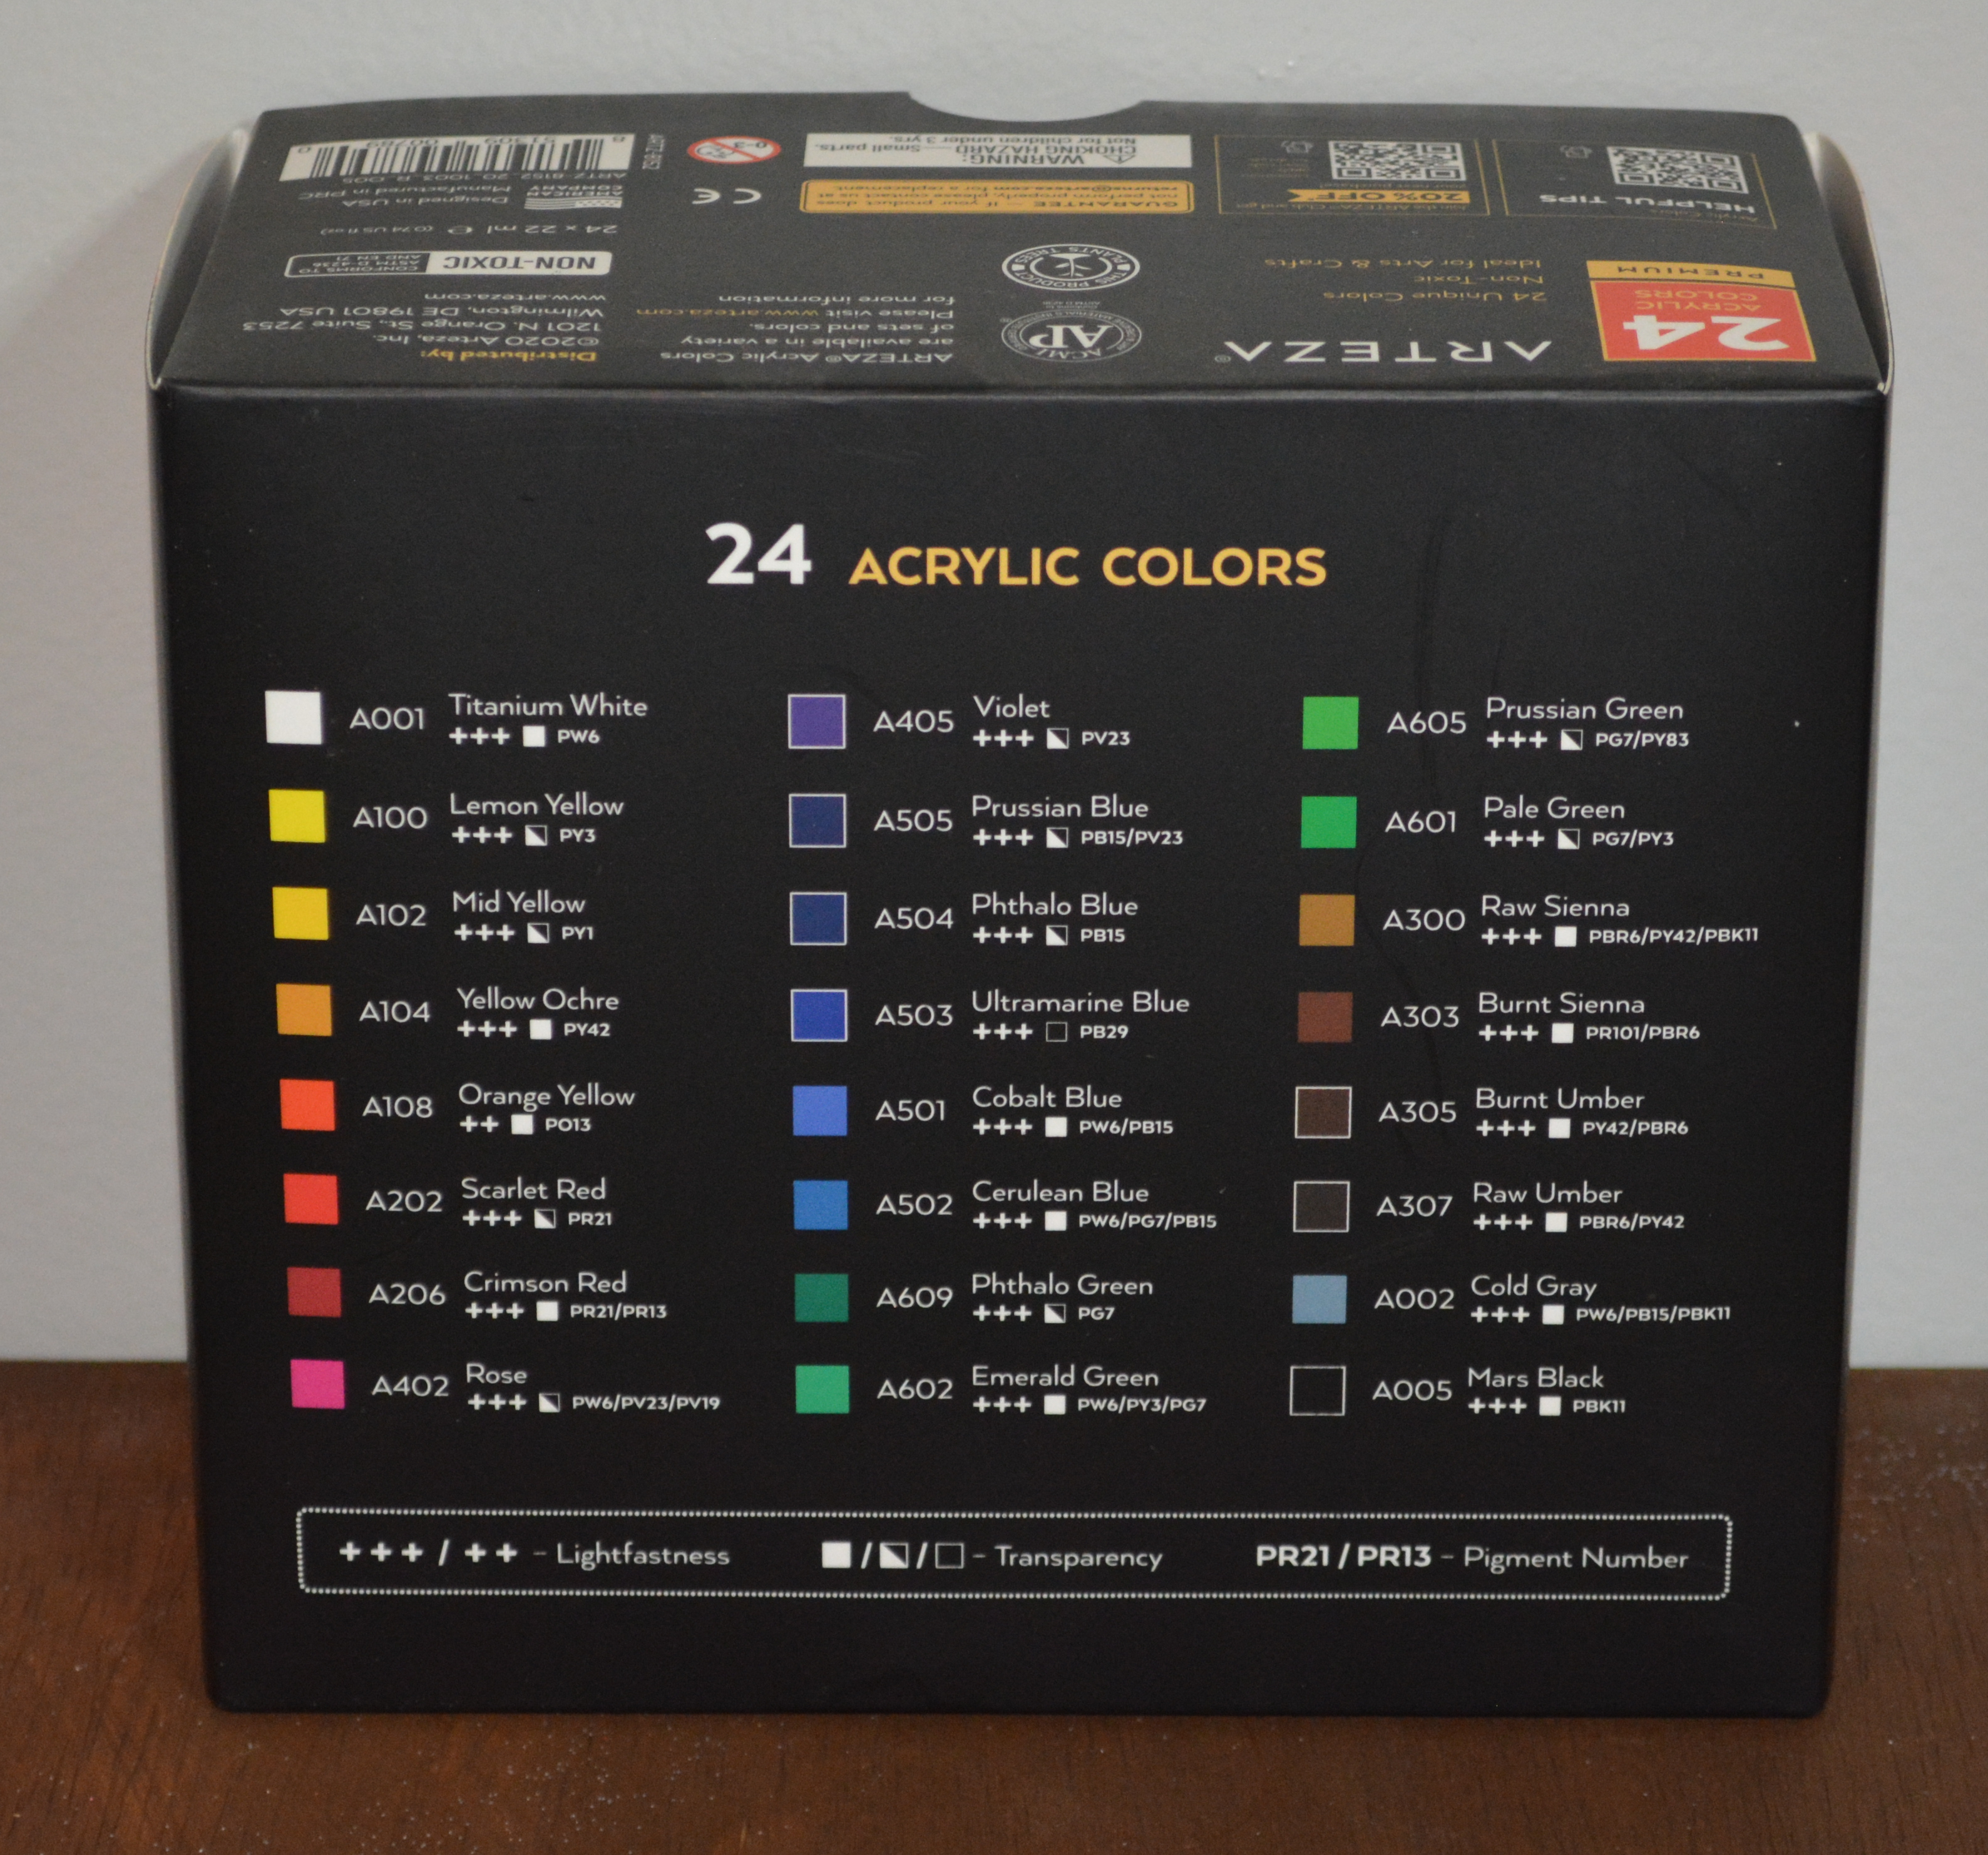
Here is another Arteza product. These are acrylic paints. I have the set of 12 so I was excited to receive the bigger set that contains 24. The paints come in metal tubes and while they might be small, they seem to last forever. A little goes a long way. The paint covers great and you can mix them together to create new colors.
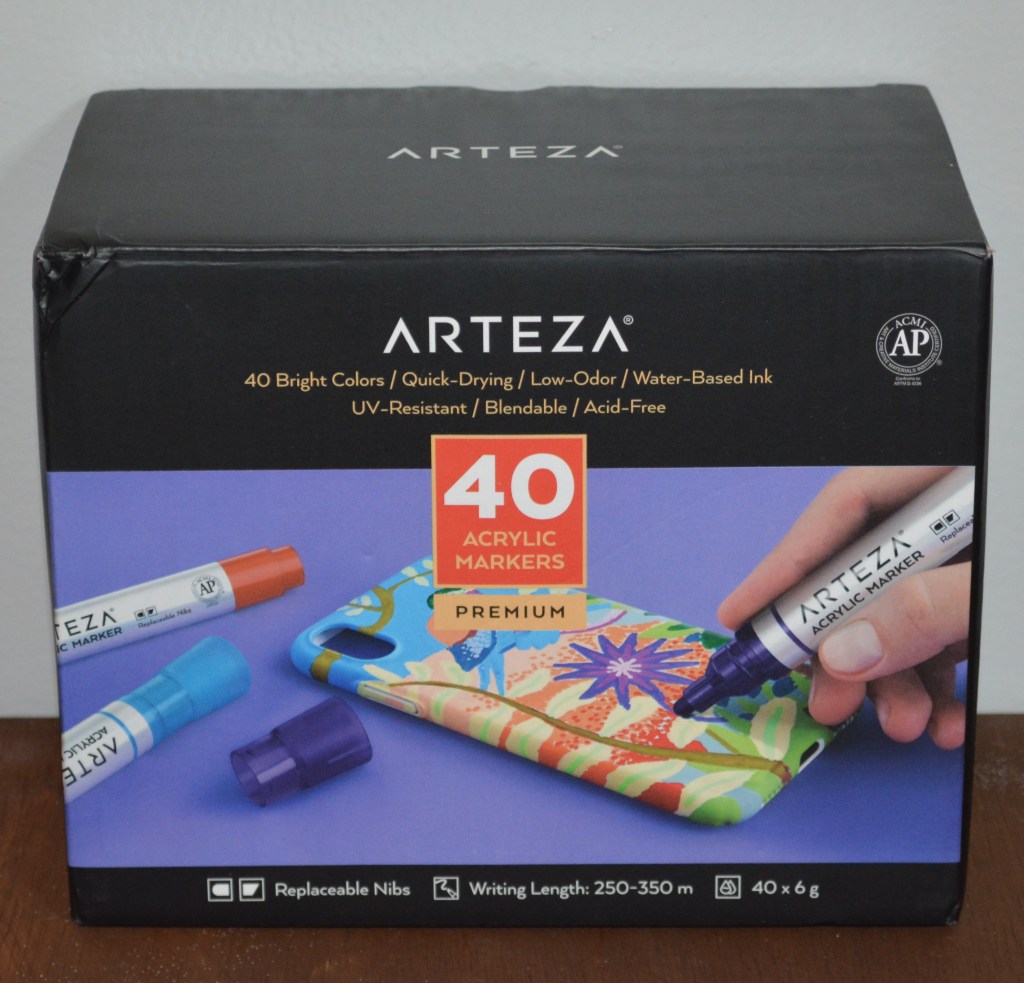
This last Christmas present is the one I am most excited about. These are Arteza Acrylic Markers. Yep you read that right, they are acrylic paint markers. I have seen several YouTube ladies use these and rave about how great they are and how easy they are to use. These were at the top of my Christmas list and you will see me crafting with them very soon!! This is the big box of colors but they do come in a smaller pack. They also have extra maker tips in the box. It’s a great investment!!
Let me know in the comments what kind of crafty things you got for Christmas!! I would love to know if I need to add more things to my wish list for my birthday that is coming up!!
Have a wonderful day and Please Like, Share, Comment, and Subscribe. Look for me on Facebook and Instagram.
Philippians 4:13 “I can do all thing through Christ who strengthens me.”
Melissa McGuire
These products can be found on Amazon, Arteza’s website and Waffle Flower’s website.
Christmas is a week away!! YAY!!! It is coming up fast!
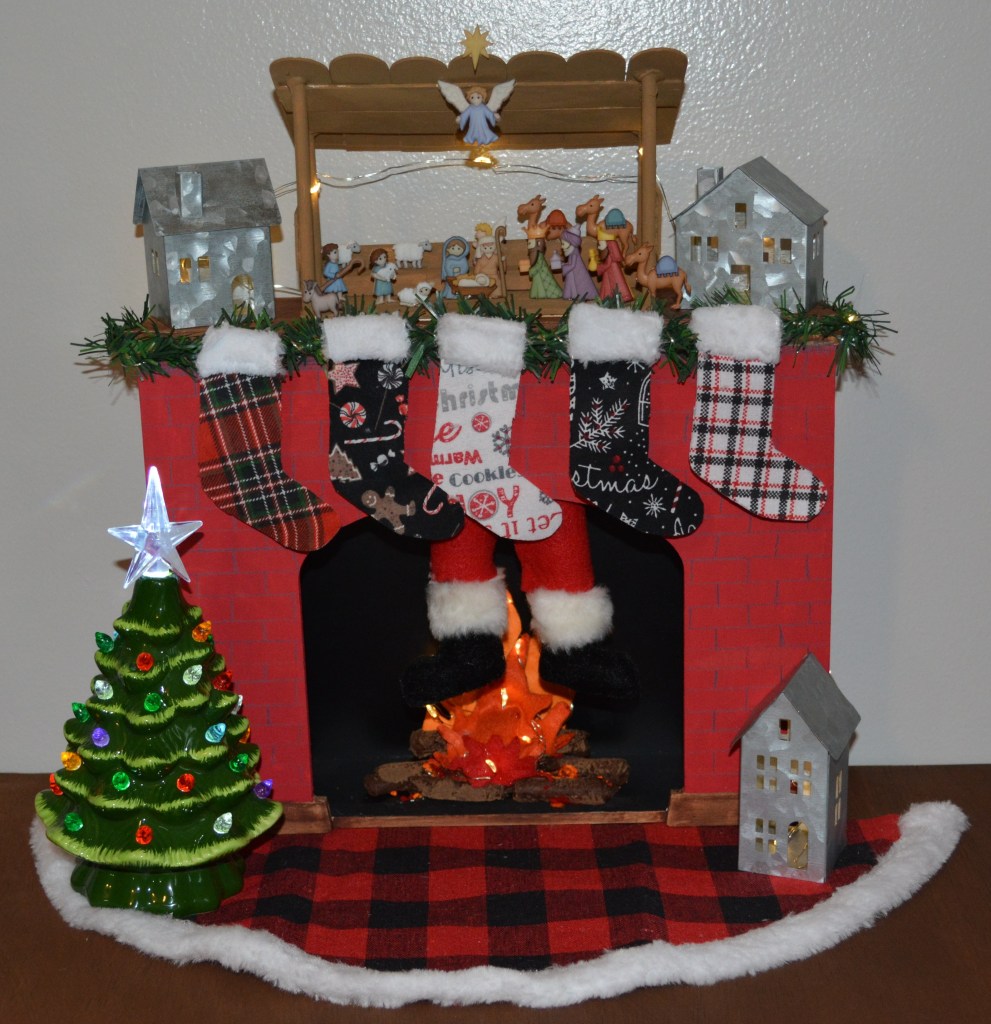
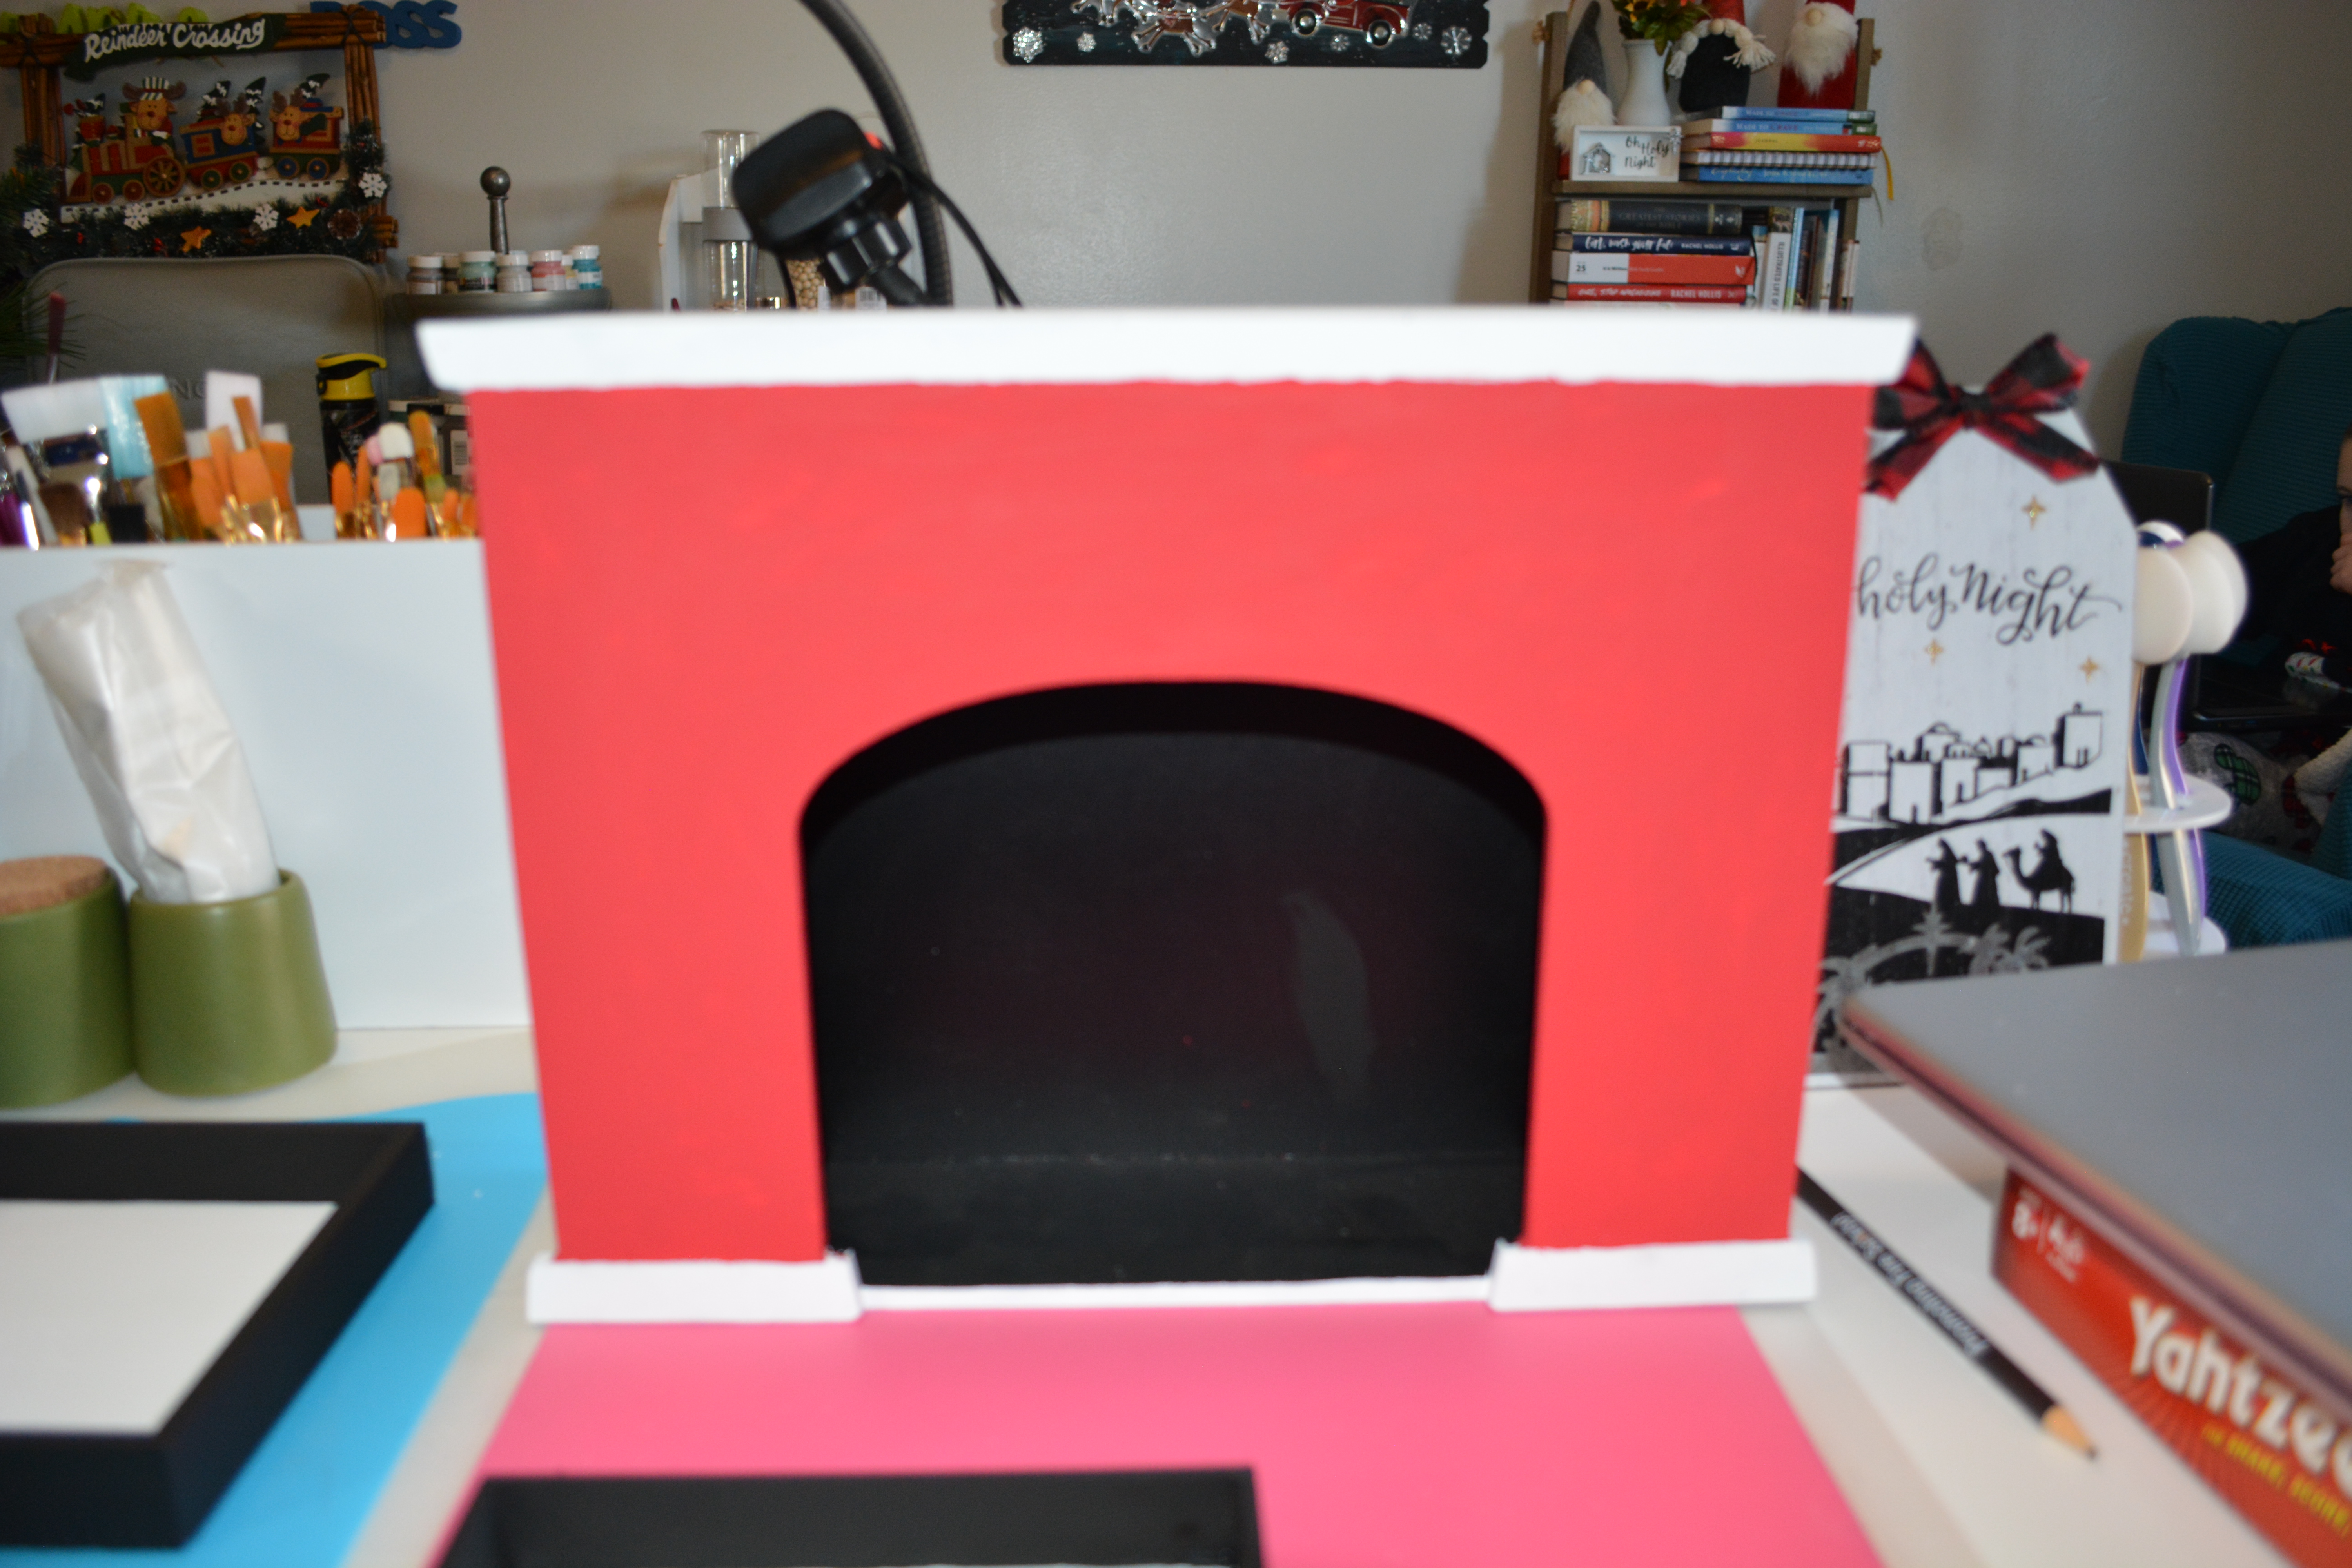
So I have worked for over two weeks on this fireplace. The Fireplace itself is from Target. It was a Halloween decoration that had something to do with potions but as soon as I first laid eyes on it, I knew exactly what I was going to do with it. It was going to be transformed into a beautiful fireplace with Santa coming down the chimney. I even built a manger out of popsicle sticks to put on the mantle. This project really challenged me to think outside of the box to make each piece of this. Please come along as I tell you how I created this cute fireplace scene.
Lets Get Started
Supplies
I am not going to lie, this project has a lot of pieces. To start, I got the Potions Halloween decoration at Target. You could make one of these out of foam core board from Dollar Tree. I used elf legs from Walmart. Some of the little stuff I used was felt, floral wire, fairy lights, houses, popsicle sticks, dowel rods, buttons, garland ties, fabric and a ceramic tree. The tools I used were wire cutters, hot glue, tape, and paint.
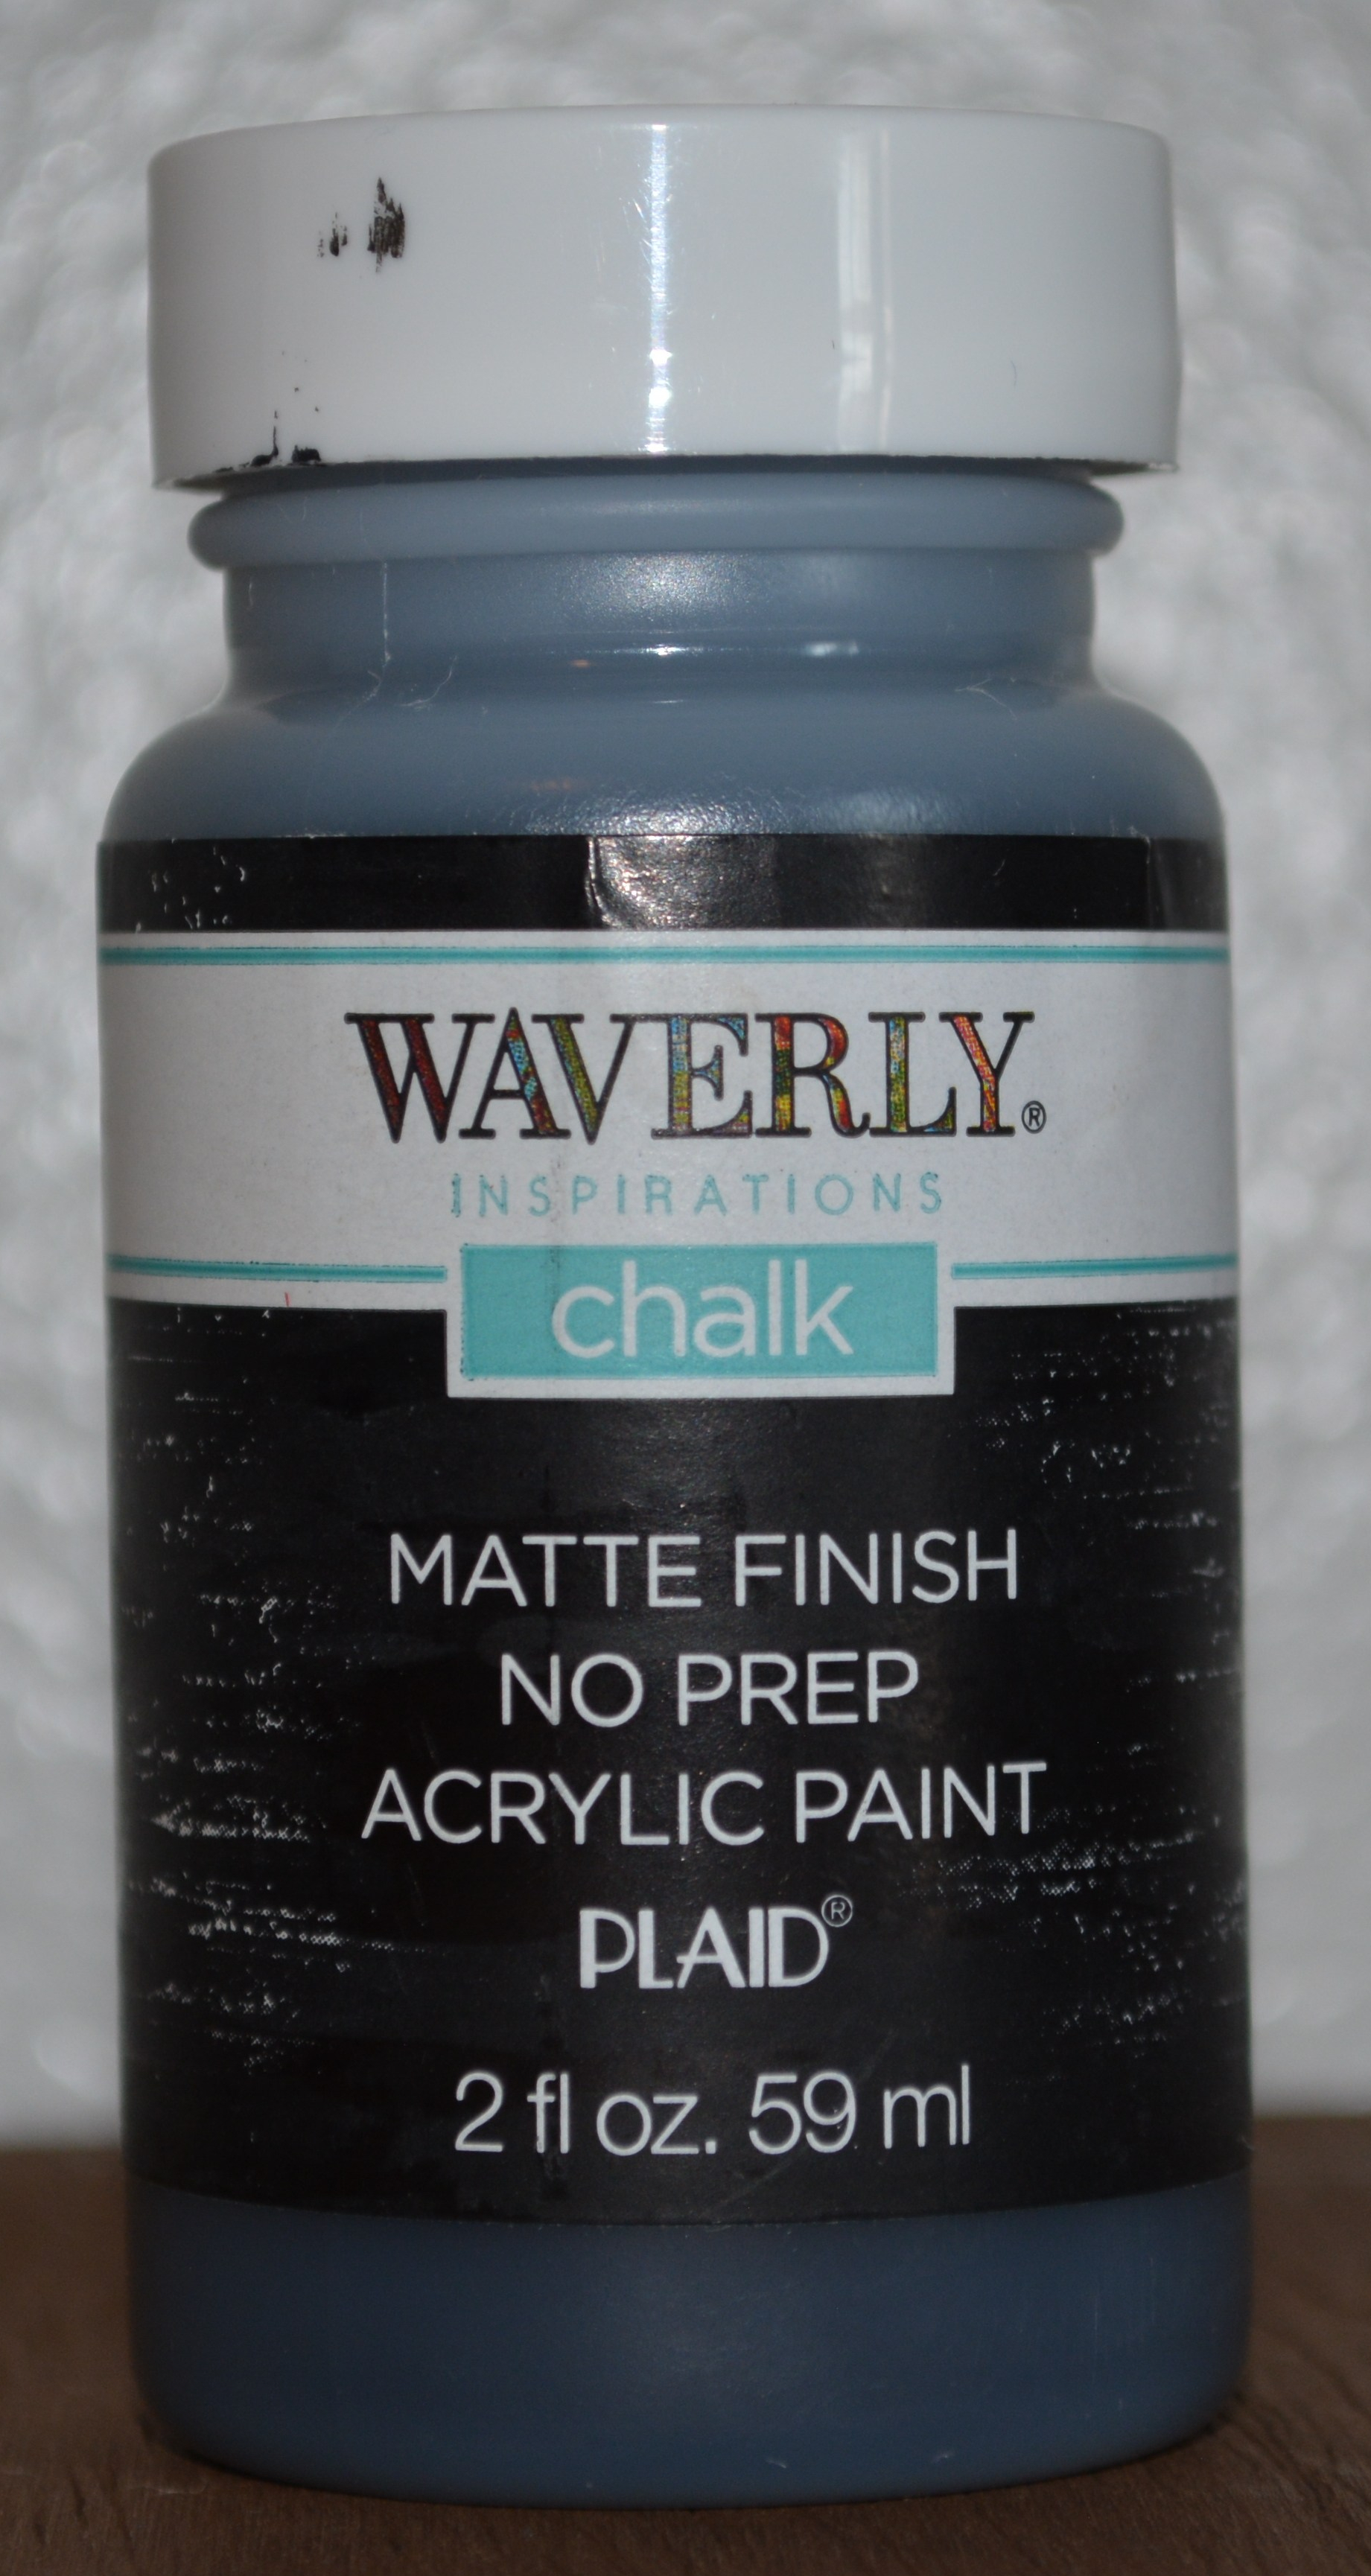
The first step for this fireplace is to prime it. I used Waverly White Chalk Paint to do that and I only did one coat. Next I painted the main part of the fireplace with red chalk paint. I left the bottom edge and the top mantle white for now. This took to coats.
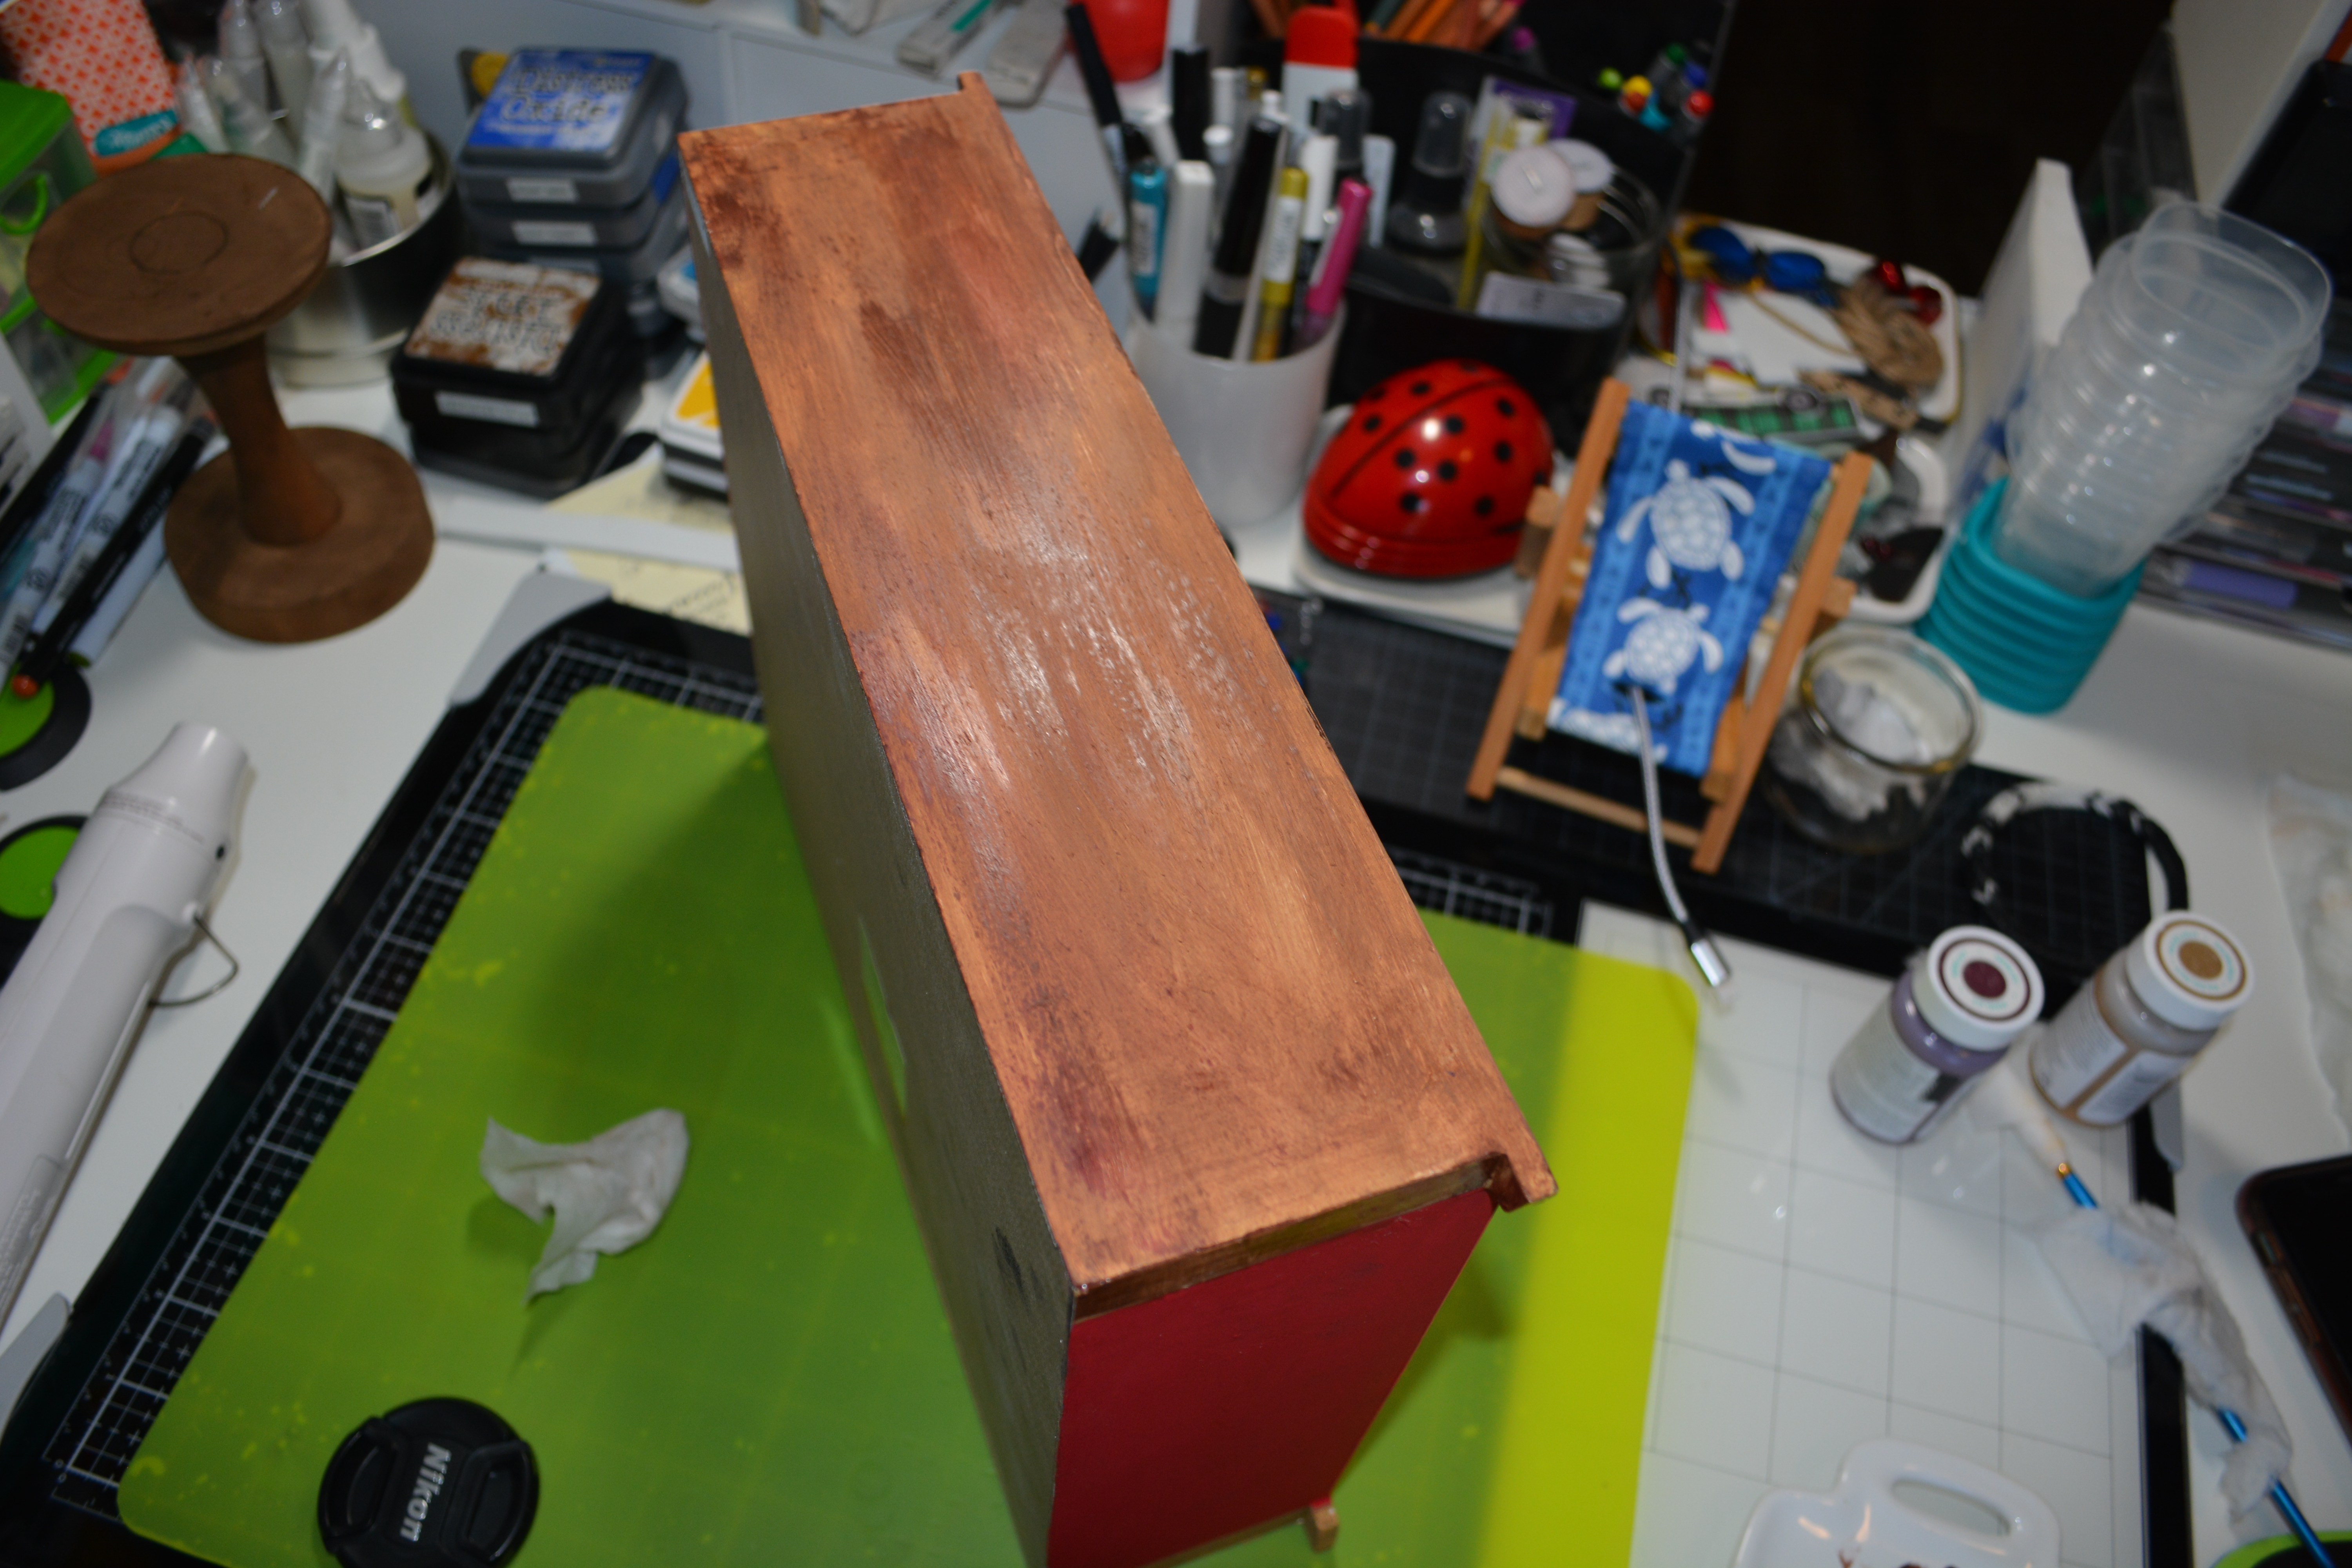
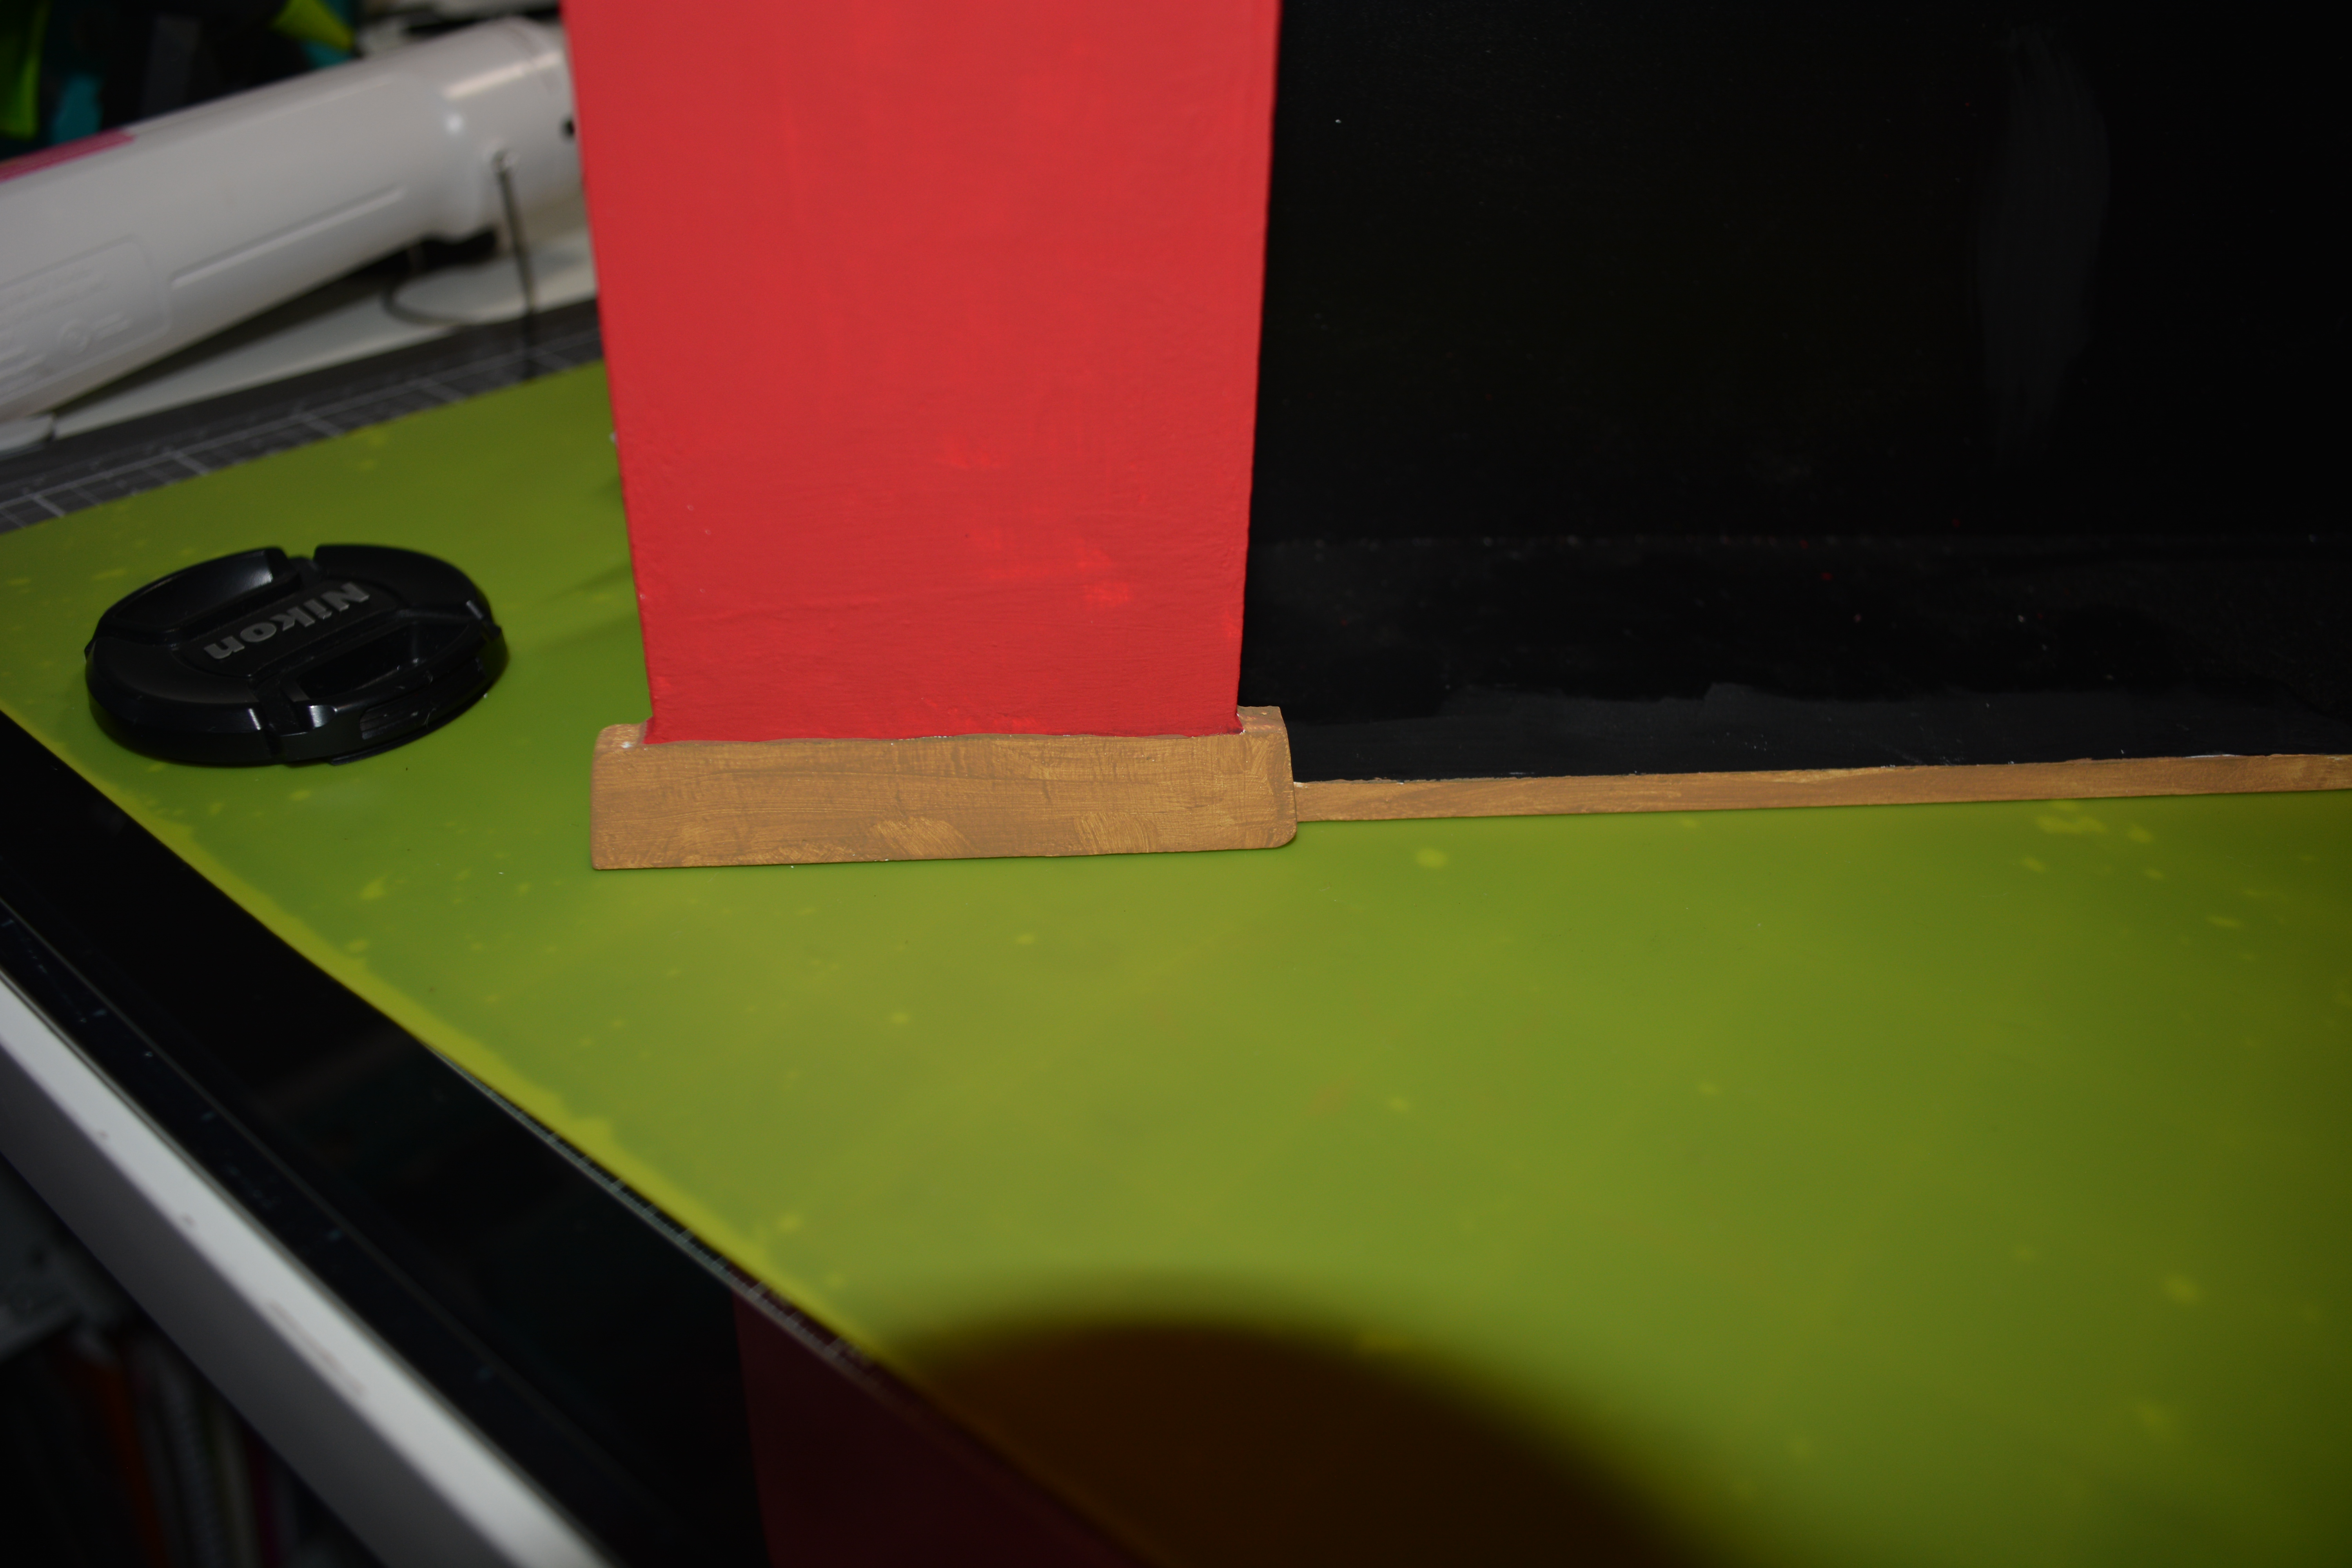
After the red chalk paint is dry, I took Waverly Chalk Paint in Hazelnut and painted the bottom and the top mantle with it. I let that dry just a bit and then dry brushed Waverly Antique Wax. This made the mantle and the bottom edge look like wood. I left the inside of the fire place black.
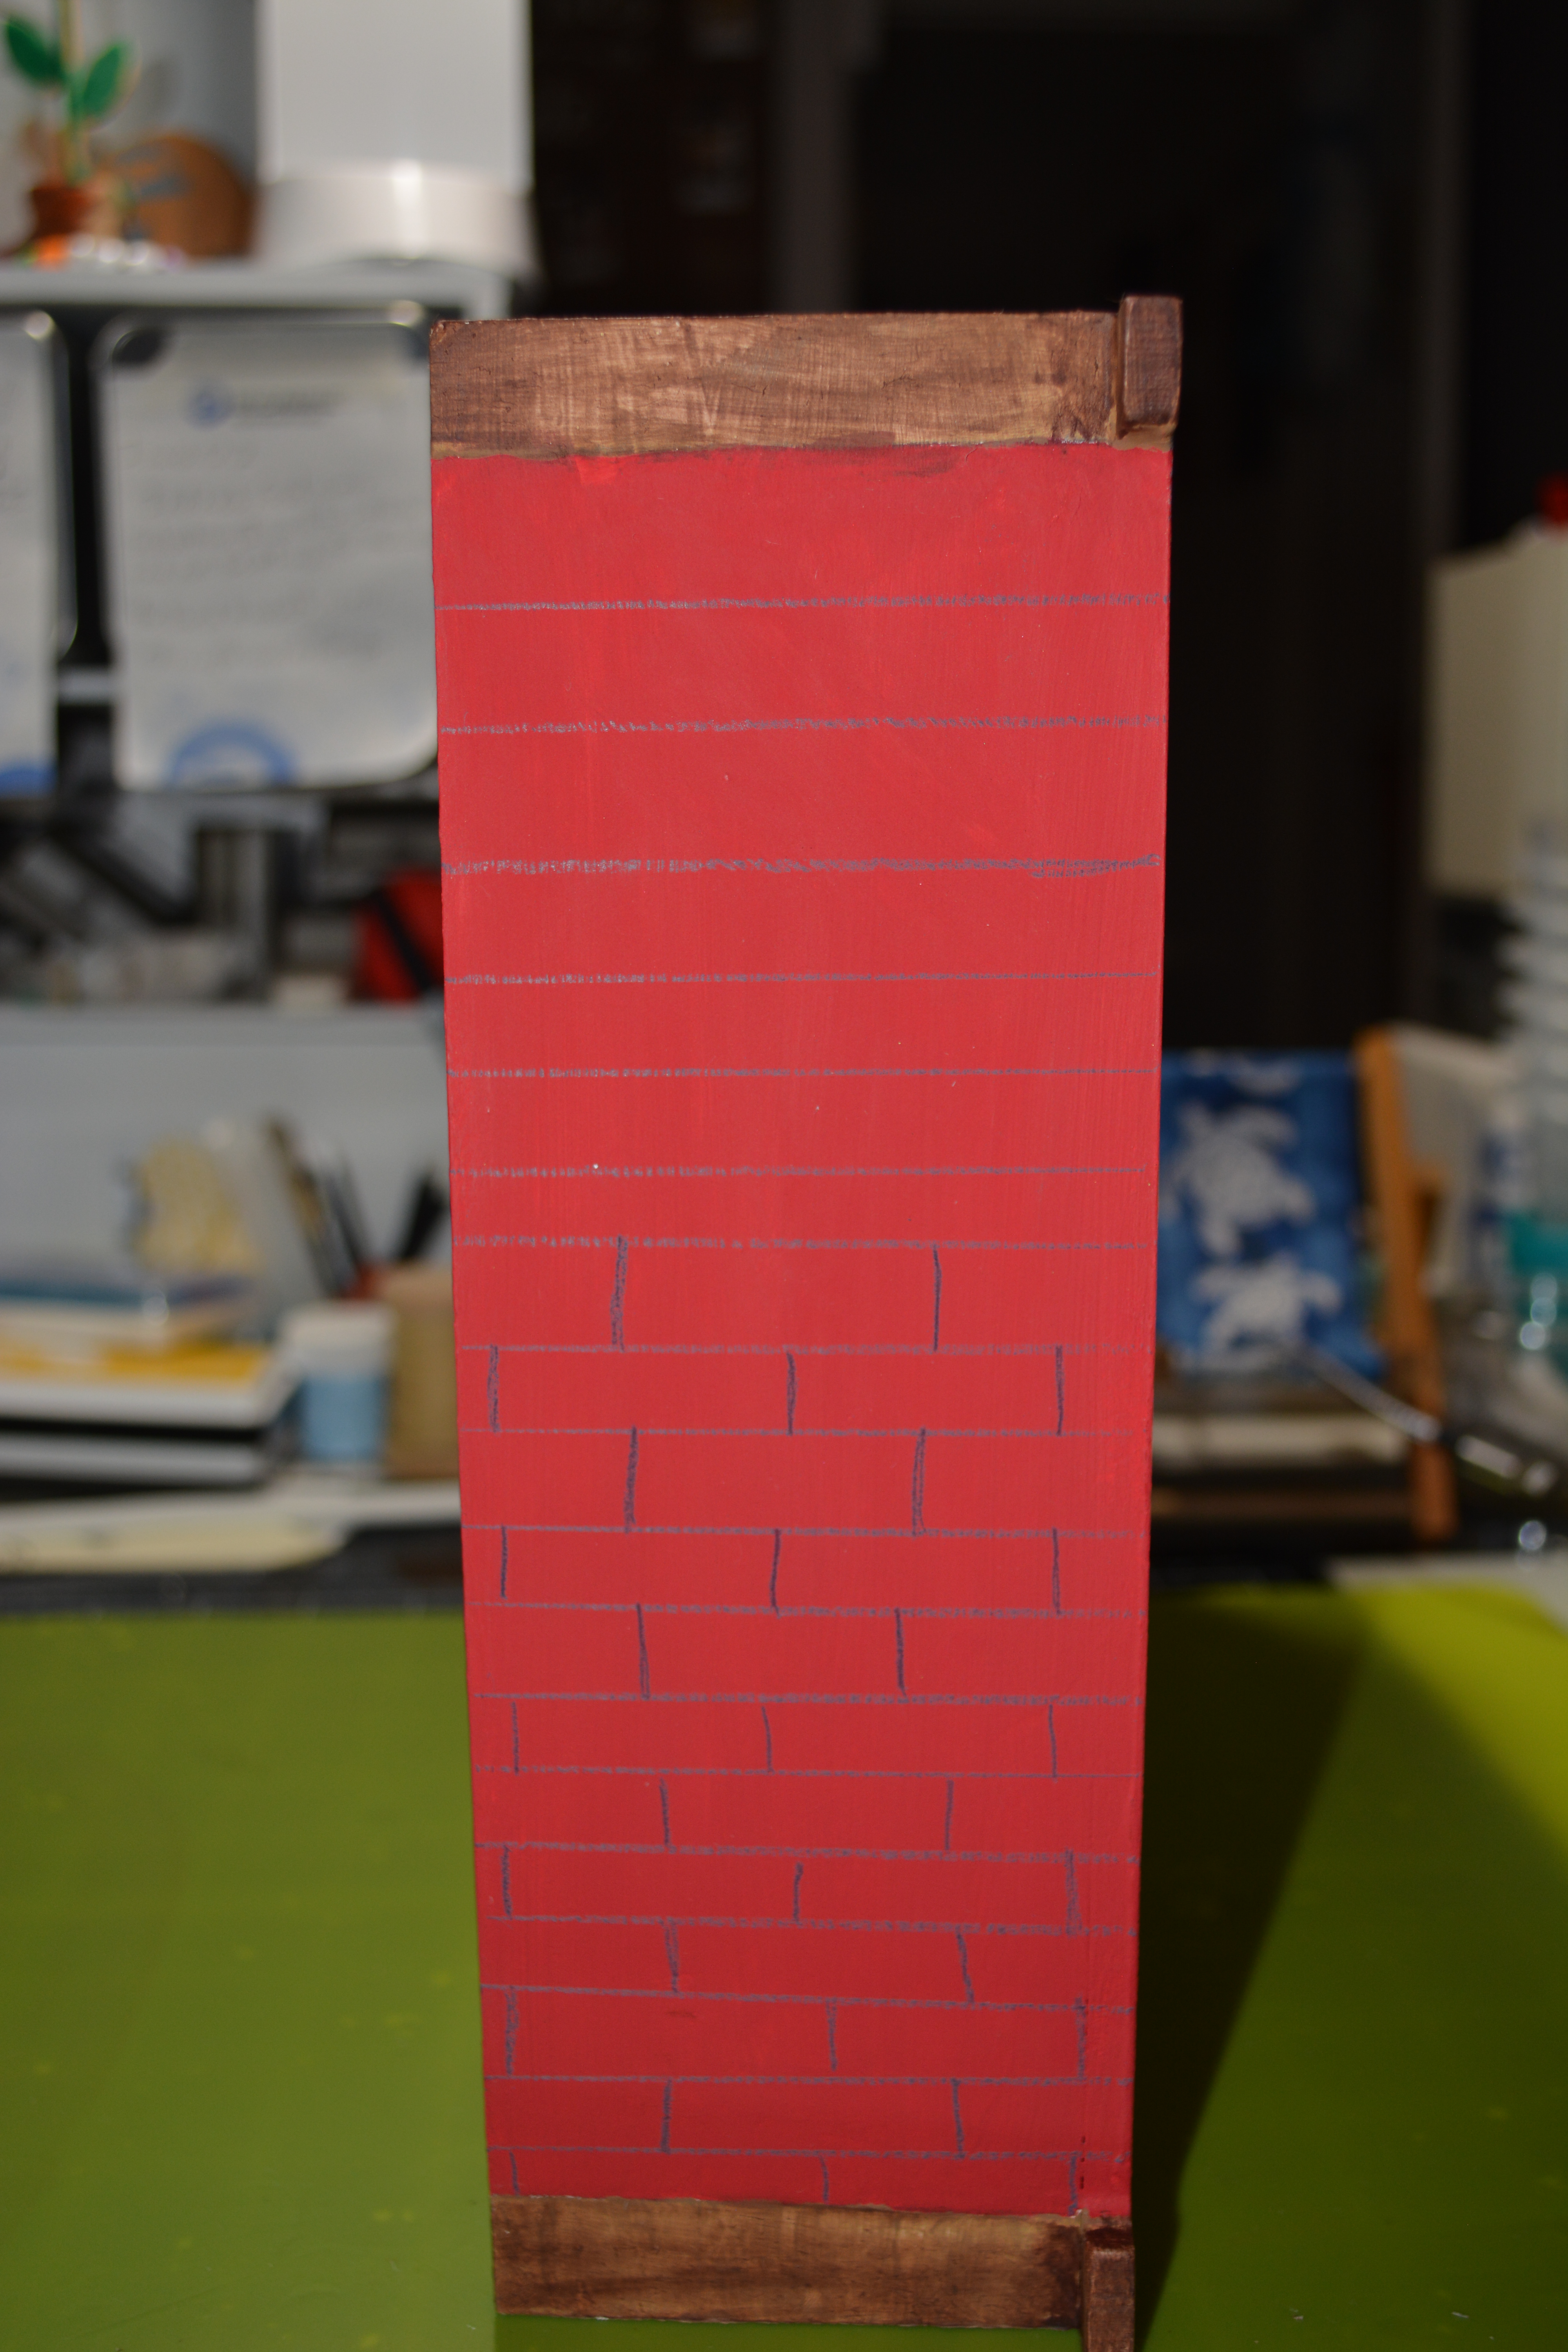
This next part is a bit tedious but the affect it gives is so great! I good a T-square and drew lines with a gray colored pencil to make the fireplace look like it was made out of brick. This took a bit and I started at the bottom of the fireplace and worked my way up.
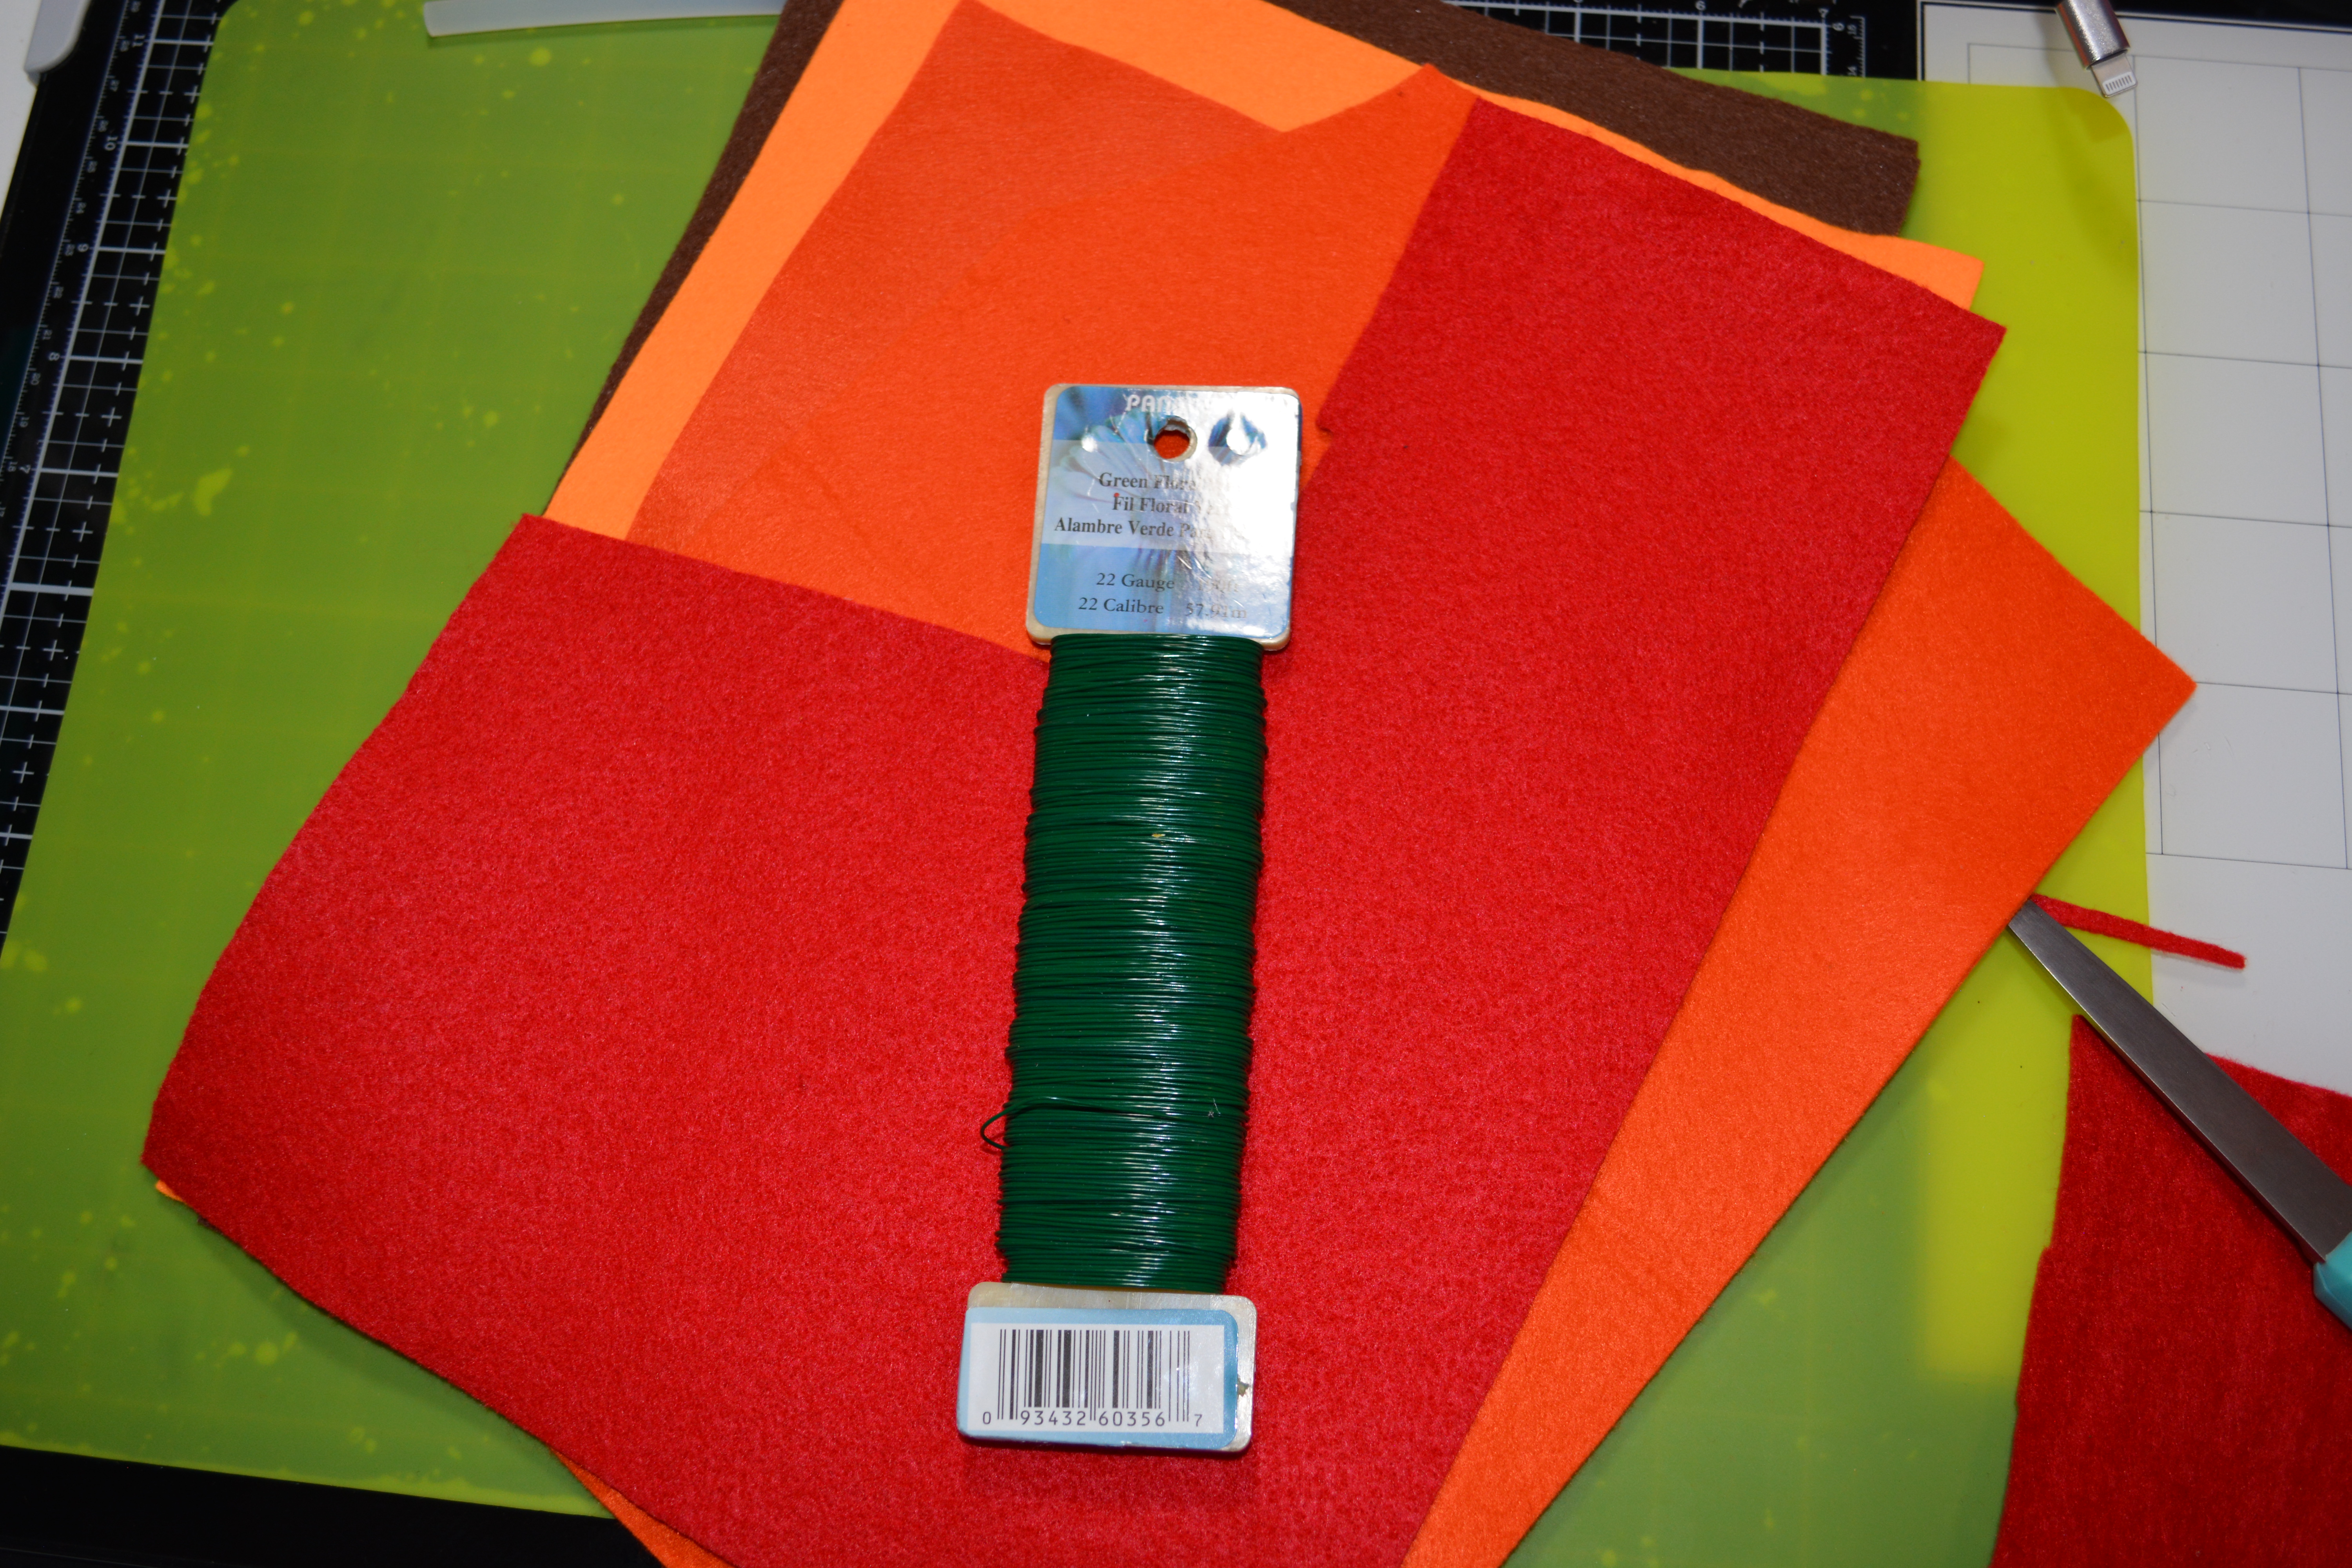
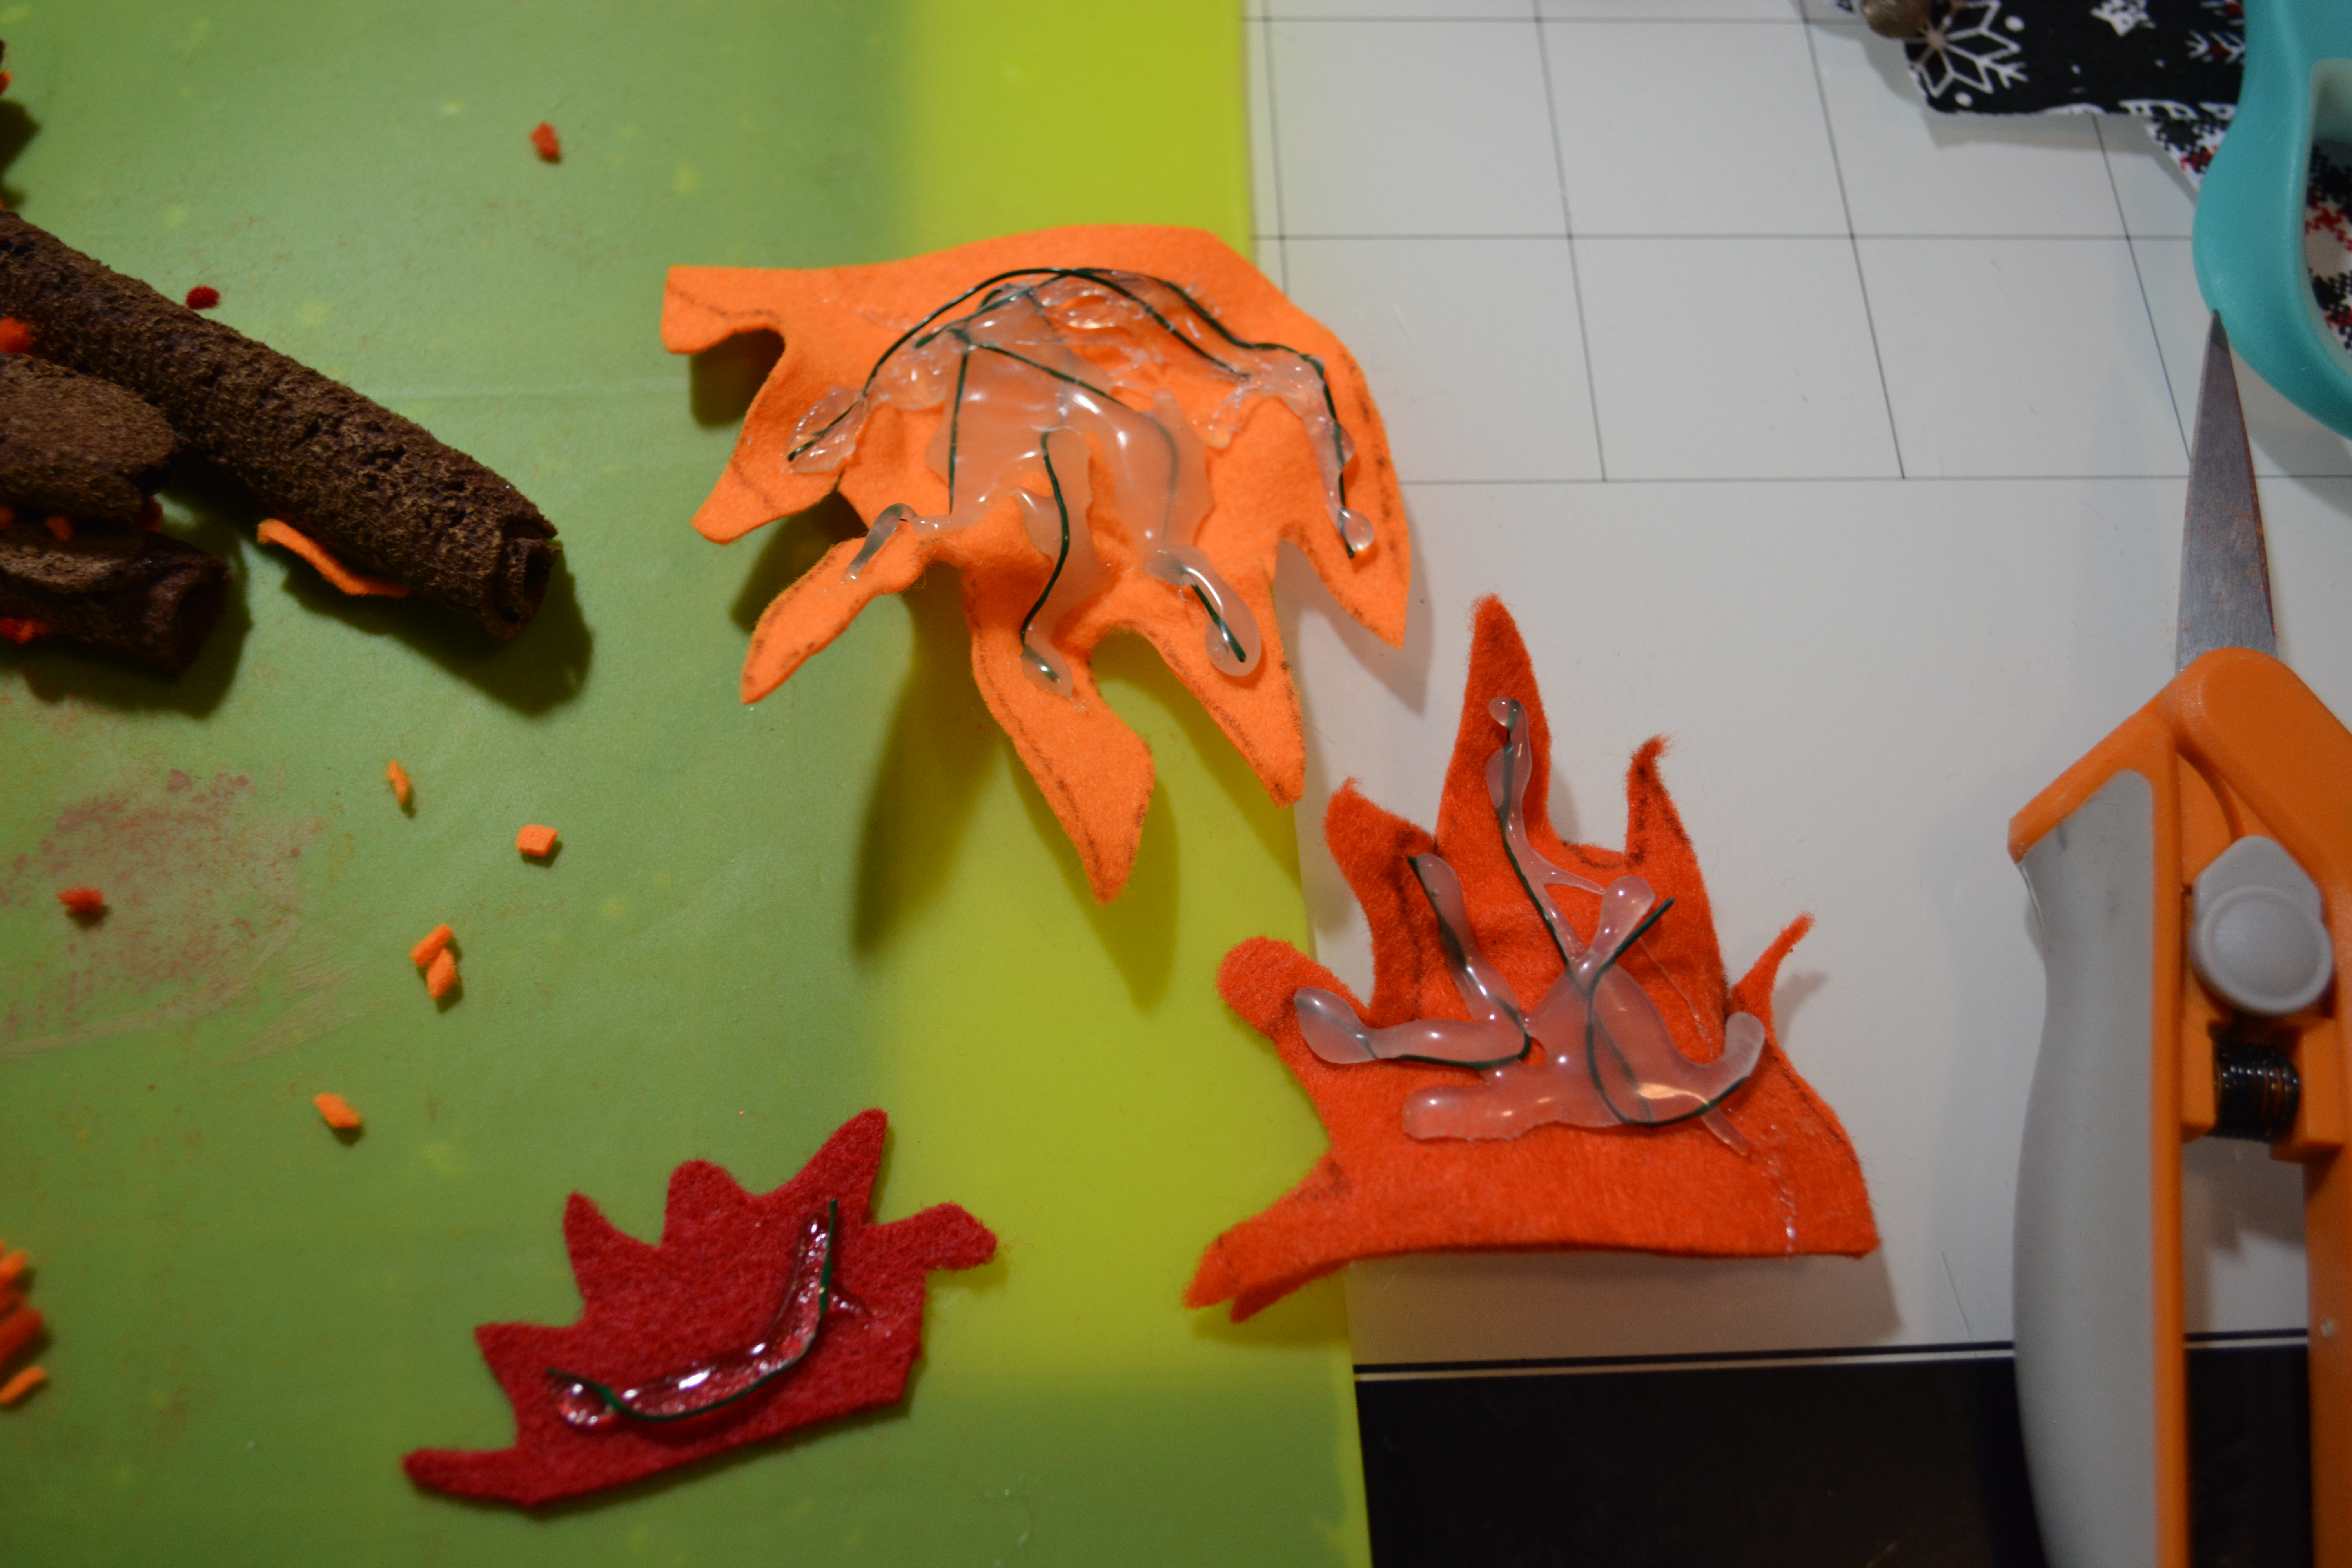
Now lets work on the fire for the fireplace. I took orange and red felt and cut out things that looked like flames. You can add yellow felt too, but I did not have any on hand. Each color is a shorter flame than the one before it. On the back of the flames I hot glued floral wire to them so that I could bend them to look more realistic. Then I sprayed the front of the felt with glimmer spray. You could skip this because it does not glitter like I thought it would.
For the firewood, I cut rectangles out of dark brown felt and rolled them up and hot glued the edges. Then I brushed Waverly Chalk Paint in Hazelnut over them. I was having a hard time trying to make these pieces look like wood. Then I remembered that if you took a crafting heat gun to felt, it melts!! so that is what I did. I melted all the pieces and they looked a lot more like wood when I got done. You could use brown paper for this.
From there I cut very tiny pieces of the orange and red felt to add with the wood to make it look like it is burning,
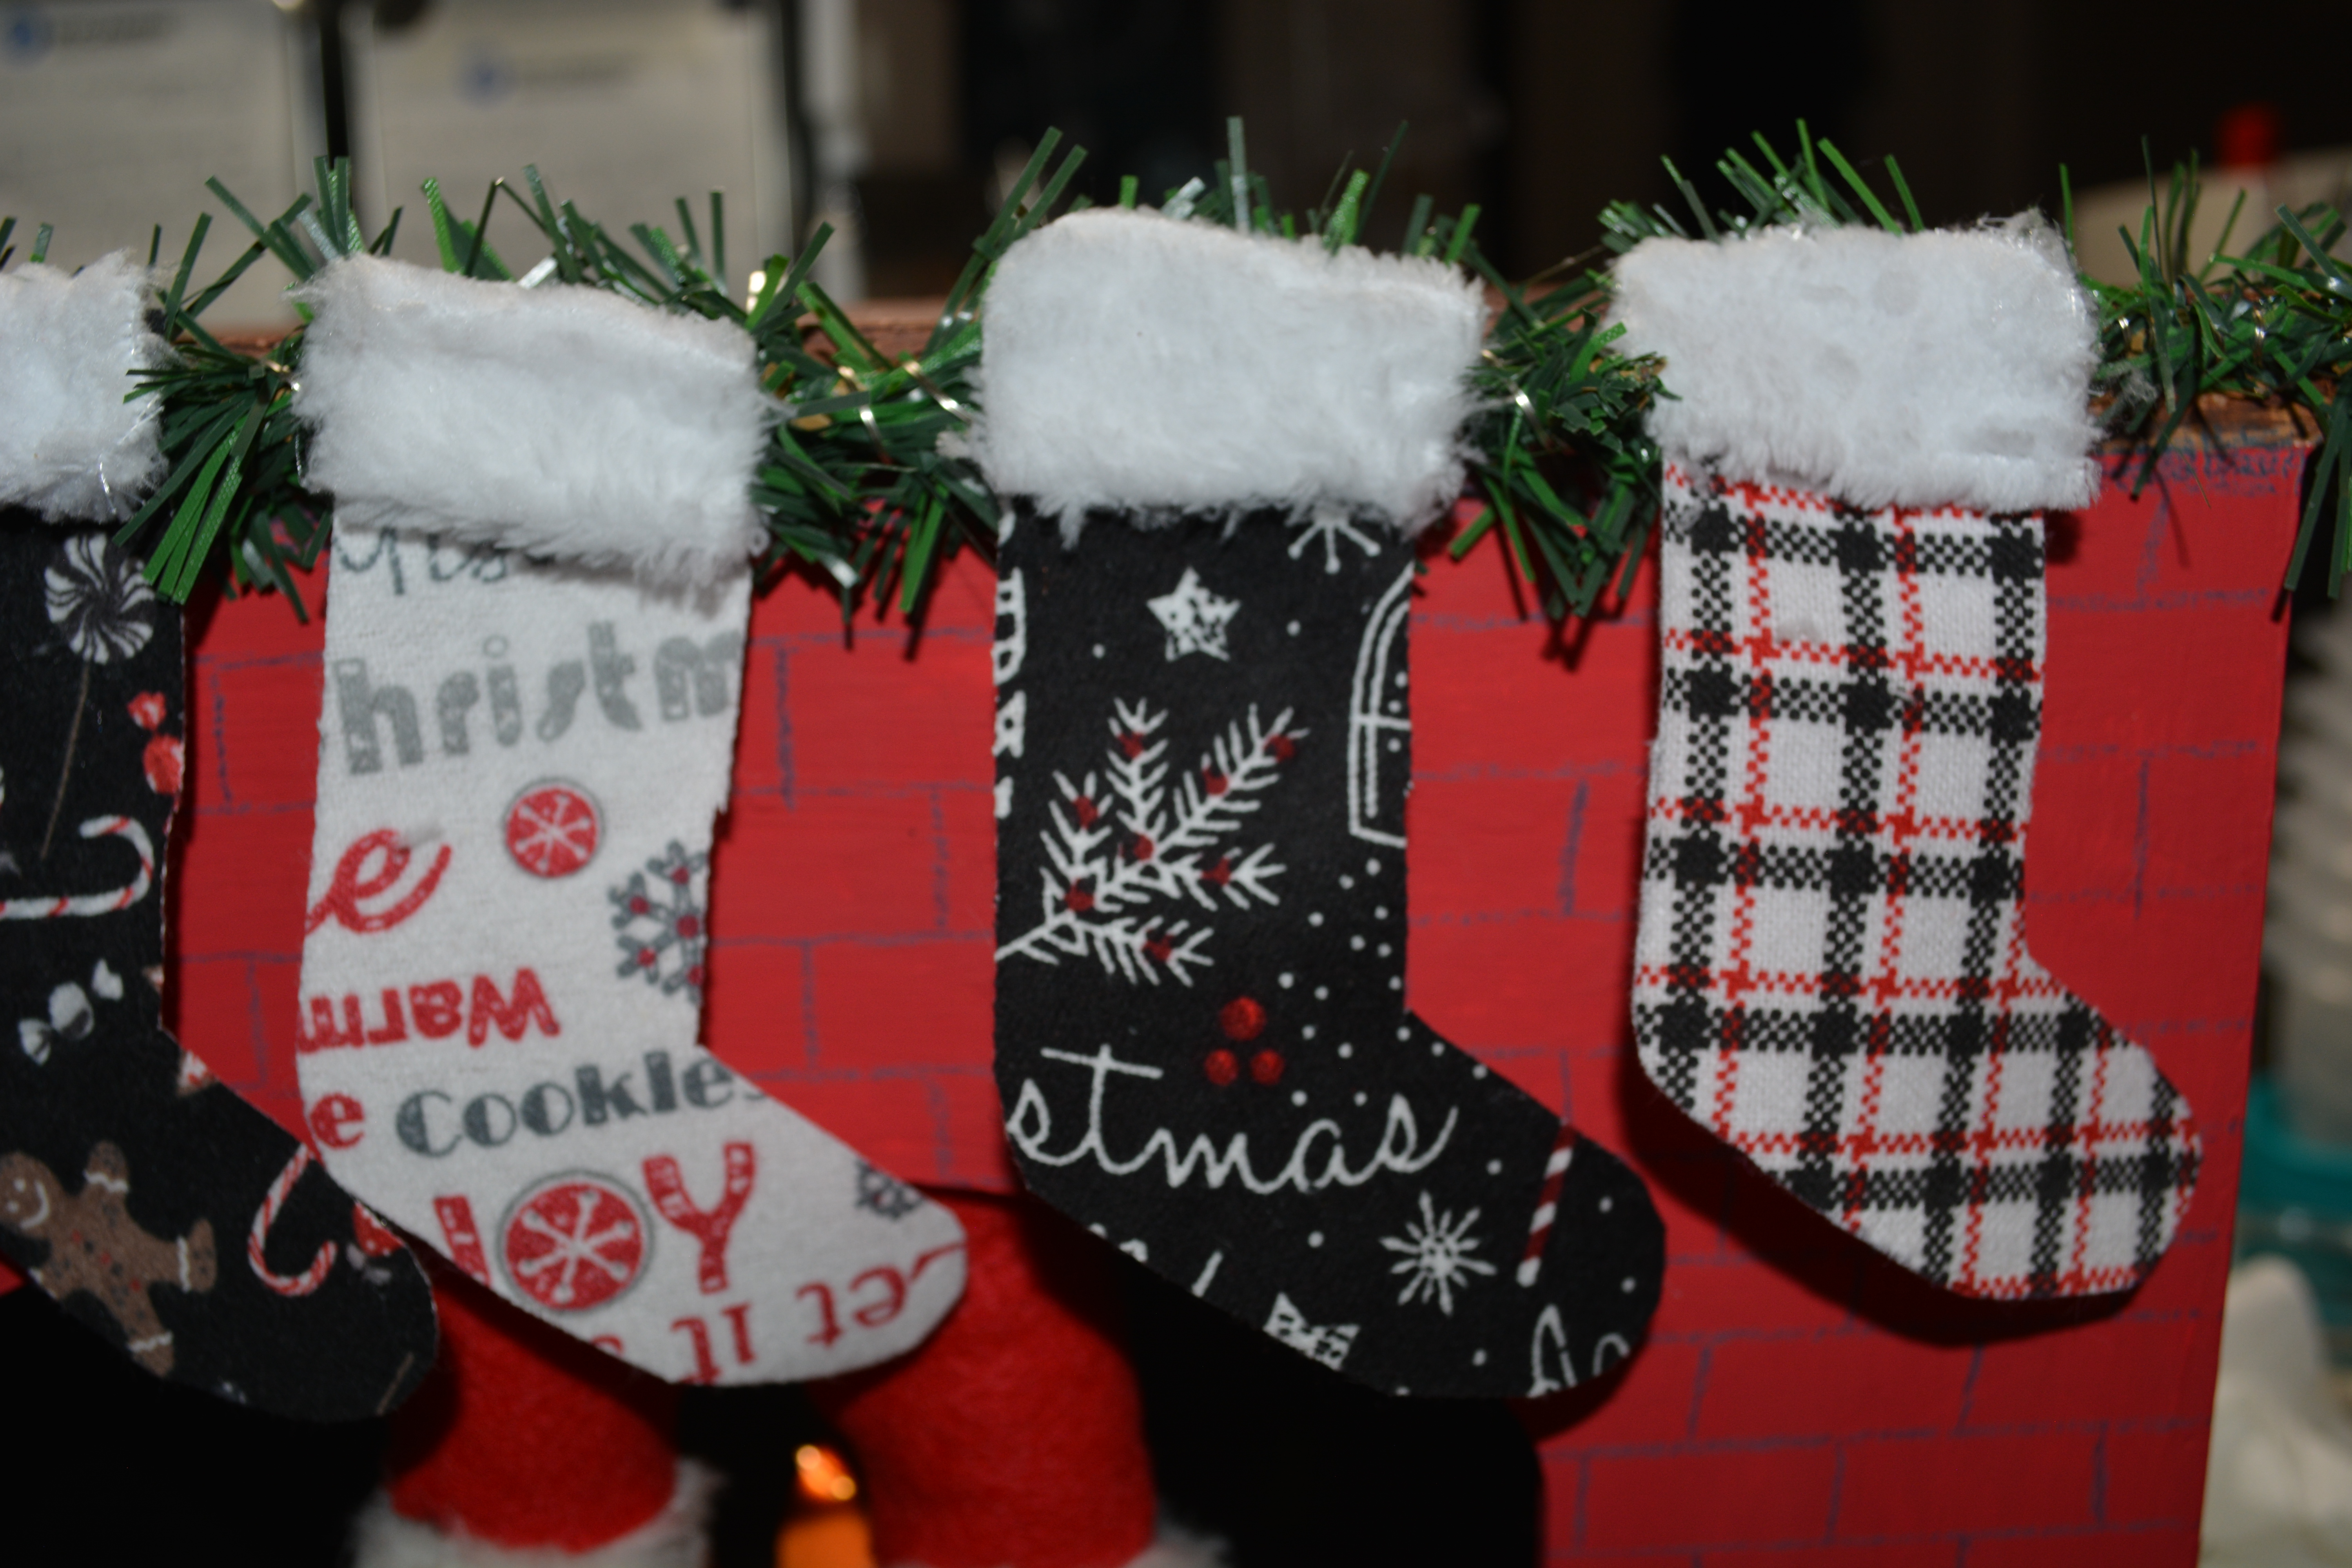
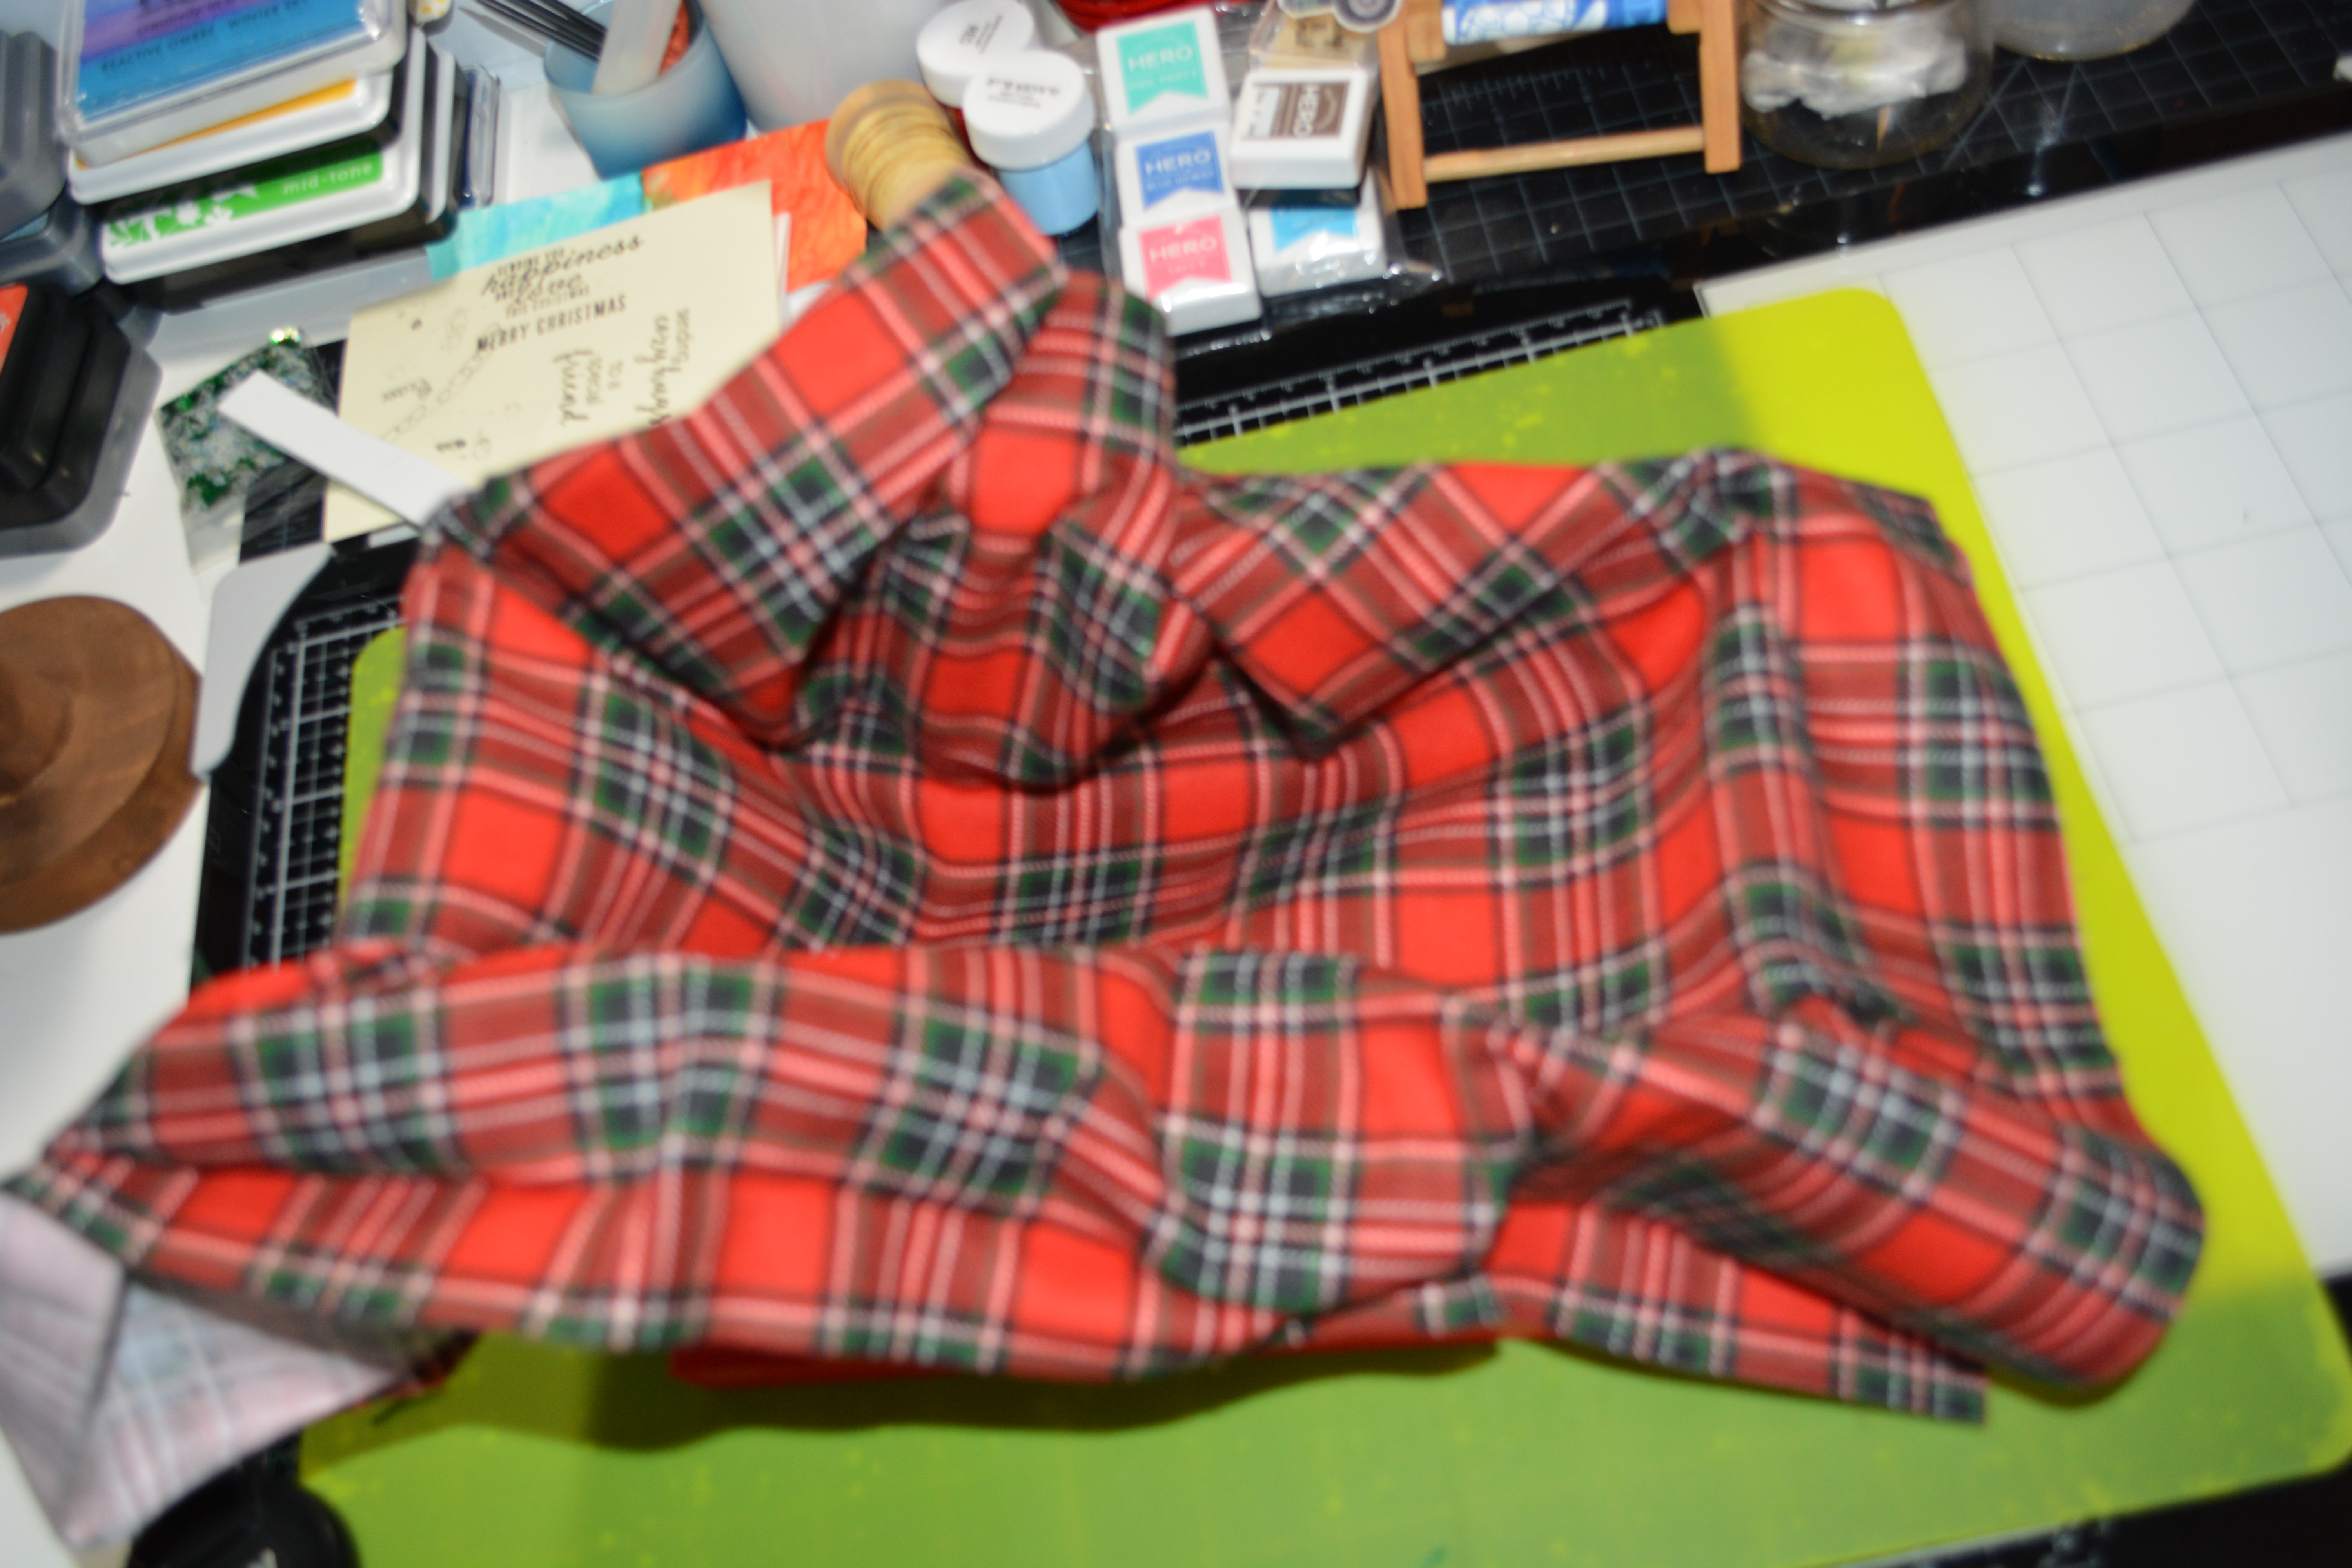
Now lets look at the stockings. I drew a stocking shape on fabric from Walmart. Lets be honest here I cut out a stocking 4 or 5 different times until I liked the shape and size of one. Then I used that one and cute out 4 more stockings. That gave me 5 all together and they were all different patterns. For the fluffy white trim, I used a white cloth from Dollar Tree. I cut it to size and rounded the corners. Then hot glued it onto the top part of the stocking.
It’s time to add Santa! Santa need some help though. I could not find Santa legs but Walmart had these elf legs that you clip under the branches of a tree. It took some thought to turn them into Santa legs. I covered the legs with red felt and hot glued it down. Then I bent the toes of the elf backwards and hot glued them backwards. This made Santa boots instead of pointy elf shoes. It is time to add Santa’s legs! I hot glued them in place making sure his legs were seen but did not completely cover the the fire.
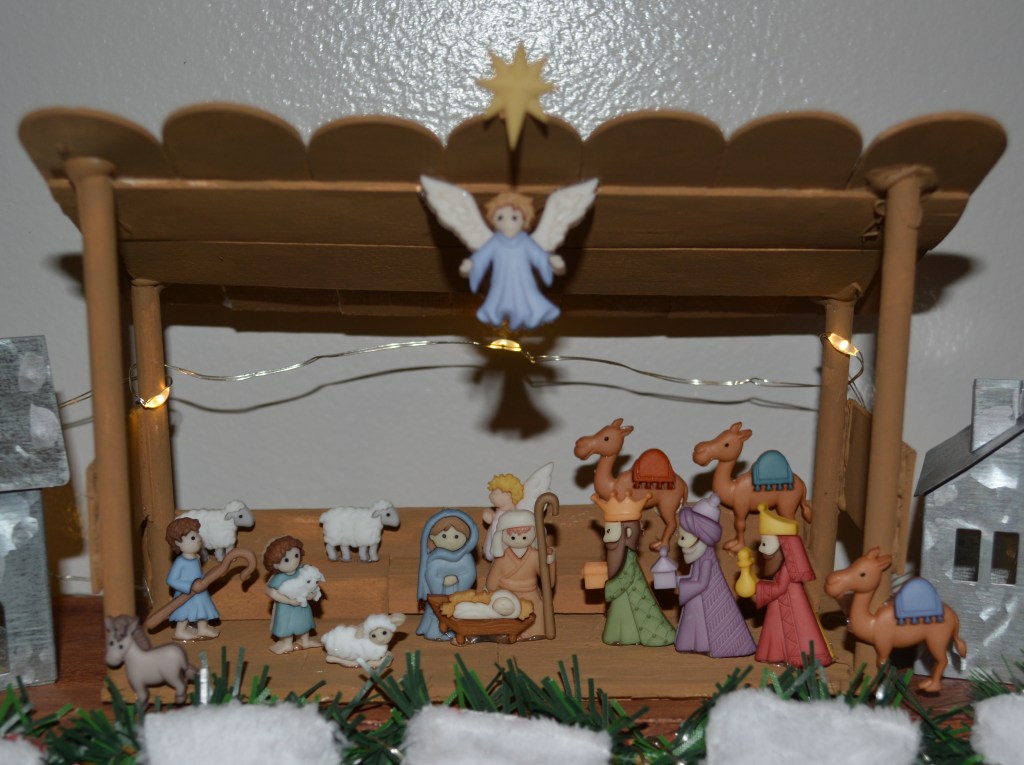
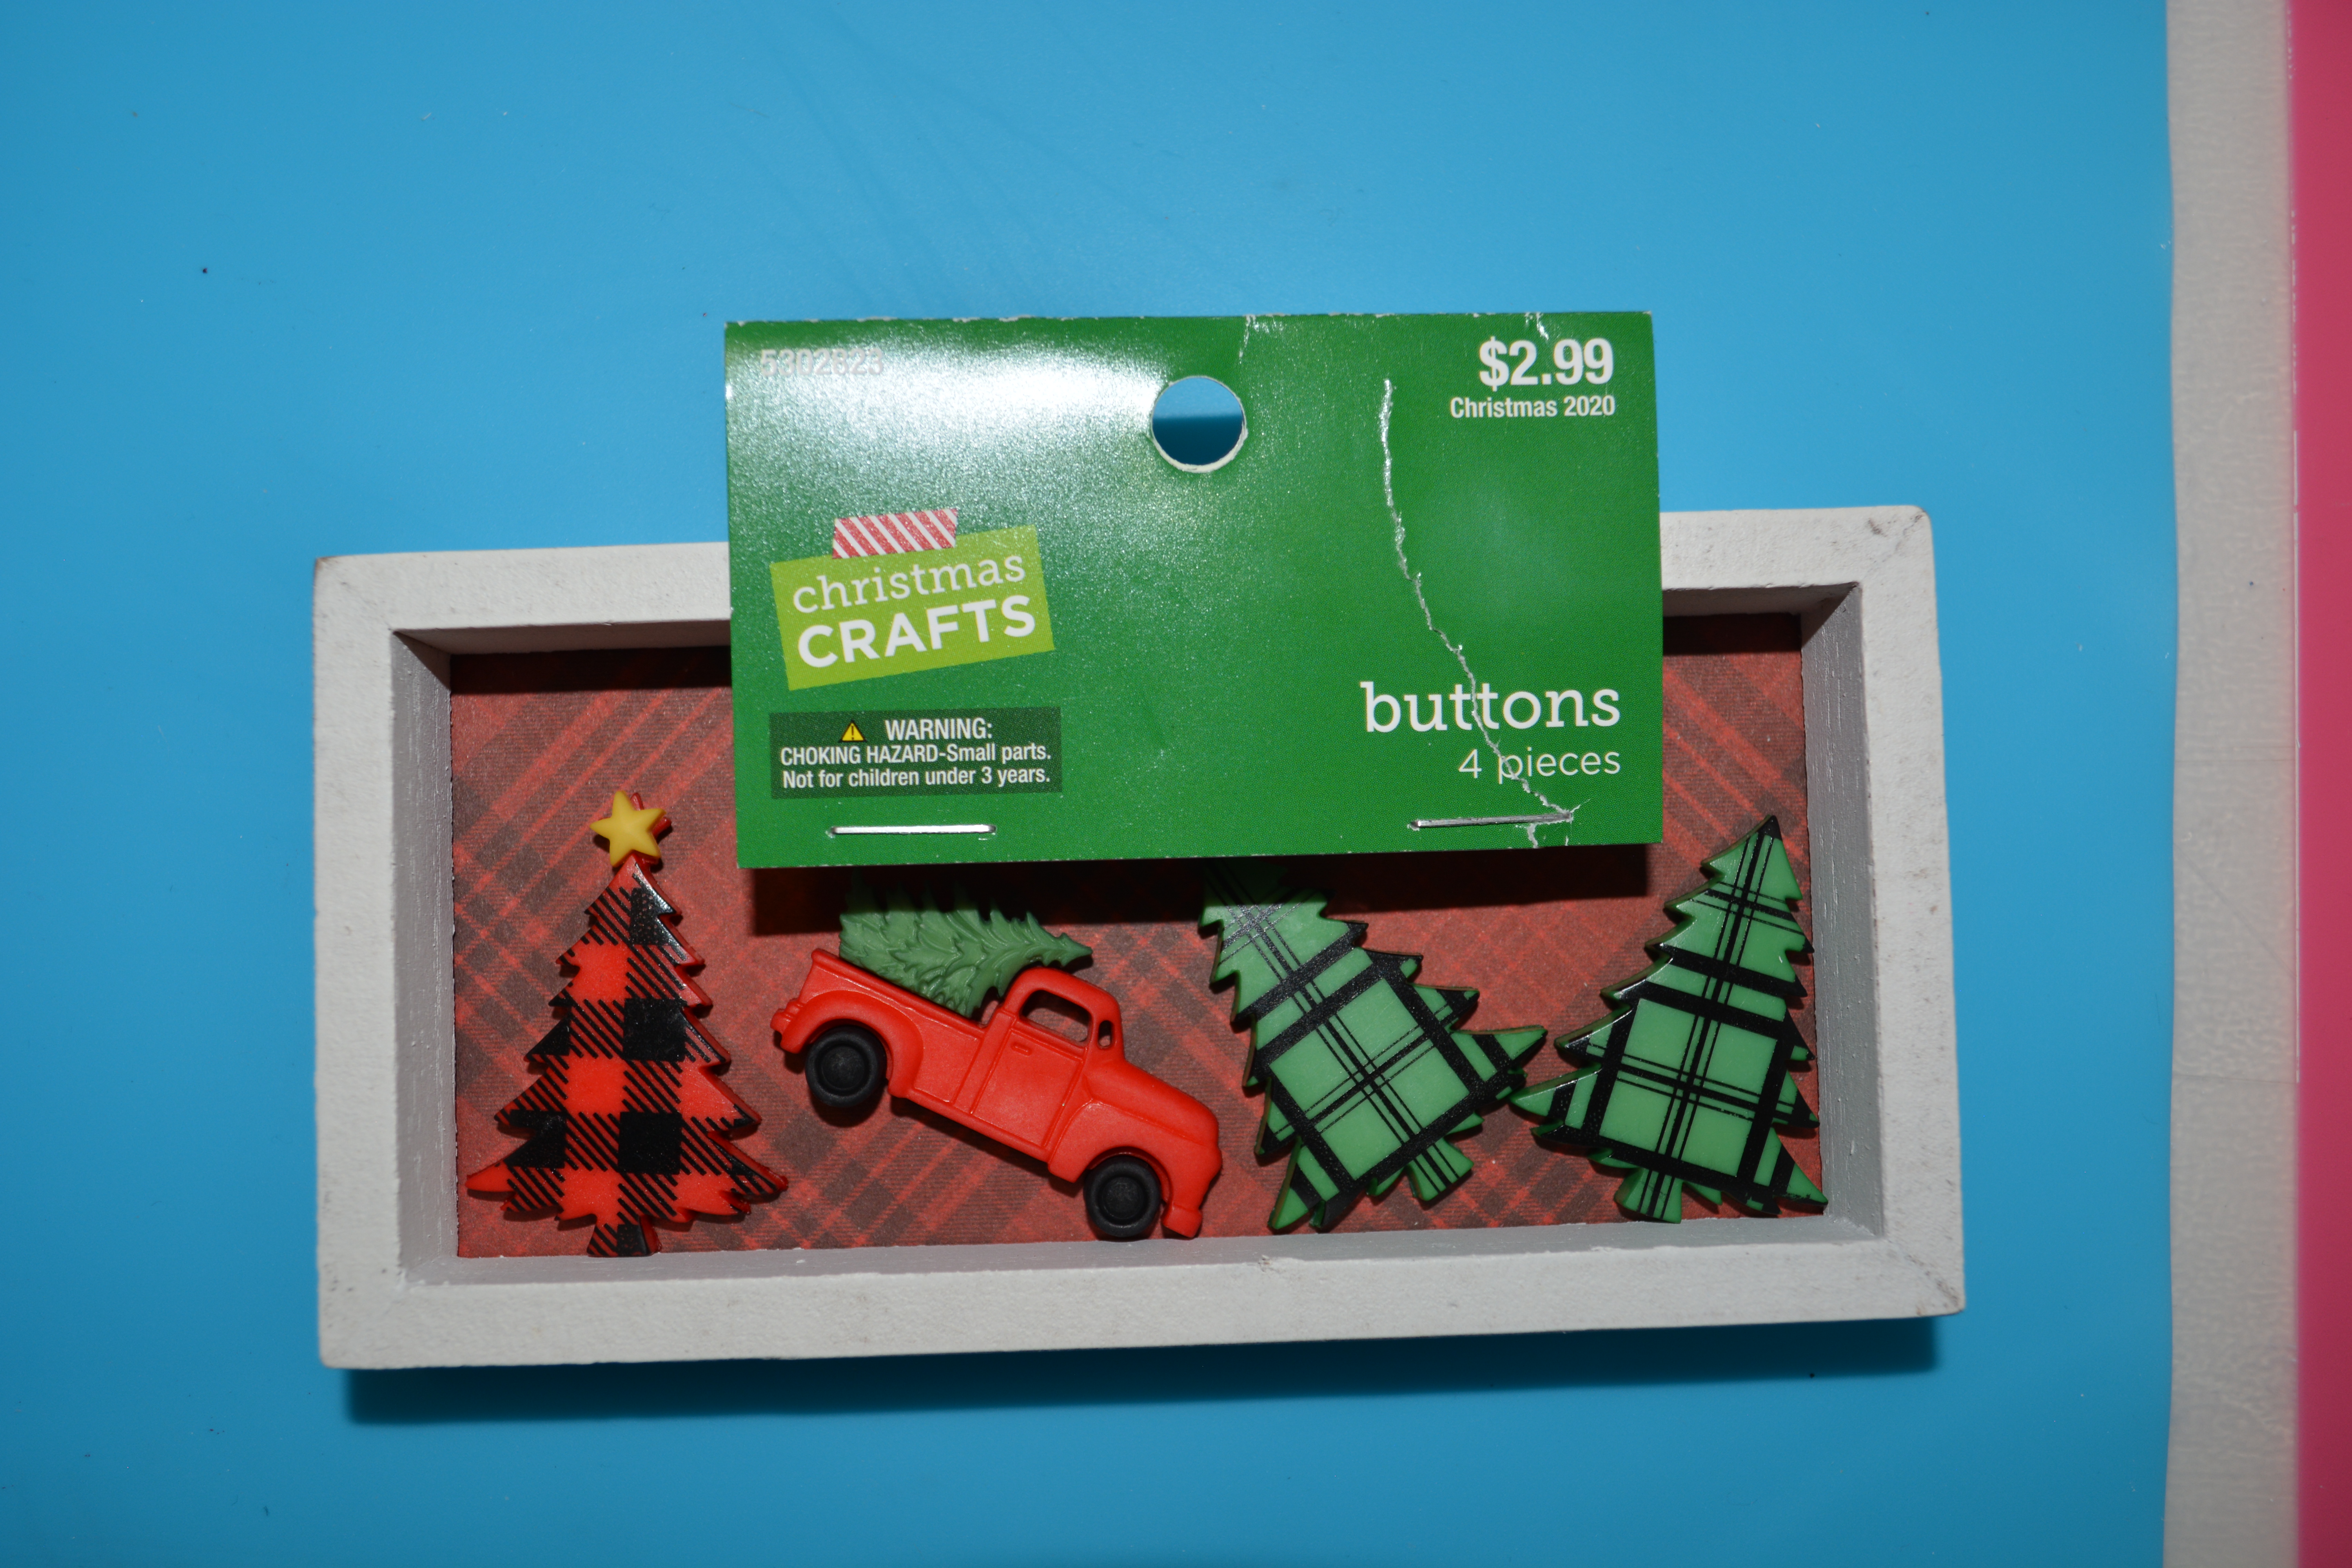
The final thing I created for this scene is a manger. I build it out of jumbo popsicle sticks and small dowel rods from Dollar Tree. The people themselves are buttons from Hobby Lobby. If you want to a manger scene you could just put a small one on the mantle. You do not have to build one. I just loved these buttons of all the Christmas story people and wanted to use them. I hot glued them in place. Yes it is a bit big for the mantle but I had to have the space for all the people and animals and a manger scene was a must have for me personally.
It is time to assemble everything. I started with the inside of the fireplace. I knew I wanted fairy lights inside the fireplace so I drilled a hole in the bottom back of it and fed some of the fairy lights through. Next I glued the wood and tiny pieces of felt down. After that I molded the flames the way I wanted them and hot glued them in place. I did not glue them on top of each other. I left some space between them. Finally, I moved the fairy lights around the flames and hot glued them down where they needed it. I did this will the fairy lights on so that I could see where the light would shine.
Around the top of the mantle, I hot glued 2 garland ties that I twisted together. From there I glued the stocking to it.
I had an extra tree skirt for a mini tree, so I cut it and made it a rug around the fireplace. On the rug I placed a ceramic tree on one side and a small metal house on the other side. I took some of those fairy lights and stuffed them inside the house. I placed 2 more small houses on top of the mantle and stuffed lights in them too.
The last step was to add the manger scene. I wrapped some lights around it too. Any fairy lights that were in the back of the fireplace I taped them to the back so they could not slide around. It took 2 strands of fairy lights to light up everything in and on the fireplace.
Yes this project took two weeks. Yes it was COMPLETELY worth it. I love this so much. It is Christmas all wrapped up in one scene. This is great for someone with a small apartment or if you do not want to put up a ton of decor but want a bit of Christmas. This fireplace can be decorated however you want. Lots of bottle brush trees on the top would be pretty or making lots of mini Christmas carts to line up across it. The possibilities are endless.
Thank you so much for reading to the end of this blog. I know it is a long one. Please Like, Share, Comment, and Subscribe. Also please find me on Facebook and Instagram all under Yellow Butterfly Craft Designs!
Have a wonderful weekend and I may have one more project next week!!
Melissa McGuire
Isaiah 9:6-7
6. For to us a child is born, to us a son is given, and the government will be on his shoulders. And he will be called Wonderful Counselor, Mighty God, Everlasting Father, Prince of Peace. 7. Of the greatness of his government and peace there will be no end. He will reign on David’s throne and over his kingdom, establishing and upholding it with justice and righteousness from that time on and forever. The zeal of the LORD Almighty will accomplish this.
Supplies
Fireplace- Target
Elf Legs- Walmart
Felt in Orange, Red, Brown, and Yellow= Hobby Lobby
Garland Ties- Dollar Tree
Fairy lights- Amazon
Mini Houses- Target
Small Ceramic Tree- Hobby Lobby
Material- Walmart
White Car Cloth- Dollar Tree
Floral Wire- Dollar Tree
Colored Pencil- Anywhere
Waverly Chalk Paint in White and Hazelnut- Walmart
Red Chalk Paint- Walmart
Waverly Antique Wax- Walmart
Mini Tree Skirt- Walmart
Surebonder Hot Glue Gun and Hot Glue Sticks- Hobby Lobby
A favorite movie in my house at Christmas time is The Polar Express. My boys love it and it is tradition for us to watch it all as a family. Aidan is 16 and does not believe in Santa anymore but he does keep the magic going for his brothers. He always says he hears the bell when his little brother asks. To see my little guy Jesse light up with Aidan’s answer is amazing. My other son Connor has not let on if he still believes in Santa or not and I am to afraid to ask.
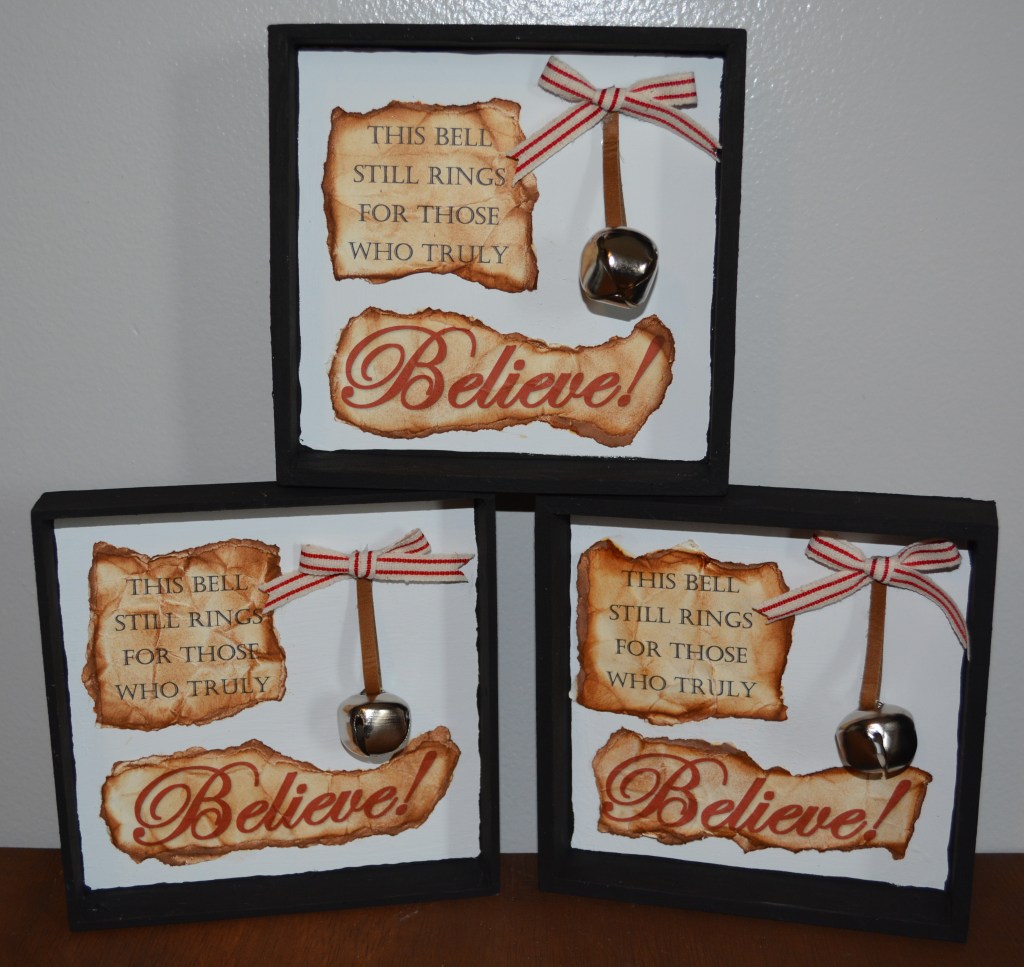
I wanted to create something that my boys could take with them when they leave the house. Aidan only has a little more time left with us until he graduates and I want him to remember the magic that he keeps alive for his brothers. That is when I came up with this project. These shadow boxes will always remind the boys of the magic of Santa and our time together watching The Polar Express. One day they will have their own kids and really see how special that magic is.
Lets Get Started
Supplies
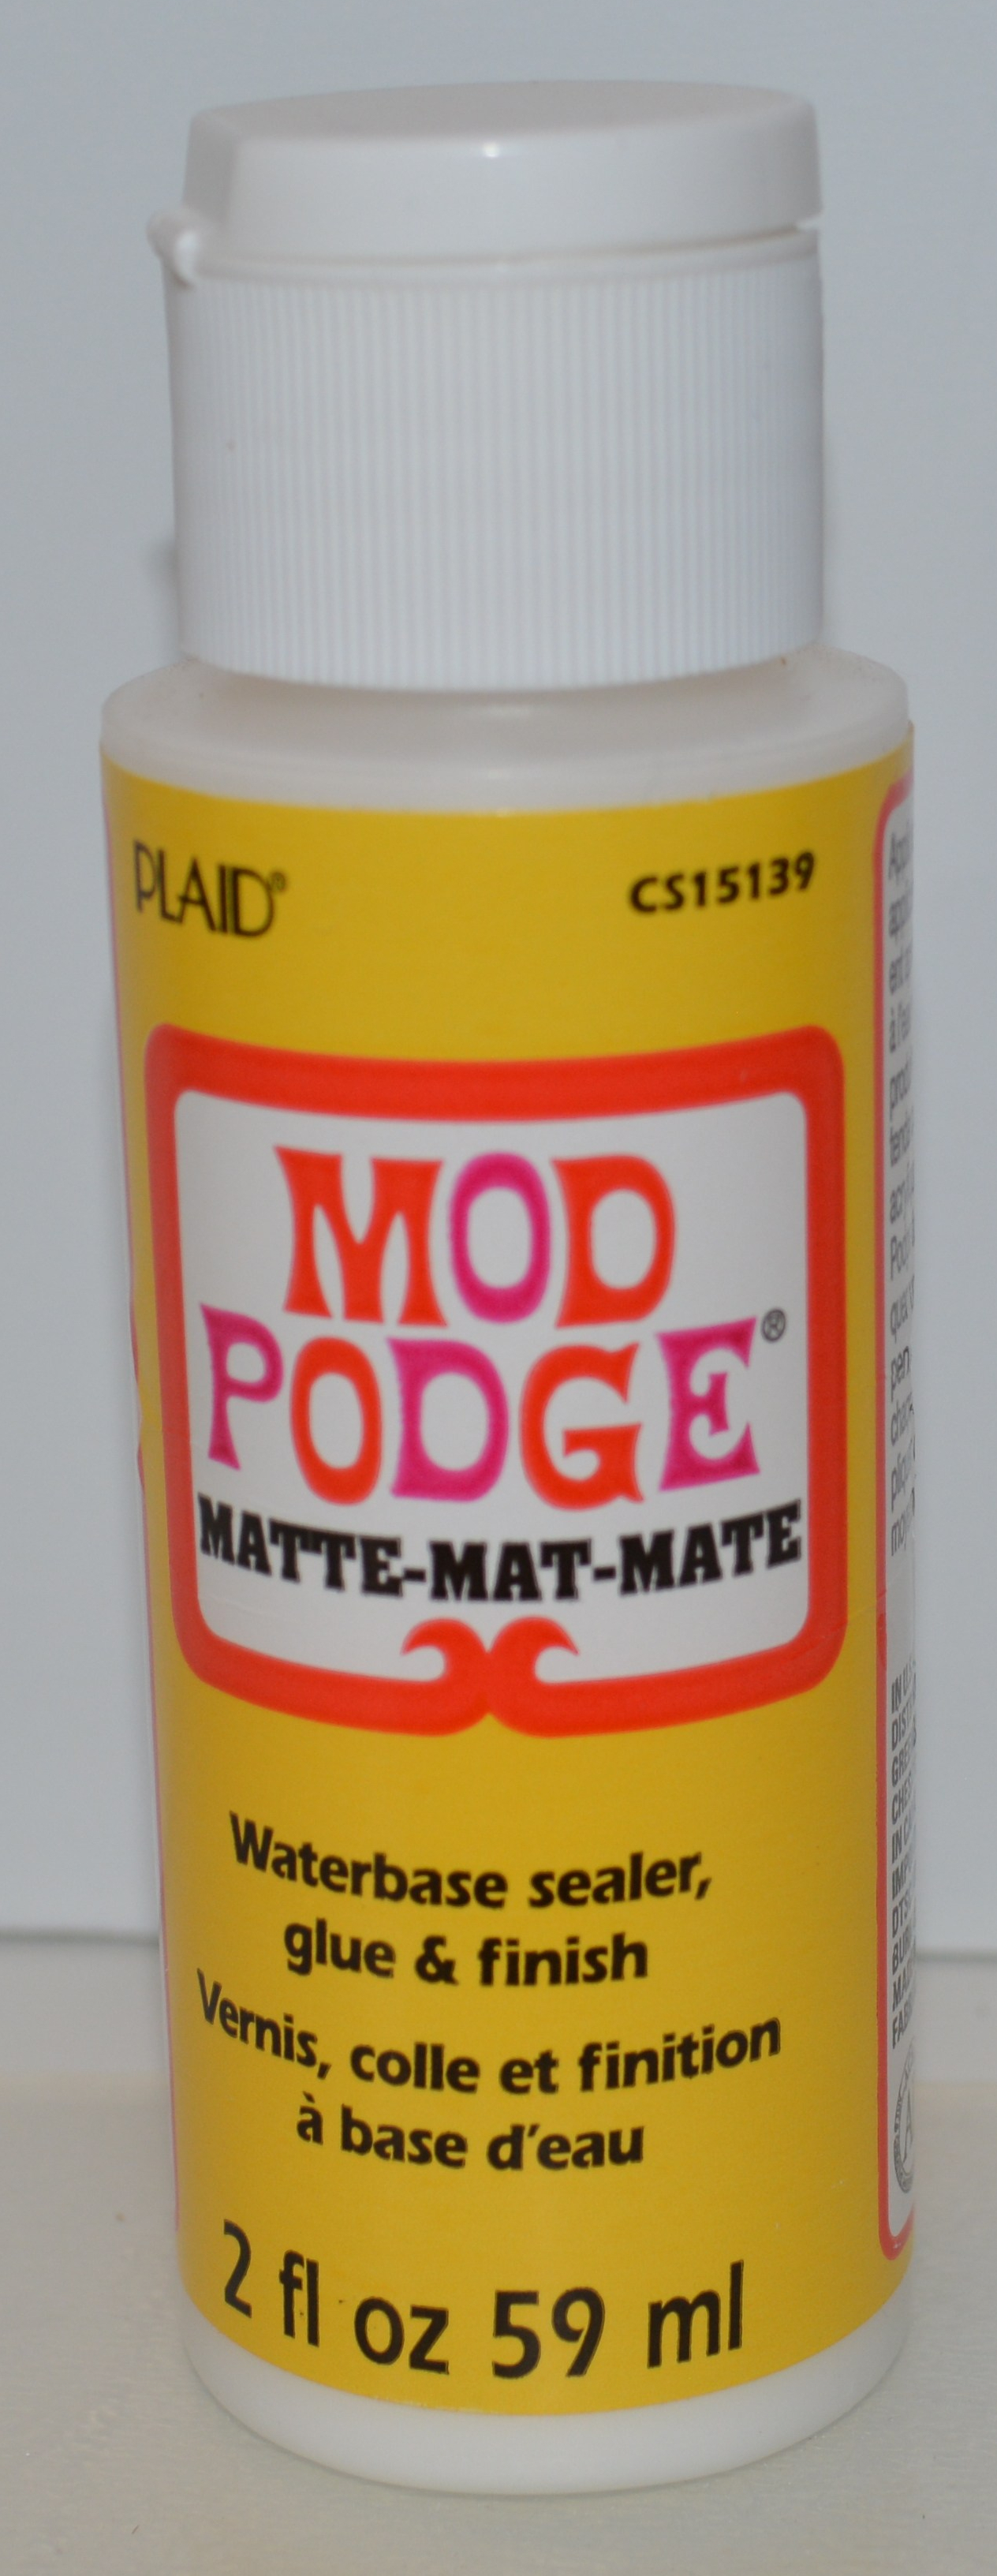
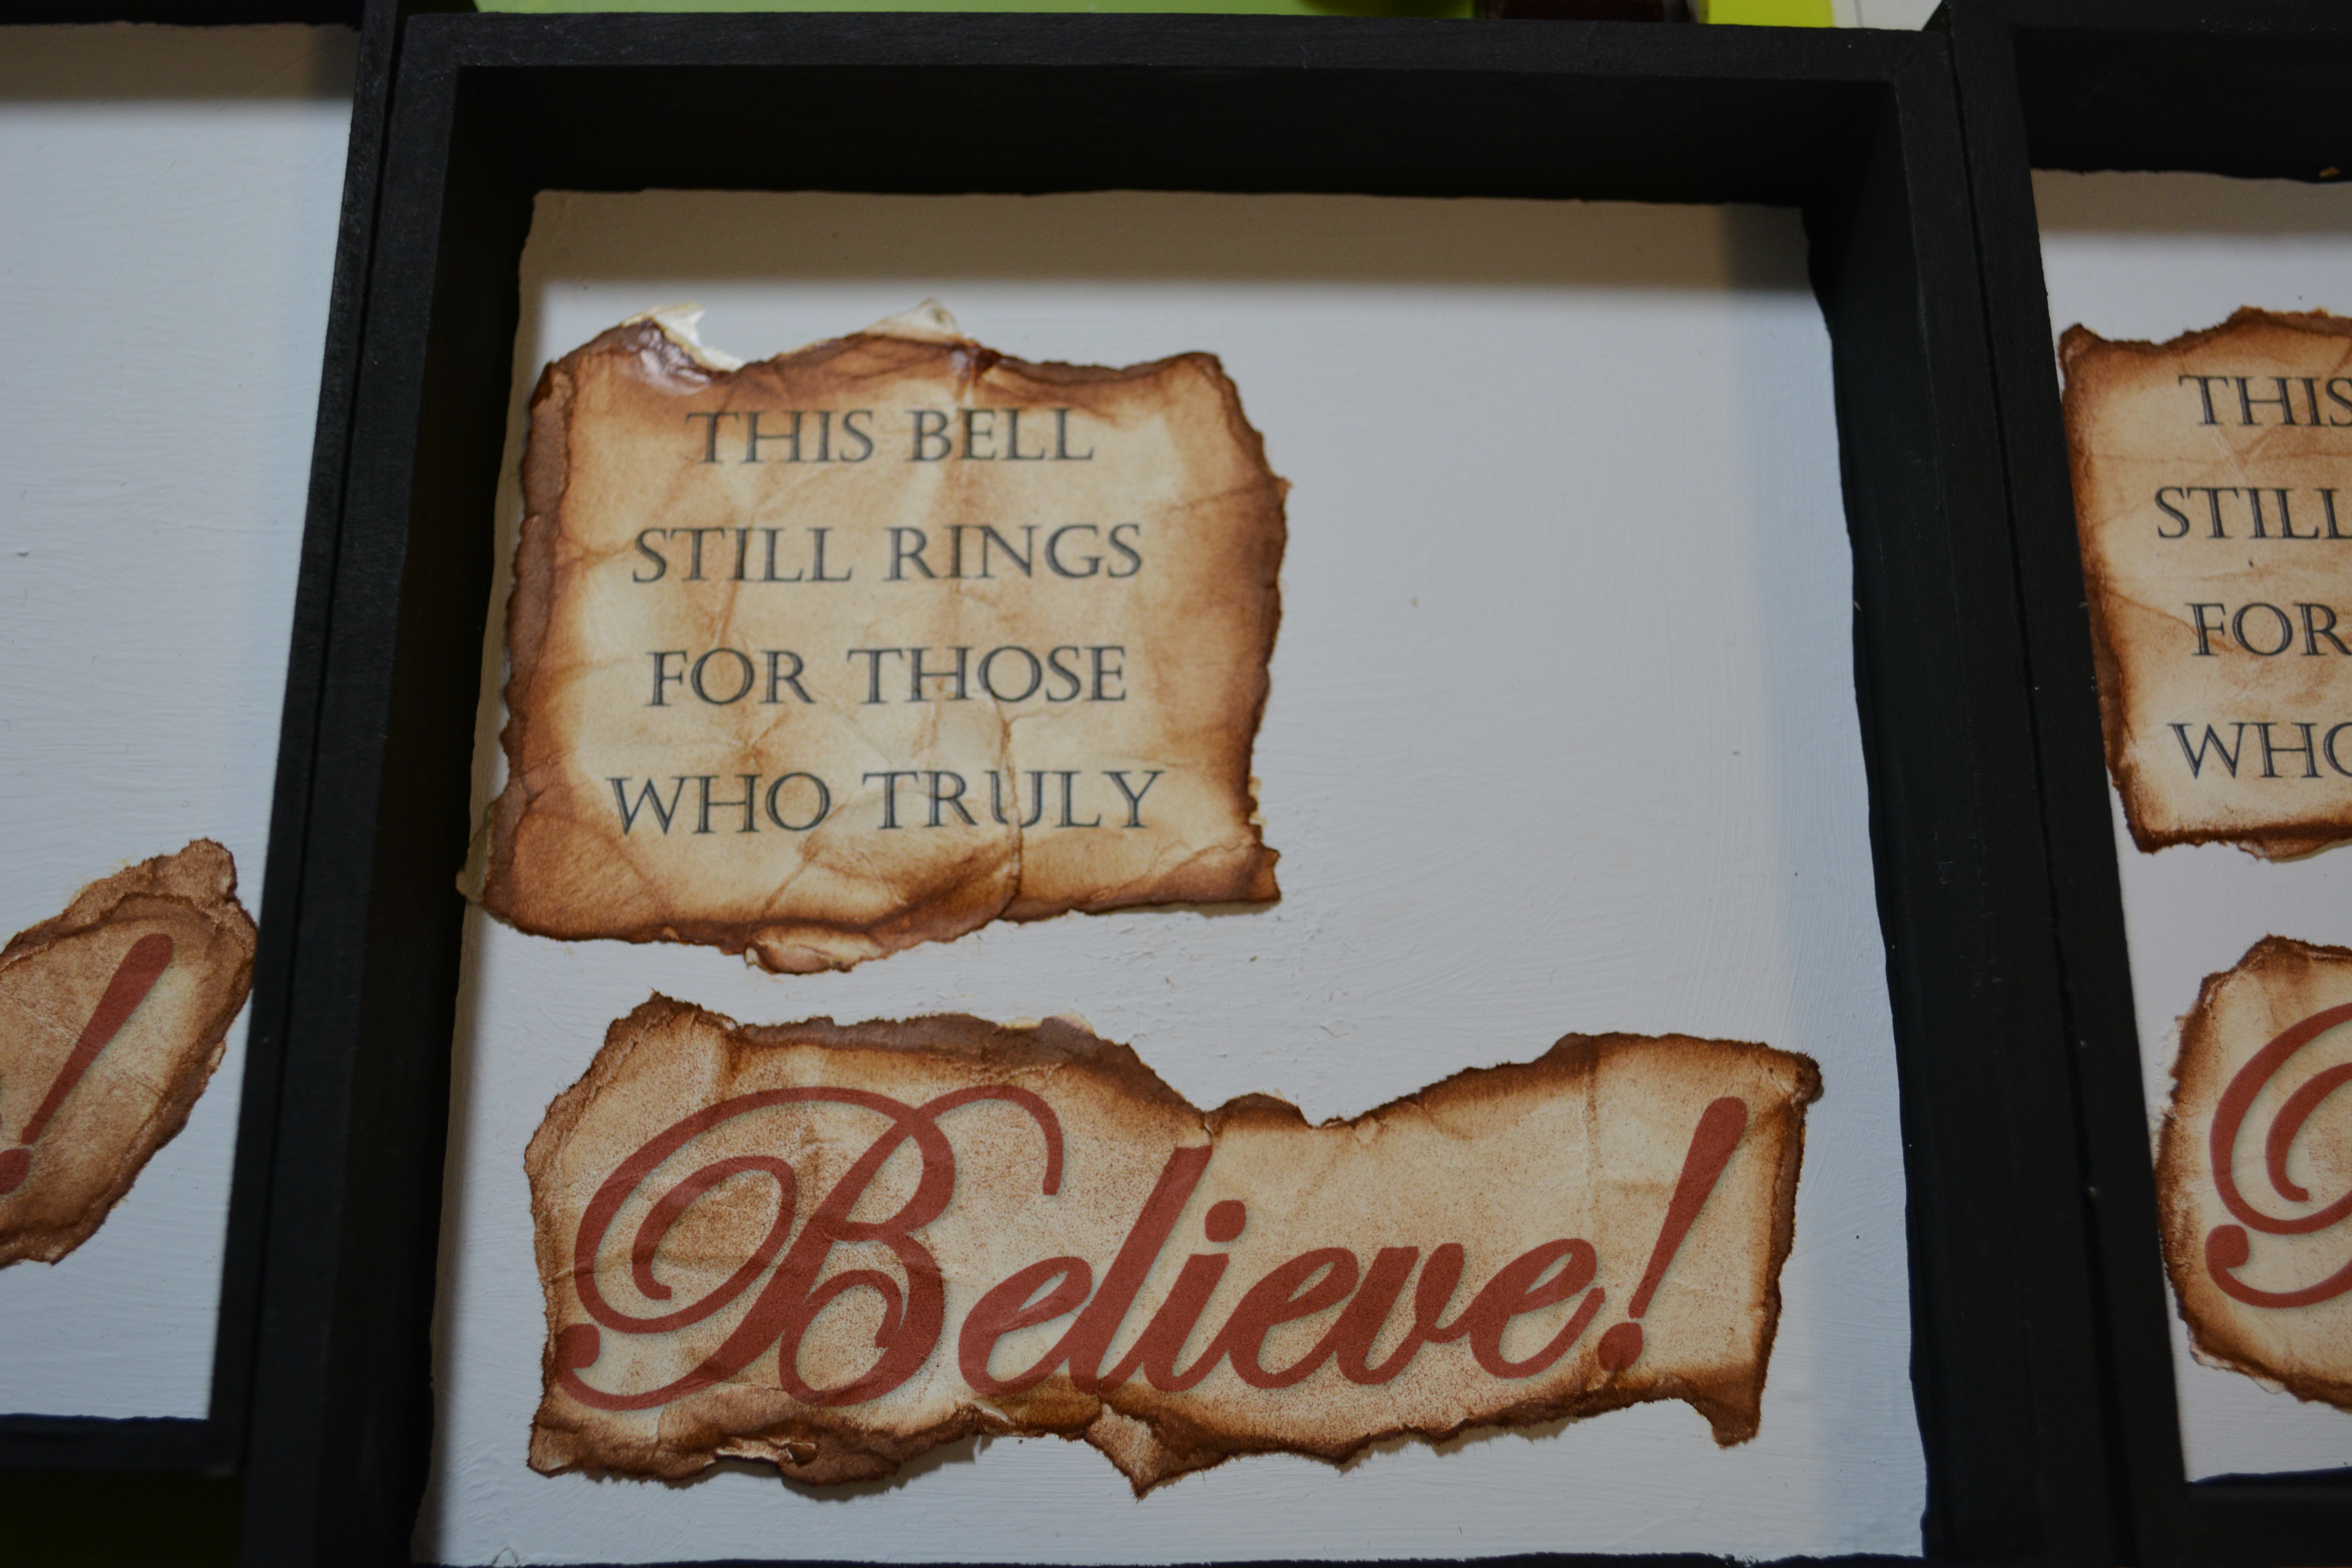
You can use what ever size sign or box you want. You will have to adjust the writing to fit your box. I used the back of the green sign for all three of my boxes. Dollar Tree always has signs that size. I painted them with Waverly Chalk Paint in White and Ink. I used my computer to make and print the words on 65 lb card stock. To distress the card stock I used distress ink from Tim Holtz but you can use a tiny bit of brown paint. I also used leather cord, Mod Podge, hot glue, and of course silver bells.
I started by scrapping the glitter off of the front of the sign. I do this because I am painting the whole sign. Take the signs and paint them all white. Do the front, back, sides, give it all a good base coat. Let it dry. Then paint what is the front of the sign black with the Ink colored chalk paint. Also do the sides and the sides of the inside of the box. Mine only needed one coat. Now paint the center of what is the back of the sign with the white chalk paint. That took me two coats of paint too. Let that dry.
While your box is drying, start working on your words. I kept playing with the size and printed these out a few times. These are the sizes of fonts that I settled on. Since I knew I wanted to distress the paper I used cream colored card stock to print out the final words on. If you do not have access to a printer, you can use sticker for the words.
Instead of cutting the words out, I carefully tore the paper all the way around the words. It makes it look like it is old paper. After that I smashed the paper in my hands and crumbled it up and flattened it back out. Then I took the distress ink and applied it all around the edges and dabbed it in the middle. If you use paint, dry brush it on very lightly. You can build up the paint until you like it.
I applied Mod Podge to the back of the pieces of paper. Make sure to not get it on the font because it will smear the ink or paint. I placed them down inside the shadow box.
Then I looped a small piece of leather cord through the bell. Hot Glue the ends of the leather cord together and glue it inside the box. Finally, add a bow. I did ask my son what color he thought the bell was in the movie, and he said silver. That was after I had distressed three silver bells and made the copper color. lol I went through the frustration of painting the bells for nothing. My son thought that was hysterical.
I gave these to my boys and my oldest two (who think they are funny) told me they could not hear the bell, but my little one went running though the house showing everyone and ringing the bell. They loved them. Children only believe in Santa for so long. I know we only have a few more years left with my little one because he is 7. It is nice to have something like this for them to still keep the Christmas magic alive and going. This was a lot of fun to make too. It was worth painting bells that did not need to be painted and the 20 times I printed the words.
Thank you for joining me for a bit of an emotional post for me. I do hope you enjoyed it. Please Like, Comment, Share, and Subscribe. Also find me on Instagram where I am showing some easy ornament DIYs and on Facebook all under Yellow Butterfly Craft Designs.
Merry Christmas!!
Melissa McGuire
Supplies
Signs- Dollar Tree
Waverly Chalk Paint in Ink and White- Walmart
Card Stock- Michael’s Craft Supply
Distress Ink- Simon Says Stamp
Ribbon- Michael’s Craft Supply
Leather Cord- Michael’s Craft Supply
Silver Bells- Michael’s Craft Supply
Mod Podge- Hobby Lobby
Surebonder Hot Glue Gun and Hot Glue Sticks- Hobby Lobby
Happy week before Christmas! I hope your shopping is done and your decorations are up. While my decorations are up, my shopping and for sure my wrapping is still not done. I am close though. All three of my boys are home doing online schooling so getting things ready for Christmas has been a challenge. We all have to make the best of it at this point.
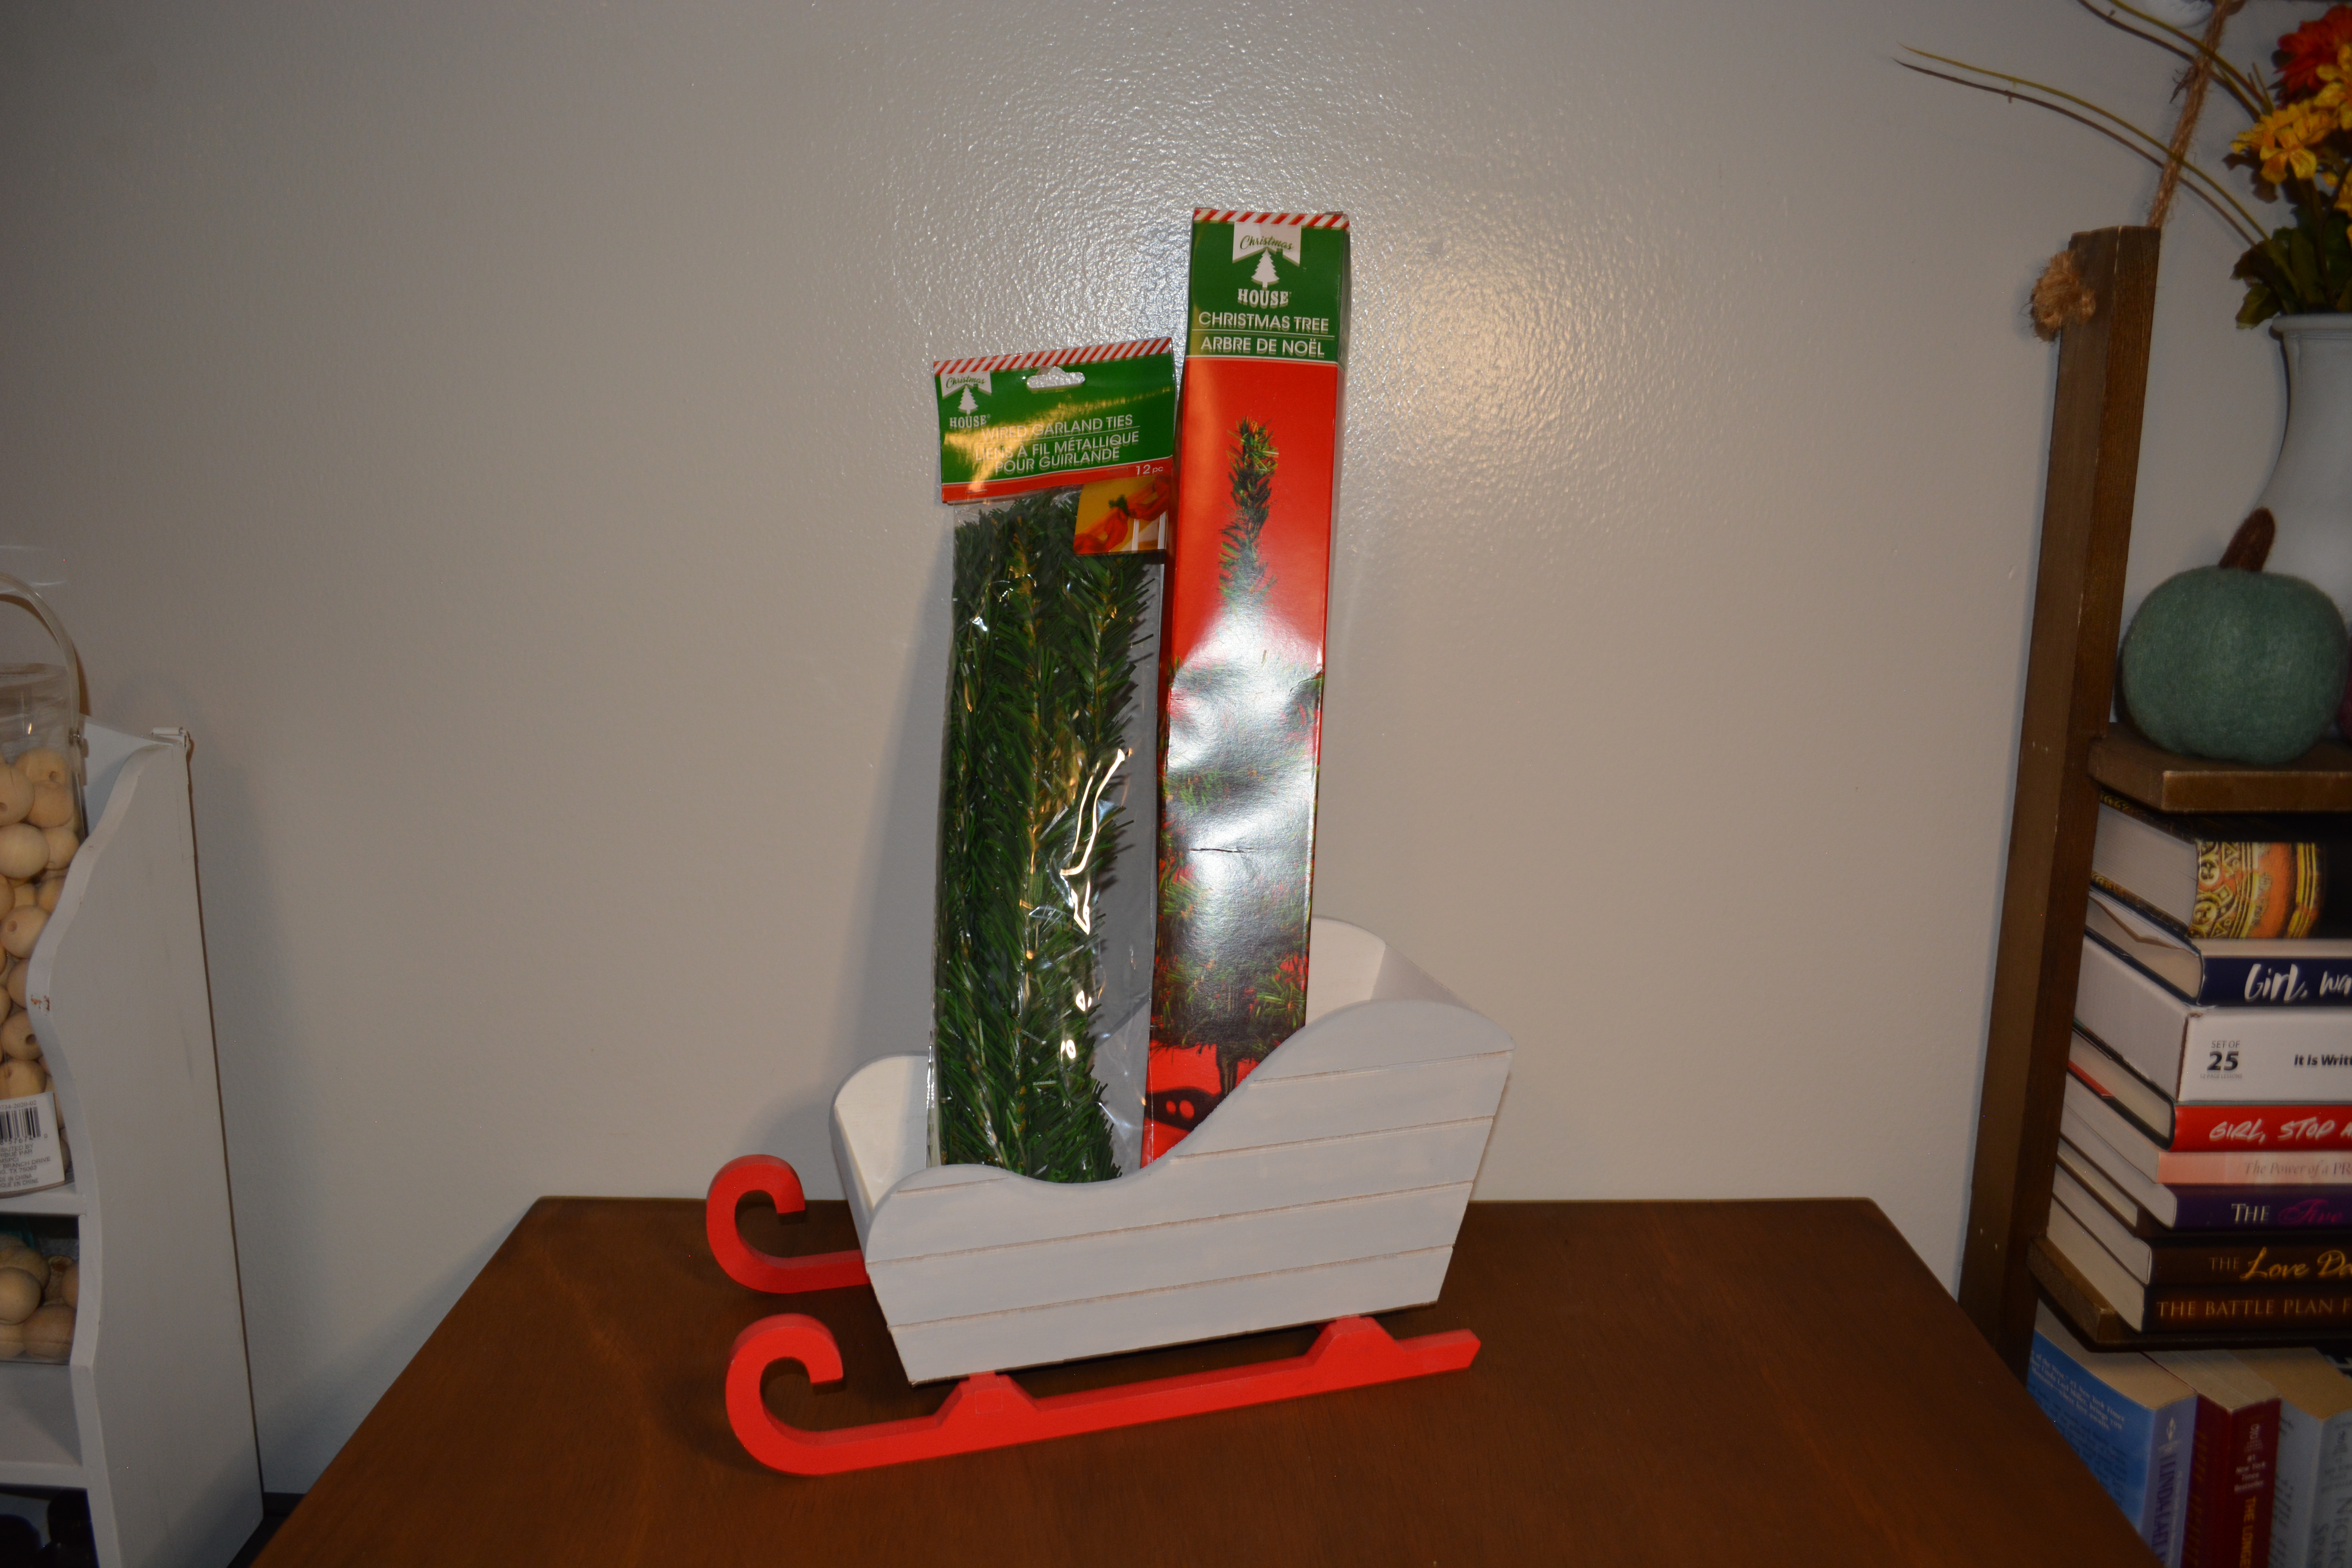
Lets talk about today’s project. I bought this sleigh last year at Target and did not know what to do with it. So this year a challenged myself to use it. I think it turned out great and it is sitting in my craft room. I love decor that just flat out makes me happy especially cause this year I have seen it a lot.
Lets Get Started
Supplies
As I mentioned before, I found the sleigh at Target last Christmas but thrift stores might have something similar. The tree is from Dollar tree and I used garland ties too. I also used some flowers from the Dollar Tree, and fairy lights that I ordered off of Amazon. Now in the top picture you can see some fabric in the sleigh and that is from Walmart. That was one of those things I added in as I was crafting. I used hot glue to put all this together.
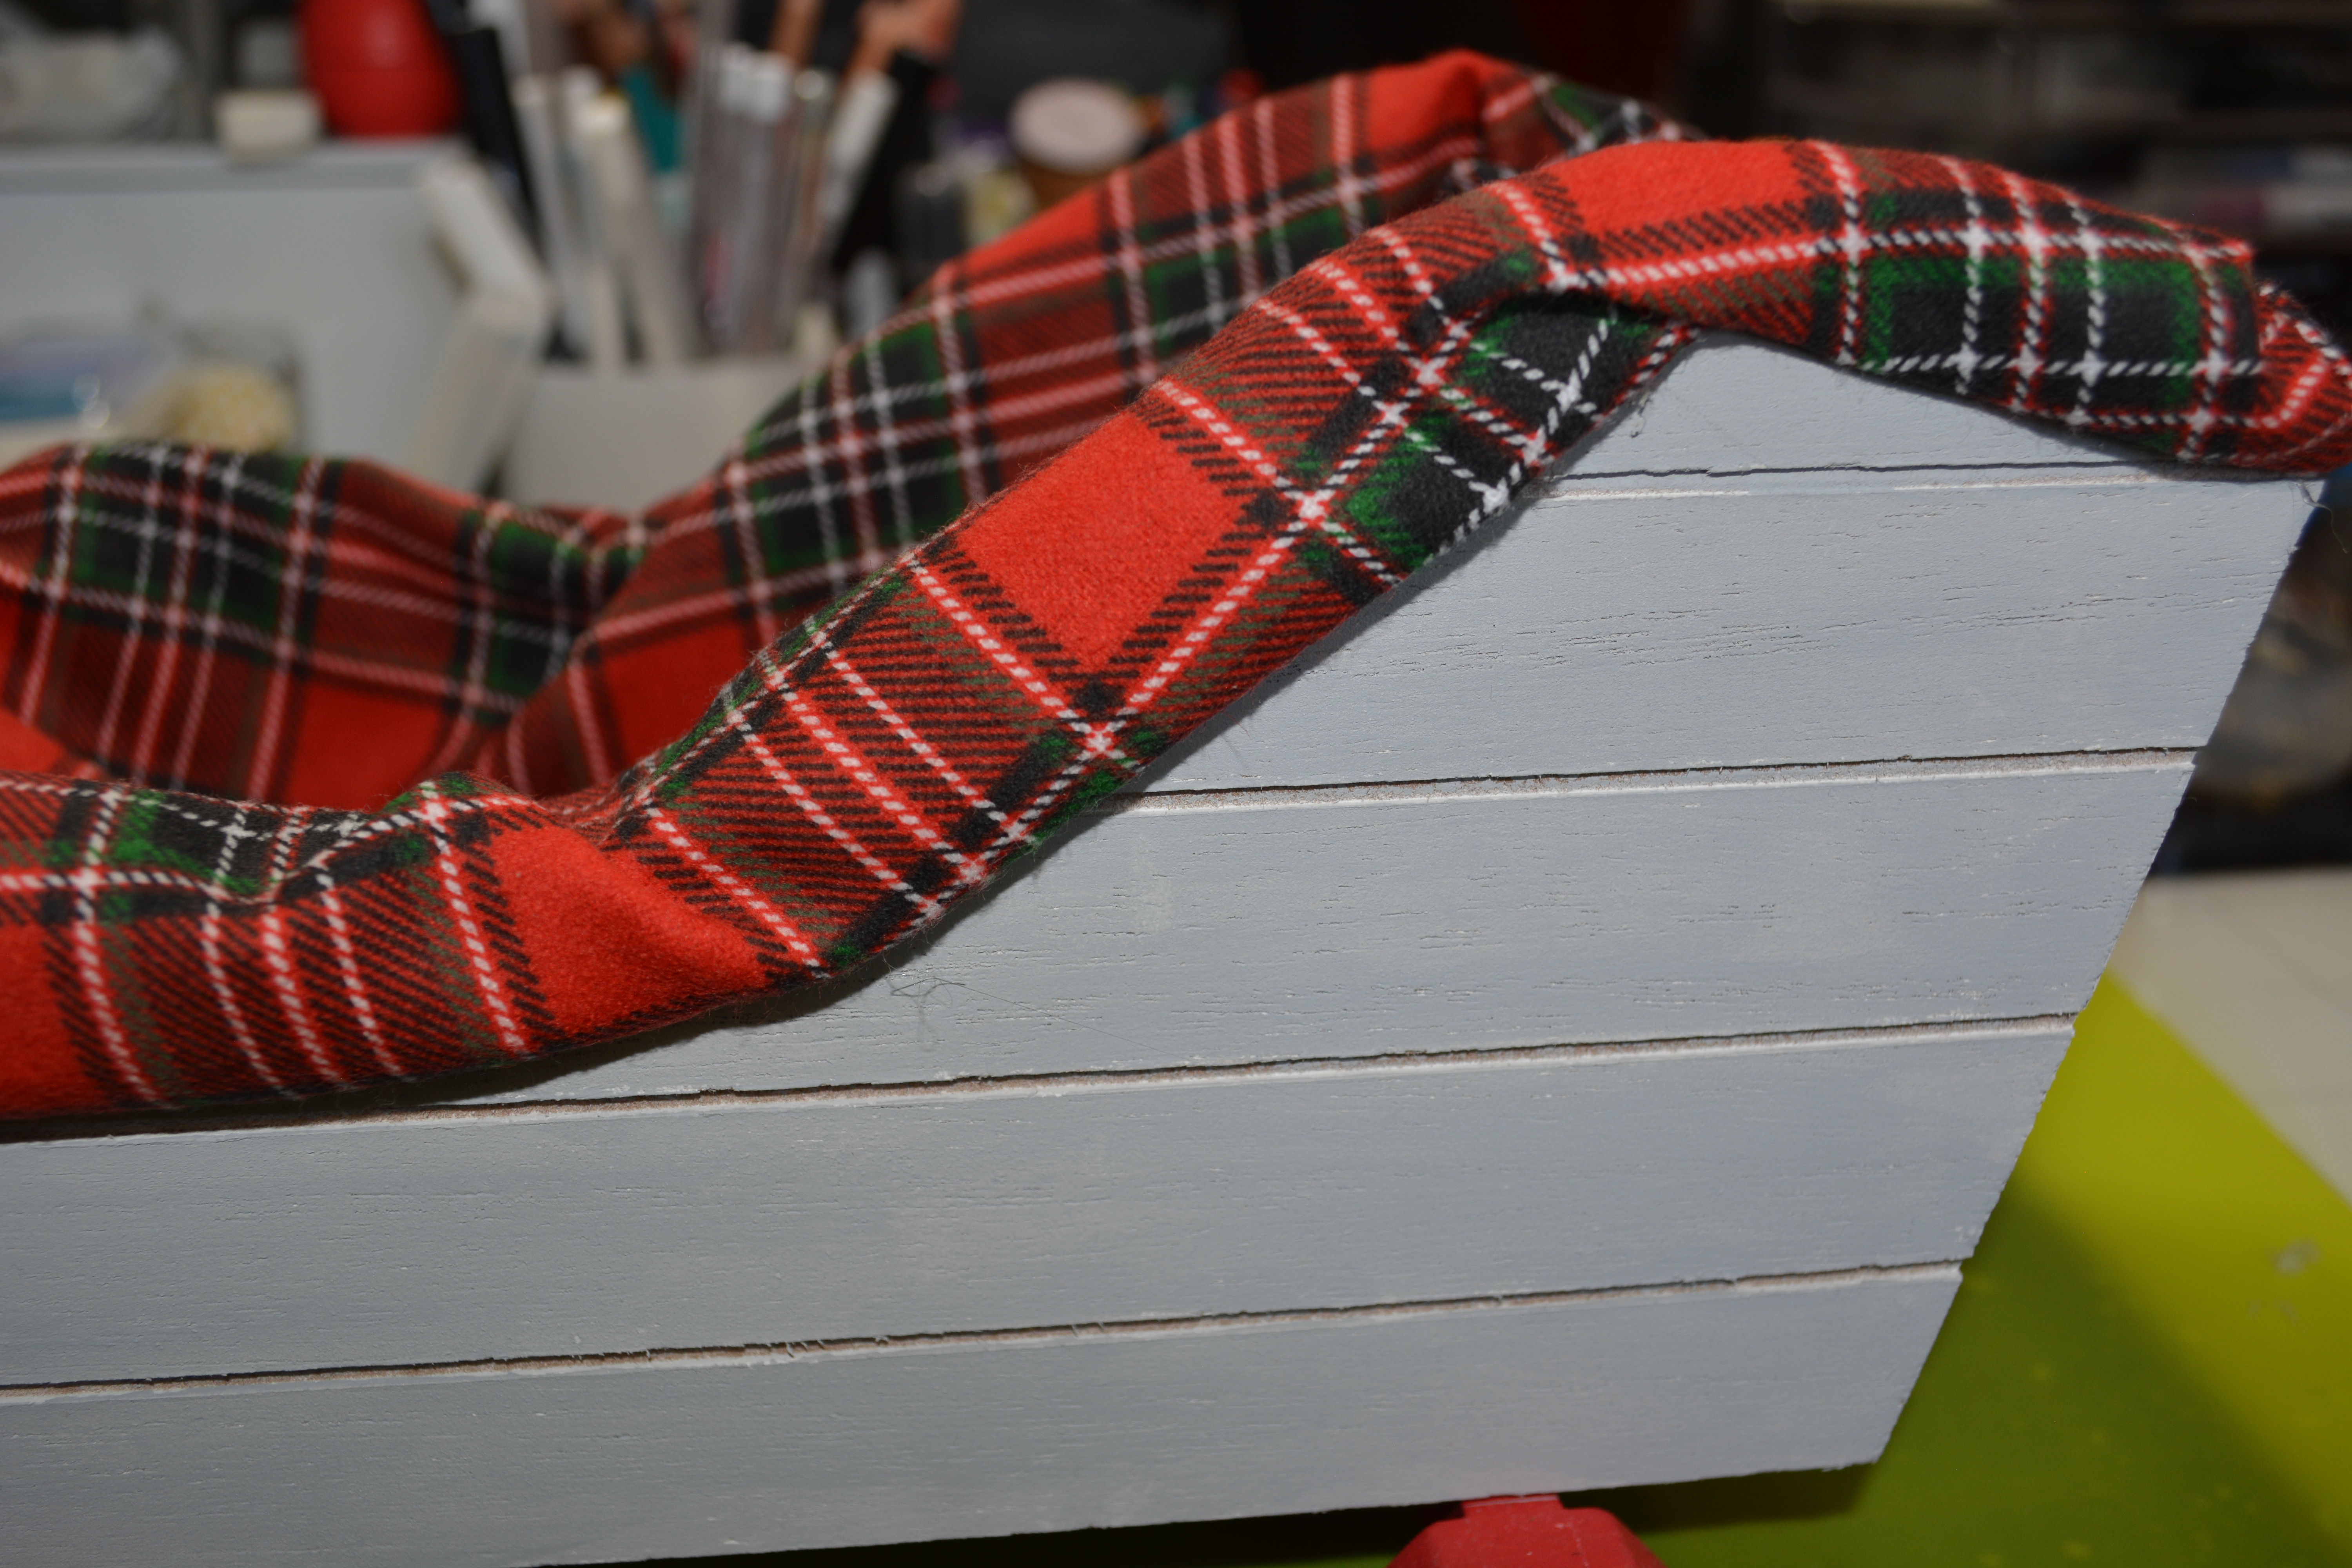
The first step was to add the fabric to the inside of the sleigh. To do this I just laid it down in the sleigh and started rolling the sides up and gluing them down. Make sure you do not roll up so much fabric that you pull it up from the middle of the sleigh. I folded and glued little by little as I went around the sleigh.
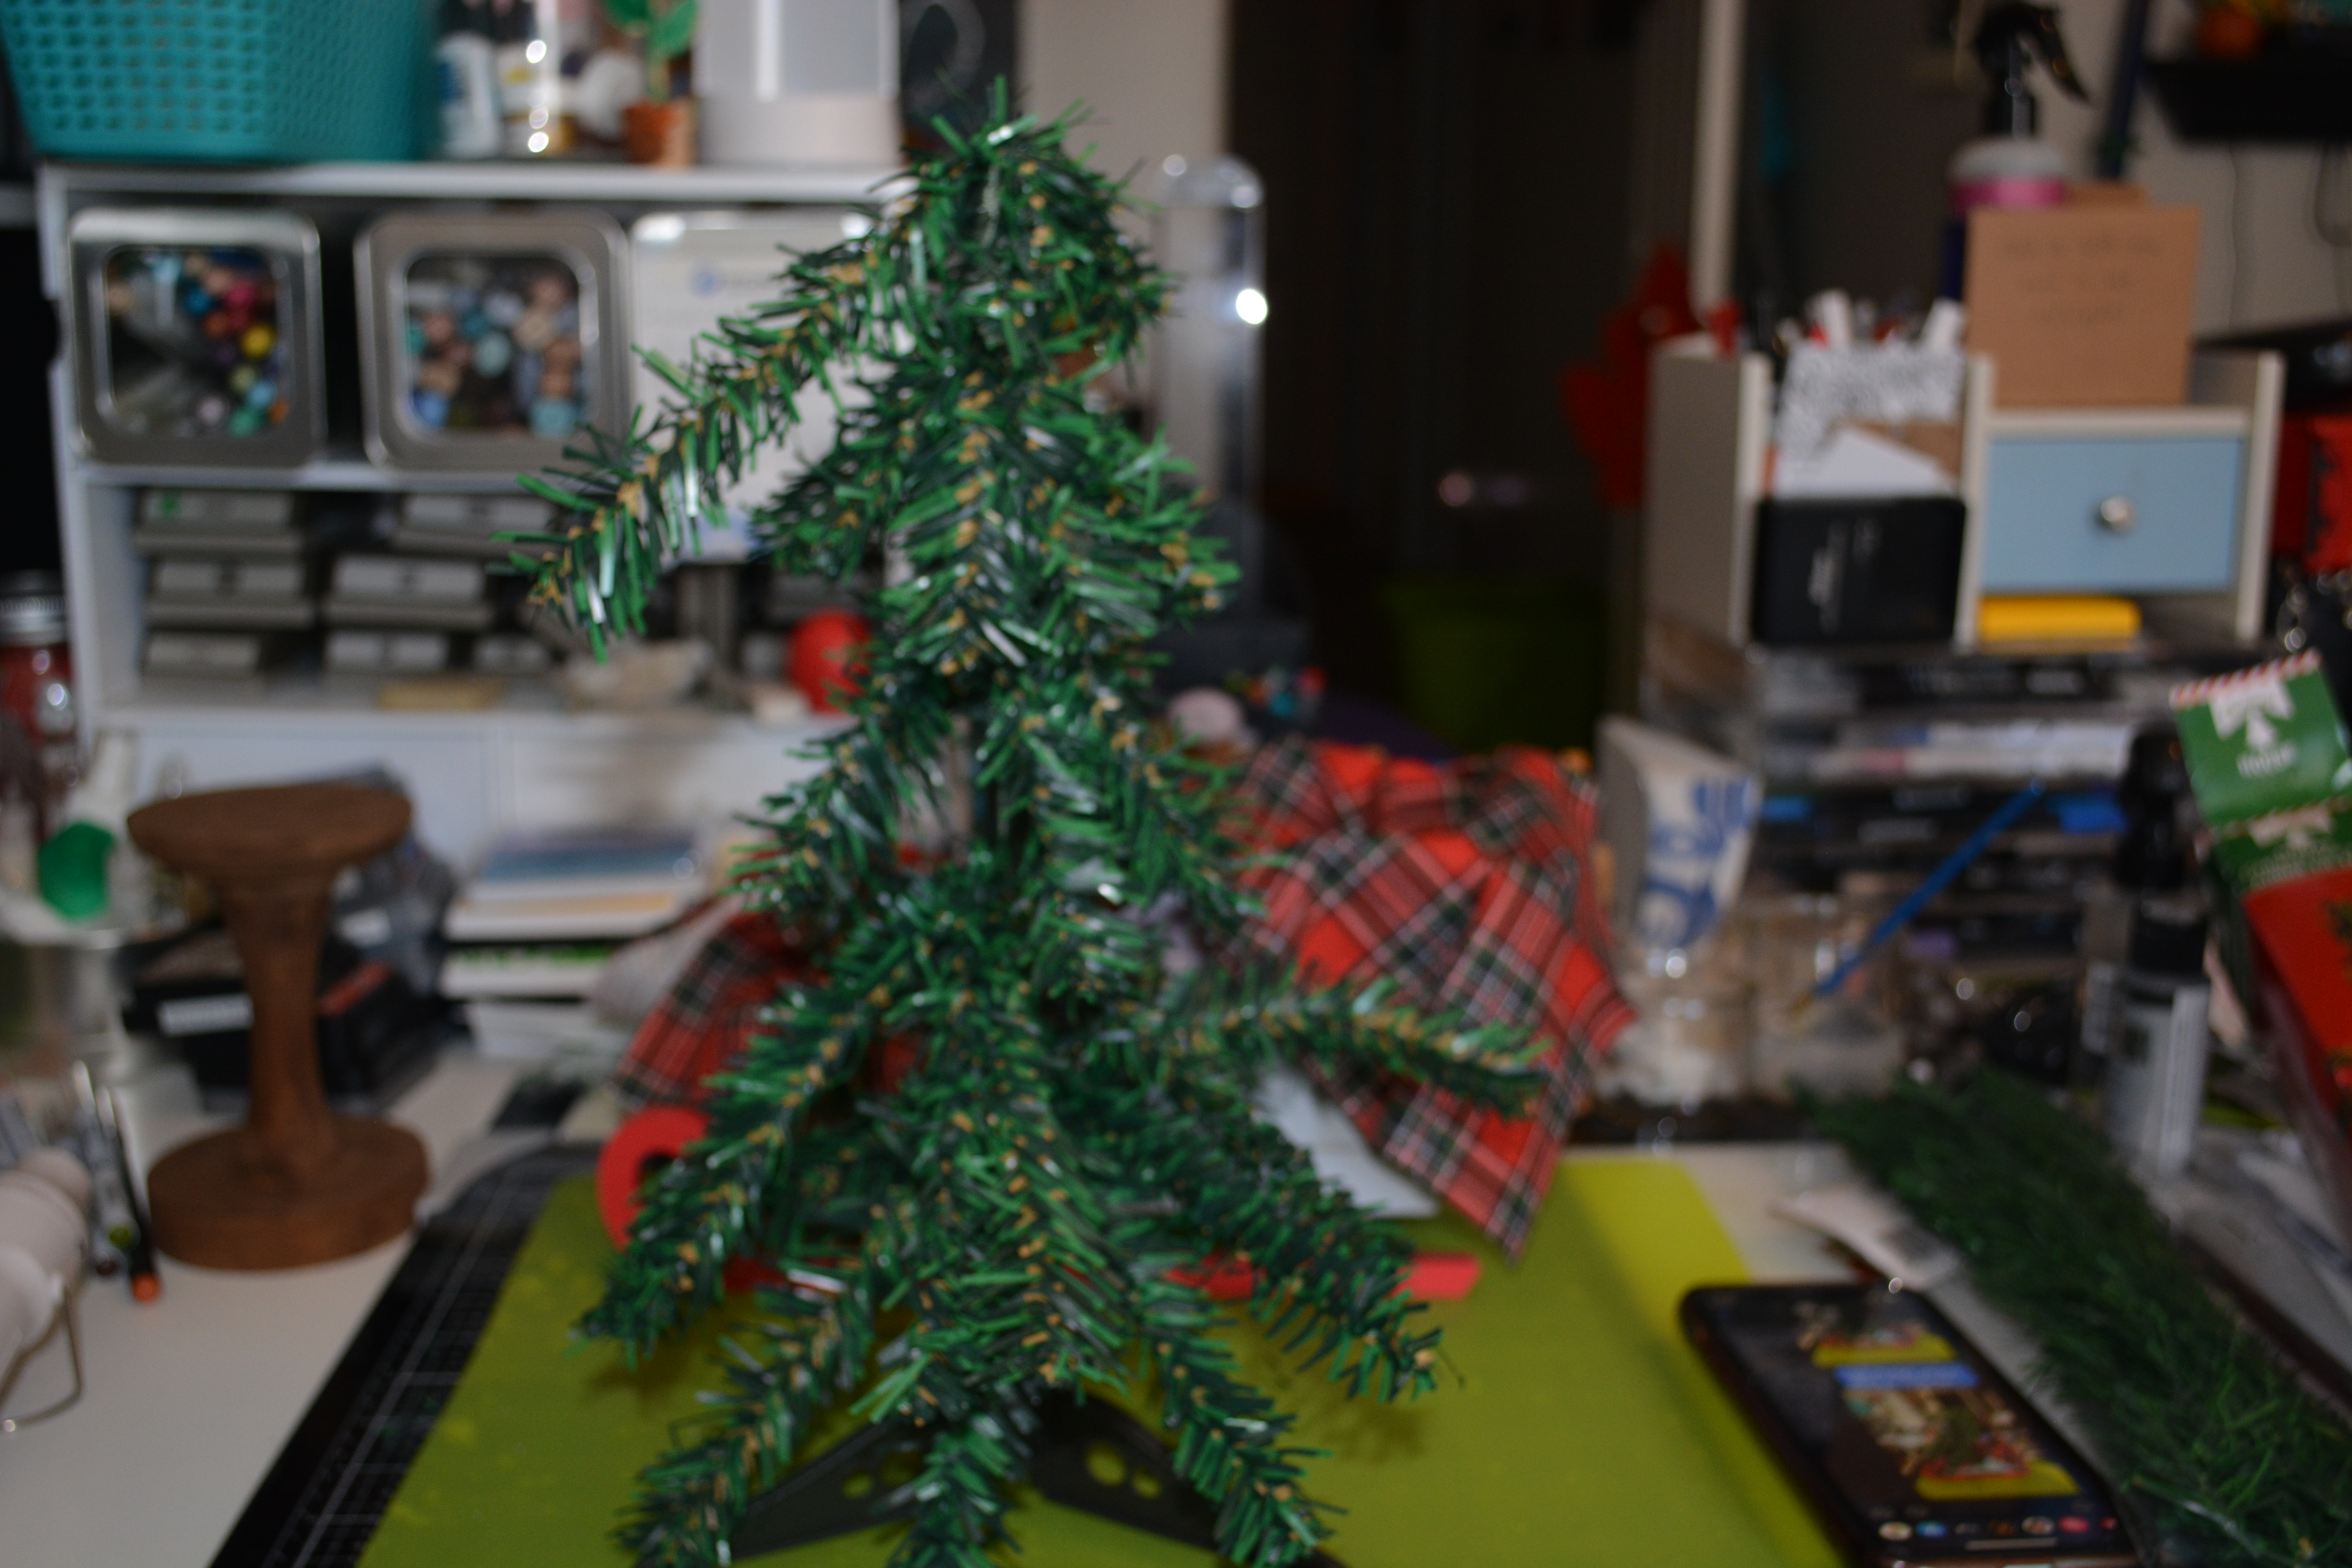
Next I placed the tree in the sleigh. This took some creativity to keep the tree upright but with some plastic bags and a bit of the fabric I got it to stand up straight. I added the garland ties to the tree is several places up and down the center twisting them around to make more branches. This makes the tree look fuller. Then I decorated the tree. I started with the fairy lights. I got them from Amazon and they are batterie operated. I prefer to order them from Amazon because I can get 10 to 12 in a back and it is cheaper than buying them from Dollar Tree. Then I had a strand of red berries that I got at Dollar Tree and added those around the tree.
That is where I thought I would stop. The tree looked so bare though. I did not want to use ornaments. So I decided to put red and white flowers on the tree. Some were single flowers and others were paired together.
The tree and sleigh both needed something else. Something to tie them together per say. I had fabric left so I cut it into strips and tied the fabric strips into bows. I glued a big one on the front of the sled and then a few more smaller bows on the tree. That was just what it needed.
The last step was adding some little presents under the tree and inside the sleigh.
This little tree would be perfect for a dorm room, or small apartment. Like I said my tree is sitting in my craft room on a small table. I put one of my shadow box signs to the side of it. It really is beautiful.
Thank you so much for coming back to the blog. Christmas is getting closer but I still have a bit more to show you before the big day. Please come back to see it all! Also please Like, Share, Comment, and Subscribe. Also look for Yellow Butterfly Craft Designs on Facebook and Instagram!
Have a wonderful day!
Melissa McGuire
Supplies
Tree- Dollar Tree
Garland Ties- Dollar Tree
Fabric- Walmart
Fairy Lights- Amazon
Flowers- Dollar Tree
Berry Garland- Dollar Tree
Sleigh- Target
Surebonder Hot Glue Gun and Hot Glue Sticks- Hobby Lobby
We made it to day 5 of the 5 Days of Christmas!! YAY!! Today’s project is making signs with wall stickers. You can do this with window clings too but I do not think they look as nice. I am really proud of how these signs turned out. This is one of those projects that you can really jazz it up or leave it plan depending on your taste.
Lets Get Started
Supplies
For this project you will need some of the Dollar Tree long signs. They have come out with these long signs for several holidays so they should not be to hard to fine. If you can not find them you could get wood from the hardware store or use foam core board. The next thing you will need are wall stickers or window clings. I also used some paint and Mod Podge.
I started by painting both boards with Waverly Chalk Paint in White. I only did one coat of white because I knew I would be adding more layers of colored paint. Lets look at the stary sky one first. To do this take any kind of black paint and roughly paint the board. While it is still wet take a clean brush and get very little white paint on it and dry brush it over the board. I also used a teal color. Purple and a dark pink would also work well. I went back and forth with the white, teal, and black paint adding it to where I thought it was lacking. After I was happy with how the sky looked, I mixed some shimmer paint and the white paint with some water. Then with a pointy brush I took the pointy brush loaded with the paint and water mixture and tapped it on my hand, over the board to make the splatter dots. This is messy but it makes it look like stars. To me, it is worth the mess.
As for the second board, I painted a road black and the sky with white and blue. I tried to channel my inner Bob Ross to make happy little trees with some green paint. It did not work well but at least I tried. Free hand painting is not something I am good at so I tried to improve when I can.
Once everything was dry, I stuck the stickers on each board. If the stickers do not stick, use a very light coat of Mod Podge on the back of them. If you put to much, you will be able to see it from the front of the sign so go at it with a lite hand.
Now if your sign does not have a hanger on it, just add one with some twine or ribbon and hot glue.
How awesome are these!!?? Like I said before, I am really proud of these signs. They look great and it would be something I would consider selling if I did not like them so much. It’s amazing what you can do for just a few bucks. These are so easy and the can really step up your Christmas decor game.
Thank you so very much for joining me all week for the 5 Days Of Christmas. I really appreciate it. I have loved all the comments!! I have a few more Christmas projects coming next week then we are going to change gears a bit. Please stay on the look out. I have another double duty coming too!!
Please Like, Share, Comment, and Subscribe! Also you can find me on Facebook and Instagram!!
Have a wonderful day and a great weekend!
Melissa McGuire
Supplies
Long Signs- Dollar Tree
Window Stickers- Walmart, Dollar Tree has them too.
Paint- Use what you have on hand.
Mod Podge- Hobby Lobby
Twine or Ribbon- Any Craft Supply Store
Surebonder Hot Glue Gun and Hot Glue Sticks- Hobby Lobby
Welcome to day 4 of the 5 Days Of Christmas!! The one thing my boys love to do is use different things to count down to Christmas. We have trucks with numbers on them and they have 2 different Advent calendars that has candy in them. This is one tradition I love and it keeps my boys excited for Christmas.
It is all their countdowns that gave me the idea to make my own. I found a few different pieces to make these countdowns. Each project is a bit different.
Lets Get Started
Supplies for project 1
So some where along the way my picture for the packaging for these blocks got deleted. These blocks came with the numbers and papers and were all together. I bought them at Hobby Lobby in their Christmas craft section. Other supplies I used were a 2X2 wooden block and a truck light from Dollar Tree. The only paint I used was Waverly Chalk Paint in Ink. To glue everything together I used hot glue and then Mod Podge to seal the blocks.
How to make the blocks countdown
To start the block project, I painted all of the blocks black with the Waverly Chalk Paint in Ink. I did all the sides and the top and bottoms. After everything was dry I took sandpaper and sanded down all the edges. This is a personal preference because I like things to look rustic and like they have been used for a while. Do these in a style you like.
Once I was done sanding, I wiped off the blocks with a damp cloth to get the saw dust off. I started placing the numbers on the clocks. They did have adhesive on them but it was not sticky enough to hold the numbers on to the blocks. I decided to put a coat of Mod Podge down then stick the numbers on. After that I put 2 coats of Mod Podge over the top of the numbers to hold them in place. I did not use the papers in the kit that were supposed to go under the numbers. I did not really like them. On the rectangular block I added the “Days Till Christmas” the same way I did the numbers.
To get the red truck, I broke apart the light stand it was attached to. It came apart with just a little bit of force. I glued it to the 2X2 block that I had. This part of the project really is optional. I wanted to add a bit more to the three countdown blocks and thought a base for them would be perfect.
What do you think? It’s about 8 inches high so it does not take up a ton of room. Since it was a kit, it was not hard to assemble either. Kits like these are great as a base line for a craft and you can get creative with it and change it up. The fun in crafting is making it your style.
Supplies for project 2
Now lets look at the next project. I found this countdown set at Target. It has the numbers with it, several words, and a few blank boards to put your words on with stickers or vinyl. The truck is an ornament from Michael’s Craft supply. I also used some paint and hot glue.
The first thing I did was paint my truck. I have found that paint markers are great. That is what I used to paint the truck. Once it was dry, I glued it to the top of the sign with hot glue.
I wanted something that said “Happy New Year”. So I used my Cricut and cut out those words and added them to one of the extra boards.
That was it. It is easy to just add to something that is already made. It is fun to have stuff that fits your style. Now if you wanted this board up all year round I would put something different at the top. You could add a small photo frame to the top. One that is easy to change out the photo on. It is a piece of decor that can be up all year round.
Thank you for joining me on day 4 of the 5 Days Of Christmas! Tomorrow is the last day. Please Like, Share, Comment, and Subscribe! Also find me on Facebook and Instagram.
Have a great Thursday!
Melissa McGuire
Supplies
Project 1
Countdown Block and Number Set- Hobby Lobby
Waverly Chalk Paint in Ink- Walmart
Mod Podge- Any Craft supply store
2X2 Block- Michael’s Craft Supply Store
Red Truck Light- Dollare Tree
Surebonder Hot Glue Gun and Hot Glue Sticks- Hobby Lobby
Project 2
Countdown Board- Target
Truck Ornament- Michael’s Craft Supply Store
Paint- What ever you have on hand
Surebonder Hot Glue Gun and Hot Glue Sticks- Hobby Lobby
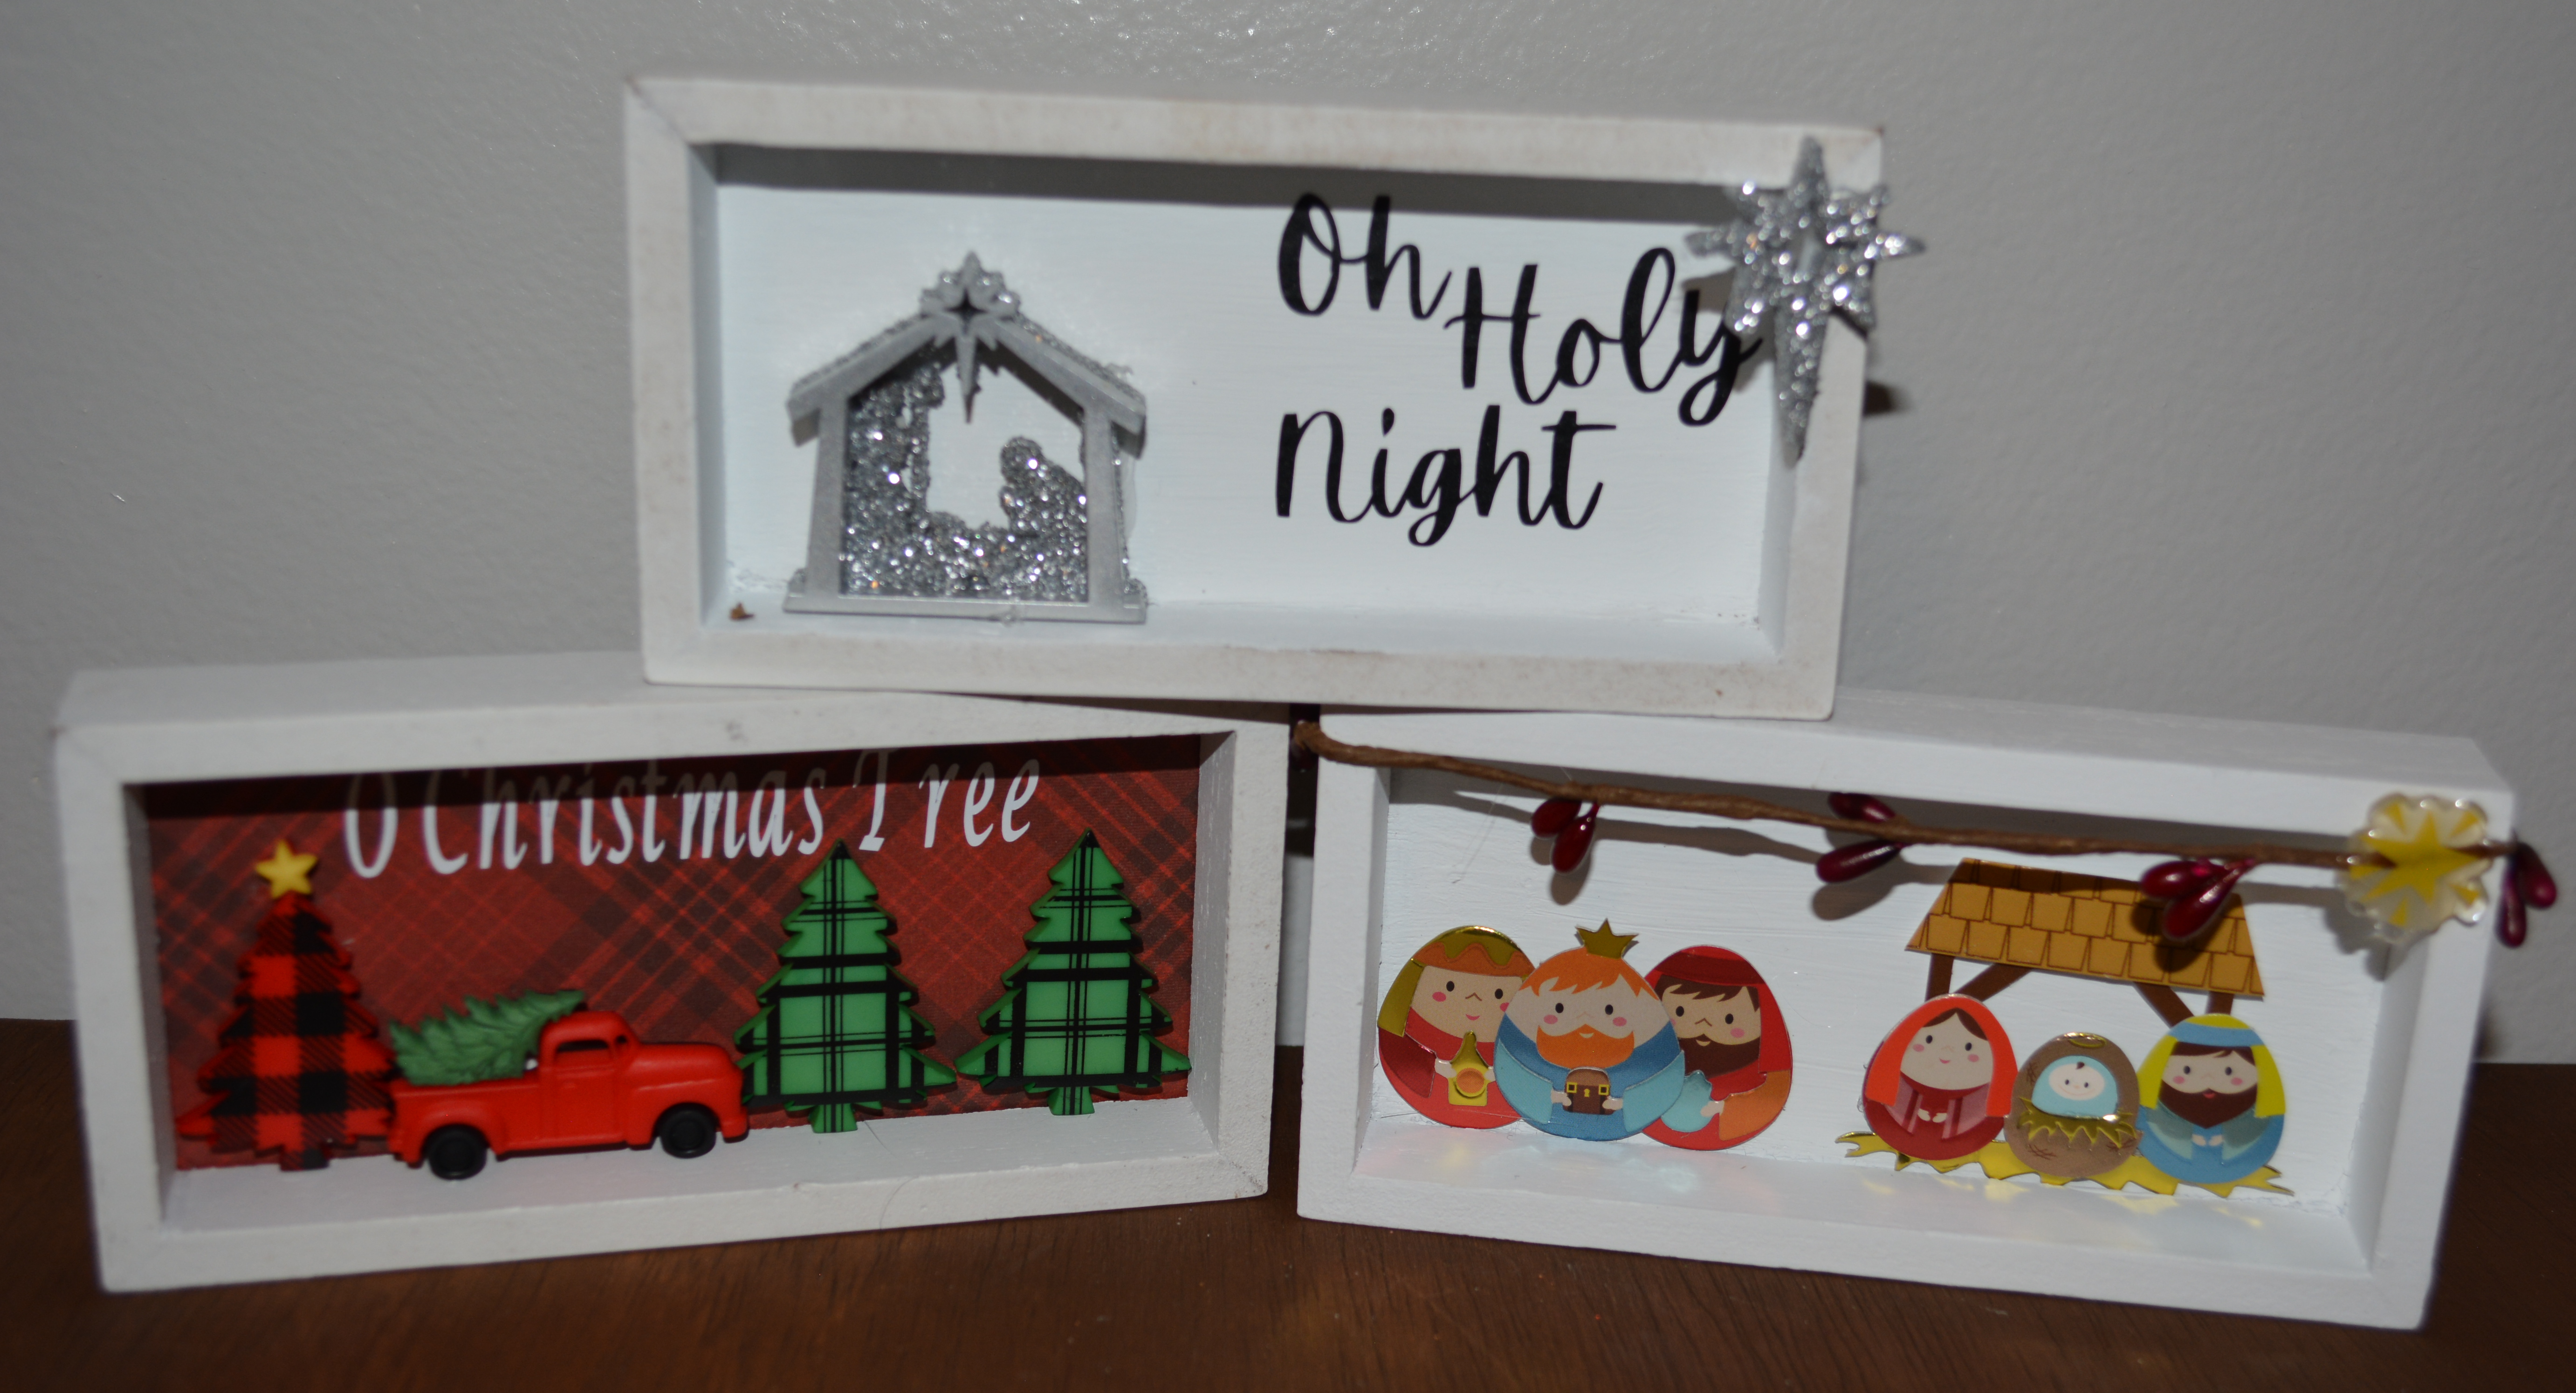
Welcome to day 3 of the 5 Days Of Christmas!!! The one thing that has been really popular this year are small shadowboxes with figures or 3D stickers inside that make a scene. I could stack these all over my house because I love them so much. They really make me smile. Some might look at these tiny boxes and think that nothing will fit in them but man are they wrong. I honestly cannot pick my favorite because they are all so cute!
Lets Get Start
Supplies
For this project you will need small signs or shadow boxes. I found the tiny ones at Target and the others were at Dollar Tree. You will also need small figures or stickers to place inside the box. The other thing I used was White Waverly Chalk Paint. As for the words, I did use my Cricut and 651 sticky vinyl. In place of the vinyl though you can use stickers or write something in your own handwriting. You could also print out words from the computer and Mod Podge them inside the boxes. I attached everything with hot glue so you will need some form of glue.
The first thing I did was paint all the boxes White with the Waverly Chalk Paint. I painter all of the sides of the box including the back. I do this so that if I want to add something like another scene or a whole different holiday on the back I can. If you are making several boxes, paint them all at one once to save yourself some time.
After everything is painted and dry, you can start putting stuff in the boxes. With the box above, I was able to remove the back and glue on some scrapbook paper. Then I hot glued the back back on and started with the buttons. I cut the back loops off of the buttons. Then started placing them where I thought they would look best. Once I was satisfied, I measured out the black space on the box to get it ready for words.
The next step was adding the words. Now for these tiny shadowboxes I had to cut out some really small words. It was a bit rough trying to get them in that small space so be careful and take your time. Once you have your words, take everything out of the box but remember where it goes. Then place your words in the box. After you placed the words down, hot glue your figures in place. Take your time with the words because you are working with limited space.
I followed these steps for each box. Trying to make each one a bit different.
These are the final products. Like I said before, I can not pick a favorite. Each one is so different and unique. The gnomes crack me up. The red truck had been an obsession for years. I loved them and buffalo check way before it was cool. These boxes are great for 3-tiered trays or to just add a little something more to a space.
Thank you so much for joining me for day 3 of the 5 Days Of Christmas. We have two more days left so please come back for more Christmas decor ideas.
Please Like, Share, Comment, and Subscribe!
Have a wonderful day!
Melissa McGuire
Supplies
Shadow Boxes- Target, Dollar Tree, or any where you can find something that looks like a shadowbox.
White Waverly Chalk Paint- Walmart
Figures and Stickers- Dollar Tree, Hobby Lobby, Michaels Craft Supplies
Bows- Walmart
Surebonder Hot Glue Gun and Hot Glue sticks- Hobby Lobby
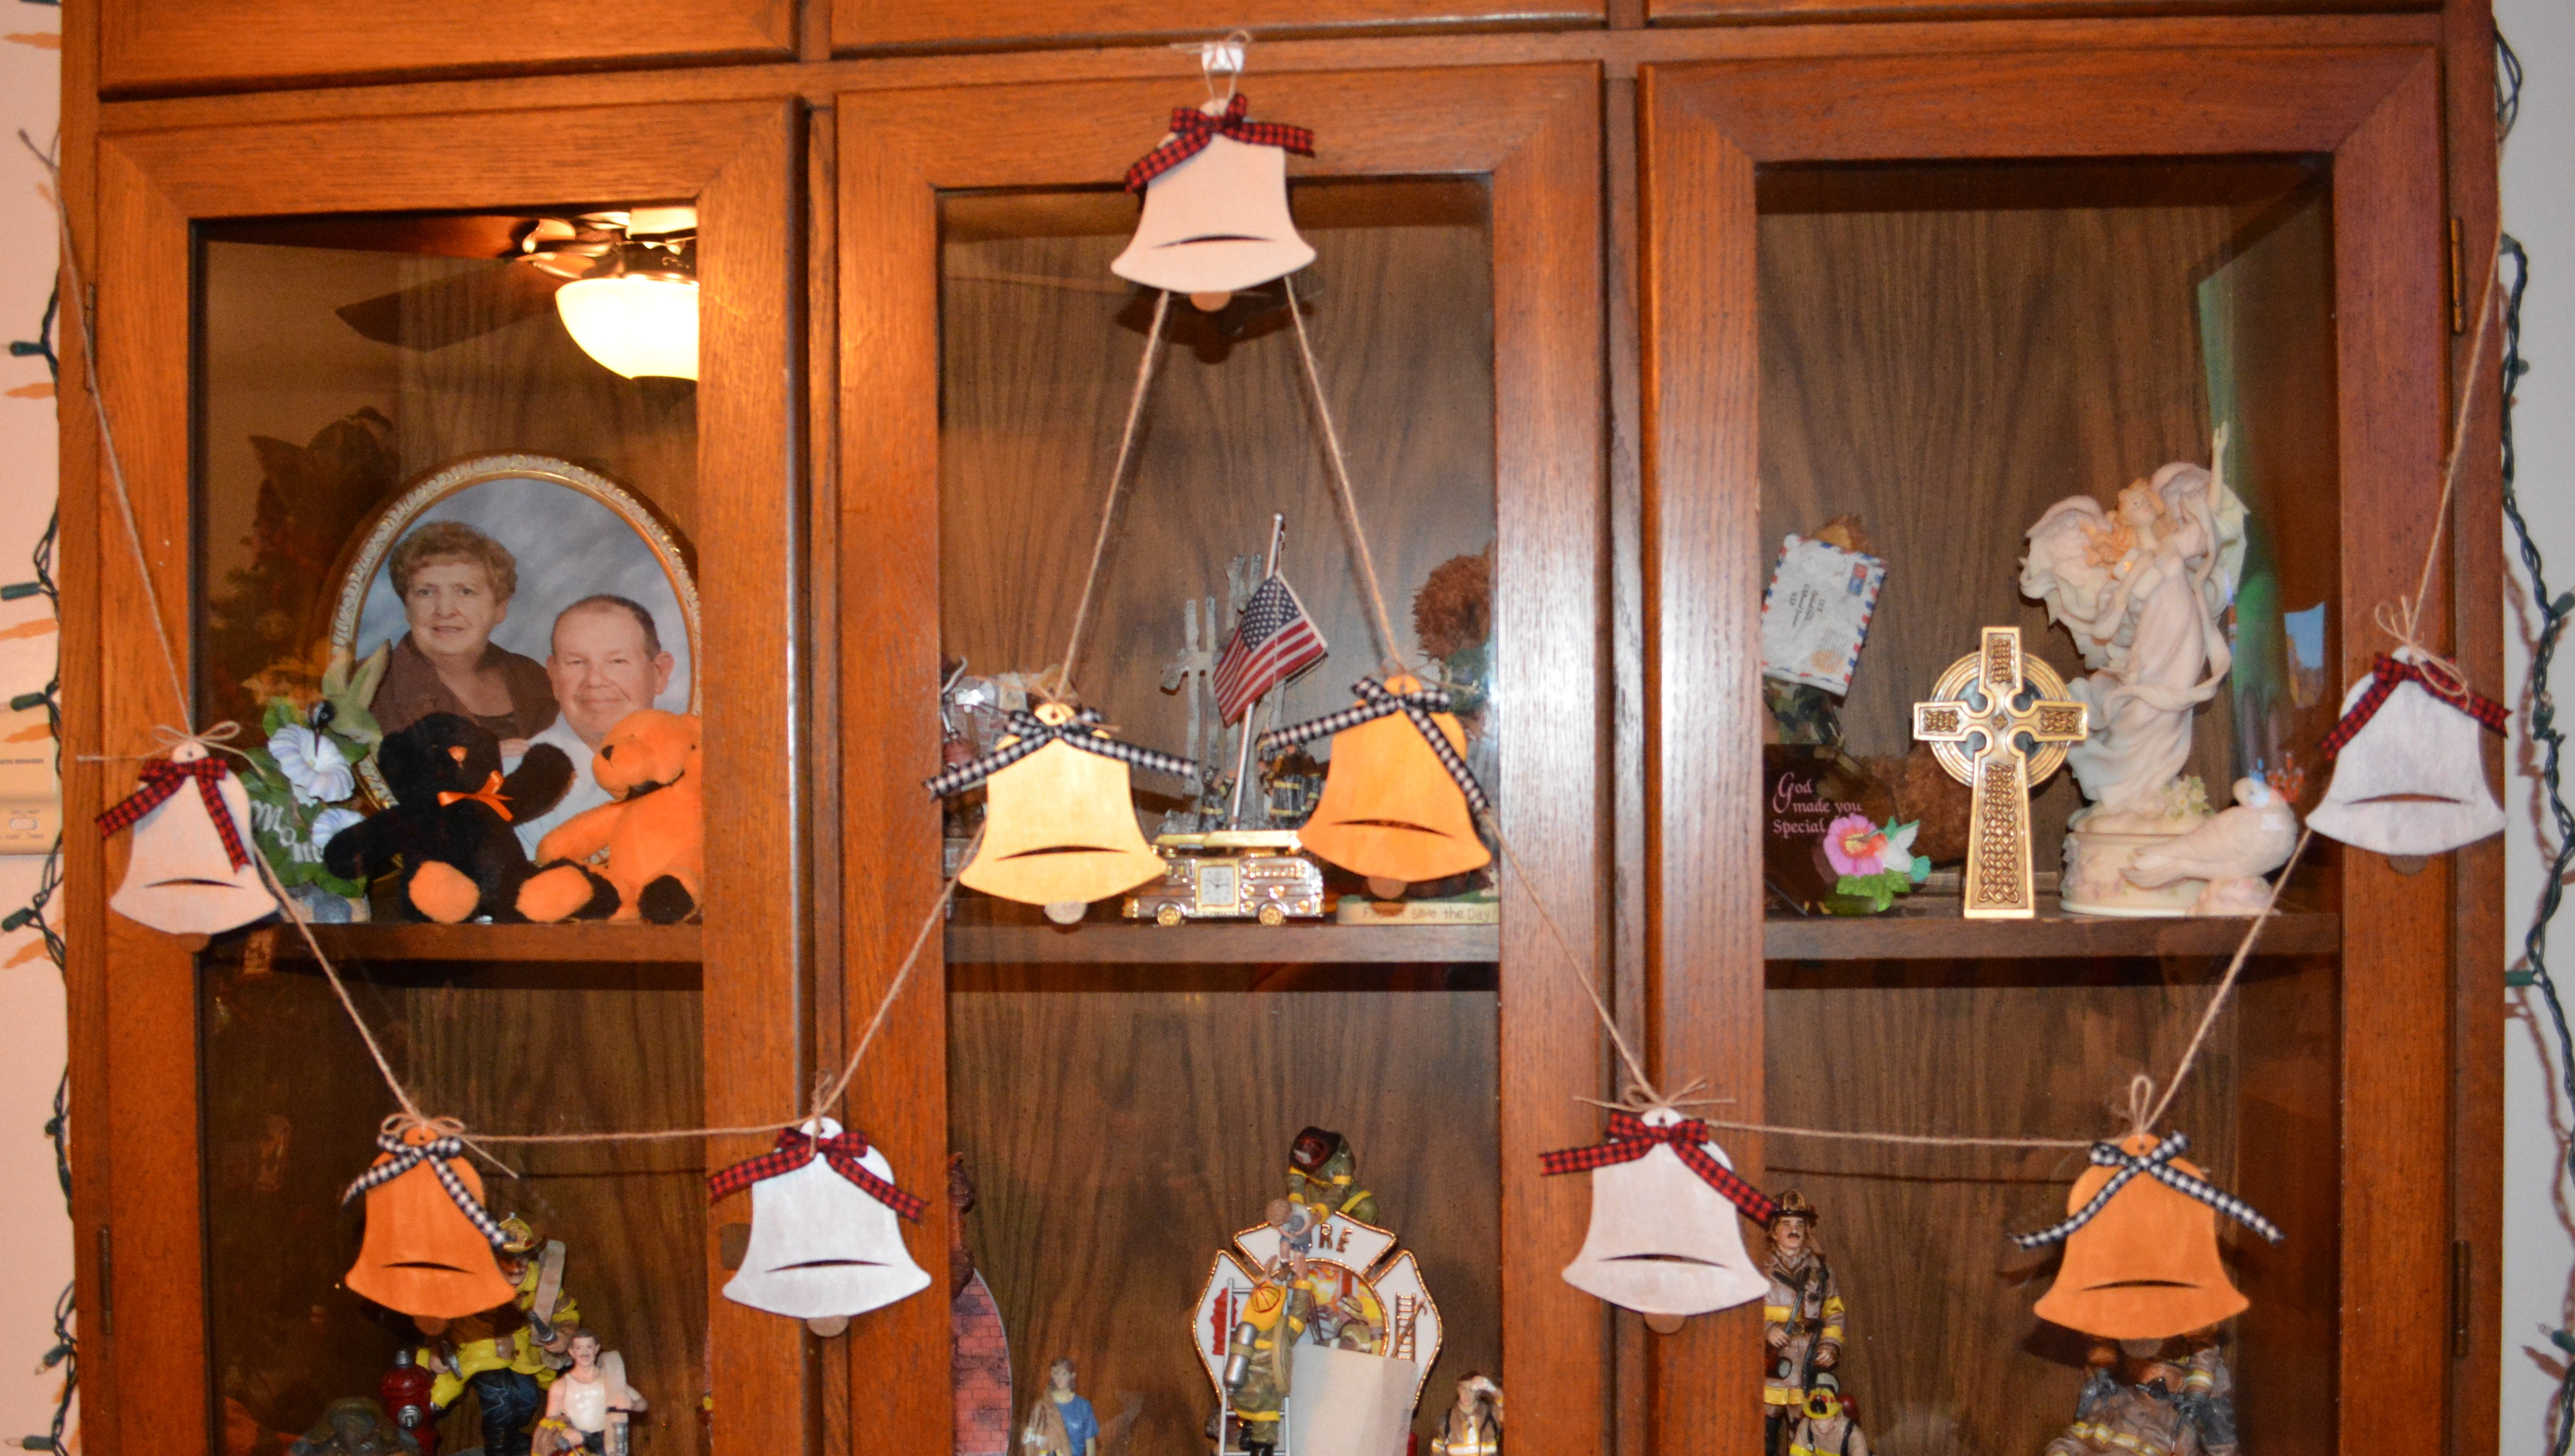
Welcome to Day 2 of the 5 Days Of Christmas!! Today we going to make garlands. I love garlands for spaces like just above a couch or buffet table. I also put a garland and sometimes two on my curio cabinet. When you layer garlands it gives it a different look. It really can add some personality to a space.
These two garlands are pretty easy. They did not take long which is good and they really changed up the space in my living room.
Lets Get Started!!
Supplies for both Garlands
The garlands use the same basic supplies. I used these ornaments from Dollar Tree. They get these ornaments in for each holiday. I also used some twine and ribbon along with different kinds of paint. To attach some of the ornaments to the ribbon, I used hot glue. There are not a ton of supplies for this one.
Start by painting the ornaments in the colors that you want. I used Waverly Chalk paint and Arteza Acrylic Metallic paint. As you can see with the trees and “Merry” I painted them green and then used a stiff fan brush to add snow. I was trying to channel my inner Bob Ross but it did not work very well.
After the paint was dry on the bells, I added bows to the top of them.
To attach the bells to the twine, I used the small twine pieces that came with the ornaments. I attached the trees the same way to the ribbon but the “Merry” I attached with hot glue. I did not want to loop twine through the letters and I like it much better with how I glued them down.
Now I made a mistake. I glued and tied the trees and “Merry” words to far apart. So my advice for this is to hang your string or ribbon up first in the spot where you want to put the garland. This is how I did it with the bells. I then started in the middle of the garland and then worked my way out tying and spacing the bells out as I went. It worked much better that way.
I can not decide which garland I like best. I love how rustic they both are. They fit well in farmhouse decor. Do not feel like you have to paint these ornaments. You could stain them with a wood stain or create your own stain with paint and water. That would really make it farm house and rustic. Instead of ornaments, you could just tie small strips of sting, ribbon, and material on some string or ribbon and give this a whole other look.
Thank you so much for joining me for day 2 of the 5 Days Of Christmas. Join me tomorrow for another fun project. Please Like, Share, Comment, and Subscribe!! Also find me on Facebook and Instagram!!
Have a wonderful day
Melissa McGuire
Supplies
Ornaments- Dollar Tree
Waverly Chalk Paint- Walmart
Arteza Metallic Acrylic Paint- Amazon
Paint Brushes- Any Craft supply store
Ribbon- Michael’s Craft Supply
Twine- Hobby Lobby
Surebonder Hot Glue Gun and Hot Glue Sticks- Hobby Lobby
I am going to give you some simple ideas all week long for Christmas decor. It is the 5 Days Of Christmas!! There will not be a whole lot of explanation and long posts because there is no need for it. A lot of the crafts this week will be fast and easy.
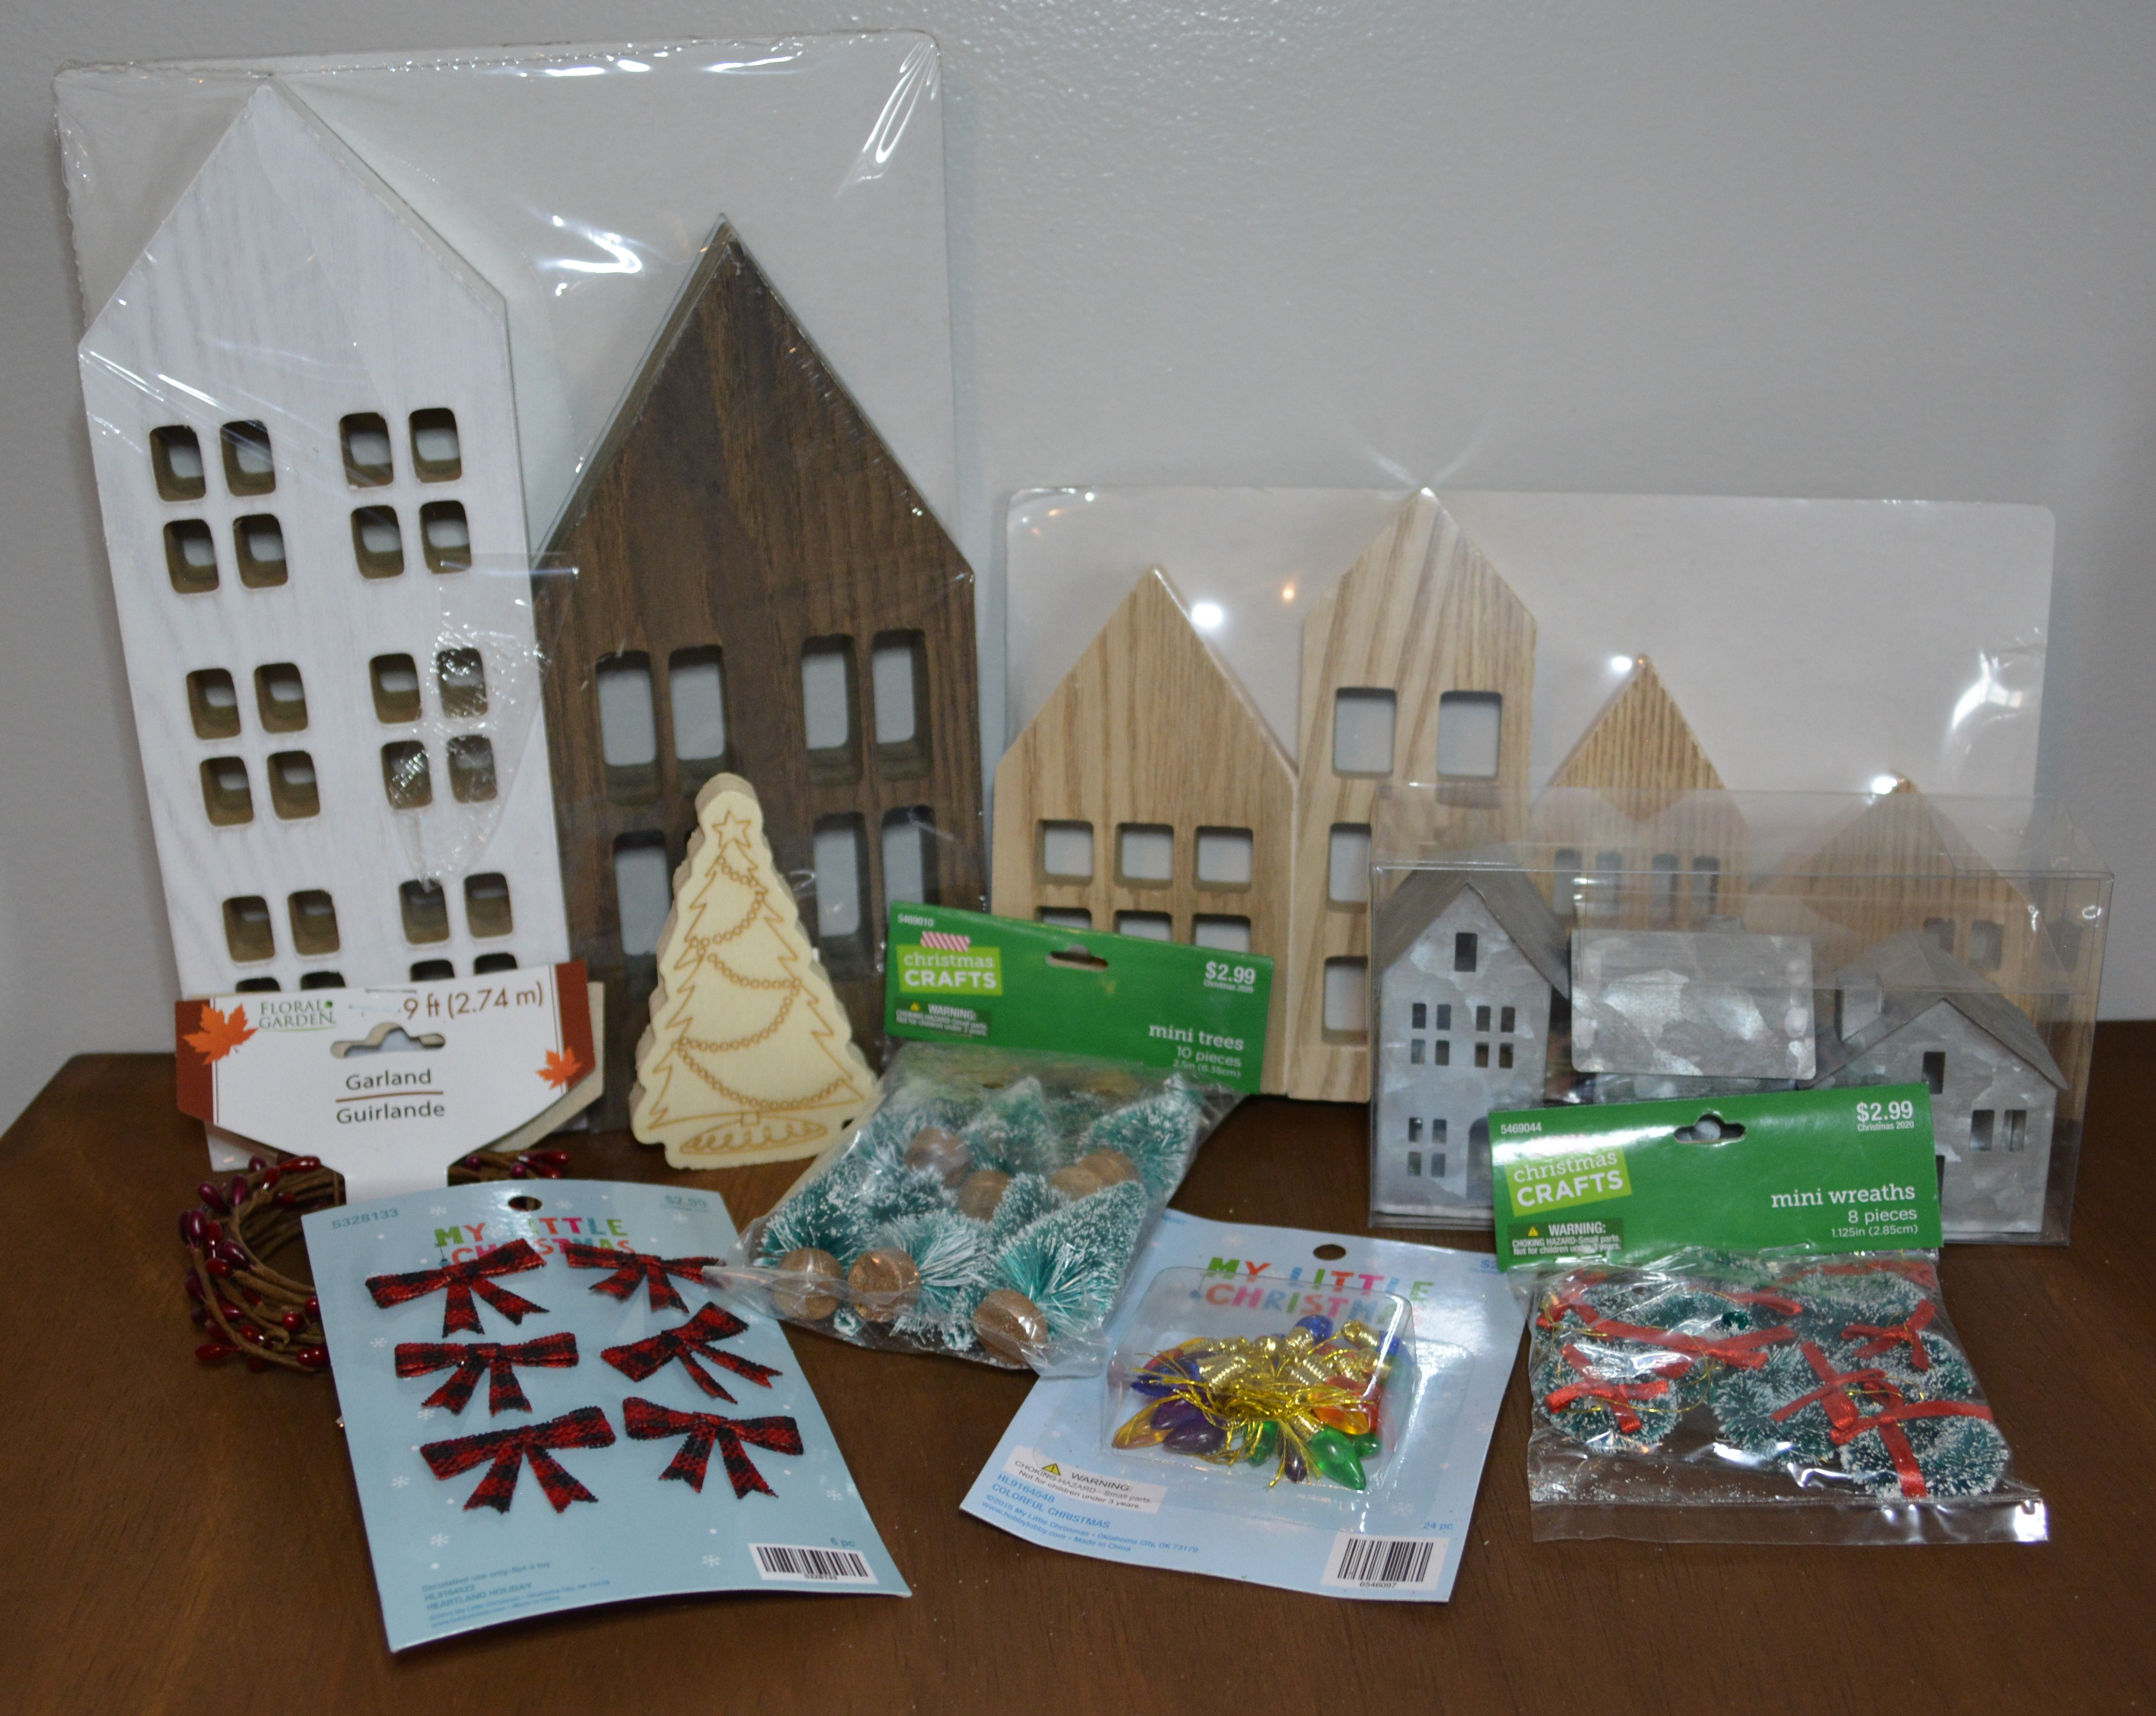
Day 1 of the 5 Days of Christmas is a Christmas Village. These are very popular. They are also very expensive. I found a wooden village at Walmart this year but it is around $10.00 per piece and it had around 20 different pieces. I knew there had to be a more affordable way to make one. That is where Target came in.
Lets Get Started
Supplies
You will need anything that is in the shape of a house. I found these wooden houses at Target. These could be cut out of Balsa wood or foam core board. Go with your budget and what you feel comfortable with.
From there, you need any kind of embellishments you want. Think about what people use to decorate their houses for Christmas. I have little lights, wreaths, trees, and figures. The decorations for the mini trees are prefect for this project. For snow I used a car cloth from Dollar Tree. Its amazing!!
To start this project, I did stain a few of the houses because I wanted some variety. If you want to stain your houses and you are working with wood, take what ever paint color you are using and mix it with water until you have the consistency you want. The thinner the paint, the less coverage you will have but you can always build up to the coverage you want. Then paint your houses.
Now it’s time to decorate. I used hot glue to add all the embellishments and decorations. Like I said earlier, think about how people decorate their homes for Christmas and use that as your inspiration.
From there, I trimmed and cut the white car cloth and glued it down to make it look like falling snow. It is not perfect but it works well. You could use cotton balls or white felt. Anything like that to look like snow.
How simple was that?! This is a project that has a big impact with little effort and money. I could not bare the thought of selling this one so it is currently on display in my craft room and I love it.
Thank you for joining me on Day 1 of the 5 Days of Christmas!
Please Like, Share, Comment, and Subscribe!!! Also find me on Facebook and Instagram!
Join me again tomorrow for Day 2 of the 5 Days of Christmas and have a great day!
Melissa McGuire
Supplies
Wooden and Metal Houses- Target
Embellishments- Hobby Lobby and Dollar Tree
White Car Cloth- Dollar Tree
Surebonder Hot Glue Gun and Hot Glue Sticks- Hobby Lobby
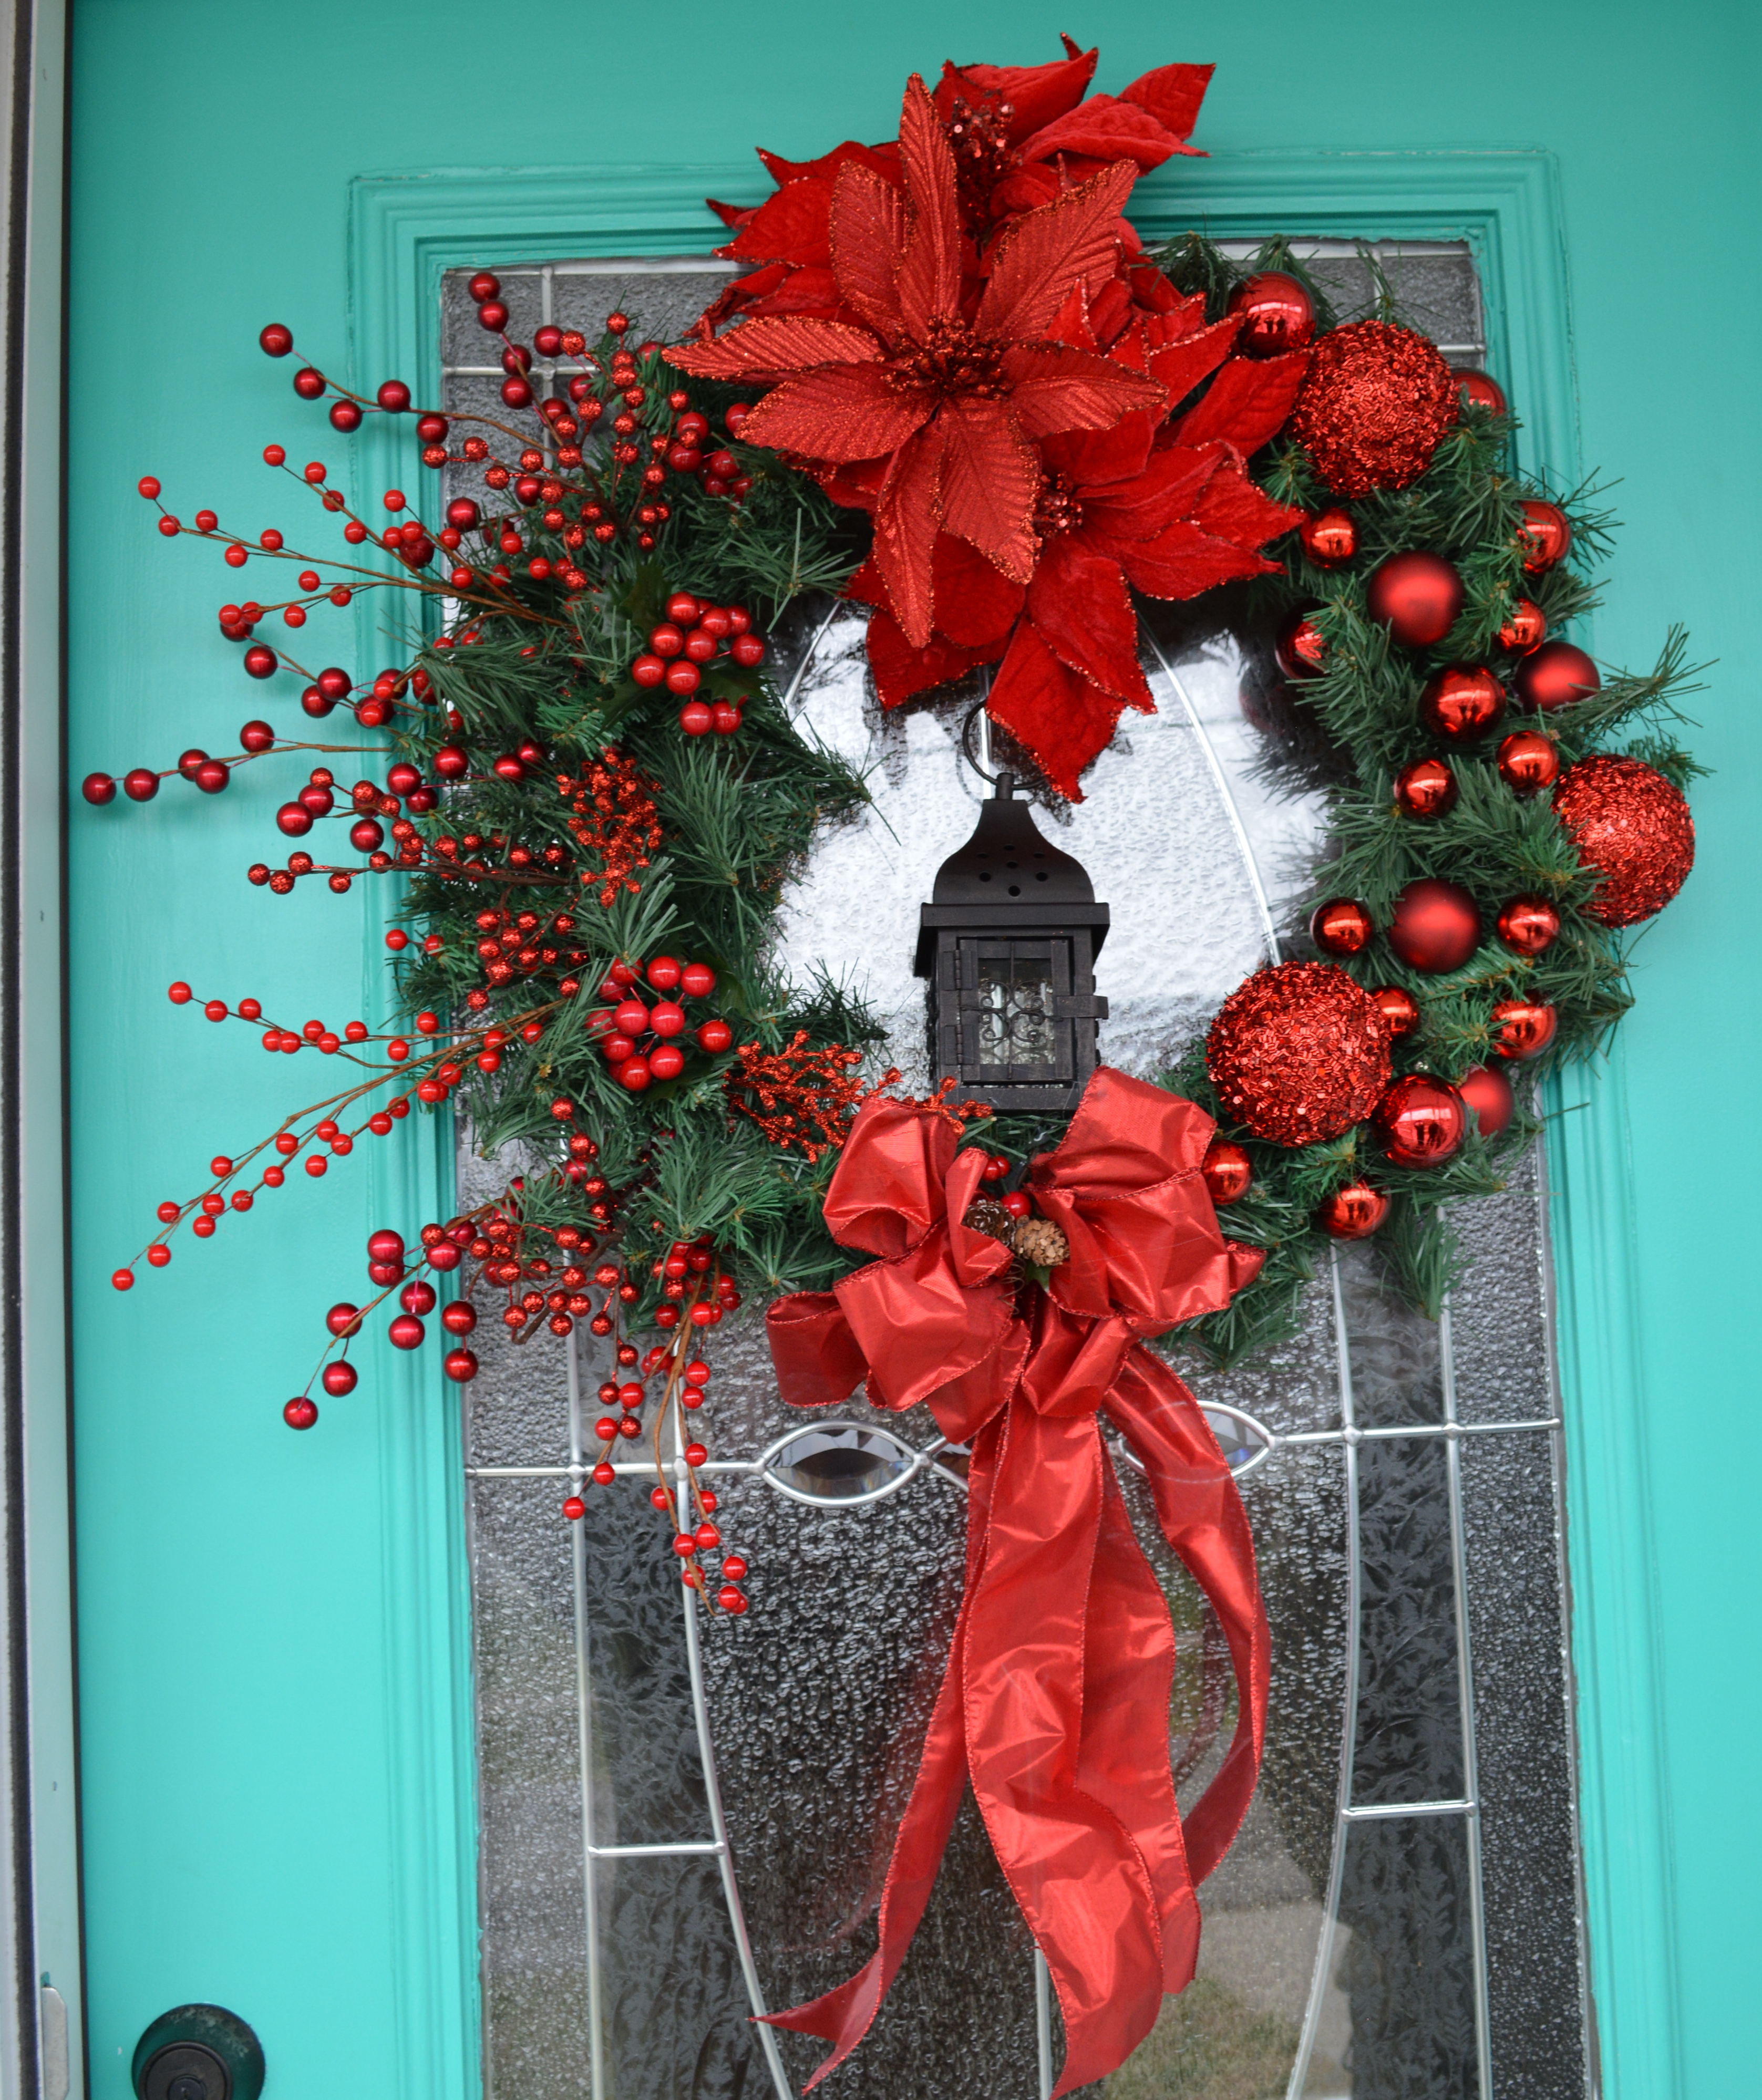
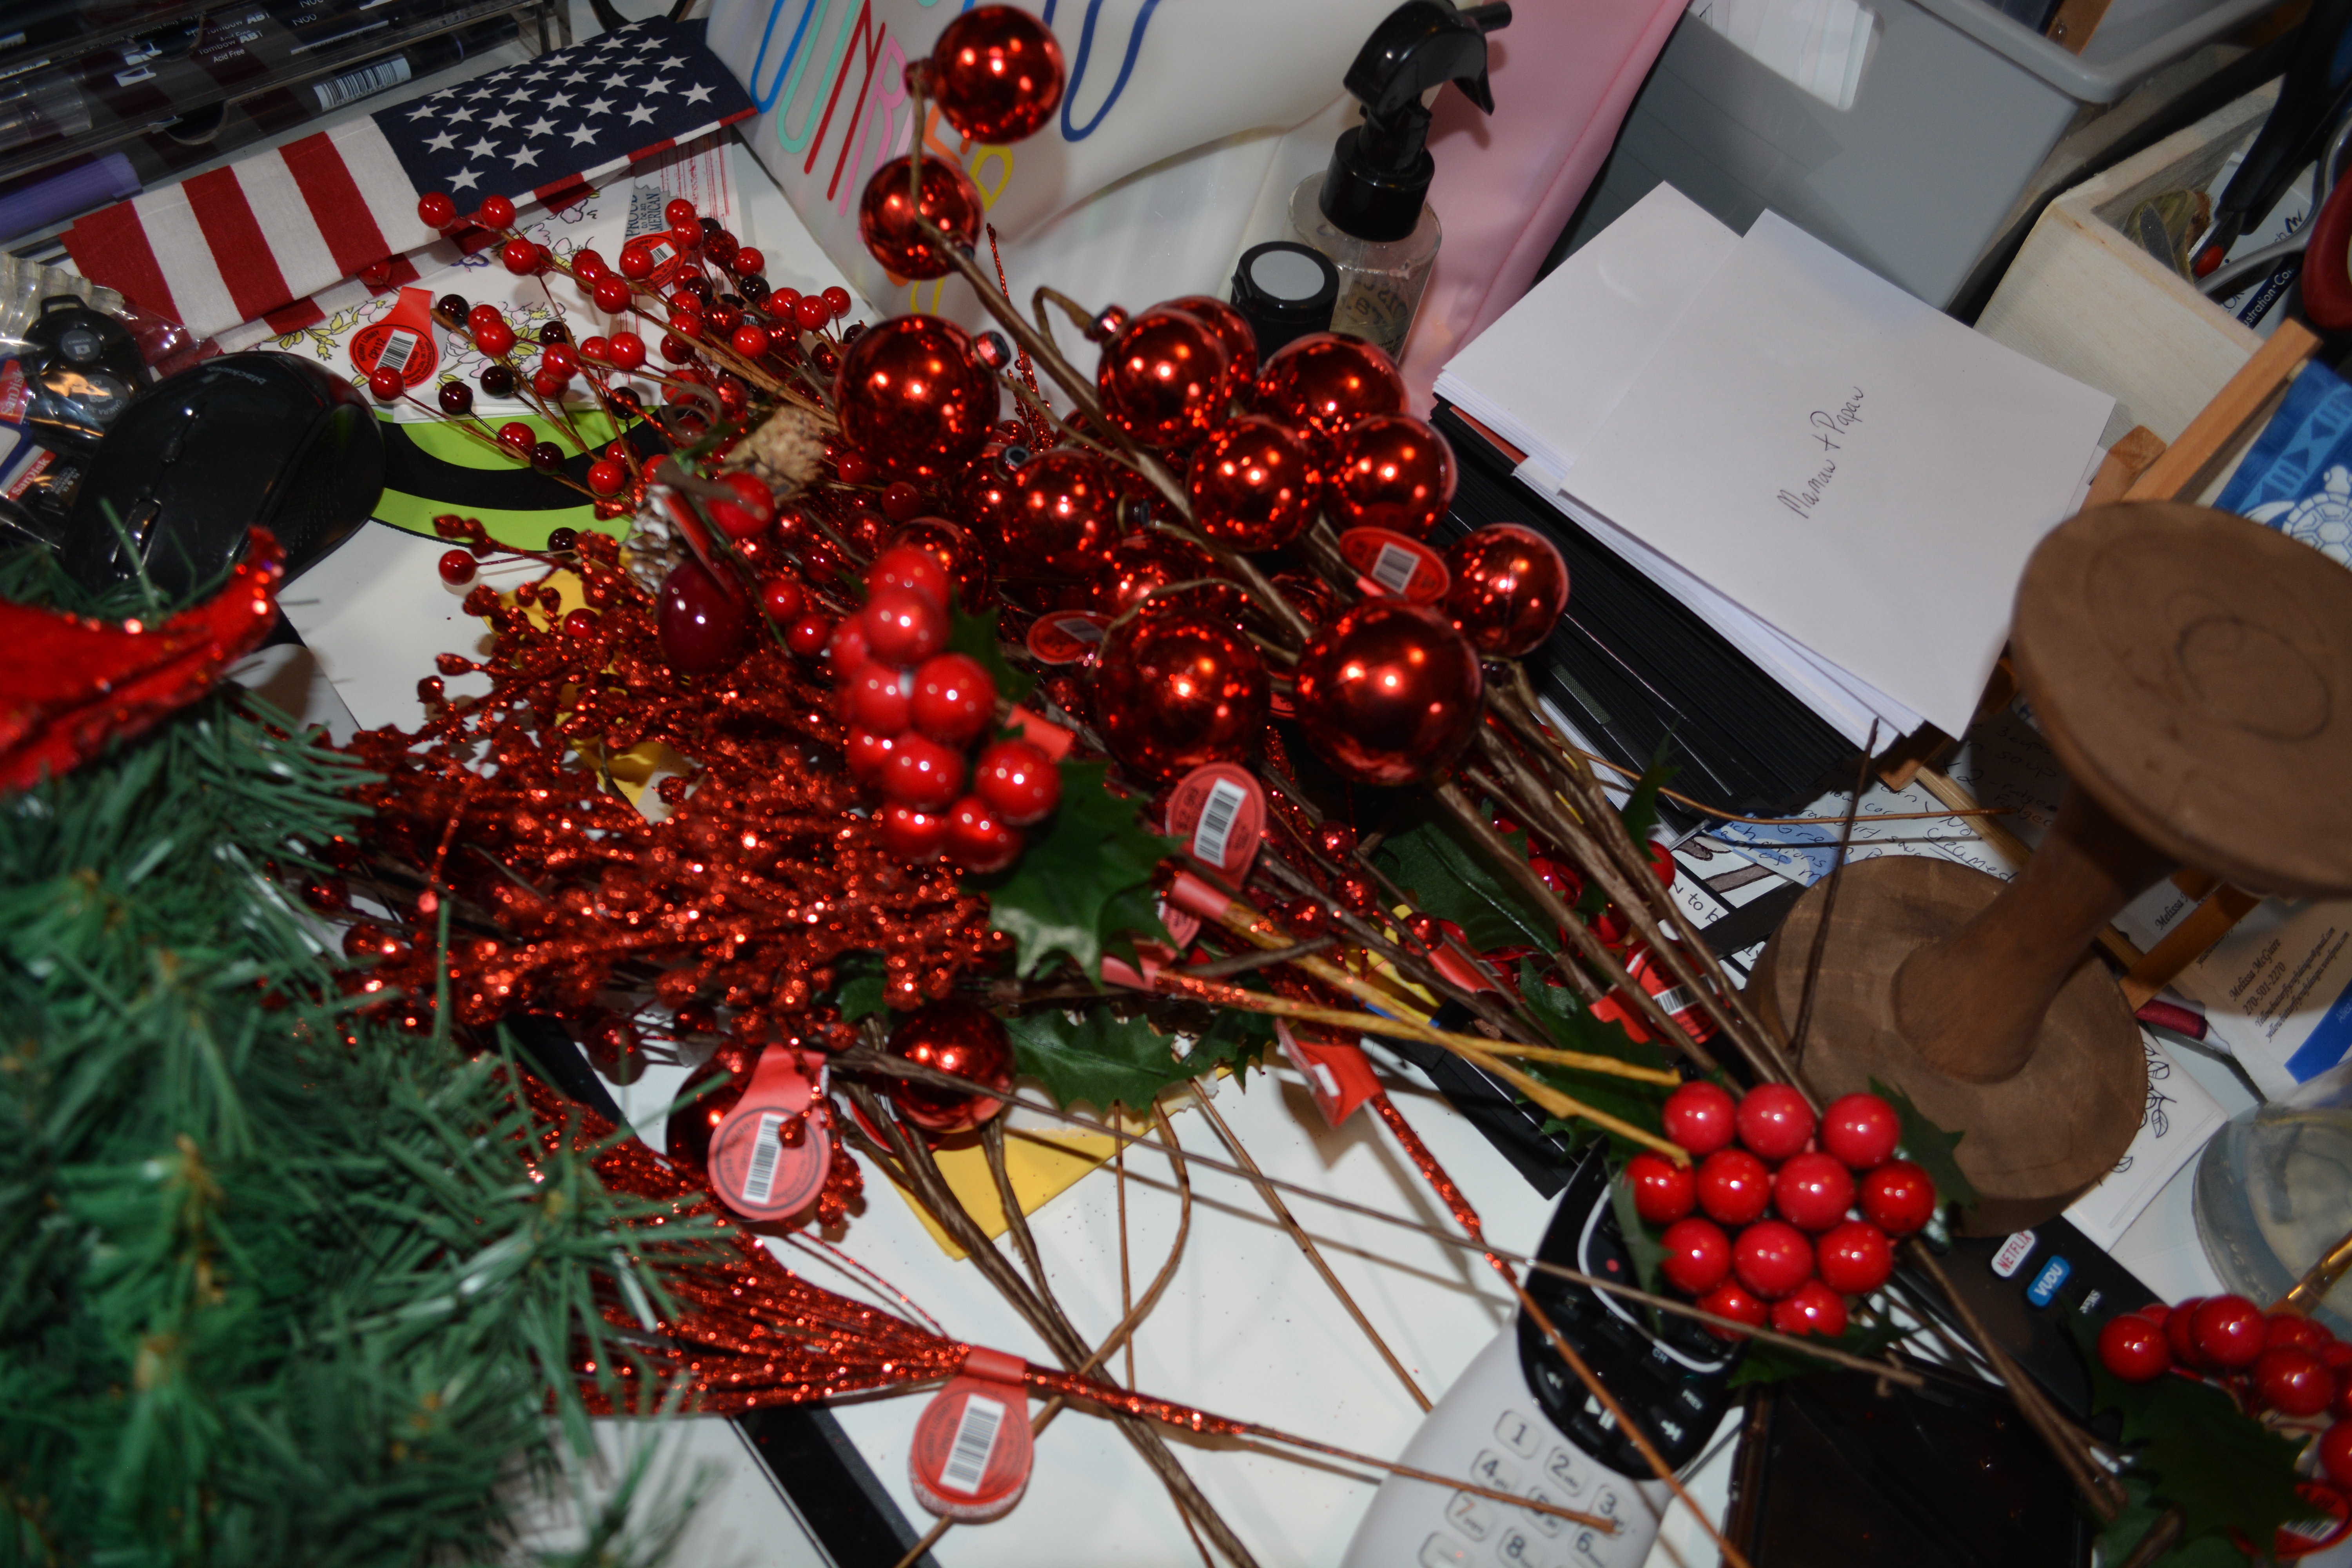
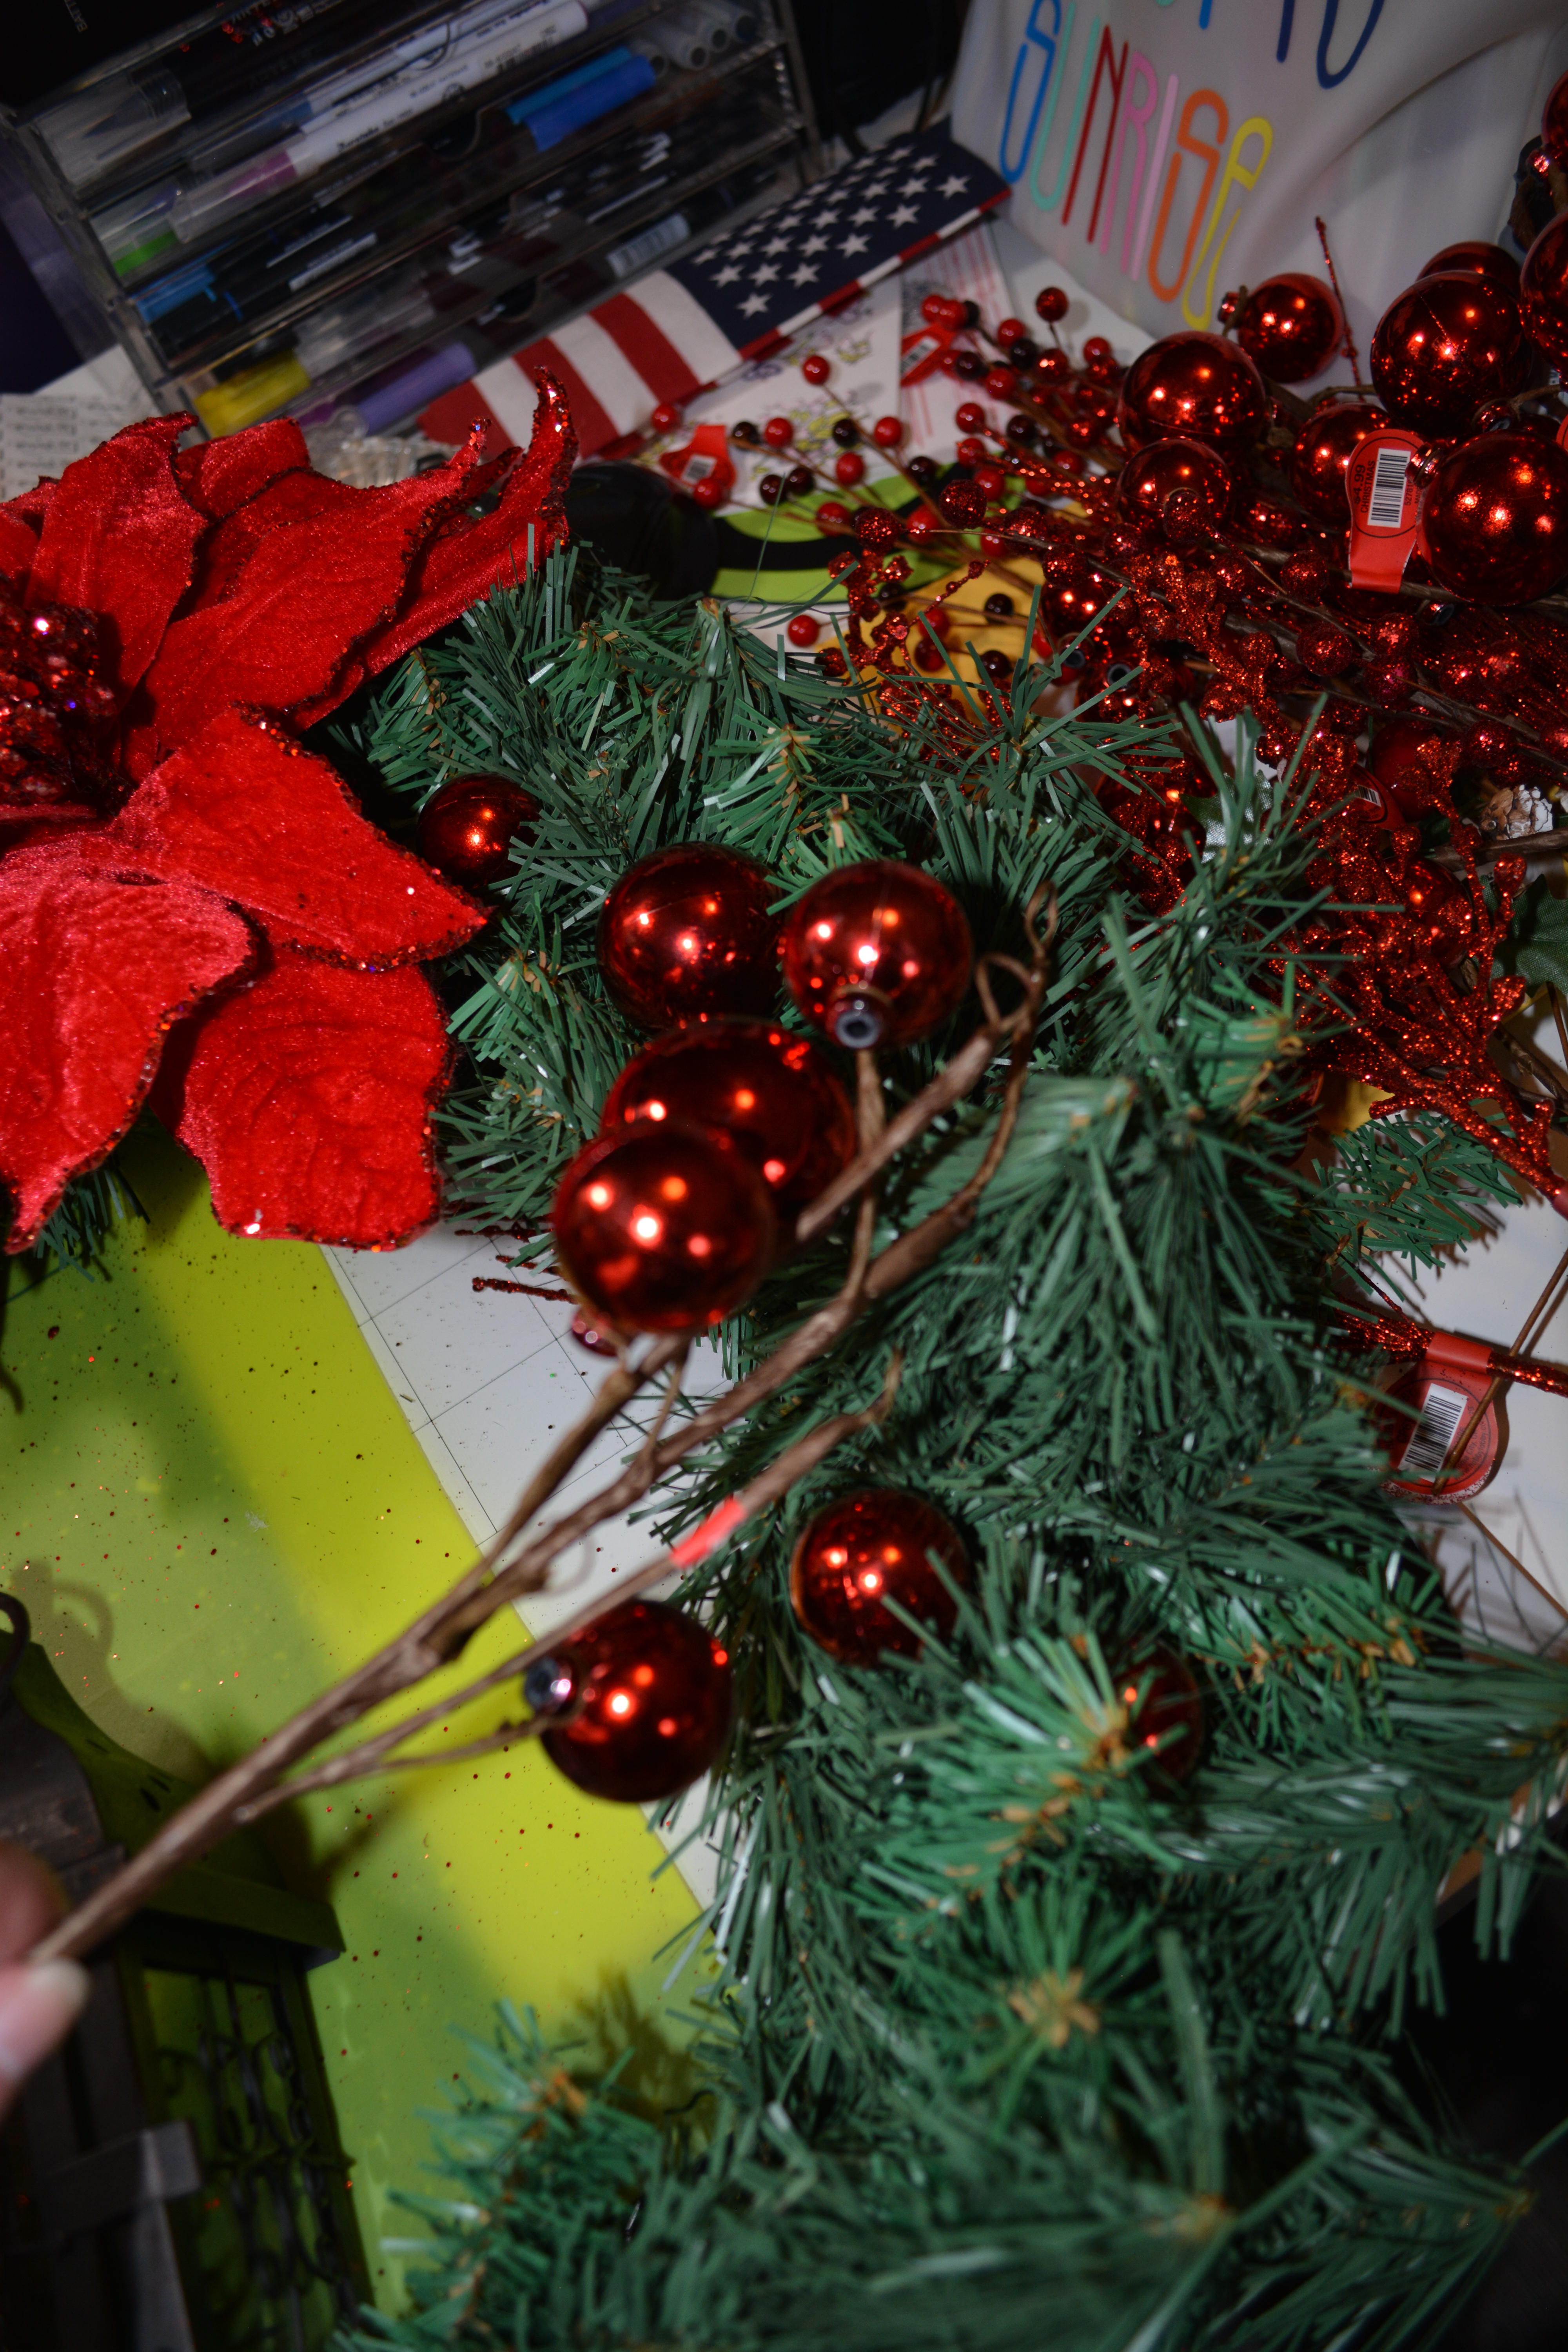
Sometimes red can be a bit much!! But in the case of this wreath, I think it is perfect!! A sweet friend of mine found a picture of this wreath on Facebook and she asked if I could possibly make it. It is a BIG wreath. It also has lots of parts to it. One side is berries and the other side is ornaments. To be honest, I was not sure I would like the wreath in person but now I wish I had bought enough stuff to make one for myself.
Lets Get Started
Supplies
As far as supplies go, I went to Hobby Lobby. You could find similar stuff at Dollar Tree but it would not look the same. I know I normally do pretty affordable crafts but I feel like if you want a great look on this one, you need to spend the extra.
I used red berries, a few different kinds of poinsettias, and lots of red ornaments of different sizes. Everything was about the same shade of red. I bought stuff that had glitter and stuff without. The variety makes the wreath interesting. The last few things you will need is some ribbon, and a wreath form. You can get any size you want. Just make sure the embellishments you buy are not to big for the wreath. Also I put a lantern in the middle of the wreath. I did use some hot glue to hold everything in place.
To start, place the poinsettias at the top of the wreath form. I had them spread out a bit a first, but them put them in a line going vertical on the form. From there I started clipping the longer stems off the berries and arranging them around the left side of the wreath. I did a pattern with the different kinds of berries because I am very OCD when it comes to things having balance.
After that I started placing the different size and type of red ornaments around the right side of the form. To make sure I had the spacing right, I added a big bow at the bottom. If you can not make a bow, Dollar Tree has them for a great price.
Once I was happy with how the wreath looked, I started hot gluing everything on. I did use some clear string to help hold up the lantern and then glued it like crazy at the bottom. That was it!! It all took me about 20 minutes to put together. I walked around the store longer buying the stuff than I did actually making the wreath.
This wreath is absolutely gorgeous in person. It shines and sparkles!! My teal door makes it pop too. The red looks amazing and I am glad I stuck with variations of one shade of red. This would probably be a $150.00 wreath if you bought it in the store and I made it for a fourth of that cost. I love it!
I hope you are happy and healthy and ready for this holiday season. It has been a hard year so try to find the beauty that is all around you this Christmas season.
Please Like, Share, Comment, and Subscribe! Also find me on Facebook and Instagram
Have a wonderful weekend
Melissa McGuire
Supplies
ALL Floral- Hobby Lobby
Lantern- Hobby Lobby
Ribbon- Hobby Lobby
Ornaments- Hobby Lobby
Wreath Form- I had this on hand but any craft supply store
Surebonder Hot Glue Gun and Hot Glue Sticks- Hobby Lobby